- Best for
- Textiles + countertop styling
- Cost
- Under $300 total
- Difficulty
- Easy (no-drill styling)
- Renter-safe
- Yes (pack-and-move pieces)
Why olive-and-gold botanical styling is the bathroom vanity of 2026
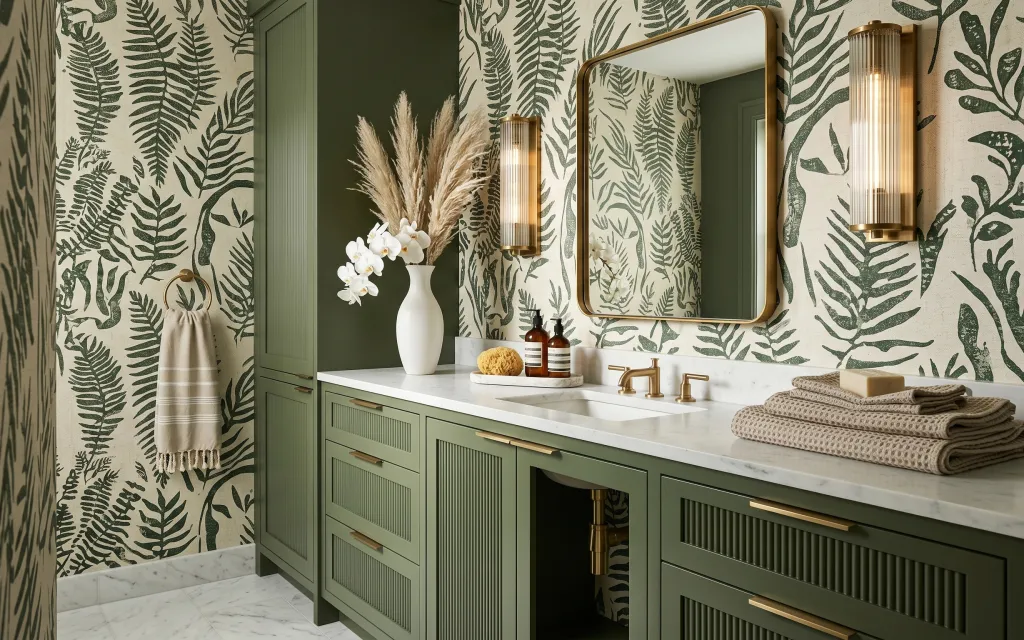
That green botanical wallpaper pattern sets the mood before anything else. In the photo, the white countertop reads crisp against olive tones, while gold hardware brings in that warm metal gleam. The styling is all about texture: striped cotton towel edges, soft folded towels, and a smooth white ceramic vase that makes the orchid feel airy. For shared-housing life, the win is that these pieces are easy to pack—towels roll, tray and bottles box, and decor can move with you when the lease ends.
I caught myself wanting to “fix” the vibe with a bigger change, like replacing the bathroom mirror or redoing the whole wall. Then I remembered how I actually live: I’m wiping counters, swapping towels, and moving everything I own. Once the mirror shape is already in place, the styling choices do almost all the work, and they’re reversible—no resentment from landlords, no permanent installs, and no awkward packing later.
Layer 1 — Beige striped hand towel ($45) sets the soft first impression
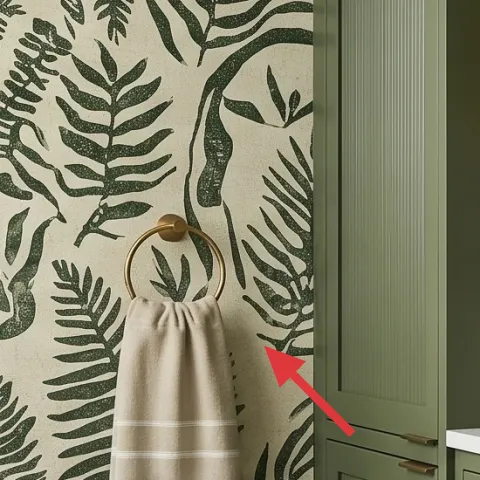
A striped beige hand towel hung on the vanity cabinet area gives the whole corner a “used on purpose” look. The stripe direction adds a subtle graphic line next to the botanical leaves, so the pattern doesn’t feel one-note. Choosing cotton with a thicker border (instead of a thin washcloth) matters because it holds its fold when packed and re-hung. It’s also the kind of piece that can travel: roll it into a tight cylinder, tuck it into a bin, and it’s ready again in the next bathroom.
Hang it where it actually lands
If the towel sits where people naturally see it first, it reduces the need for extra wall decor.
Layer 2 — Folded beige towels on countertop ($35) adds stacked texture

Those folded beige towels on the right side of the countertop do two jobs at once: they soften the hard surfaces and they keep the styling from looking like a showroom. The neutral tone works with the white countertop and lets the gold accents read warmer. A tighter fold also makes the pile look intentional instead of accidental—like you chose the “stack height,” not just the towel. The trade-off is that folded towels take up a little surface space, so the best version leaves room for the tray and your daily essentials.
More fold, less clutter
Two or three compact folds read styled; a looser drape can look messy fast in a shared bathroom.
Layer 3 — Decorative tray ($30) corrals the small daily items
A decorative tray is the easiest way to make bottles and a sponge feel curated instead of random. In the photo, the tray’s light neutral surface gives contrast against the green backsplash wall and the white countertop. It also creates a “container within a container,” so the styling reads organized even when routines change. The obvious alternative is going straight for matching bottles, but that still leaves scattered objects; the tray is what creates one clean footprint. Because trays are flat-packable for moving, it stays in your budget and your packing plan.
Choose one tray color, not five
A single light finish keeps the botanical print from competing with small accessories.
Layer 4 — White ceramic vase ($45) becomes a DIY planter moment
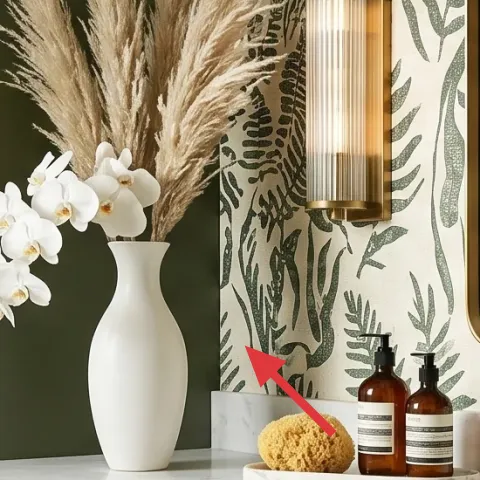
The vase is doing the “shape” work here—smooth, tall, and white—so the orchid looks light instead of bulky. For this layer, the move-ready swap is to replace the look with a painted terracotta planter set that still gives height and a clean silhouette without being fragile glass. The trade-off is that terracotta can be heavier than a lightweight vase, so keep the arrangement shallow and pack it carefully in a towel-lined box. This DIY keeps the same role: a dedicated container for the floral accent that travels with your decor.
Make it instead of buying it
Swap the white vase look for a painted terracotta planter set so the orchid-style centerpiece stays tall but move-friendly.
Materials
- Small terracotta planters (set of 3) — 3 total — thrift/discount store — $18
- Acrylic craft paint (cream/white) — 1 small bottle — craft store — $12
- Foam brush — 1 — craft store — $5
- Painter’s tape — 1 roll — hardware store — $3
- Disposable gloves/cloth — 1 pack — convenience store — $2
Steps
- Wash and dry the terracotta planters completely so paint bonds evenly.
- Mask any rim areas you want to keep earthy with painter’s tape.
- Brush on the first thin coat of acrylic paint, letting it dry fully.
- Apply a second coat until coverage matches the bright vase look.
- Touch up edges with the foam brush for crisp lines.
- Let the paint cure fully before arranging flowers on top.
Total DIY cost: $40 — saves about $5 over buying.
Layer 5 — White orchid flowers ($40) keep the centerpiece airy
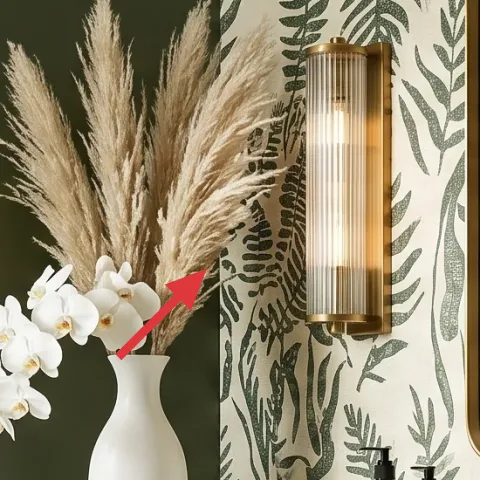
Those white orchid blooms are the reason the vanity styling feels elevated without adding more decor pieces. The petals add contrast to the green botanical wall and keep the white countertop from looking blank. Because orchid stems sit above the container, they create vertical rhythm that balances the mirror’s shape. The trade-off is that real orchids are maintenance-heavy, so for a shared rental, a high-quality faux-style stem or dried-look bundle is easier to manage and still reads like “fresh” when you move in. Styling tip: keep the blooms in the center of the container and trim the stems to keep height consistent across moves.
Skip overstuffed arrangements
If the blooms spill too far, they crowd the tray and make the counter feel smaller fast.
Layer 6 — Apothecary-style bottles ($25) make the routine look intentional
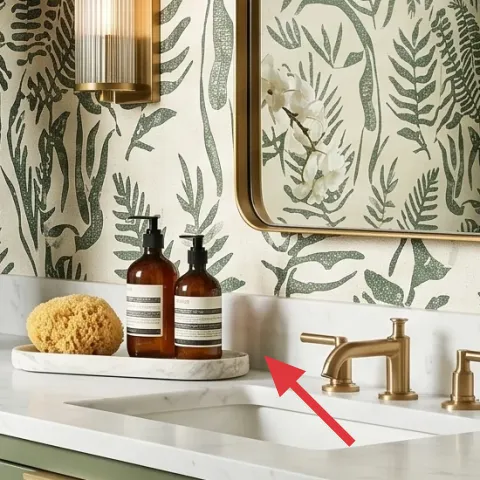
Apothecary-style bottles turn “everyday stuff” into a visual story. In the photo, the warm brown and clear bottles add depth against the cool green wall and bright countertop. Keeping the bottle shapes similar (rather than mixing totally different silhouettes) makes the set look planned. The benefit for shared housing is practical: pump or pour bottles are faster for guests and roommates, and the bottles box easily compared to bulky dispensers. The trade-off is storage space—choose two bottles max, not a full shelf, so the counter still feels breathable next to the mirror.
Match finishes, not labels
Clear glass plus warm-toned bottles reads cohesive even with different scents.
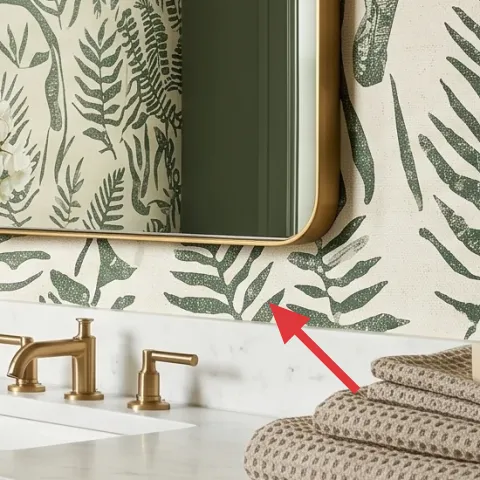
Layer 7 — Wall-mounted mirror ($90) frames the botanical pattern
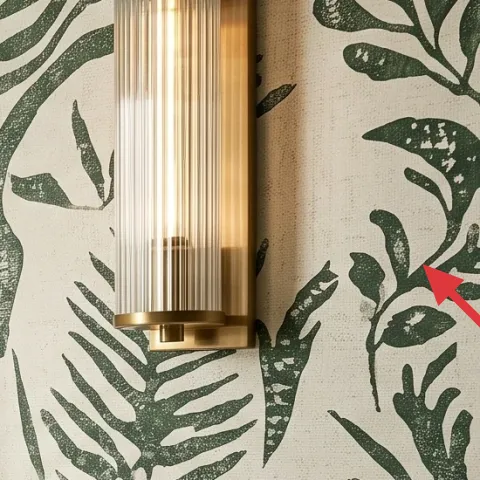
That mirror is what makes the whole vanity area feel bigger and more finished. It’s a functional piece and a styling tool: the reflection multiplies the countertop objects, so everything looks more “composed” even with simple accessories. When choosing a similar mirror for a rental, focus on the frame finish—gold reads warm and echoes the hardware tone in the photo. The trade-off is that mirrors are more fragile to move, so pack with flat cardboard and keep it inside a dedicated box. If the current mirror is staying, use this layer as a replacement plan for the next place.
Pick a frame finish you’ll reuse
A warm gold or brushed metal tone works with green botanical wallpaper again and again.
The cost, layer by layer
| Layer | Item | Cost |
|---|---|---|
| 1 | Beige striped hand towel | $45 |
| 2 | Folded beige towels on countertop | $35 |
| 3 | Decorative tray | $30 |
| 4 | Painted terracotta planter set (DIY) | $45 |
| 5 | White orchid floral stems | $40 |
| 6 | Apothecary-style bottles (set of 2) | $25 |
| 7 | Wall-mounted mirror with gold-toned frame | $90 |
| Total | $300 | |
A cheaper variant keeps the same layout but swaps the mirror look for a simpler frameless option or a smaller size. The bottles can also be replaced with one matching refillable pump set, while the orchid stems go faux and get trimmed to fit the tray footprint.
What worked, what didn't (across the whole room)
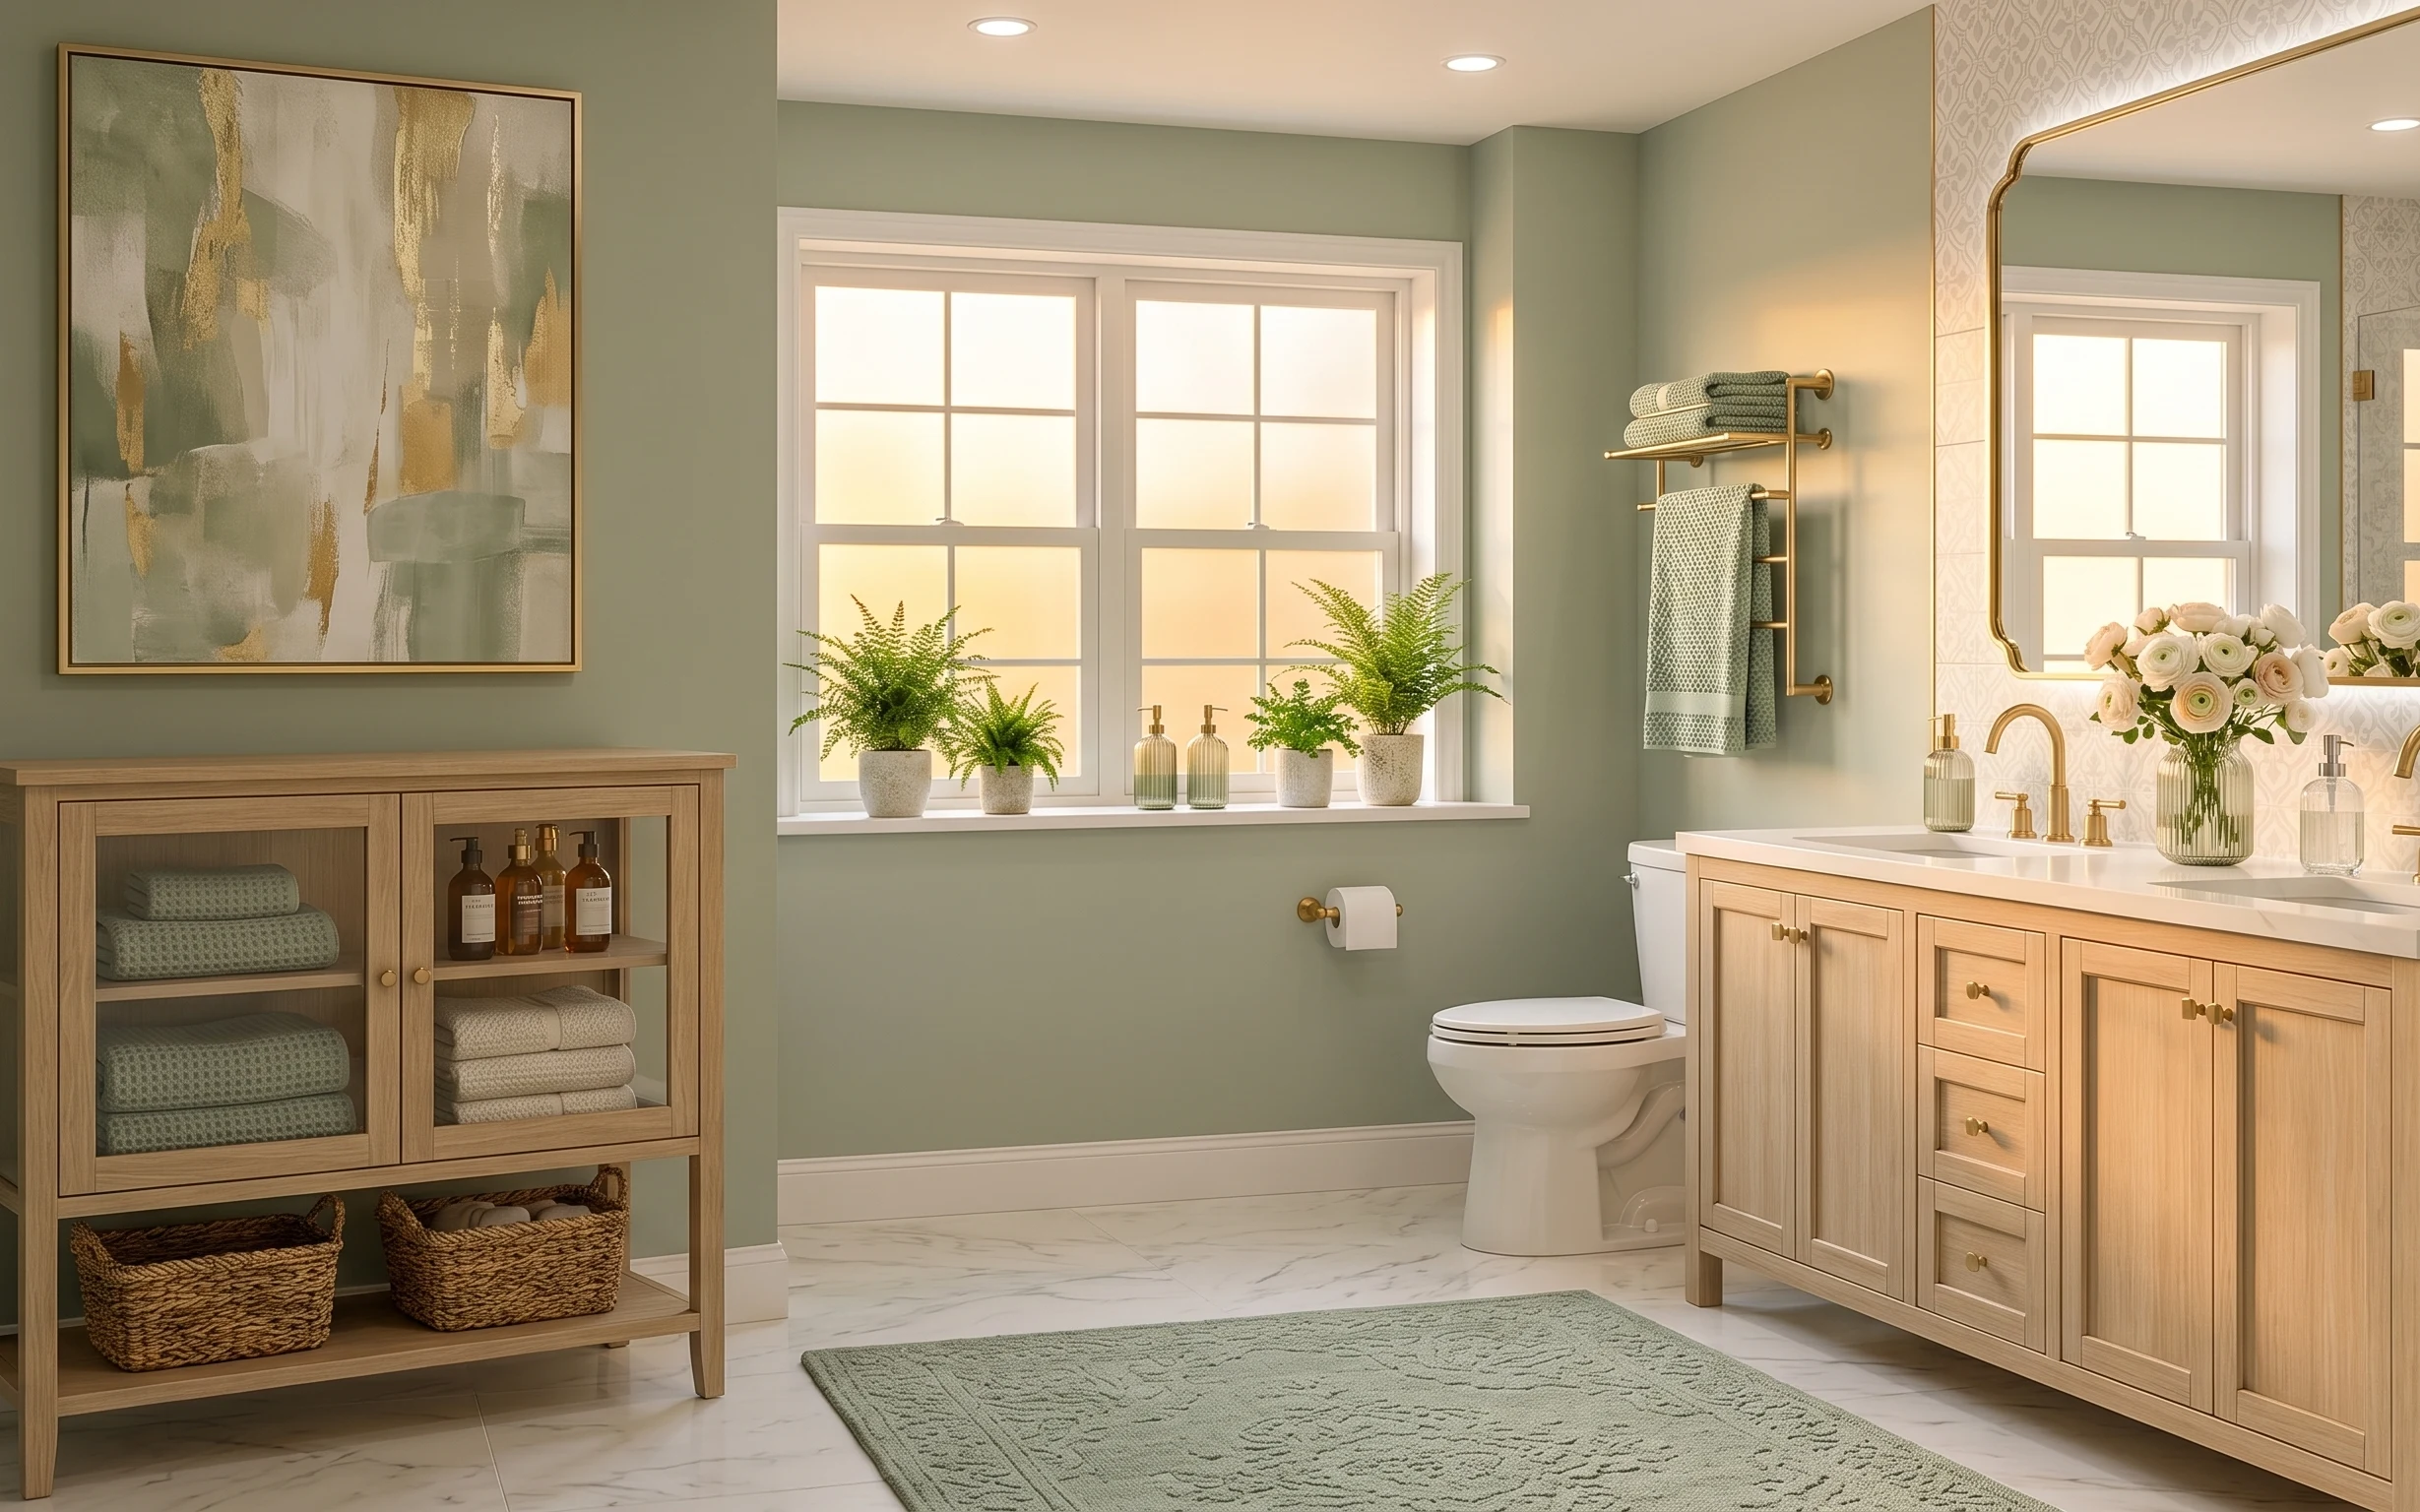
This setup works because it balances bold botanical wall pattern with calm neutrals at the countertop level. The textiles and countertop containers keep the scene cohesive without relying on permanent changes. The only part to watch is proportion—too-tall clutter or overstuffed blooms can make the vanity feel cramped.
What worked
- Striped hand towel adds a graphic line that complements the botanical pattern instead of fighting it.
- Folded towels create softness and quick “done” energy on days when counters get busy.
- A decorative tray keeps bottles visually aligned, even if routines change by roommate.
- White orchid stems add vertical lightness that balances the mirror’s frame.
- Apothecary bottles make everyday products look intentional and reduce clutter anxiety.
- Gold-toned mirror framing warms the green and keeps the vanity reading upscale.
What didn't
- Overfilling the tray with too many items makes the countertop look smaller and messier.
- Using blooms that are too wide causes crowding near the mirror reflection line.
- Mixing random bottle silhouettes can look like storage instead of styling.
- A fragile mirror frame is a pain to pack, especially for short moves.
What we'd skip if we did it again
Skip chasing a full bathroom “set” of coordinated pieces. Matching everything (towels, bottles, and tray) sounds neat, but it often looks sterile against a botanical wall pattern.
Skip tall, sprawling arrangements on the countertop. Even when the room is bright, a bouquet that spreads wider than the tray footprint will crowd the vanity and fight the mirror’s shape.
Skip buying a mirror frame you’ll regret. Since shared-housing moves happen fast, the safest choice is a simple gold-toned frame finish that still works with new wallpapers or future wall palettes.
Frequently asked
How long does this bathroom vanity refresh take?
Plan about 60–90 minutes to place textiles, set the tray, and build the centerpiece with the orchid stems. If the DIY painted terracotta planter set is already done, the remaining steps are quick: fold towels into a consistent stack height and line up the bottles. If you need to DIY from scratch, the painting portion adds dry/cure time, but it’s still a one-evening project for shared housing.
Is this doable in a rental where nothing can be installed?
Yes—most of the refresh is textiles and countertop styling. The towel placement, tray arrangement, bottles, and orchid-stem centerpiece don’t require drilling. For the mirror layer, treat it as a “next place” upgrade if the current mirror can’t be swapped. The visual payoff still comes from the styling choices, not from permanent installs.
What if my bathroom is smaller or has less countertop space?
Keep everything on one tray footprint. Use only two towels (one towel on the cabinet area and one small countertop stack), and trim the orchid stems so the height matches the mirror line. In small spaces, vertical height helps more than width, so focus on a tall centerpiece instead of spreading decor across the whole counter.
Where should I shop for these move-friendly pieces?
For towels and tray styling, try big-box basics plus home decor aisles that carry neutral textiles. Apothecary-style bottles show up often in discount home sections and online in refillable sets. For orchids, look for stems that come on bundles so they can be trimmed and repacked. The DIY planter set can be thrifted first, then painted to match your room palette.
What’s the biggest mistake people make with a botanical bathroom vanity?
Overstuffing. Botanical wallpaper already has a lot of visual information, so extra clutter on the countertop reads busy fast. Stick to one tray, one centerpiece container, and two bottles. If the orchid blooms spread wider than the tray, trim the stems so the arrangement stays compact and structured.
More in Bathroom

Under $300: botanical bathroom vanity refresh with 7 layers
A botanical bathroom vanity refresh you can pack into boxes: 7 move-friendly swaps for towels, countertop styling, and a mirror moment. Tot…
Under $400: 7 move-friendly bathroom swaps for a spa look
A renter-friendly bathroom refresh that keeps the look airy and styled: swap in a textured bath rug, add framed art, update towels, and sty…
Under $500: boho spa bathroom refresh with 7 renter swaps
A renter-friendly boho spa bathroom refresh for under $500, built around a multicolor bath rug, a macramé wall hanging, and warm candle sty…