
- Best for
- balcony lounging and evening lighting
- Cost
- about $440 total for this refresh
- Difficulty
- easy weekend styling + one DIY pour
- Time
- 2–4 hours plus cooling time
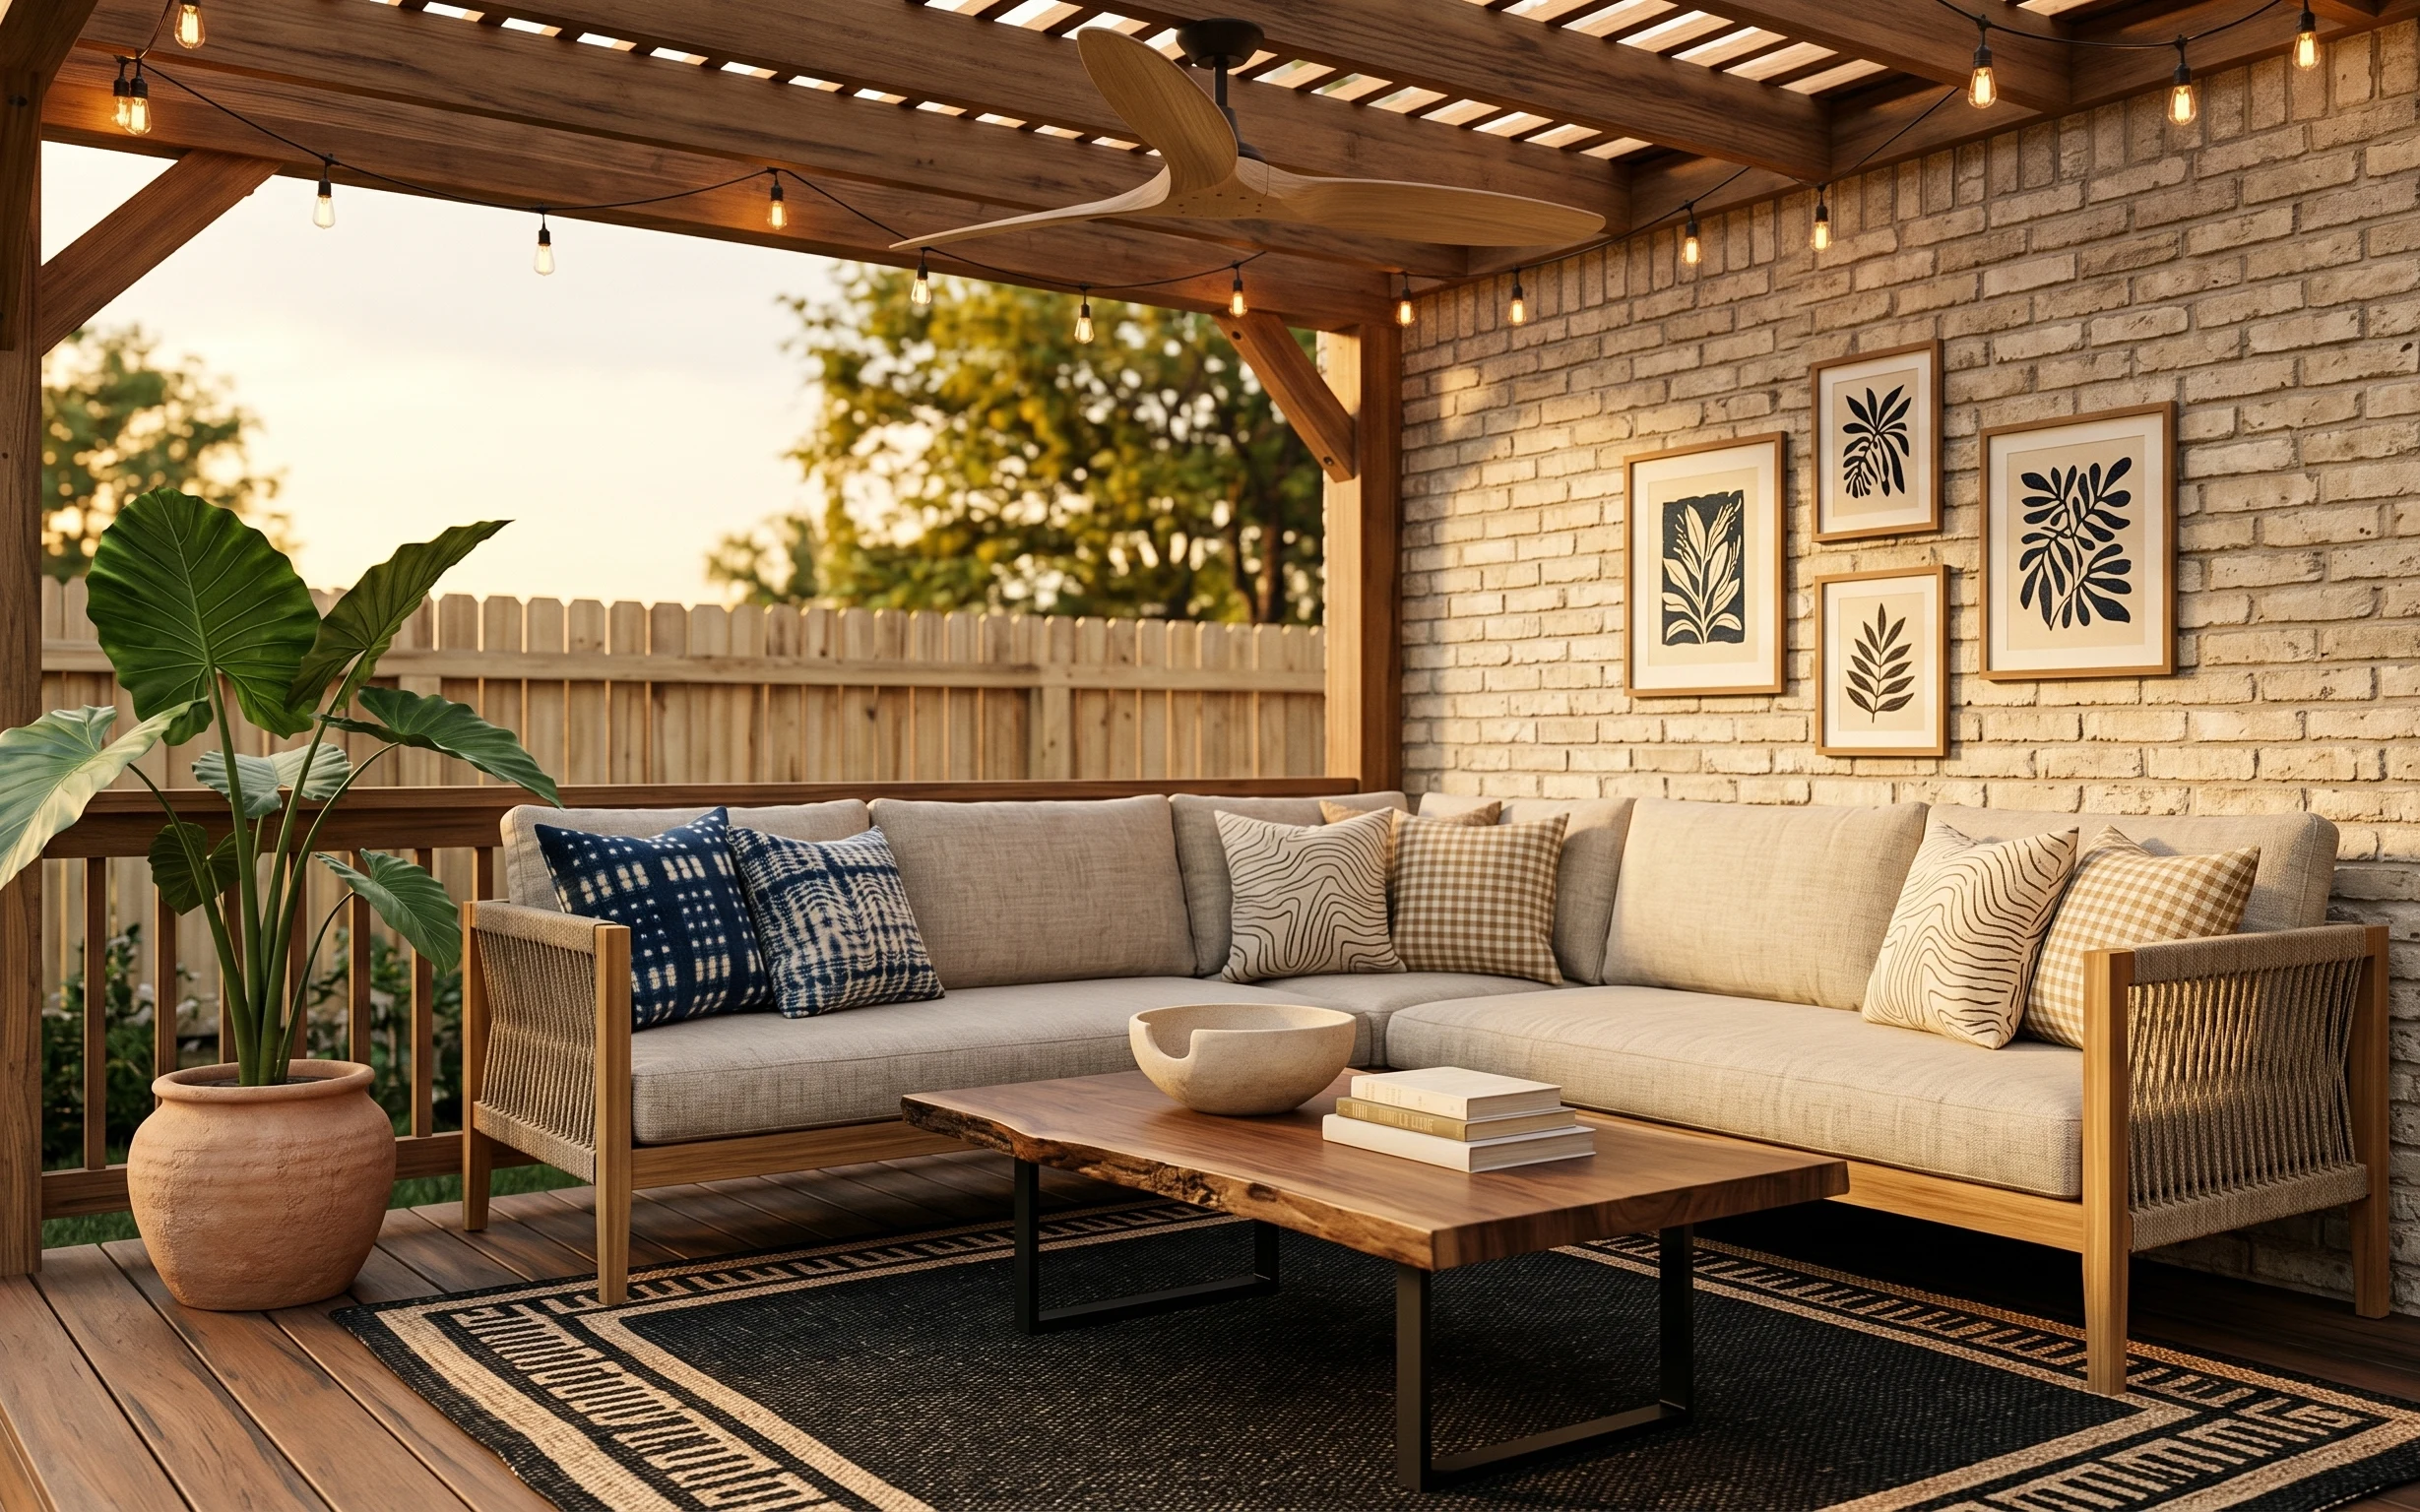
Why terracotta-and-jute patio details are the balcony lounge of 2026
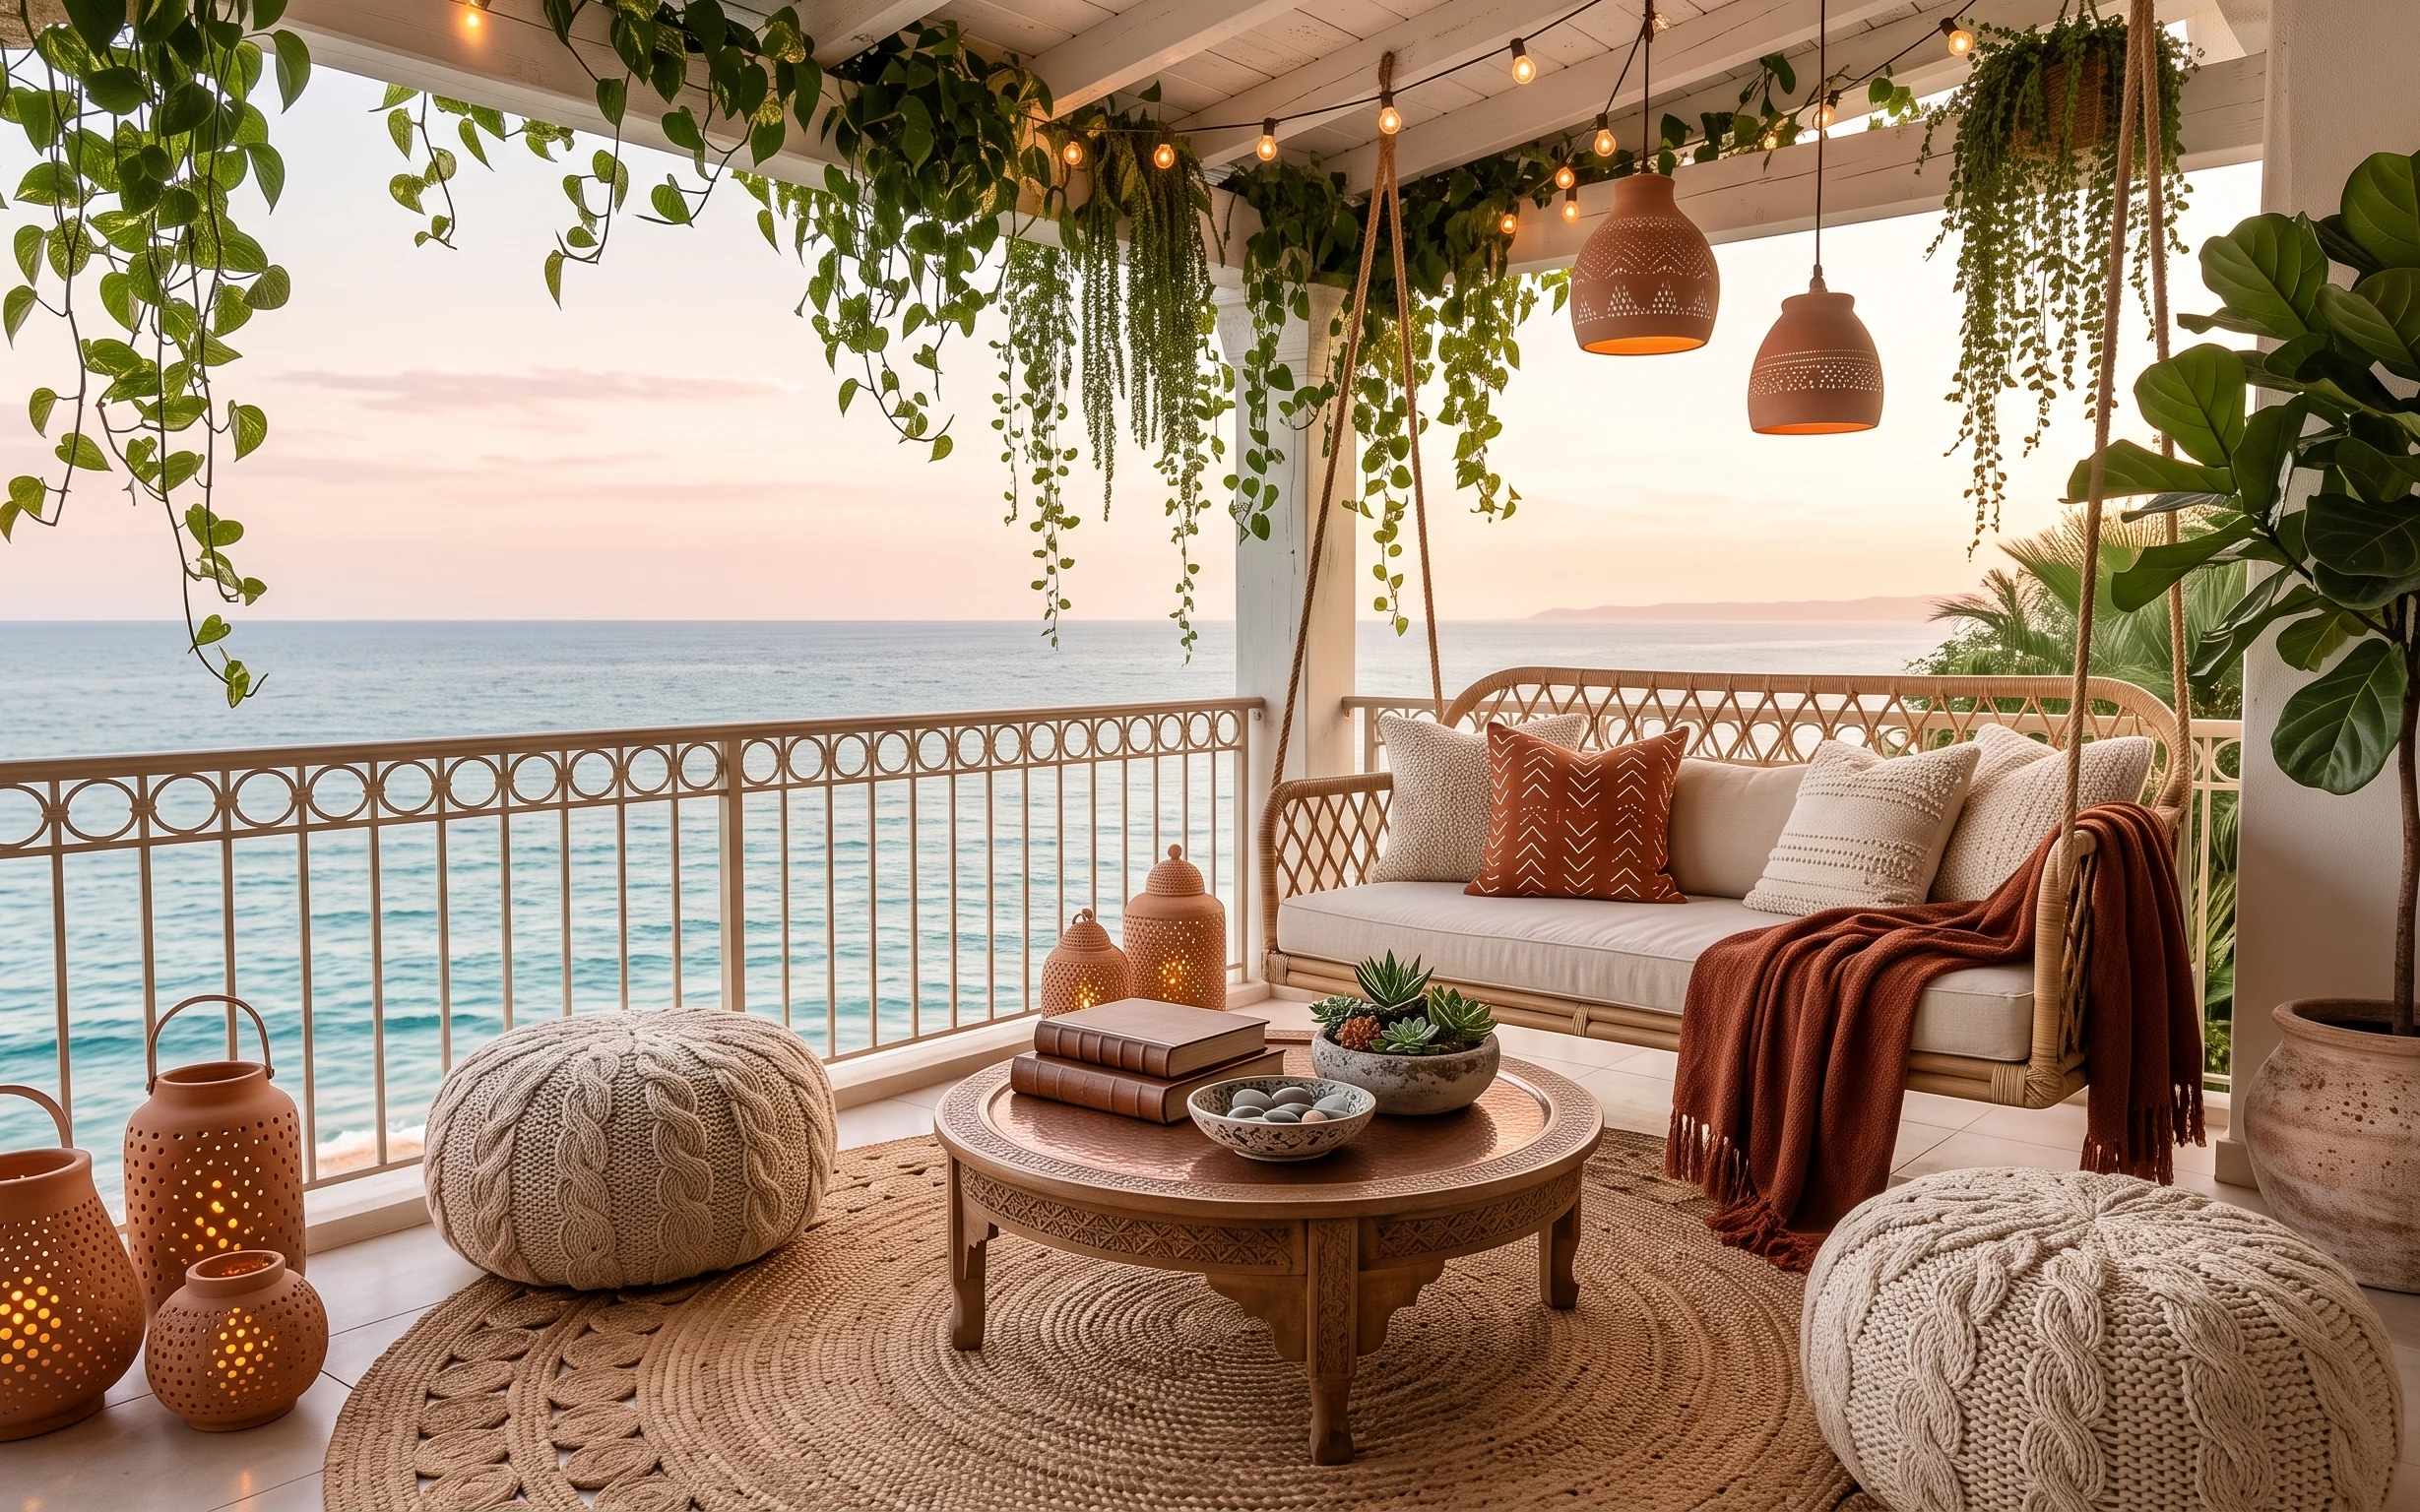
That warm terracotta-and-off-white palette reads “vacation” without needing any landlord permission. In the hero, the texture mix is the whole point: a large round woven rug underfoot, an off-white knit throw draped for softness, and rust chevron pillow texture sitting against the woven rattan daybed. The metal railing with its repeating circular pattern adds a coastal rhythm, while the hanging string lights and amber pendant shades bring that golden-hour glow. For renters, you can recreate the same atmosphere with freestanding pieces, plug-in lighting, and stuff that packs up when the lease ends.
I almost overdid the decor once and ended up with “pretty but busy.” What actually changed my mind here was noticing how much negative space the railing and the ocean view give you—so the decor should feel intentional, not cluttered. I kept repeating the same move: one big grounding surface (the round rug), one solid furniture anchor (the coffee table), then textiles and light as the smaller layers. That’s why this works on a real rental budget.
Layer 1 — large round woven rug ($120) Underfoot texture that hides outdoor scuffs
The large round woven rug is what makes the whole balcony feel like one “zone” instead of scattered accessories. Choose a woven style with a neutral, oatmeal base so it ties into the off-white knit throw and the rust pillows without fighting the bright view. A round rug also works well on a terrace because it visually softens the railing’s straight lines. I’d rather spend on the rug than on another decorative basket, because the rug is what you see every time you sit down. The trade-off: woven rugs show dust sooner than flat synthetics, so a quick shake-out matters.
Anchor the rug before adding accents
Lay the rug down first, then place the coffee table and pillows so everything visually circles toward the same center.
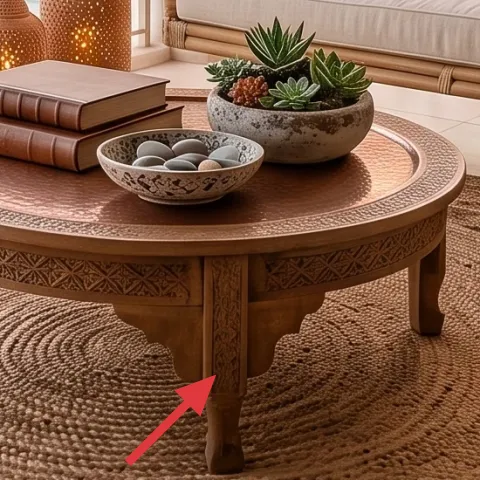
Layer 2 — round wooden coffee table ($150) Small top space for the “tea-and-books” moment

This round wooden coffee table gives you a place for that succulent bowl and a stack of books without blocking the walkway. In the photo, the table’s light wood tone sits between the warm terracotta planters and the cooler ocean palette, which keeps it from feeling too heavy. A round top is also more forgiving on a narrower balcony because it doesn’t create sharp corners you’ll bump. The obvious alternative is a rectangular side table, but that shape tends to look boxed-in against railing bars. Trade-off: round tables can be slightly harder to find in the exact size you want, so measure the available diameter.
Use the table for styling, not clutter
Keep one centerpiece (like the succulent bowl) and one “support” object (a small stack of books) so the tabletop stays breathable.
Layer 3 — off-white knit throw blanket ($35) Drape weight that reads soft, not sloppy
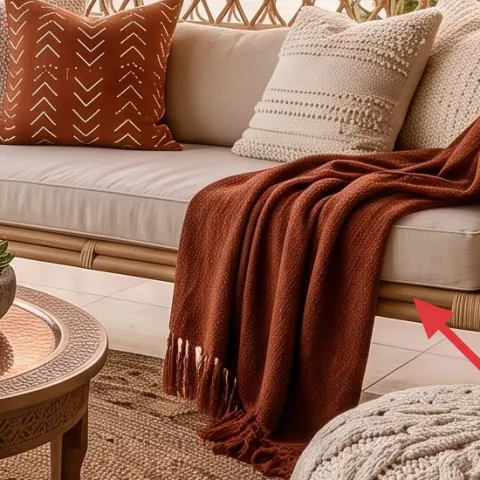
The off-white knit throw blanket is the tactile contrast that makes the woven daybed feel inviting. Look at how it’s placed: loosely draped on the seat edge so the knit pattern catches light and adds depth to the neutral base. If you choose a blanket that’s too thin, it won’t hold shape against the daybed texture; if it’s too chunky, it can overwhelm the pillow colors. The trade-off I’d accept for renters is slight wrinkling—knits forgive wrinkles, and you can smooth it with one pass of your hand before company comes over. This is the layer that makes the whole setup feel “styled,” not just furnished.
Match knit tone to your rug
Pick an off-white throw that’s close to the rug’s oatmeal undertone so the neutral layers look intentional together.
Layer 4 — rust chevron throw pillow ($40) One bold pattern that coordinates with terracotta
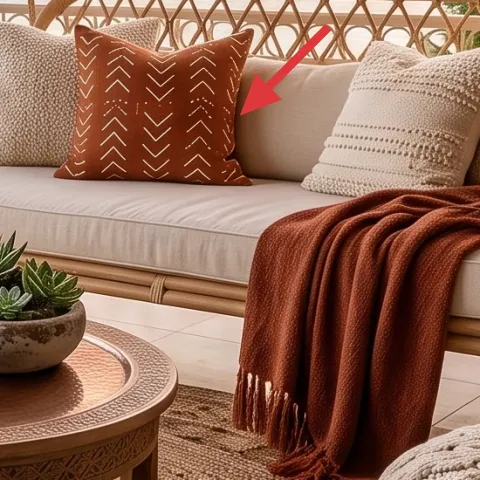
The rust chevron throw pillow is the color-and-pattern cue that ties the terracotta lantern glow to the rest of the palette. In the hero, it sits front and center on the rattan daybed, so it does more work than a plain pillow would—especially when the ocean view keeps the background bright. The key is the chevron: it brings movement and a handcrafted feel that looks right next to woven textures. I’d avoid choosing a pillow that’s too orange-red, because it can look separate from the warm amber lighting. Trade-off: a patterned pillow is the first thing you’ll change for seasonal swaps.
Don’t pick a chevron in the wrong undertone
Stay in rust/terracotta territory; a cool-toned red will fight the warm lantern light.
Layer 5 — hanging string lights ($30) Plug-in glow that makes evenings feel like a destination
The hanging string lights are what turn a daytime balcony into a night-time sitting spot. In the hero, the lights are spaced along the overhead line and paired with amber pendant-style shades, so you get warm points of light at multiple heights. For renters, the win is that you can use plug-in string lights and hooks that don’t require drilling—aim for removable adhesive hooks made for temporary installs. The alternative is battery lanterns everywhere, but that usually looks busy instead of layered. Trade-off: outdoor string lights can need weather-safe outdoor ratings, so check the label before buying.
Think in layers of height
Lights above + textiles below + one tabletop vignette = a balanced look without extra furniture.
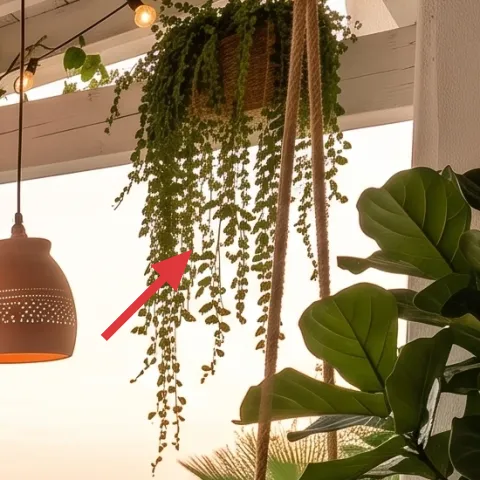
Layer 6 — terracotta pot with leafy plant ($40) Green that echoes the hanging vines
The terracotta pot with leafy plant on the right side completes the story that the balcony is “living,” not just decorated. Terracotta keeps the warm color family consistent, while the broad leaves add shape against the vertical railing and hanging vine lines. I’d choose a plant with thick leaves (or add seasonal greenery) because delicate foliage can look sparse against the bright outdoor background. The trade-off is maintenance: outdoor plants need some water and occasional leaf-cleaning, but they’re also the only layer that keeps improving as they grow. If you’re renting, prioritize a pot you can move easily.
Repeat terracotta once more than you think
One terracotta pot plus the rust textiles is usually enough—adding a second matching pot can start to look accidental.
Layer 7 — perforated lanterns with tea lights (DIY candle pour) ($25) Warm dotted light you can control
Those perforated lanterns create the exact kind of warm, dotted glow that makes outdoor spaces feel gathered and intimate. Since the hero has visible warm points of light inside the lanterns, it’s the easiest “ambience” layer to DIY—especially if you’re swapping in new wax and wicks rather than buying a totally new lantern set. The trade-off: poured candles take a little patience for setup, but once they’re ready, the glow is hands-off. For renters, candle-pour lanterns also pack up quickly at the end of the lease, unlike permanent lighting changes.
Make it instead of buying it
You’re pouring new candle wax into the same perforated lantern-style holders to recreate that warm dotted tea-light glow.
Materials
- Candle wax (soy or container wax) — ~1 lb — craft store — $10
- Cotton wicks (pre-tabbed) — 2–4 wicks — craft store — $4
- Heat-safe container or pour jar (if you don’t reuse the lantern holder) — 1 — craft store — $4
Steps
- Prep the wick: center it in the lantern holder and secure it temporarily at the top.
- Melt wax gently in a pour-safe vessel until fully liquefied.
- Pour wax slowly into the lantern holder, leaving a small space at the top.
- Let the wax cool and set fully at room temperature.
- Trim the wick to about 1/4 inch before lighting.
- Test burn for a short first session, then enjoy the dotted glow.
Total DIY cost: $18 — saves about $7 over buying.
The cost, layer by layer
| Layer | Item | Cost |
|---|---|---|
| 1 | Large round woven rug | $120 |
| 2 | Round wooden coffee table | $150 |
| 3 | Off-white knit throw blanket | $35 |
| 4 | Rust chevron throw pillow | $40 |
| 5 | Hanging string lights set | $30 |
| 6 | Terracotta pot with leafy plant | $40 |
| 7 | Perforated lanterns with tea lights (DIY candle pour) | $25 |
| Total | $440 | |
If you want a cheaper variant, pick a simpler neutral area rug (smaller size or thinner weave), and swap the wooden coffee table for a basic side table in a similar light wood tone. Keep the lighting and textiles—those do the most visual work per dollar.
What worked, what didn't (across the whole room)
The biggest win is the layering logic: one round grounding rug, one centered tabletop, then textiles and warm light doing the mood work. The warm terracotta/amber tones also coordinate with the greenery so the scene feels cohesive. The only part that can go wrong is when people try to copy every detail at once instead of choosing the same “fewer, stronger” anchors.
What worked
- The large round woven rug makes the seating feel intentional, even with a busy railing behind it.
- The round wooden coffee table keeps the balcony flow smooth and reduces corner-bump risk.
- Off-white knit textiles add softness against woven rattan textures and bright outdoor light.
- Rust chevron color connects the pillows to the lantern glow so nothing feels random.
- Plug-in hanging string lights create a multi-height warm effect without drilling.
- Terracotta plant containers repeat the palette and make the greenery feel styled, not dumped.
What didn't
- Too many small decor pieces on the coffee table makes the space look cluttered fast.
- Cool-toned reds in pillow covers clash with warm amber pendant and lantern lighting.
- Oversized lighting lines can crowd the overhead space if the balcony is narrow.
- Choosing a very thin throw blanket makes the drape look flat instead of plush.
What we'd skip if we did it again
Skip buying a matching full outdoor furniture “set.” On a balcony, the view and the railing already add structure—mixing one main anchor (the daybed) with textured accessories looks more lived-in.
Skip low-quality battery candles for the main glow. Replace them with DIY candle-pour lanterns or true tea-light holders so the dotted light looks consistent and lasts longer on an evening sit.
Skip adding more than one patterned textile. Keep the chevron pillow as the only bold pattern; the rest should be texture (knit, woven) and neutral color so the palette stays calm.
Frequently asked
How long does this balcony setup take to pull together?
Most of the look is styling and placement. Planning and positioning the rug and coffee table takes about 45–75 minutes. Adding textiles and pillows is another 20–30 minutes, and hanging string lights is usually 30–60 minutes depending on your balcony layout. The DIY candle-pour part is mostly hands-off—setup and pouring can be done quickly, but the wax needs time to cool fully.
Can I do this without drilling into the building?
Yes. Choose plug-in hanging string lights that can be routed using removable hooks or tension options that don’t require drilling. For the rest of the layers—rug, coffee table, pillow covers, and planters—everything is movable and doesn’t touch the landlord-installed surfaces. Stick to freestanding decor so you can pack it all up when the lease ends.
What if my balcony is smaller or has less overhead space?
Keep the same layer order, just scale down. A smaller round rug still grounds the seating, and a narrower round side table can replace the coffee table if space is tight. Use shorter string-light runs (fewer bulbs) so the overhead doesn’t crowd the view. For plants, go for one medium terracotta pot rather than multiple large greenery pieces.
What should I swap if I can’t find the exact rug shape?
If you can’t find a round woven rug, choose a jute-style rug in a neutral oatmeal color and place it so it still sits centered under the coffee table. The goal is the same: visible texture and a defined “circle” of seating. Don’t match every color—match undertones. Off-white knits and rust pillows will still read cohesive on a slightly different rug shape.
What’s the biggest mistake people make with balcony lounge decor?
Overbuying decor before anchoring the space. People toss in extra small accessories and end up with a look that feels cluttered instead of curated. Start with the largest base layer (rug), then add the furniture anchor (coffee table), then use textiles and warm lighting to finish. That sequence keeps everything intentional and budget-friendly.
More in Outdoor & Patio
Under $500: renter-friendly balcony lounge refresh
A renter-friendly balcony lounge refresh built around warm terracotta, off-white knits, and layered lighting. This look comes together for …
Under $500: boho covered balcony refresh with 7 move-ready swaps
A warm, boho covered balcony look—rebuilt with renter-friendly swaps and a DIY painted planter set. This refresh uses 7 layers for a total …
Under $800: boho outdoor seating nook refresh with 7 layers
Turn a brick-and-wood patio seating nook into a cozier hangout with 7 budget-friendly upgrades, including a patterned outdoor rug, statemen…