
- Best for
- Shower-nook updates that feel built-in
- Cost
- Under $900
- Time
- A long weekend (5–7 hours)
- Renter-safe
- Mostly yes with plug-in lighting and paint
Why $900 warm wood-and-olive refresh is the bathroom shower nook of 2026
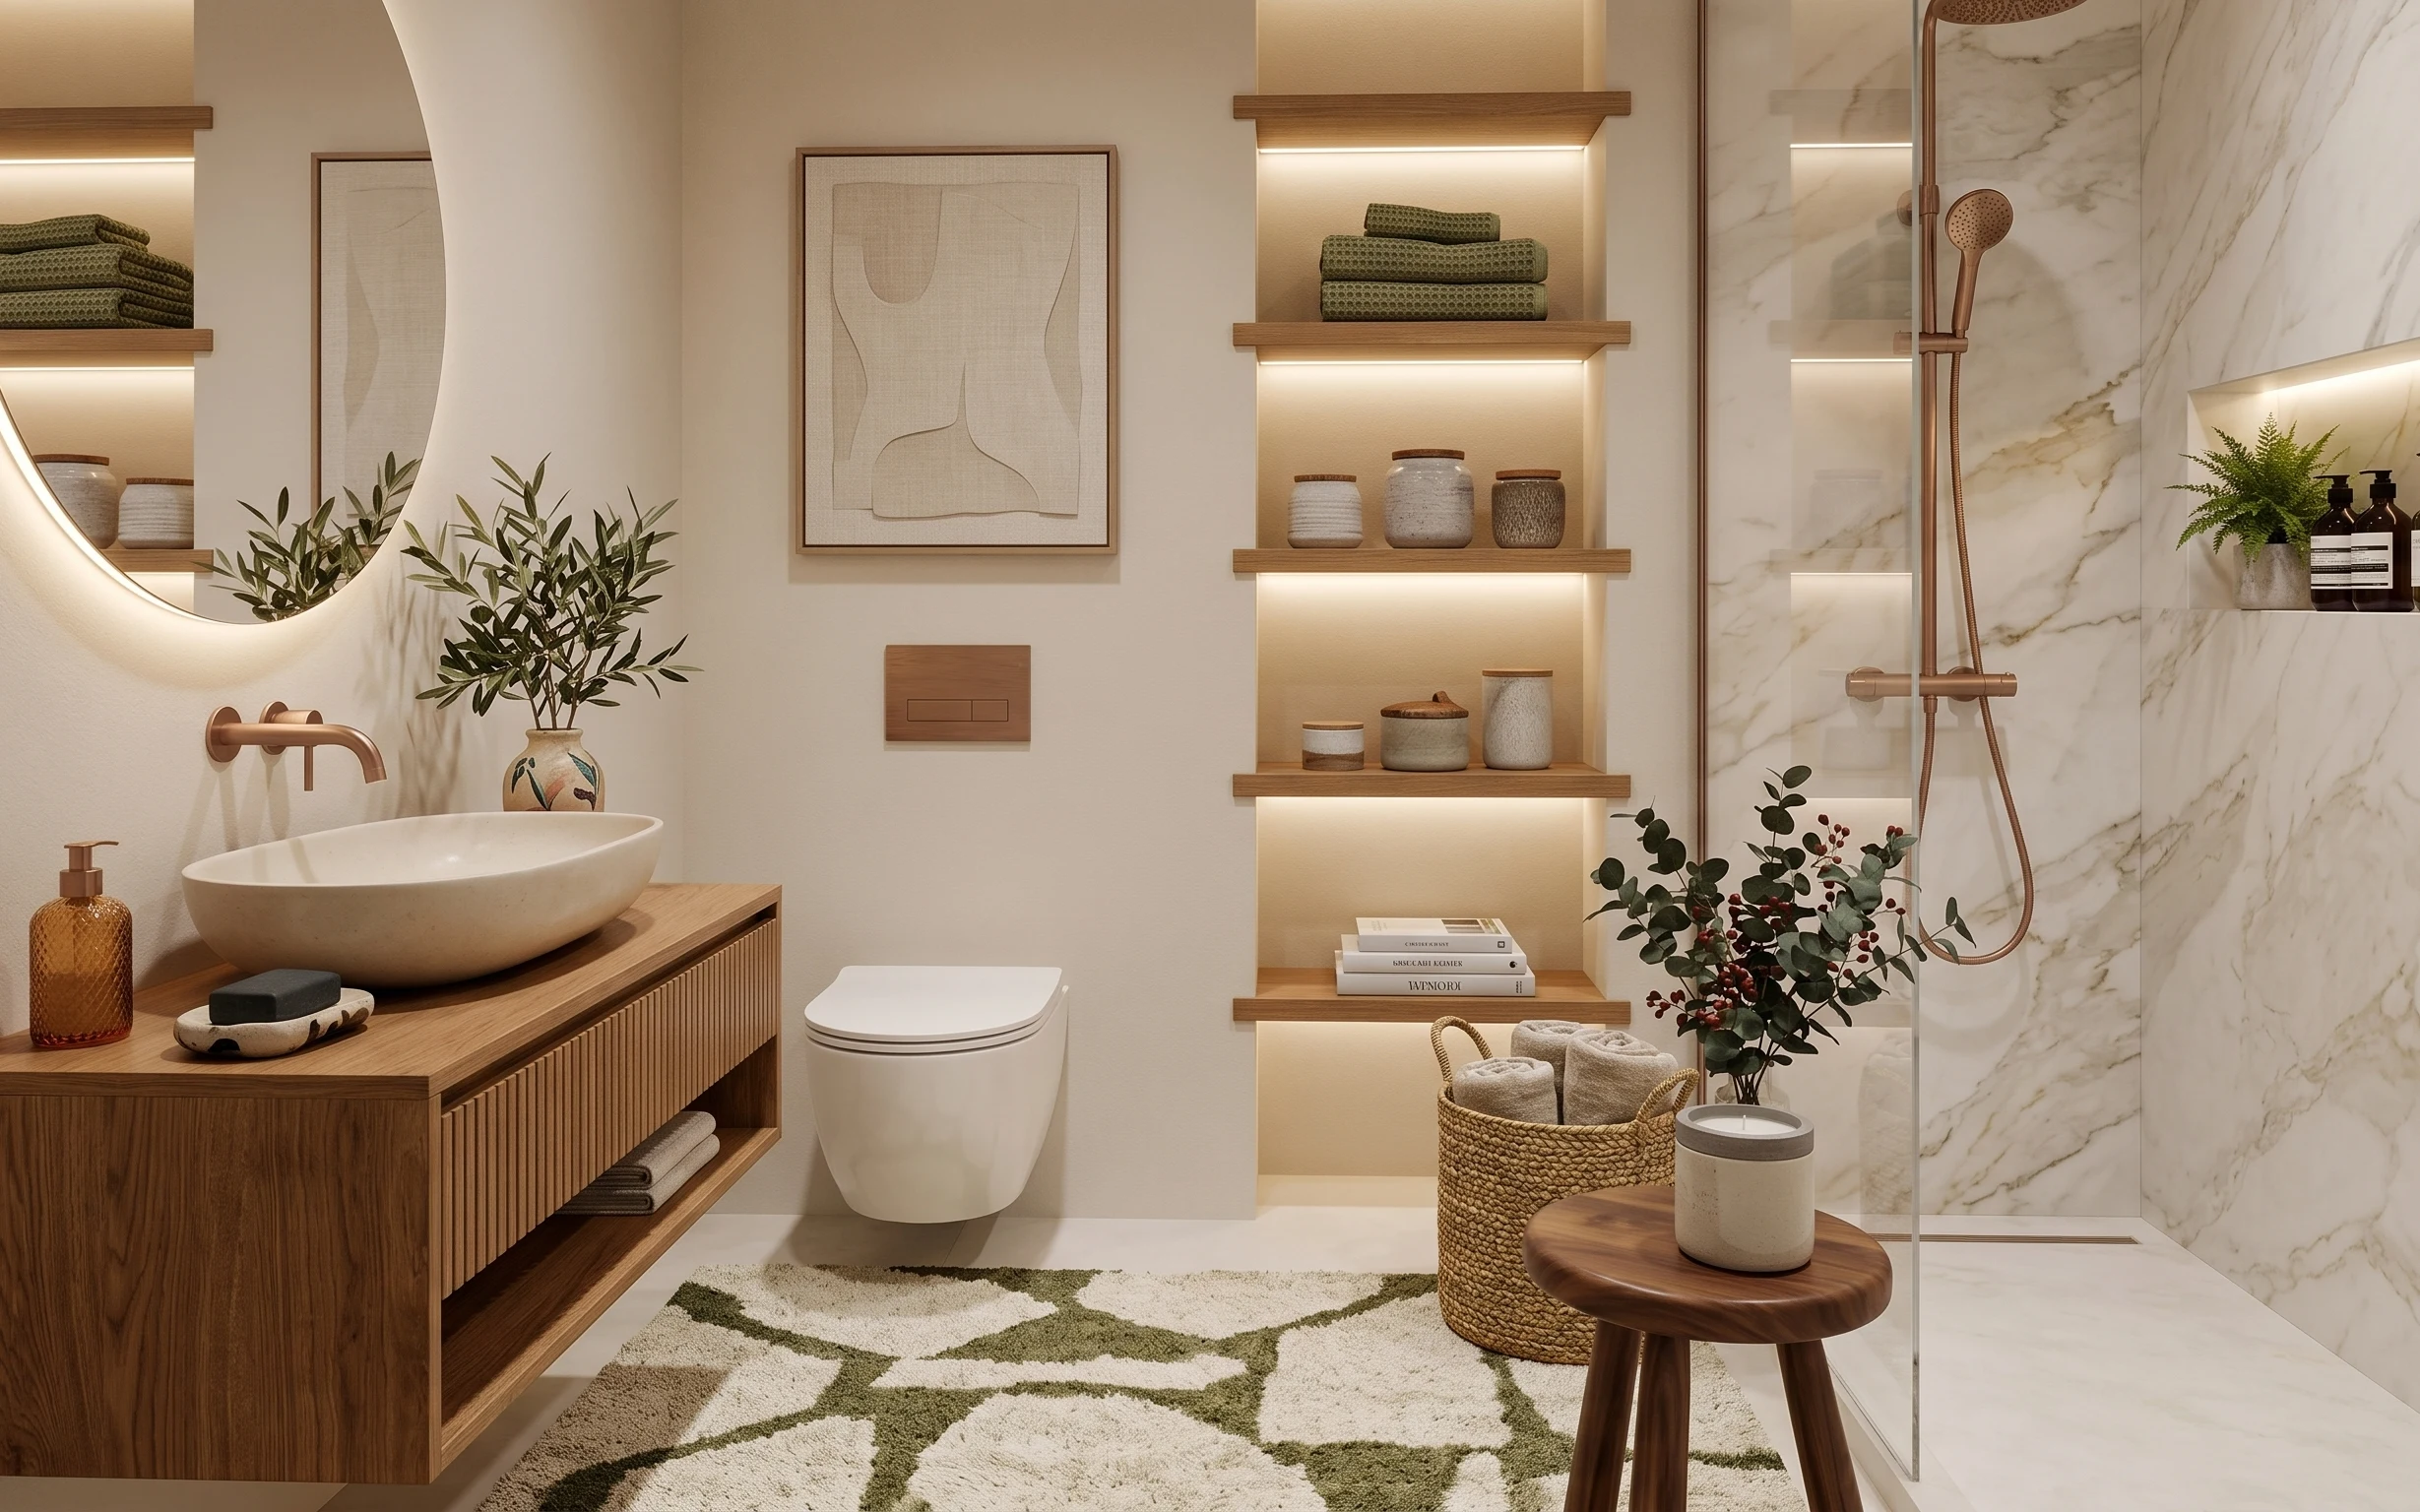
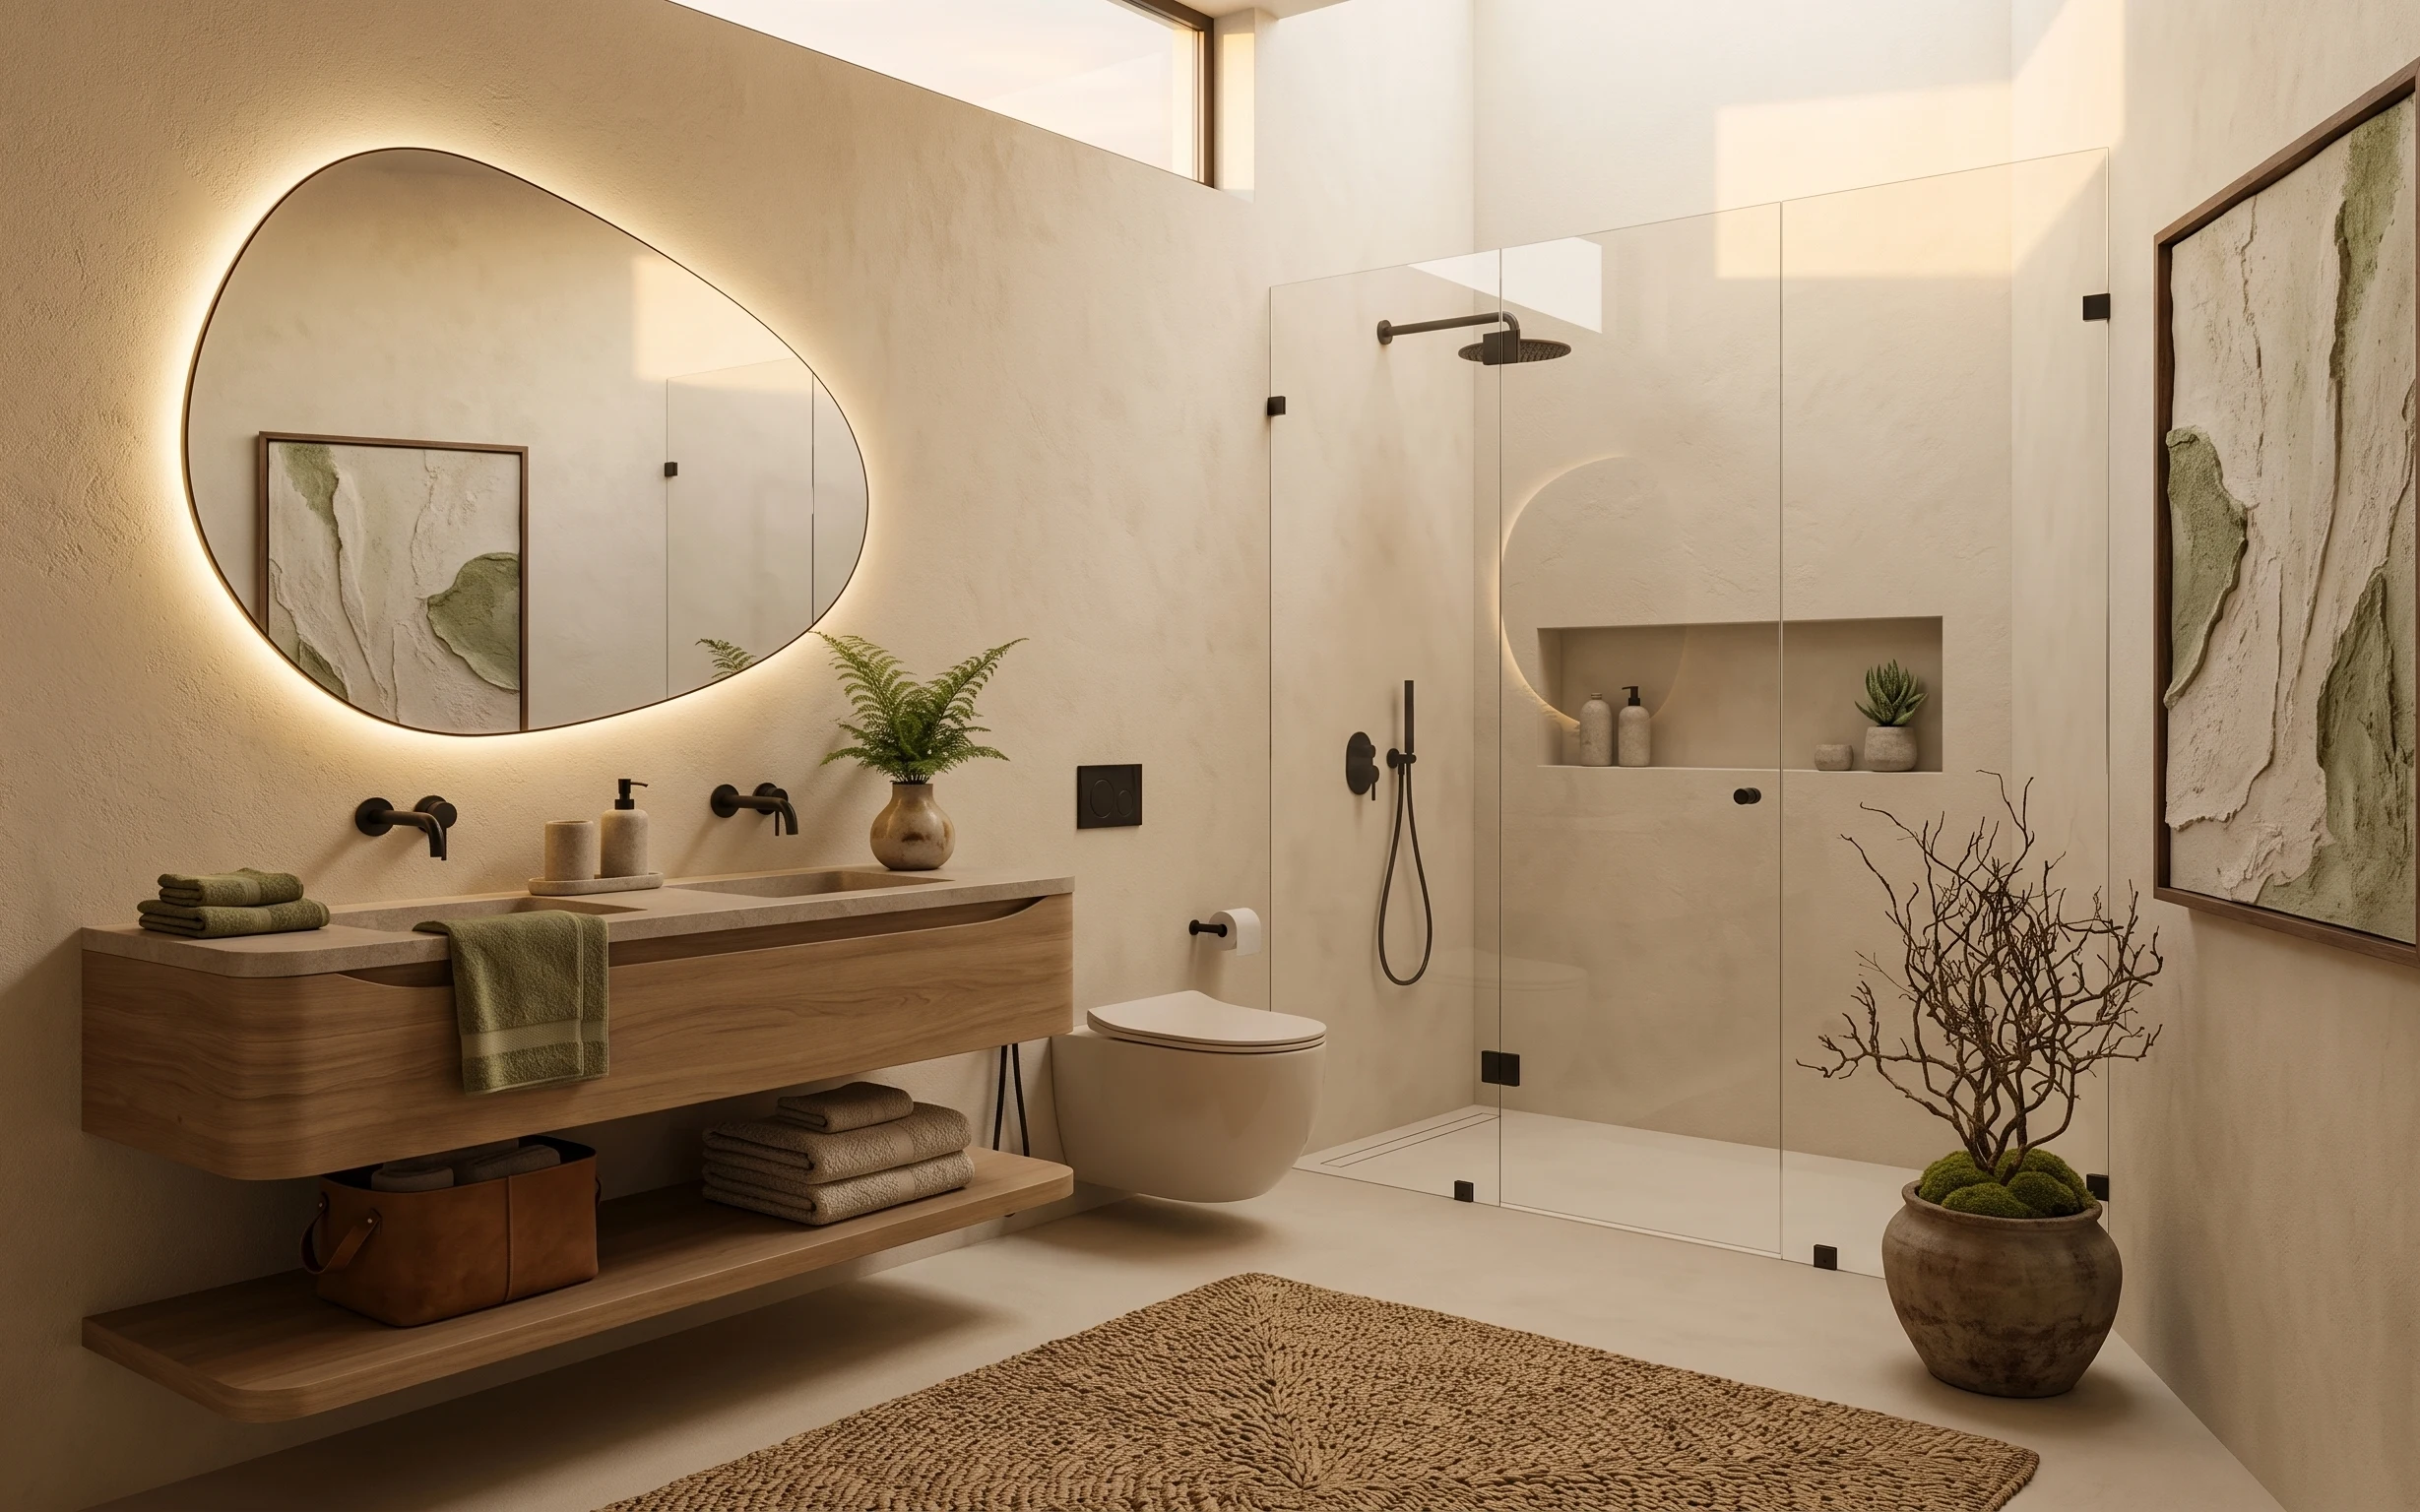
That bright, hotel-clean moment in the photo comes from three things working together: warm wood surfaces, crisp white tile, and the olive-green pop from towels and the rug. The LED backlit oval mirror keeps the vanity zone legible even when you’re not using overhead light. Floating shelves pull the “spa shelf” look off without needing to renovate the layout, and the framed abstract print gives the walls a soft focal point. All of this is achievable for homeowners because the biggest changes here are paint-level decisions and install-friendly upgrades.
I made the mistake in one of my own bathrooms of buying storage that was pretty but too light to feel intentional—everything looked like it belonged to different people. This time, the shelves and the plaque stay in the same warm wood family so the eye doesn’t keep bouncing. Also, the rug pattern matters more than I expected: it hides the day-to-day splashes and makes the white tile feel calmer.
Layer 1 — green-and-cream patterned area rug ($200) anchors the whole shower-and-vanity zone
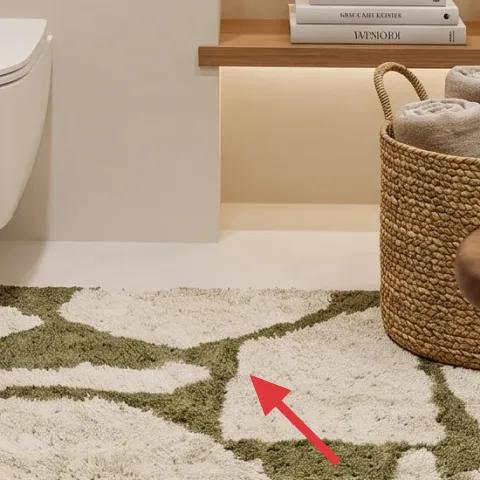
That green-and-cream pattern is doing more work than it looks like from far away. It breaks up the big white tile field with a grounded color (olive) and a creamy base that still reads clean, not dingy. If you go with a plain beige rug, the shower glass and marble veining dominate; the room starts to feel cold. The rug also makes the stool and basket styling look “planned,” because pattern gives you a visual boundary on the floor. Trade-off: a rug like this requires a quick shake/vacuum schedule, but it’s worth it for how much calmer the bathroom feels.
Pick a pattern with two neutrals
In a marble-heavy bathroom, choose rugs that repeat white/cream plus one color you’ll repeat elsewhere (like olive towels).
Layer 2 — LED backlit oval mirror ($120) makes the vanity feel brighter without overhead drama
The LED backlit mirror changes the “morning routine” experience immediately. Instead of relying on whatever ceiling lighting your bathroom has, this mirror provides an even glow that flatters skin tones and makes the countertop and sink area look crisp. The oval shape is also a softer counterpoint to the sharp marble veining and rectangular vanity cabinetry. The alternative—another flat mirror—often looks dim in photos because bathroom light bounces around tile differently than walls. Trade-off: make sure it has a clean, simple edge so it doesn’t look like an appliance; this one reads like intentional modern décor.
Use mirror height to avoid shadows
Center the mirror around eye level for most standing tasks; lower mirrors cause dark zones above the vanity.
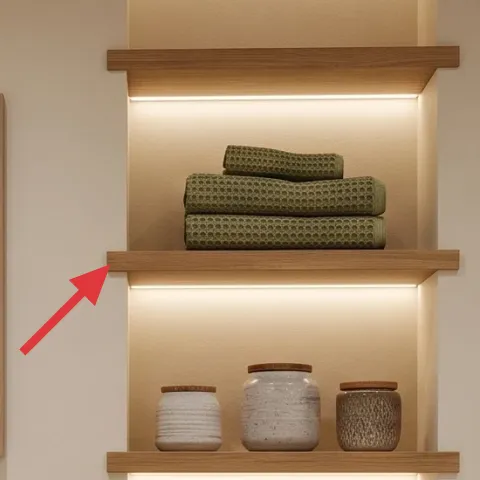
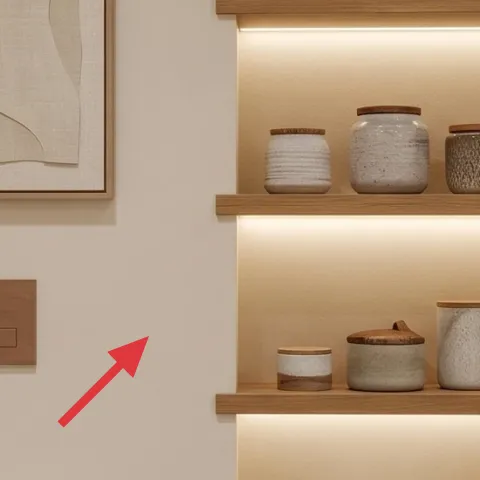
Layer 3 — three-tier floating wood shelves ($180) gives you “built-in” storage without the demo
Those three-tier floating shelves are the reason the whole look feels composed. They let you group jars, small décor, and folded towels in vertical bands, so the shower nook doesn’t become a clutter catch-all. The warm wood ties directly into the vanity and the small wood plaque, which makes the spa styling feel cohesive instead of random. If the alternative is a countertop caddy and random baskets, you’ll lose the clean wall lines. Trade-off: floating shelves mean you’ll be measuring and mounting carefully, but the result looks architectural and stays budget-friendly compared to new cabinetry.
Don’t overload the middle tier
If the center shelf is packed, it visually fights with the framed art—leave a little breathing room on each level.
Layer 4 — large framed abstract wall art ($80) softens the marble with calm, low-contrast shapes
The large framed abstract print works because it’s mostly neutral and line-based. With marble tile already providing texture, you don’t want busy, high-contrast art on top of it. This one adds warmth and a gentle focal point above the mid-bath zone, so the room stops reading as “only tile and fixtures.” An easy alternative is smaller prints, but they often look lost in bathrooms with tall tile and glass shower walls. Trade-off: pick a frame that won’t glare under the mirror lighting, and use paper backing or protective matting if your bathroom runs humid.
Choose art that repeats your rug palette
Pull one color from the rug (olive or the cream field) so the bathroom looks collected.
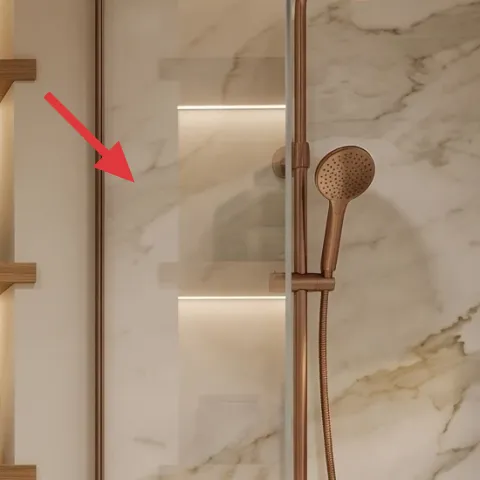
Layer 5 — brushed bronze showerhead and handheld set ($160) warms up the chrome problem
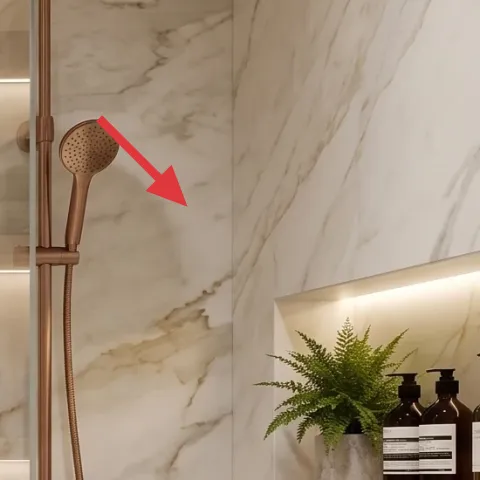
The brushed bronze finish is the warm-metal detail that makes everything else feel more intentional. In this bathroom, white tile and glass are doing most of the visual work; a cooler metal would make the whole setup feel slightly clinical. By matching the warm tone to the wood vanity and the wood shelf brackets, the shower hardware disappears into the design instead of standing out as “just a fixture.” The trade-off is that metal finishes show wear over time—still, brushed textures hide water spots better than shiny chrome. If you want the same effect without changing everything, this upgrade is usually the most noticeable for one install weekend.
Plan for water pressure compatibility
Before buying, check your shower’s connection type and whether the set is designed for your household pressure.
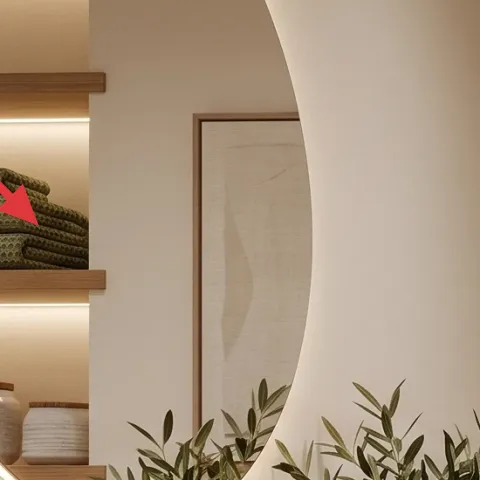
Layer 6 — folded olive towel stack ($60) repeats the rug color where it matters
Olive towels are small, but they’re strategically placed. They sit on the floating shelves where you’ll see them every day, and they echo the rug’s green tone so the bathroom reads as one palette instead of separate décor islands. The texture of folded towels also adds “soft volume” against hard tile and clean wood lines. If you use white towels only, the bathroom becomes too monochrome; you’ll need more pattern or another color to avoid flatness. Trade-off: choose towels that actually feel good—thin towels fold differently and look less luxe on the shelf.
Fold towels for height, not just neatness
A staggered fold gives you visual rhythm across tiers, especially when shelves are visible from the doorway.
Layer 7 — small rectangular wood wall plaque ($45) ties the warm-wood theme together
This small wood plaque may be easy to ignore, but it’s doing the quiet work of repeating warm tones at a different scale. When the plaque matches the vanity’s wood warmth (instead of floating in a different finish), the eye treats the bathroom as one story—vanity, shelves, and this wall accent all feel related. The alternative is leaving it unfinished or mismatched, which makes the room look staged in pieces. Trade-off: a painted finish can look “too perfect” if you go heavy-handed, so you’ll want thin coats and a clean edge.
Make it instead of buying it
DIY-paint the small rectangular wood wall plaque with a two-tone faux panel so it matches the vanity and looks built-in.
Materials
- Fine-grit sandpaper (medium/small block) — 1 pack — $4
- Bonding primer (for wood) — 1 small can — $10
- Warm greige interior paint (eggshell) — 1 small can — $12
- Foam brush or mini roller — 1 set — $6
- Painter’s tape — 1 roll — $3
Steps
- Sand the plaque lightly to dull the finish for better paint grip.
- Wipe off dust with a dry cloth, then tape off edges you want crisp.
- Brush/roll on a bonding primer layer.
- Let primer fully dry, then sand a second time for a smoother topcoat.
- Roll on the warm greige topcoat in thin layers.
- Use painter’s tape to create the faux panel lines, then paint the contrast section.
- Pull tape while paint is slightly tacky to avoid ragged edges.
- Let everything cure fully before rehanging or resting any décor on nearby shelves.
Total DIY cost: $35 — saves about $10 over buying.
The cost, layer by layer
| Layer | Item | Cost |
|---|---|---|
| 1a | Green-and-cream area rug 5×7 | $150 |
| 1b | Rug pad | $50 |
| 2 | LED backlit oval mirror | $120 |
| 3 | Three-tier floating wood shelves | $180 |
| 4 | Large framed abstract wall art | $80 |
| 5 | Brushed bronze showerhead and handheld set | $160 |
| 6 | Olive towel set (folded) | $60 |
| 7 | Small rectangular wood wall plaque | $45 |
| Total | $845 | |
If you want a cheaper variant, keep the mirror and shelves but downsize the rug to a simpler cream option and skip the showerhead upgrade—use a new towel set plus the DIY plaque paint for the same warm, finished feel.
What worked, what didn't (across the whole room)
The biggest wins were the bright mirror and the way the rug and towels repeat the olive color—those three pieces made the room feel calmer instantly. The floating shelves also helped because they give you a place for jars and folded towels instead of countertop clutter.
What worked
- The green-and-cream rug pattern hides daily water marks and keeps the floor from feeling sterile.
- The LED mirror makes vanity tasks clearer without relying on ceiling brightness.
- Three-tier shelves let towels and jars look intentional instead of randomly stacked.
- The abstract framed art softens the marble veining with calm, line-based texture.
- Warm brushed bronze hardware keeps the shower area from looking too cool next to wood.
- Olive towels repeat the rug color right where your eye lands during everyday routines.
What didn't
- Leaving the small wall plaque mismatched made the wood theme feel segmented across the room.
- Too much décor on the middle shelf made the framed art feel crowded and visually heavier.
- Using a single-color towel stack (all white) reduced the spa palette and made the room look flat.
- A plain rug would have made the marble and glass dominate instead of grounding the space.
What we'd skip if we did it again
Skip a high-gloss finish on any wood accents near the shower. In bathrooms, shine catches light and highlights fingerprints and water spots, especially beside an LED mirror.
Skip tiny wall décor that competes with the framed abstract print. In a tile-and-glass layout, small pieces get swallowed unless they repeat your color family or share the same warm wood tone.
Skip clutter-first organizing. Floating shelves look best when each tier has a clear job—towels on top, jars in the middle, and one “breathing” item where your eye can rest.
Frequently asked
How long does this kind of bathroom refresh take for a first-time homeowner?
Plan for about 1 weekend if the wall art and fixtures are already where you want them. The slow parts are usually mounting floating shelves and letting paint cure on any DIY pieces. If you’re swapping a showerhead and handheld set, add a little buffer for removing the old hardware and confirming the right connection.
If I rent, what can I keep from this plan?
Keep the ideas, not the permanent items. You can still do the patterned rug, LED mirror (if it’s a plug-in style), and towel styling. For storage, look for freestanding shelving or corner organizers rather than drilling. For the “warm wood plaque” vibe, a removable wall panel or a framed print swap with removable backing can mimic the look without commitment.
What if my bathroom is smaller than the photo?
In a smaller bath, prioritize the mirror and rug, and consider reducing shelf depth so items don’t crowd the aisle. A smaller rug that still repeats the cream/olive palette keeps the color story. For wall art, go for the largest piece you can comfortably fit—small art in tiny bathrooms often looks accidental.
What if my bathroom has different finishes, like brass instead of bronze?
Warm metals are more important than the exact color. Match the shower fixture metal to one other element—either the mirror frame edge, a faucet, or decorative hardware on the vanity. If everything else is already brass, choose the same brass tone for the shower set and repaint wood accents to a warm greige so the palette stays consistent.
Where should I shop first for the biggest visual impact?
Start with the rug and the mirror. Those two items set the room’s brightness and floor rhythm. Then buy the shelves and the framed art, because they determine what goes where on the wall. Last, handle the showerhead set and towel stack, since those are easier to swap once the palette is clear.
What’s the biggest mistake to avoid in a marble-and-glass shower setup?
Overloading the visual hierarchy. Marble tile and shower glass are already “busy,” so if shelves, art, and décor all compete, the bathroom feels louder than it should. Keep each tier with a clear role, leave negative space on the middle shelf, and repeat one color family (like olive) across rug and towels.
More in Bathroom
Under $900: warm wood-and-olive bathroom shower nook refresh
A warm wood-and-olive bathroom shower nook refresh you can do on your own schedule for under $900. Swap in a patterned rug, a bright LED mi…
Under $400: earthy-neutrals bathroom vanity corner refresh
A bathroom vanity corner can feel spa-calm without touching fixed fixtures. This $400-friendly plan layers a beige textured rug, sage towel…
Under $300: olive-and-terra-cotta bathroom vanity nook refresh
A bathroom vanity nook refresh built around renter-safe swaps: patterned rug, green curtains, and warm shelf styling. This plan keeps the e…