
- Best for
- soft, move-friendly bedroom styling
- Time
- 2–4 hours (most swaps are fast)
- Total cost
- $390 for the full look
- Renter-safe
- no drilling, packable soft goods
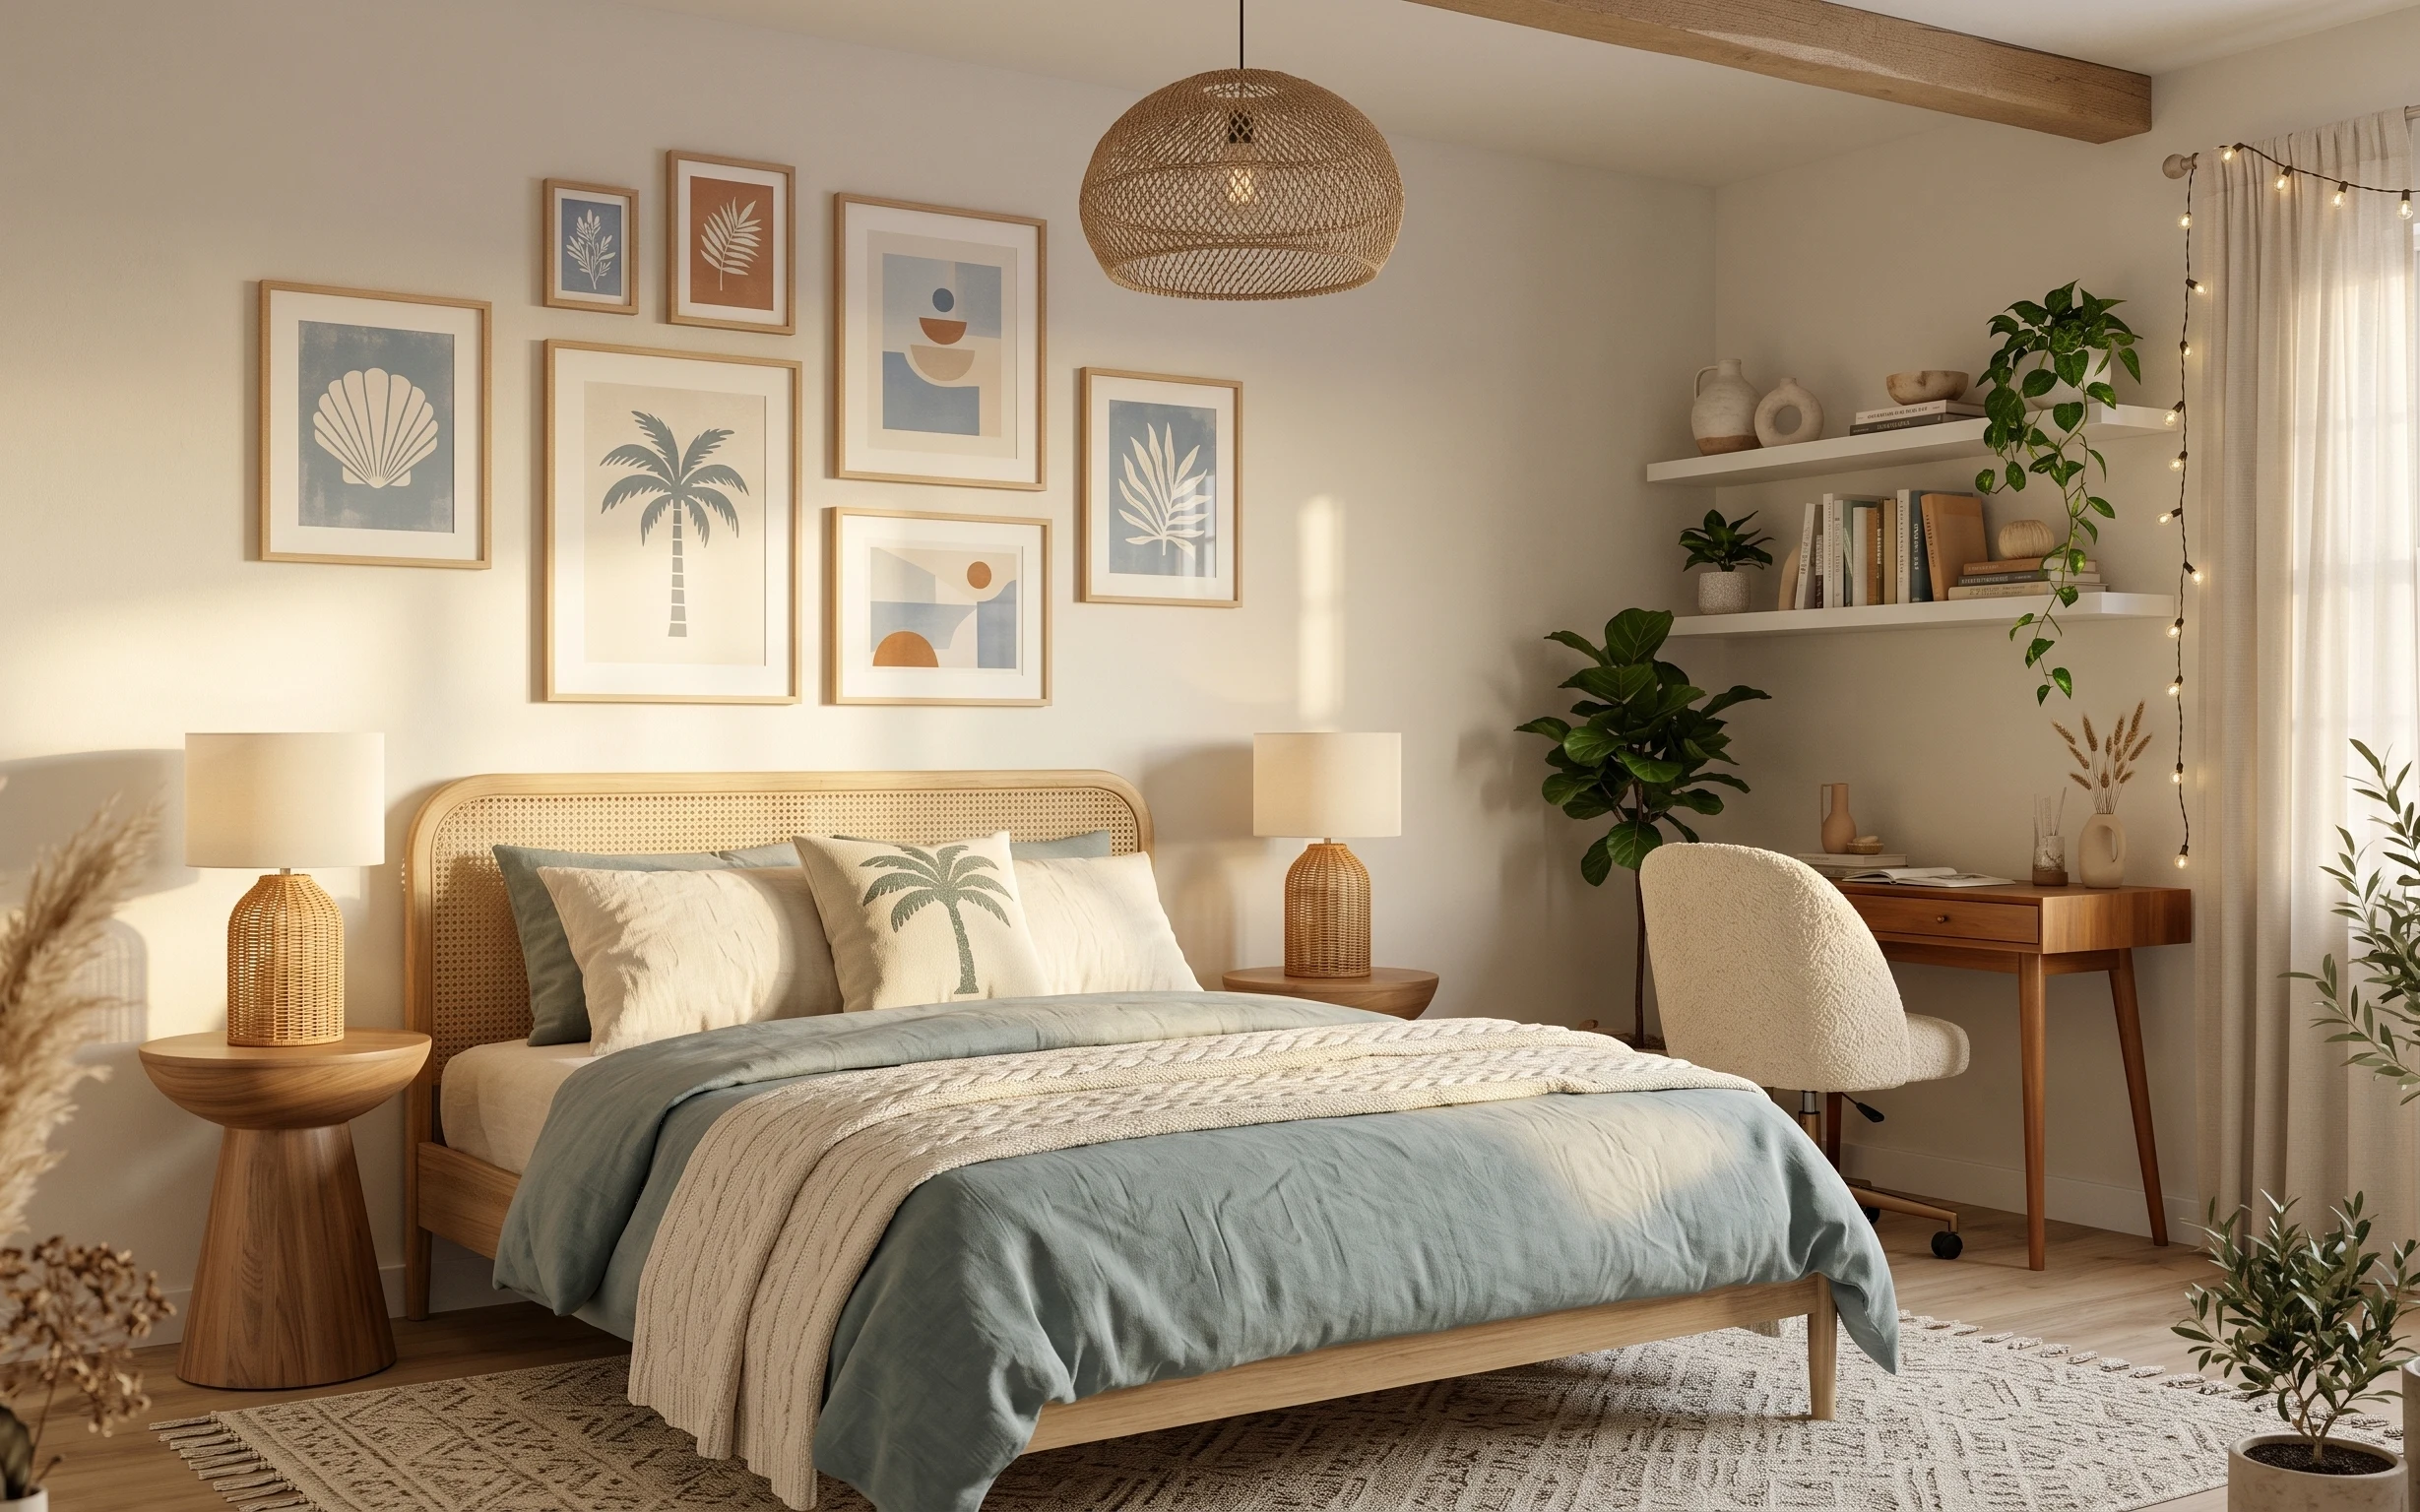
Why olive-and-clay textures are the bed nook of 2026
The hero here is the mix of warm clay-brown textiles and cream backdrops: a textured area rug, a chunky throw blanket, and patterned throw pillows keep the bed feeling grounded instead of flat. The light curtain panels add movement and privacy, while the string lights on cord turn the wall into a soft frame around the mattress area. Even with the framed botanical print and the wood-toned nightstand, the overall palette stays airy because everything is in warm neutrals and olive-green accents. For students and roommates, this is achievable because you’re styling what you can carry.
I almost overbuilt the look the first time I tried this in a shared apartment—bought “bedroom” decor that didn’t survive packing day. What changed my mind was realizing the best pieces aren’t the hardest ones to live with; they’re the easiest to take down. Curtains roll, pillow covers dye and swap fast, and string lights store in a box without drama. The result is a bed nook that still feels intentional after every move.
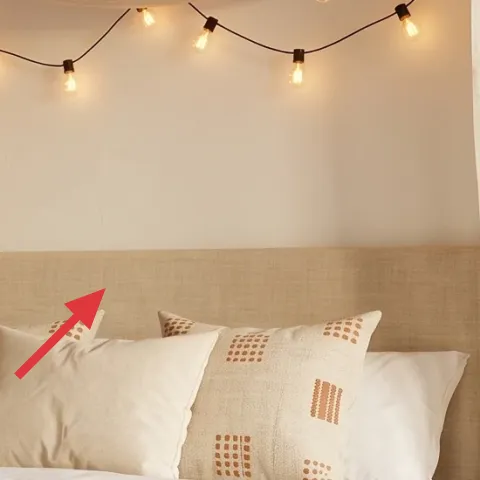
Layer 1 — area rug ($80) Texture underfoot that hides day-to-day life
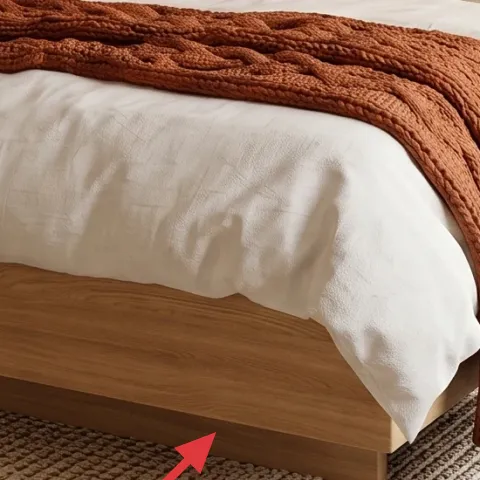
An area rug in a creamy, slightly textured weave is doing a lot of work here: it visually anchors the bed, softens the wood floor, and makes the whole nook feel less “temporary.” Choose something with a nubby or looped surface because it reads cozy in daylight and better hides small scuffs than a smooth flatweave. I’d rather start with rug texture than with more wall decor, because it’s one piece you can feel every day. The trade-off is that rug sizing matters—aim for a rug that reaches at least partway under the bench and front of the bed.
Pick for traction, not just color
If the flooring feels slippery, prioritize a rug with a slightly grippy pile and use a thin rug pad so it stays put during roommates’ busy mornings.
Layer 2 — throw blanket ($25) Draped warmth that makes the bed look styled
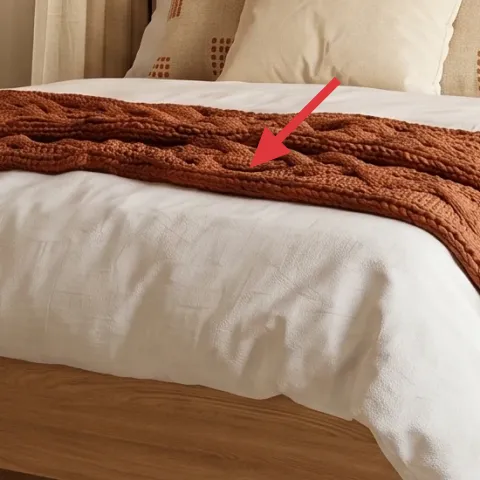
That chunky throw blanket in a warm clay brown is one of the fastest ways to make a rented bed look designed. It sits across the front edge of the bed, so it’s visible from the doorway and also takes the “where do I put stuff?” stress off the pillows. The best part is the fabric weight: a thicker knit reads cozy without needing extra furniture or wall changes. If you try to match too many materials at once, the bed can start feeling busy—so this blanket is the single bold texture that does the heavy lifting.
Keep the blanket where your eyes land
Drape it over the front third of the bed so the color shows right away, even when you’re rushing out with the lights off.
Layer 3 — dyed pillow covers ($30) Warm up the patterned pillows without buying new ones
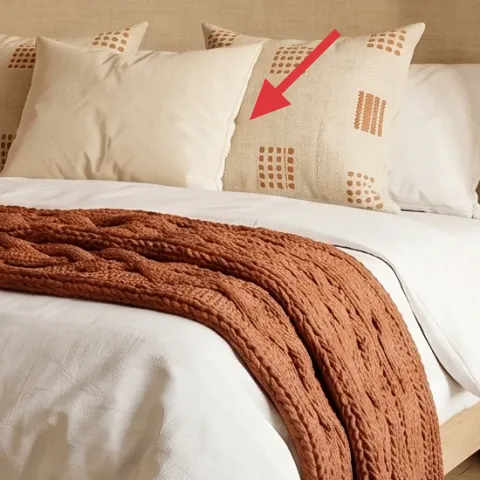
Those patterned throw pillows are small, but they set the tone: cream base with warm clay shapes keeps the palette cohesive. Swapping the look here with dyed pillow covers is a move-friendly way to “steer” the color of your bed nook without hunting for a perfect new pillow set. The trade-off is you have to commit to one dye direction—too many colors turns into a patchwork vibe. Going for one warm clay-adjacent shade keeps it earthy while still letting the patterns show.
Make it instead of buying it
DIY dyed pillow covers by using fabric dye to shift plain covers toward a warm clay-brown tone so they match the throw blanket.
Materials
- Fabric dye kit (clay-brown tone) — 1 kit — craft store — $12
- Salt (for dye setting) — 1 small box — grocery store — $4
- Disposable gloves — 1 pair — drugstore — $3
- White vinegar — 1 bottle — grocery store — $4
- Paper towels or old towels — 1 pack — household supplies — $0
Steps
- Pre-wet the pillow covers so the dye spreads evenly, then wring lightly.
- Dissolve dye and salt in warm water according to the kit directions.
- Submerge the cover and stir or move it gently so there are no blotchy spots.
- Use vinegar rinse as directed to help set the color.
- Rinse in cool water until it runs mostly clear, then dry fully.
- Cover must be completely dry before stuffing back into pillow covers.
Total DIY cost: $23 — saves about $7 over buying.
Test dye on fabric scrap first
Different cover materials (cotton vs. poly blends) take dye differently, and pillow covers are one of the few items you can’t easily “undo” once the tone is set.
Layer 4 — framed botanical print ($80) A vertical anchor that balances all the textiles
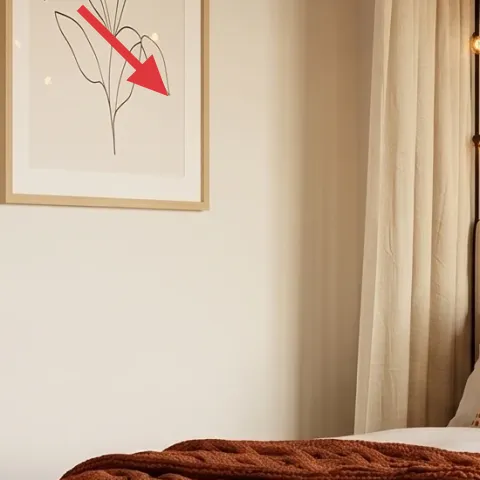
A framed botanical print is the calm visual pause between all the soft, textured pieces on the bed. In this nook, the print sits above the bed zone and gives your eye a clean vertical line, which makes the curtains and string lights feel intentional instead of random. Go with line-art style or minimal botanical drawings to keep it readable when you have patterned pillows nearby. The trade-off is that you’re choosing one focal image—avoid adding extra small prints at the same height, or the wall will start competing with the bed styling.
Use removable hanging methods
For rentals, mount the frame with low-tack, removable hooks and keep the weight within the hook’s rating for your wall type.
Layer 5 — light curtain panels ($80) Soft privacy and a built-in “frame” for the bed
Light curtain panels are doing double duty: they soften the beige walls and create that airy, draped look that makes the bed feel tucked in. In a shared house, curtains also make the bed area feel more separate from the rest of the room—without any permanent work. Choose sheer or semi-sheer fabric so daylight still bounces around, especially if the room is on the smaller side. The main trade-off is maintenance: airy fabric shows wrinkles, so plan for a quick steam or hang-time flattening when you move.
Choose panels that drape past the bed line
Longer panels read more intentional in photos and look better in real life when you’re sitting up in bed.
Layer 6 — string lights on cord ($15) A warm “photo light” effect without extra fixtures
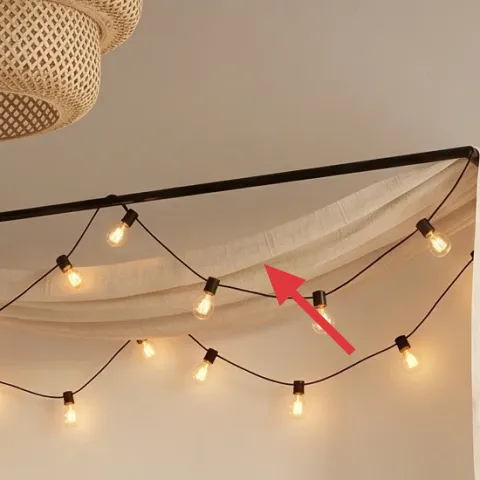
String lights on cord are the easiest way to get warm, low-glare lighting in a rented bedroom. Here they stretch across the top of the bed area, turning the space around the curtains into a soft halo when the overhead light is off. The choice matters: pick warm white bulbs so the tone stays clay-and-cream instead of turning the room blue-green. Compared to swapping a ceiling fixture (not an option for most renters), this gives the vibe change with almost zero commitment. The trade-off is that you’ll need a clear plan for cable placement so it doesn’t tangle when you pack up.
Hide cords behind curtain folds
If you run the cord along the curtain’s inner edge, it looks cleaner and is easier to remove later.
Layer 7 — two drawer nightstand ($80) Storage that supports the styling on top
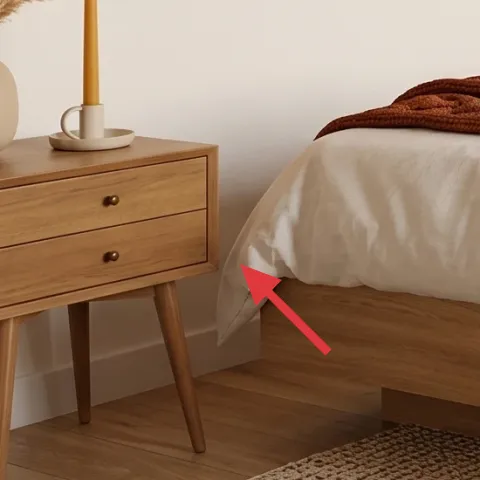
A two-drawer nightstand keeps the bed nook from feeling like a staging area. In this layout, the wood-toned surface is where the decorative candle and small objects live, so you get that “lived-in” feeling without adding more furniture. I like a drawer-forward nightstand in shared housing because you can stash personal items quickly when roommates are doing their thing in the common areas. The trade-off is footprint: measure your walkway first so the drawers open smoothly. If space is tight, choose a slimmer nightstand instead of forcing a larger one.
Use the top for one category
Keep it to candle + one small plant or jar so the surface stays calming even when the room is busy.
The cost, layer by layer
| Layer | Item | Cost |
|---|---|---|
| 1 | Area rug | $80 |
| 2 | Throw blanket | $25 |
| 3 | Dyed pillow covers (DIY) | $30 |
| 4 | Framed botanical print 16×20 | $80 |
| 5 | Curtain panel pair (84") | $80 |
| 6 | String lights (set) | $15 |
| 7 | Two-drawer side/bedside table | $80 |
| Total | $390 | |
If the rug price feels high, swap to a smaller 5×7 rug in a similar neutral tone and keep the “texture” coming from the throw blanket and pillow covers instead.
What worked, what didn't (across the whole room)
This bed nook works because the big changes are soft goods: rug texture, curtain drape, and warm lighting. The look reads cohesive thanks to the shared warm clay and cream palette, even with multiple patterns. The small objects (candle, jars, plants) add personality without needing extra furniture.
What worked
- The area rug grounds the bed and makes the wood floor feel less stark during daytime.
- The clay-brown throw blanket gives one bold texture without overwhelming the room.
- Dyed pillow covers let you steer color fast when you’re moving again soon.
- String lights create warm evening lighting without changing any fixtures.
- Curtain panels add privacy and soften the visual lines around the bed.
- The bedside table provides a home base for a candle and small styling objects.
What didn't
- If the curtains are too short, the “frame” effect breaks and the nook feels unfinished.
- A cool white bulb tone can fight the warm clay palette and look harsh at night.
- Trying to match every pattern color across pillows, art, and curtains quickly turns busy.
- If the rug is too small, the bed looks like it’s floating above the floor.
What we'd skip if we did it again
Skip buying a second “accent” rug just to get a pattern. In this palette, one textured rug plus a chunky throw blanket is enough, and additional floor layers make packing day heavier than it needs to be.
Skip cool white string lights. Warm white bulbs keep the cream-and-clay textiles reading soft, while a blue tone can make the whole bed nook look colder and less cohesive.
Skip extra small wall decor at the same height as the framed botanical print. When curtains, string lights, and pillows already add visual motion, one main framed print keeps the wall from feeling cluttered.
Frequently asked
How long does this bed nook refresh take?
Plan for 2–4 hours total. Hanging a framed botanical print and arranging curtains are usually the slowest parts. The string lights take minutes once you know the cable route, and styling the rug/throw/pillows is quick. The only time add-on is drying dyed pillow covers if you DIY them; if you’re doing it same-day, build in drying time.
Is this renter-friendly if I can’t change anything permanent?
Yes. The layers are built from soft goods (rug, throw, curtains, pillow covers) plus removable wall art and clip-friendly lighting options. Nothing requires painting, drilling, or replacing fixed fixtures. The idea is to style what you can carry and remove cleanly when the lease ends.
What if my room is smaller than the photo?
Use the same palette, but scale down one category instead of changing the whole plan. Choose a slightly smaller rug, keep one main framed print instead of adding more wall pieces, and let the curtains do the “bigger” work by pooling slightly at the floor. Keep the string light run shorter so it still frames the bed without crossing walkways.
What if I want a more colorful version of this look?
Keep the foundation pieces in cream and warm clay, then swap one “color driver” item at a time—usually the pillow covers or the throw blanket. That way, the framed botanical print still feels calm and the warm string lights don’t compete with loud patterns.
Where should I shop for these exact types of items?
For the quickest move-friendly options: look for rugs and throw blankets at home stores or thrifted-house decor sections, curtains online in neutral sheer or semi-sheer fabric, and string lights in warm white sets. The framed botanical print is best found as a simple 16×20 line-art piece so it matches the minimal look.
Biggest mistake to avoid in a shared bedroom?
Avoid adding too many patterned accents in the same visual zone. When pillows, wall art, and curtains all compete, the nook can feel busy even if every individual item looks nice. Choose one “pattern moment” (like the pillow covers) and keep the rest mostly in texture and warm neutrals.
More in Bedroom
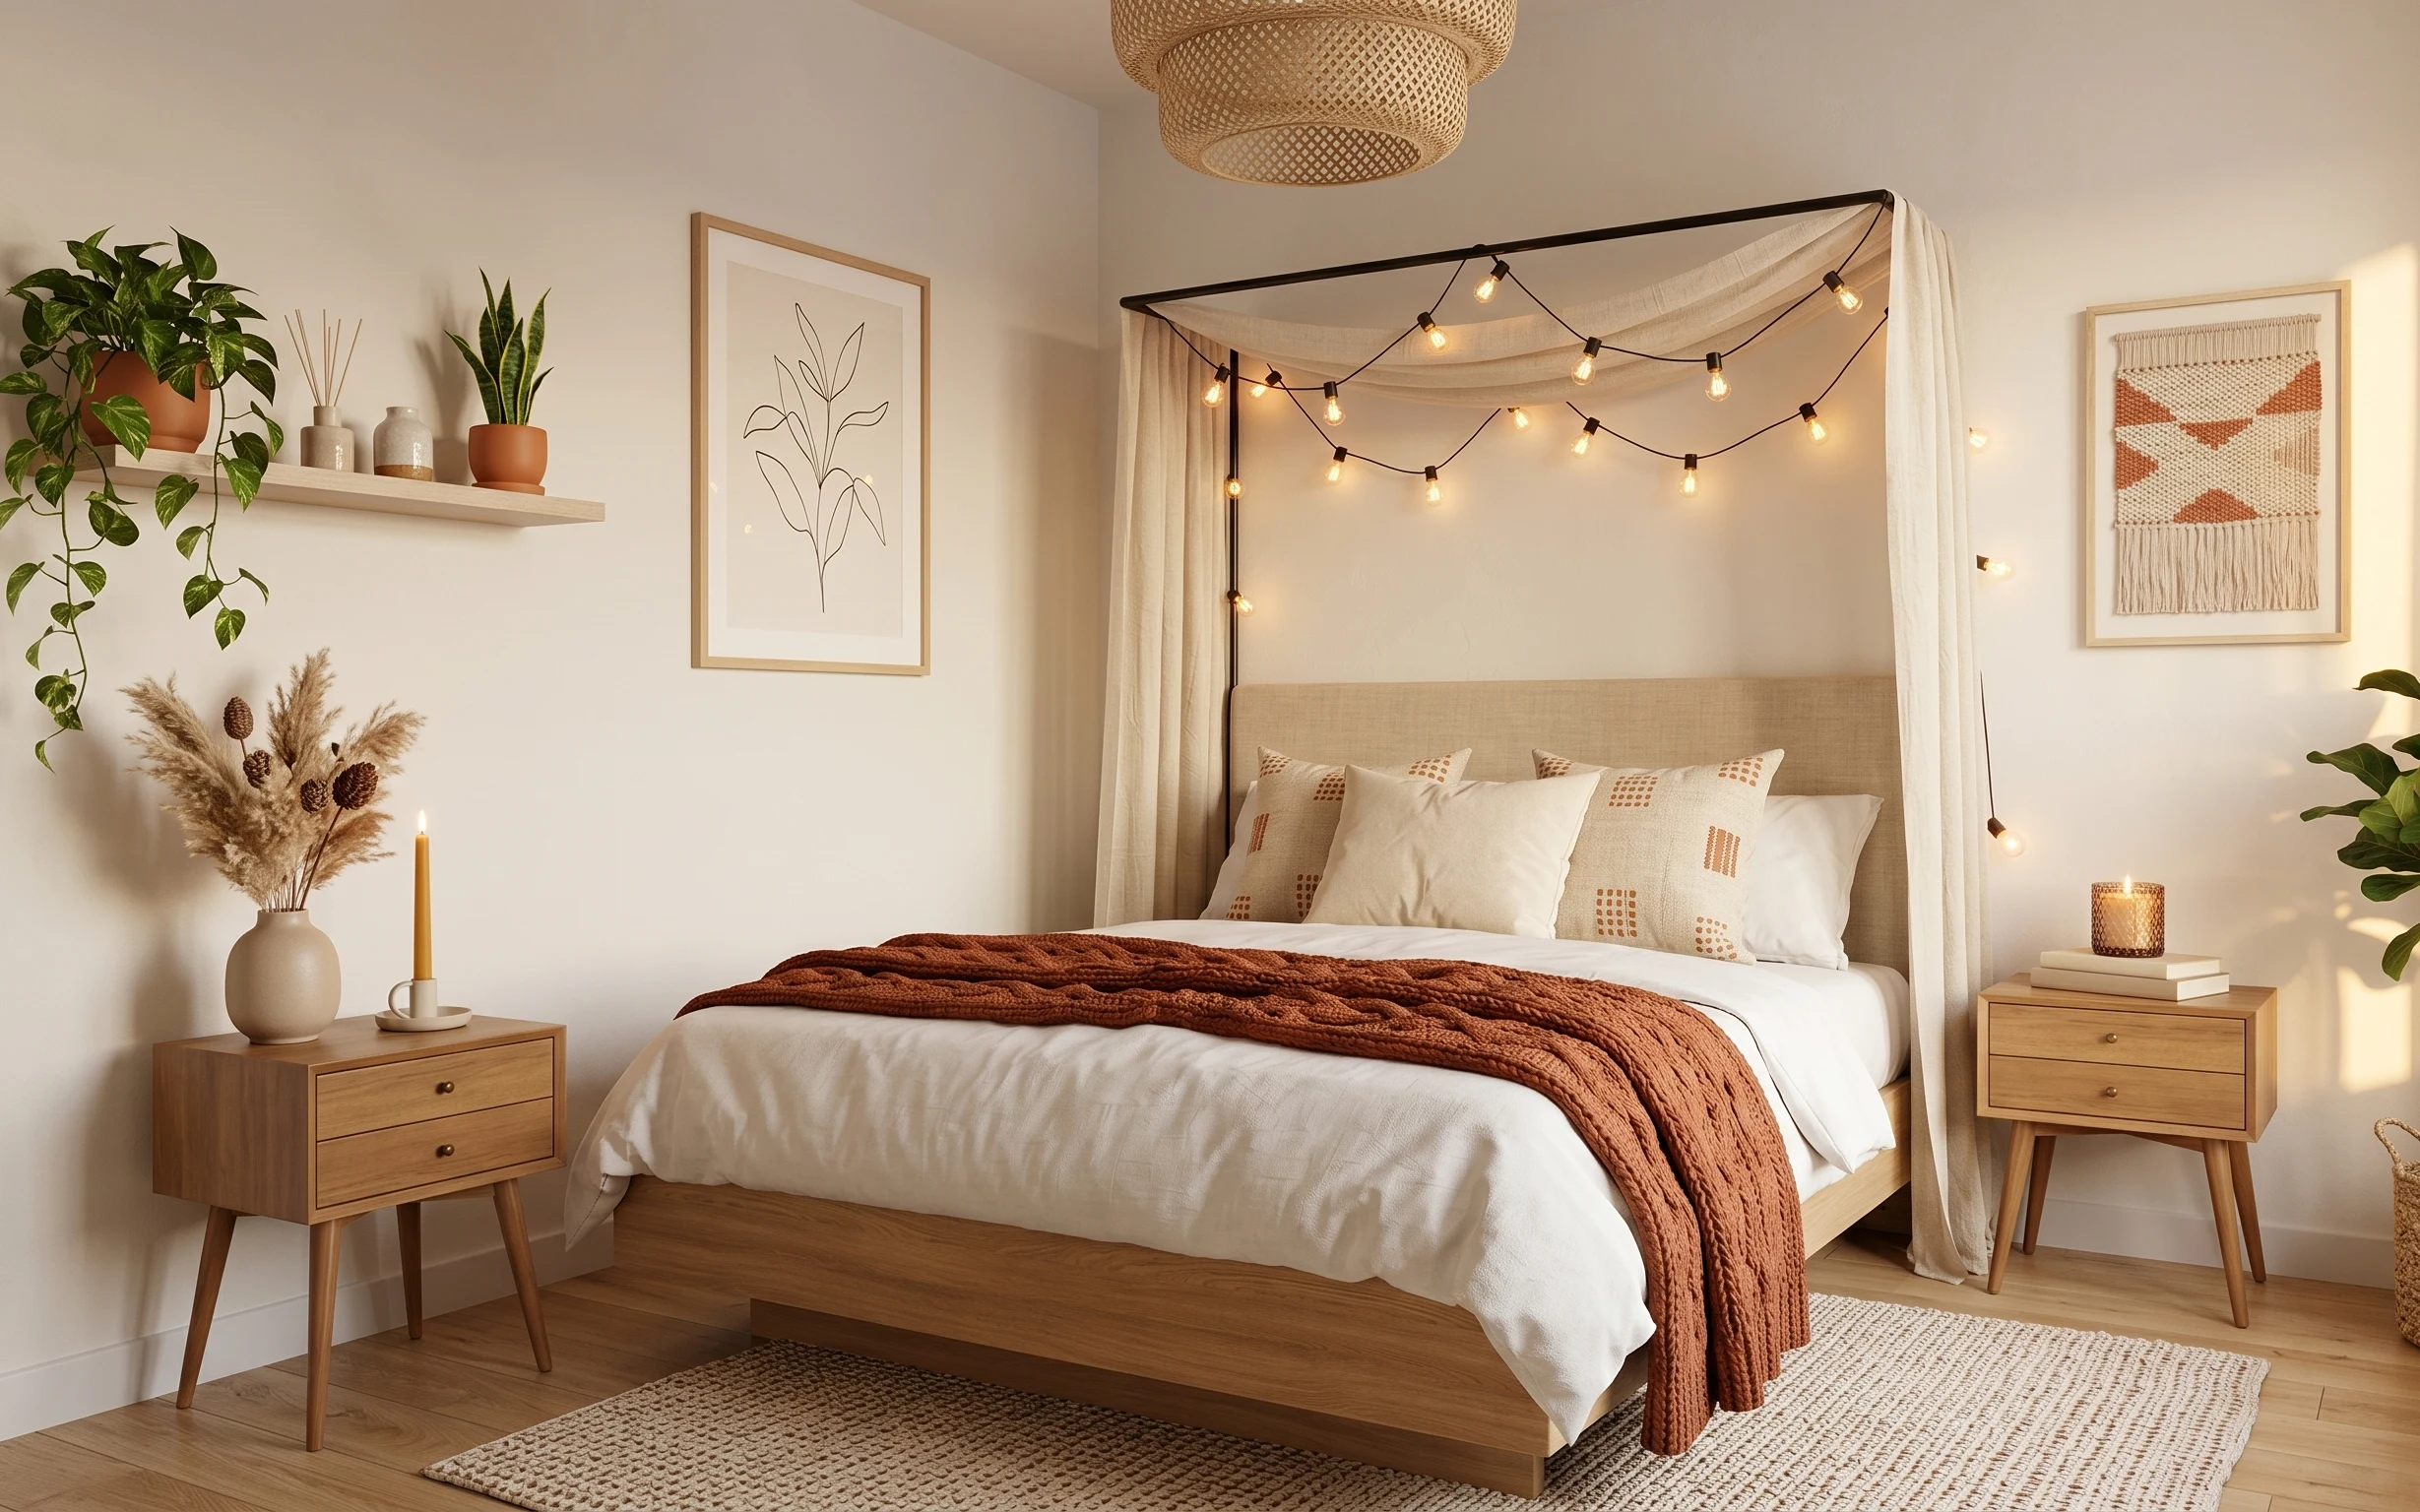
Under $400: olive-and-clay bed nook refresh for shared housing
A rented-bed nook makeover built from soft goods: rug, throw, dyed pillow covers, curtains, string lights, and a framed botanical print. Ev…
Under $500: boho bedroom refresh with move-ready swaps
A boho bedroom update built for shared housing: soft warm light, layered textiles, and renter-safe wall styling. This look comes together f…
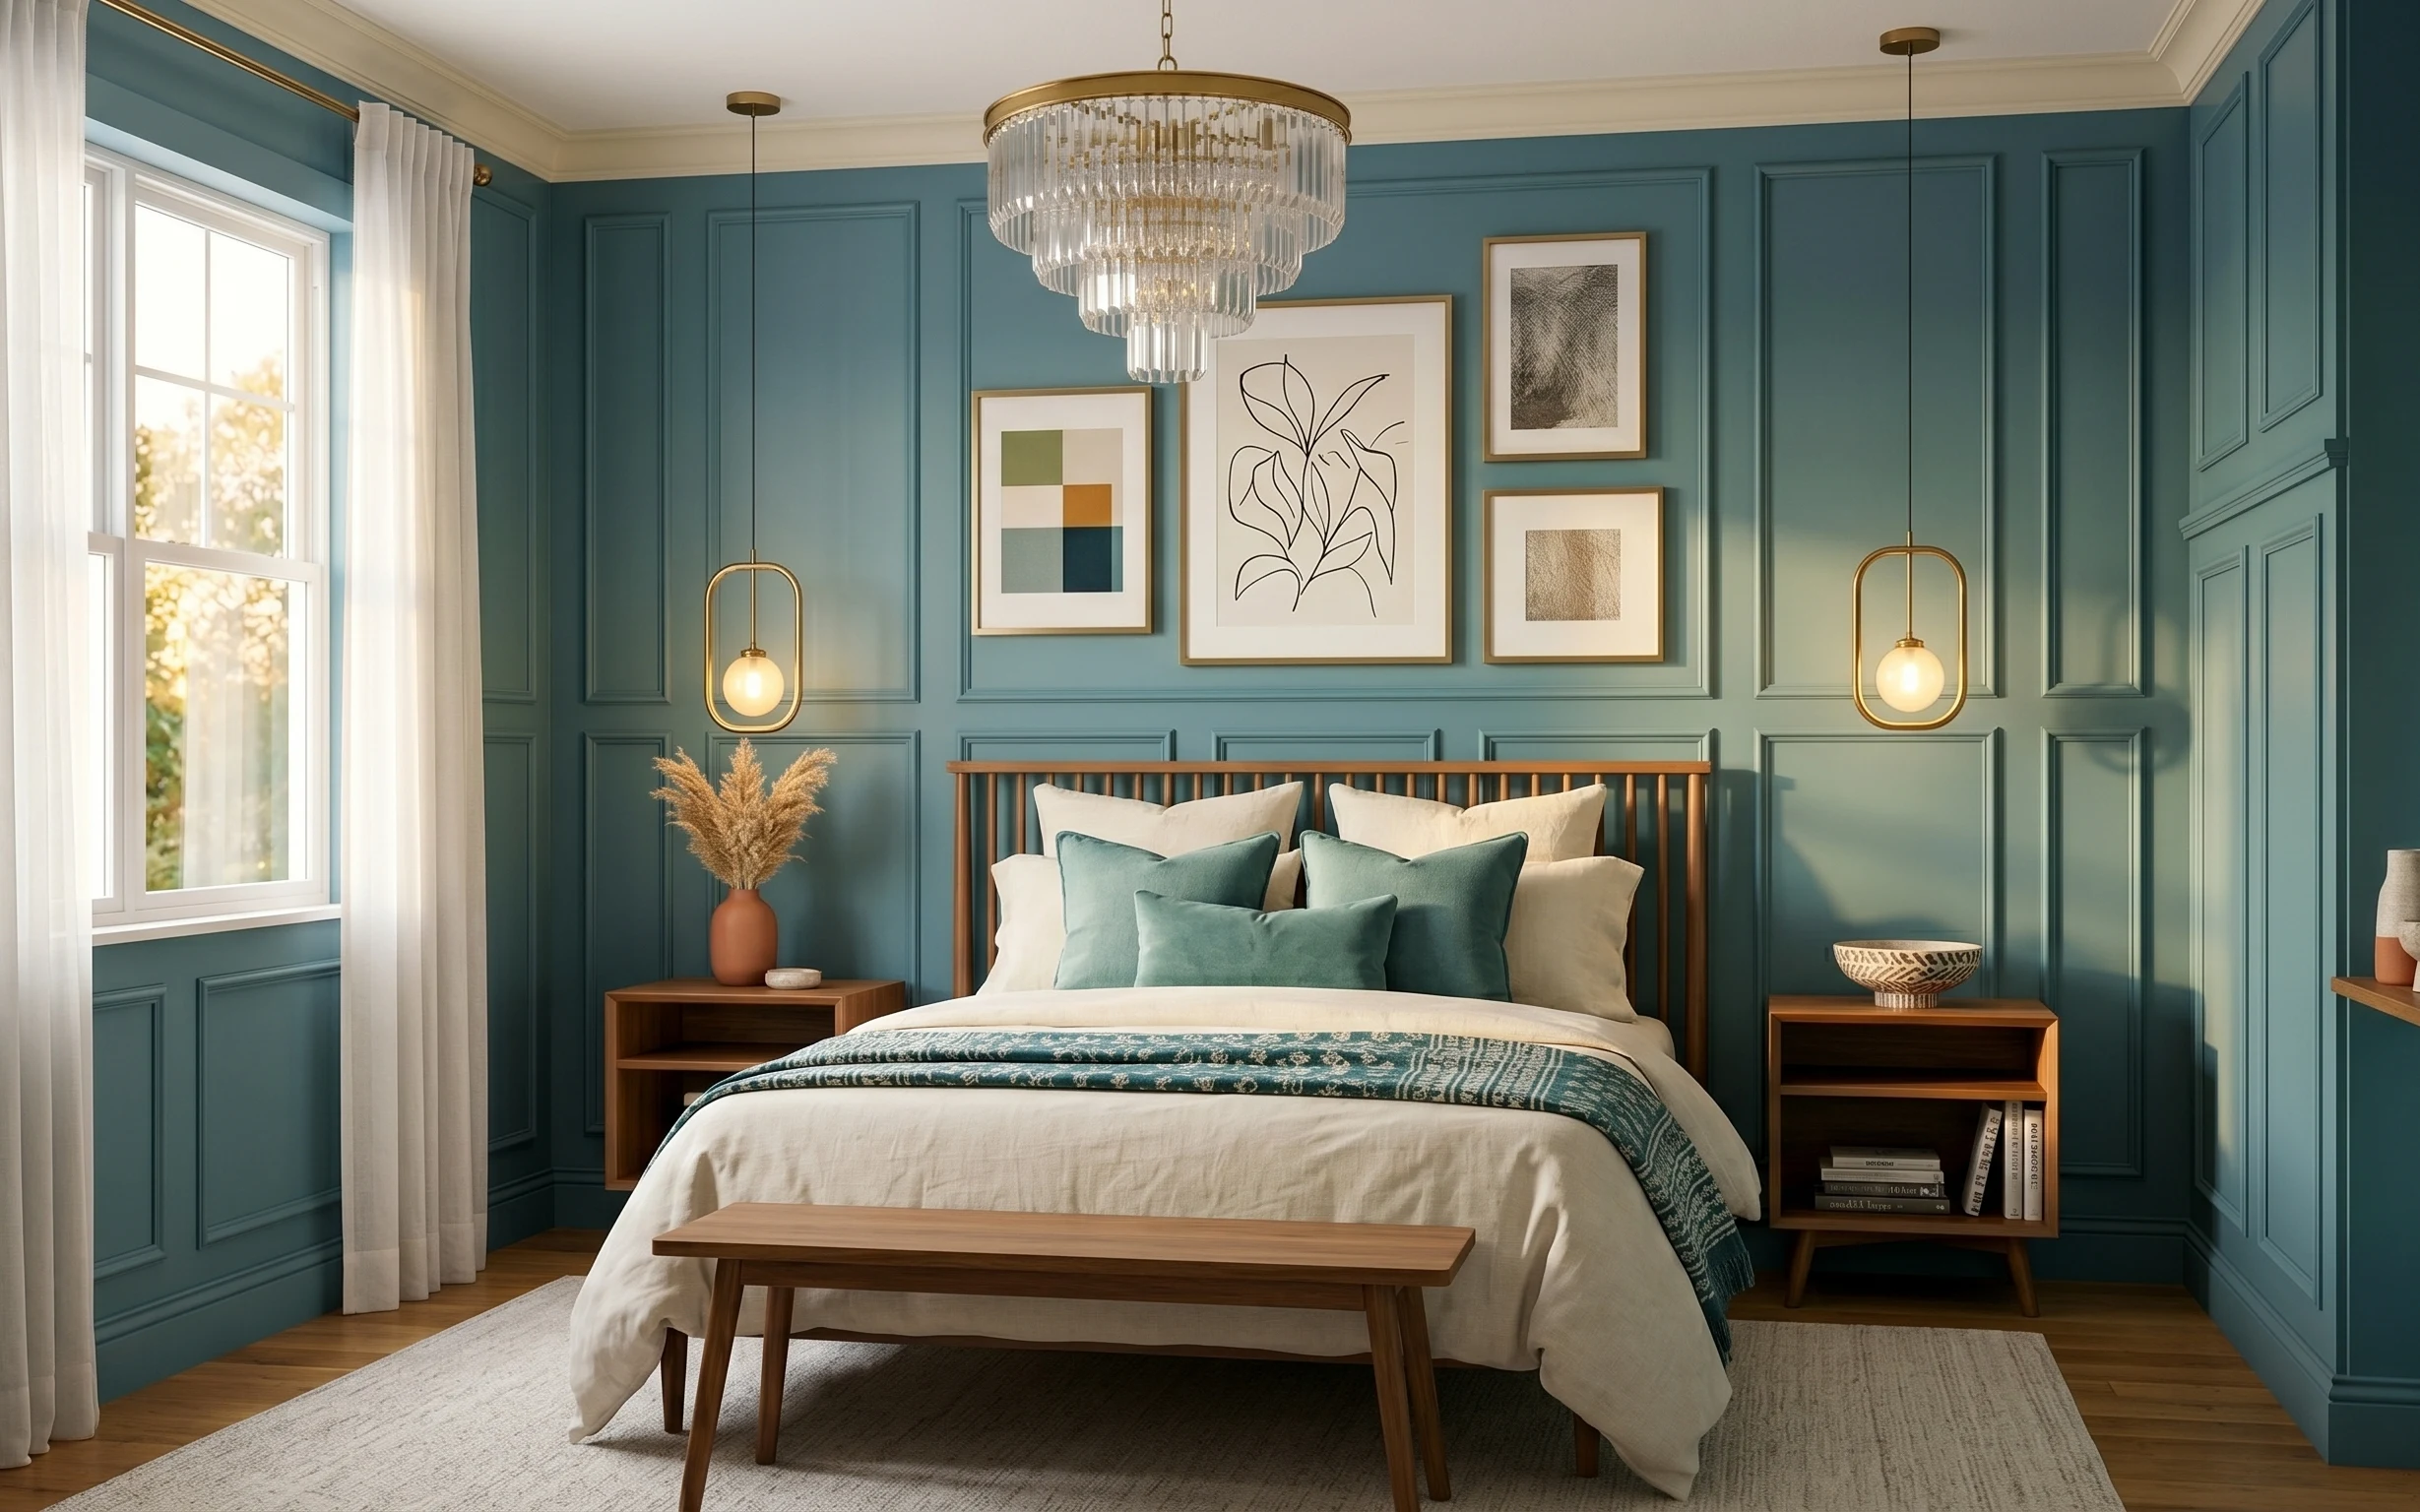
Under $1500: 7 upgrades for a teal bed nook bedroom
A teal bed nook bedroom refresh that leans warm walnut + cream textures. This weekend-friendly plan uses seven upgrades totaling $1005, wit…