
- Square footage
- Works in tight corners
- Cost
- Under $500
- Difficulty
- Easy (mostly swaps)
- Renter-safe
- No-drill approach
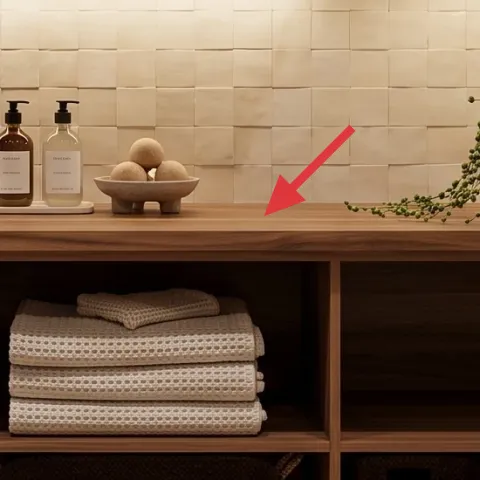
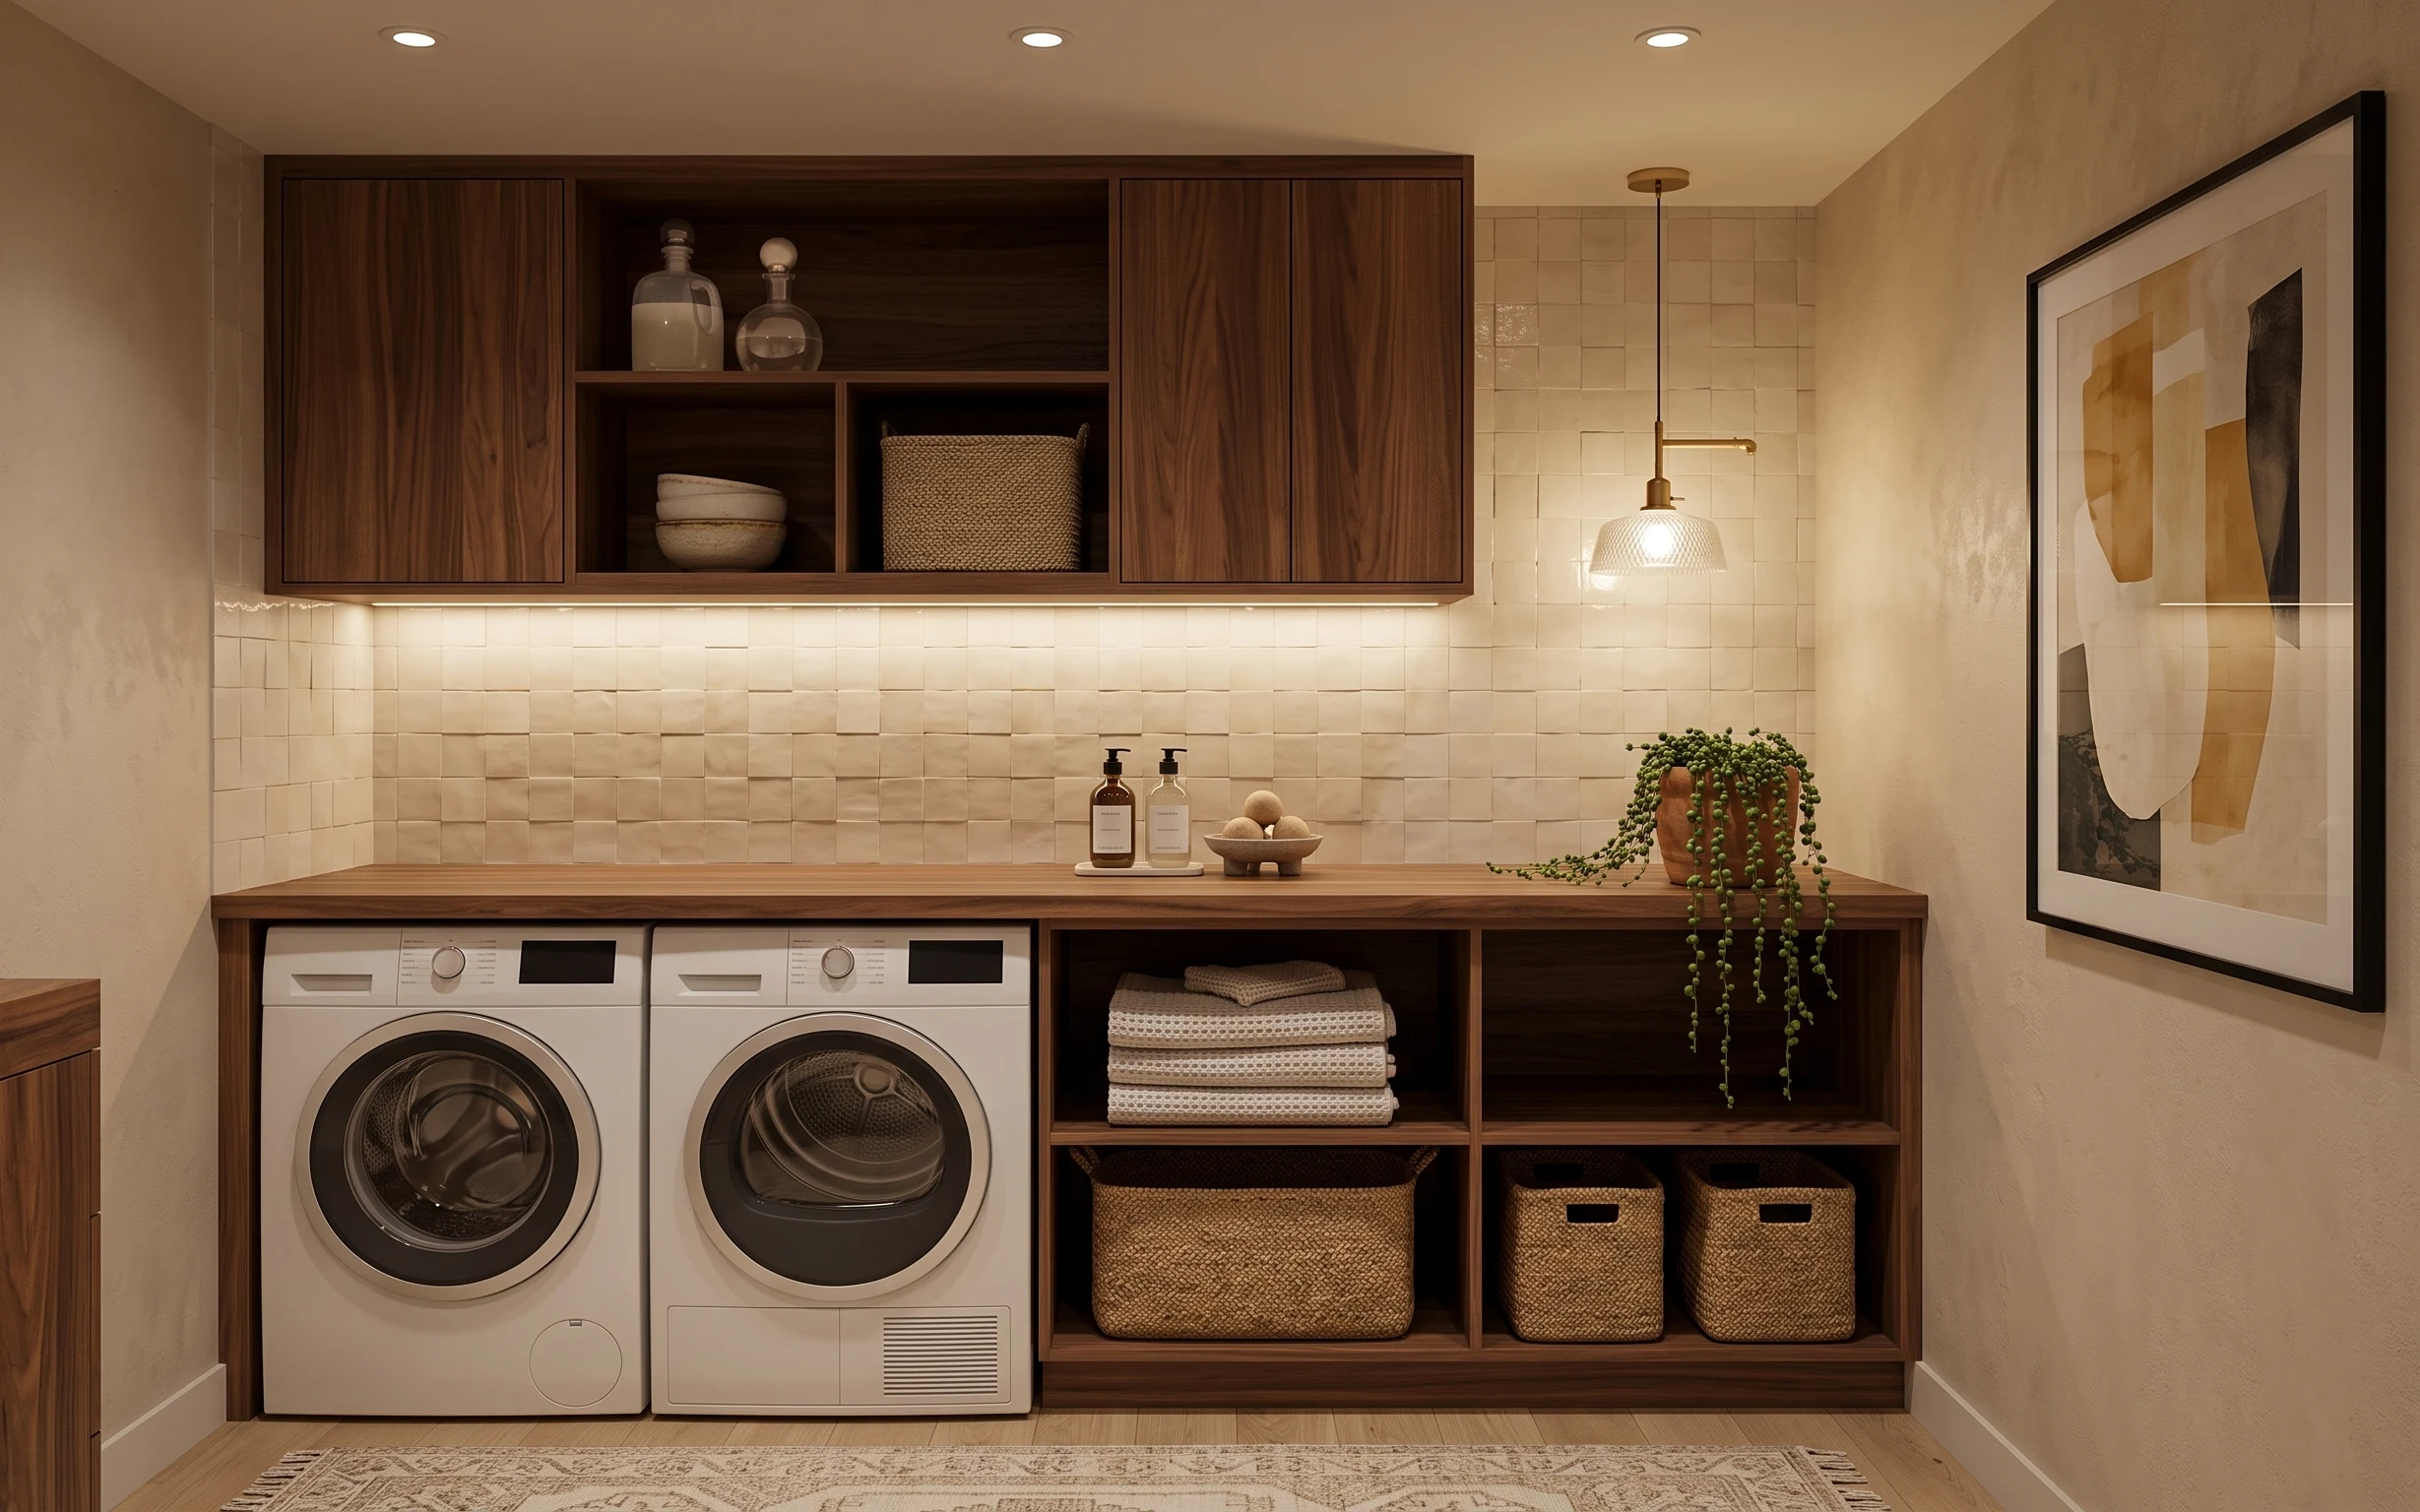
Why warm earthy-neutrals is the laundry nook of 2026
What makes this laundry nook feel pulled together is the restraint: warm walnut tones, light beige tile, and a single framed print create a calm “spa corner” without adding clutter. The textures do the heavy lifting—think woven baskets on the shelf, stacked towels, and the soft underfoot rug. Even the countertop styling is minimal, with small bottles and a ceramic bowl arranged like a still life. For shared housing, that’s the key: these are all things you can box up fast and set back down at your next lease.
The first time I tried to make a shared laundry corner “prettier,” I overdid it with too many small objects. Everything looked cute until laundry day—then the shelf became a dumping zone. This version makes me rethink my default: keep the palette tight, use containers (baskets) for visual order, and let the rug and art do the decorative work. You get the calm look without the constant reshuffling.
Layer 1 — area rug ($120) Adds soft underfoot texture and hides scuffs
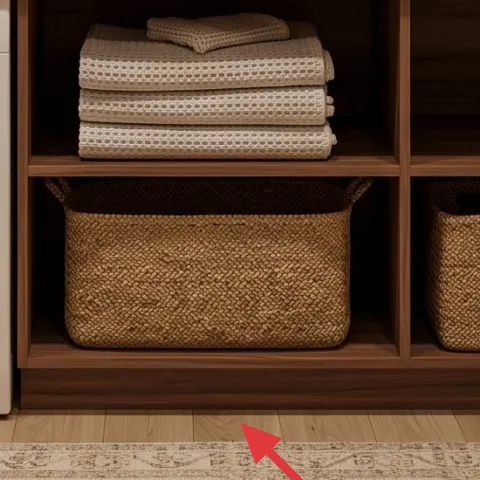
The rug in this laundry nook is the first win because it takes a utilitarian floor and turns it into a “stand here comfortably” zone. Pick a low-pile option in oatmeal or warm taupe so it reads cohesive with the beige tile and walnut wood. I’d rather spend on the rug than on extra decor: a larger textile piece makes the whole space feel finished, even when the shelf is still being organized. The trade-off is choosing a rug that’s easy to shake or spot-clean, since laundry rooms tend to collect lint and stray water droplets.
Rug placement for tight rooms
Center the rug so at least the front edge sits under the open-shelf base—crooked placement reads messy fast in small layouts.
Layer 2 — woven storage baskets on open shelf ($40) Keeps towels and extras looking intentional
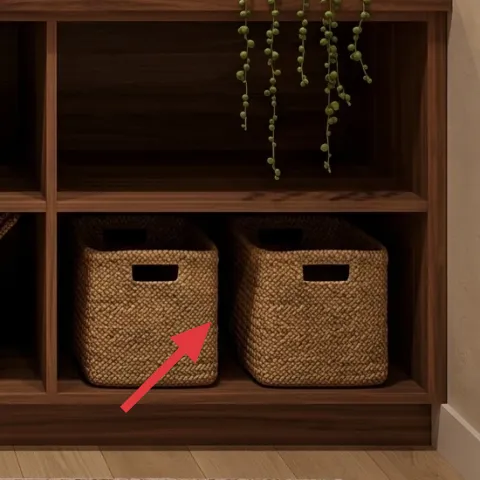
These woven baskets are doing two jobs: they add warmth and they fix the real problem with open shelving—everything looks busy. With baskets, folded towels and small laundry essentials stay contained, so the nook looks styled on a good day and still tidy on a chaotic day. Choose baskets with a slightly varied texture (tight weave vs. looser weave) for depth without adding more items. I’d skip “matchy-matchy” bins; the uneven natural texture feels more like lived-in design and less like organizing-as-a-project.
Baskets work better than stacking alone
A neat towel stack is great, but baskets make it easier to maintain when multiple people use the space.
Layer 3 — decorative tray on the countertop ($35) Creates one tidy “landing zone” for small items
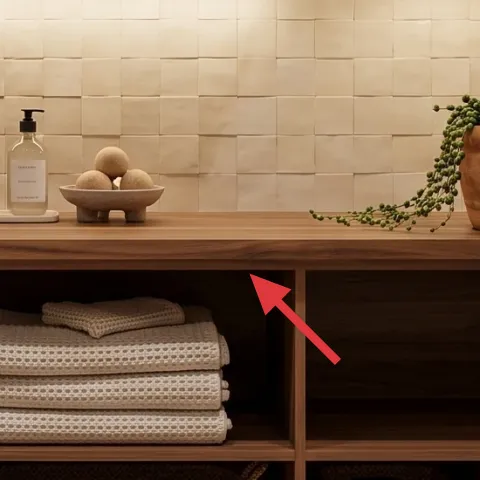
A decorative tray on the countertop gives this laundry nook a focal moment that isn’t the machines. Use it to group the small pump bottles and any daily “grab” objects so they don’t scatter across the counter. I like trays in wood tone or a neutral finish here because they echo the shelving and keep the look warm. The trade-off is that a tray takes up a little surface area, so pick a size that fits your everyday bottles without turning the counter into a storage ledge.
Group by function
Set pumps on the back edge of the tray and keep the front edge clear so the counter stays usable.
Layer 4 — small ceramic bowl on the countertop ($45) Adds a handmade look without more clutter
The ceramic bowl is small, but it makes the countertop styling feel curated instead of random. In a laundry nook, a single “organic” shape softens the straight lines from tile and cabinetry. Choose a bowl with a matte finish or subtle speckle so it doesn’t look shiny against the light beige wall. I prefer one bowl over multiple little dishes because it’s easier to pack and reset when roommates change or when it’s time to move.
Why one bowl
One ceramic piece reads intentional at a glance; too many tiny objects tends to look like laundry supplies.
Layer 5 — hanging string of green bead-like succulent stems ($45) Brings a “lived-in” pop of green from above
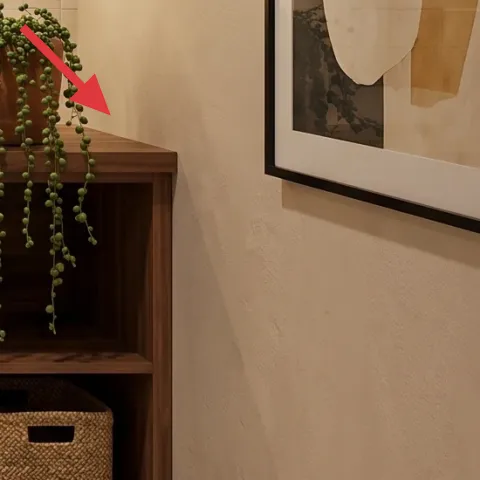
That hanging succulent adds color and vertical texture, which matters in small laundry nooks because you don’t have room for big decor. The bead-like stems also visually bridge the shelf and the art on the right wall, making the nook feel connected instead of separated into zones. For a move-friendly setup, choose a string-style plant you can detach and rehang using existing hooks on furniture or by swapping to a tension-mounted option if the next place allows it. The trade-off is watering consistency—plants like this do best with a quick check so they don’t dry out.
Watch for shedding
String plants can drop stems or tiny beads during handling—keep a small tray or paper under it when you move it.
Layer 6 — stack of folded towels on open shelf ($70) Repeats the palette and makes the shelves feel staged
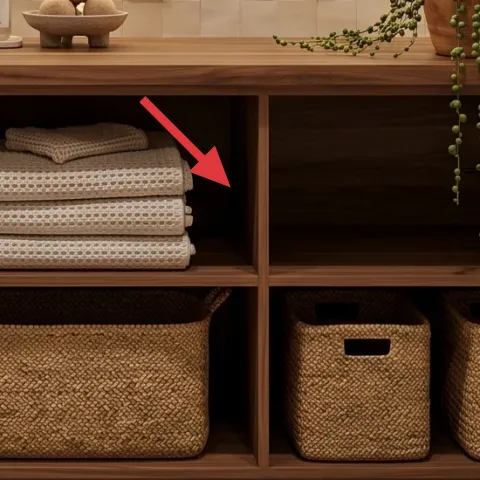
This towel stack works because it’s both practical and pretty: folded linens create order, and their texture looks good even from a distance. Stick to warm neutrals—cream, oatmeal, or light tan—so the towels don’t compete with the beige tile and walnut wood. I’d rather buy fewer towel pieces in the right tones than bring in random colors that look off under warm pendant light. The trade-off is that towels need occasional freshening, so keeping them in a consistent set makes it easier to maintain the look.
Fold for height, not uniformity
Mix fold styles slightly (one flat, one rolled) to create natural variation without looking messy.
Layer 7 — framed abstract wall art print ($80) Adds a calm focal point you can pack

A framed abstract print is the quickest way to make a laundry nook feel like a real room instead of a utility closet. This one works with the space because it stays neutral in color while adding contrast against the warm wall and wood. For shared housing, the best part is mobility: you can wrap it in bubble wrap and move it like a normal piece of wall decor. The trade-off is choosing a frame that isn’t too heavy—lightweight frames are safer and easier to carry when you’re moving with roommates.
Make it instead of buying it
DIY a hand-painted abstract on cardstock, then place it into your existing frame so the art looks custom but still packs up with you.
Materials
- A5–letter cardstock set — 1 pack — store stationery aisle — $12
- Acrylic craft paint set (starter) — 1 set — craft store — $10
- Small foam brush assortment — 1 pack — craft store — $7
- Painter’s tape — 1 roll — craft or hardware aisle — $5
- Black fine-tip marker — 1 — craft store — $8
Steps
- Cut cardstock to fit your frame opening and test the fit against the back.
- Tape off a few loose sections to create imperfect “blocks” for your abstract.
- Paint the largest shape first using light beige and warm brown tones for the base layer.
- Dry completely, then add a smaller accent shape with a deeper earth color.
- Use a foam brush to soften edges so it looks organic rather than graphic.
- Finish with thin marker lines or a simple geometric stroke for contrast and balance.
Total DIY cost: $42 — saves about $38 over buying.
The cost, layer by layer
| Layer | Item | Cost |
|---|---|---|
| 1 | Area rug (warm neutral, low pile) | $120 |
| 2 | Woven storage baskets (set on open shelf) | $40 |
| 3 | Decorative tray (counter grouping) | $35 |
| 4 | Small ceramic bowl (counter styling) | $45 |
| 5 | Hanging string of bead-like succulent stems | $45 |
| 6 | Stack of folded towels (warm neutral set) | $70 |
| 7 | Framed abstract wall art print (DIY alternative) | $80 |
| Total | $435 | |
A cheaper version is to skip the ceramic bowl and tray and put the same small pump bottles directly in a single basket on the shelf. You’d still keep the rug and towels, which do most of the visible “finished room” work.
What worked, what didn't (across the whole room)
The strongest improvements were the ones that add texture at multiple heights: rug underfoot, towels and baskets at shelf height, and plant spill from above. The second best choice was the framed print because it gives the nook a calm focal point instead of letting machines dominate the wall.
What worked
- The warm neutral rug makes the laundry floor feel intentional and reduces the “bare tile” look.
- Woven baskets keep shared-shelf clutter from turning into visual chaos.
- A tray reduces countertop scatter and makes daily items look grouped.
- One ceramic bowl adds softness without introducing more objects to manage.
- The hanging succulent provides vertical interest in a tight layout.
- Towel stacking turns laundry essentials into consistent styling.
What didn't
- Adding too many small countertop dishes makes the nook look like supply storage.
- Choosing a high-gloss tray makes fingerprints stand out under warm pendant light.
- Skipping baskets and relying on stacks alone leads to a messy look during peak laundry days.
- Letting the string plant spill unevenly can make the shelf area feel lopsided.
- Frames that are too heavy become a hassle when you’re moving with roommates.
What we'd skip if we did it again
Skip adding extra countertop decor beyond one tray (and maybe one ceramic bowl). In a laundry nook, too many small pieces compete with the machines and quickly look like inventory instead of styling.
Skip going dark on textiles. The beige tile and warm wood already lean earthy, so a black or very saturated towel set can feel heavy under warm lighting and make the corner look smaller.
Skip frames that require complicated mounting. If the next place doesn’t match the wall situation, lightweight, easy-to-wrap art is the safer bet for shared-housing moves.
Frequently asked
How long does this laundry nook refresh take?
Most of the work is styling and swapping soft goods, so plan for about 2–4 hours total. The longest part is usually finding a rug size that sits cleanly with the shelving and getting the towel folds to look consistent. If you DIY the abstract art on cardstock, add another 30–60 minutes for painting and drying.
Is this renter-friendly if the next place has a smaller laundry area?
Yes—these changes are layout-flexible because they rely on moveable items: a rug, baskets, countertop groupings, and framed art. If the next nook is smaller, scale down by choosing a smaller tray and fewer towel pieces, while keeping one strong anchor (the rug or the framed print).
What if I share the space and people don’t keep things styled?
Use containers that make it easy to reset at a glance: baskets for the shelf and a tray for the counter. If the day-to-day becomes messy, the texture still helps hide it, and you can restore the look with a quick “basket dump” instead of re-styling every object.
Where should I shop for the baskets and rug without spending too much?
For baskets, look at home goods sections that carry natural weaves and planters-style storage. For rugs, prioritize low-pile neutrals from big-box retailers and rug marketplaces with return policies. Keep the budget focus on the rug and one storage container; the rest is optional styling.
What’s the biggest mistake in laundry nook decor?
The most common mistake is adding too many small decorative items on the countertop or shelf. It looks pretty for a day, then gets swallowed by laundry supplies. A better approach is to pick one container system (tray + basket) and keep the rest limited to texture—towels, one ceramic bowl, and one piece of wall art.
Can I keep the framed art DIY if I move?
Yes. The DIY cardstock abstract is designed to pack: you can remove it from the frame and reinsert it into the next frame later. Wrap the frame or mat in paper/bubble wrap, and keep it with your other breakable decor so it doesn’t get crushed during a move.
More in Small Spaces
Under $500: 7 move-friendly upgrades for a laundry nook
A laundry nook already has the hard part (storage and lighting). This $500 refresh adds a warm rug, shelf styling, and one move-friendly fr…
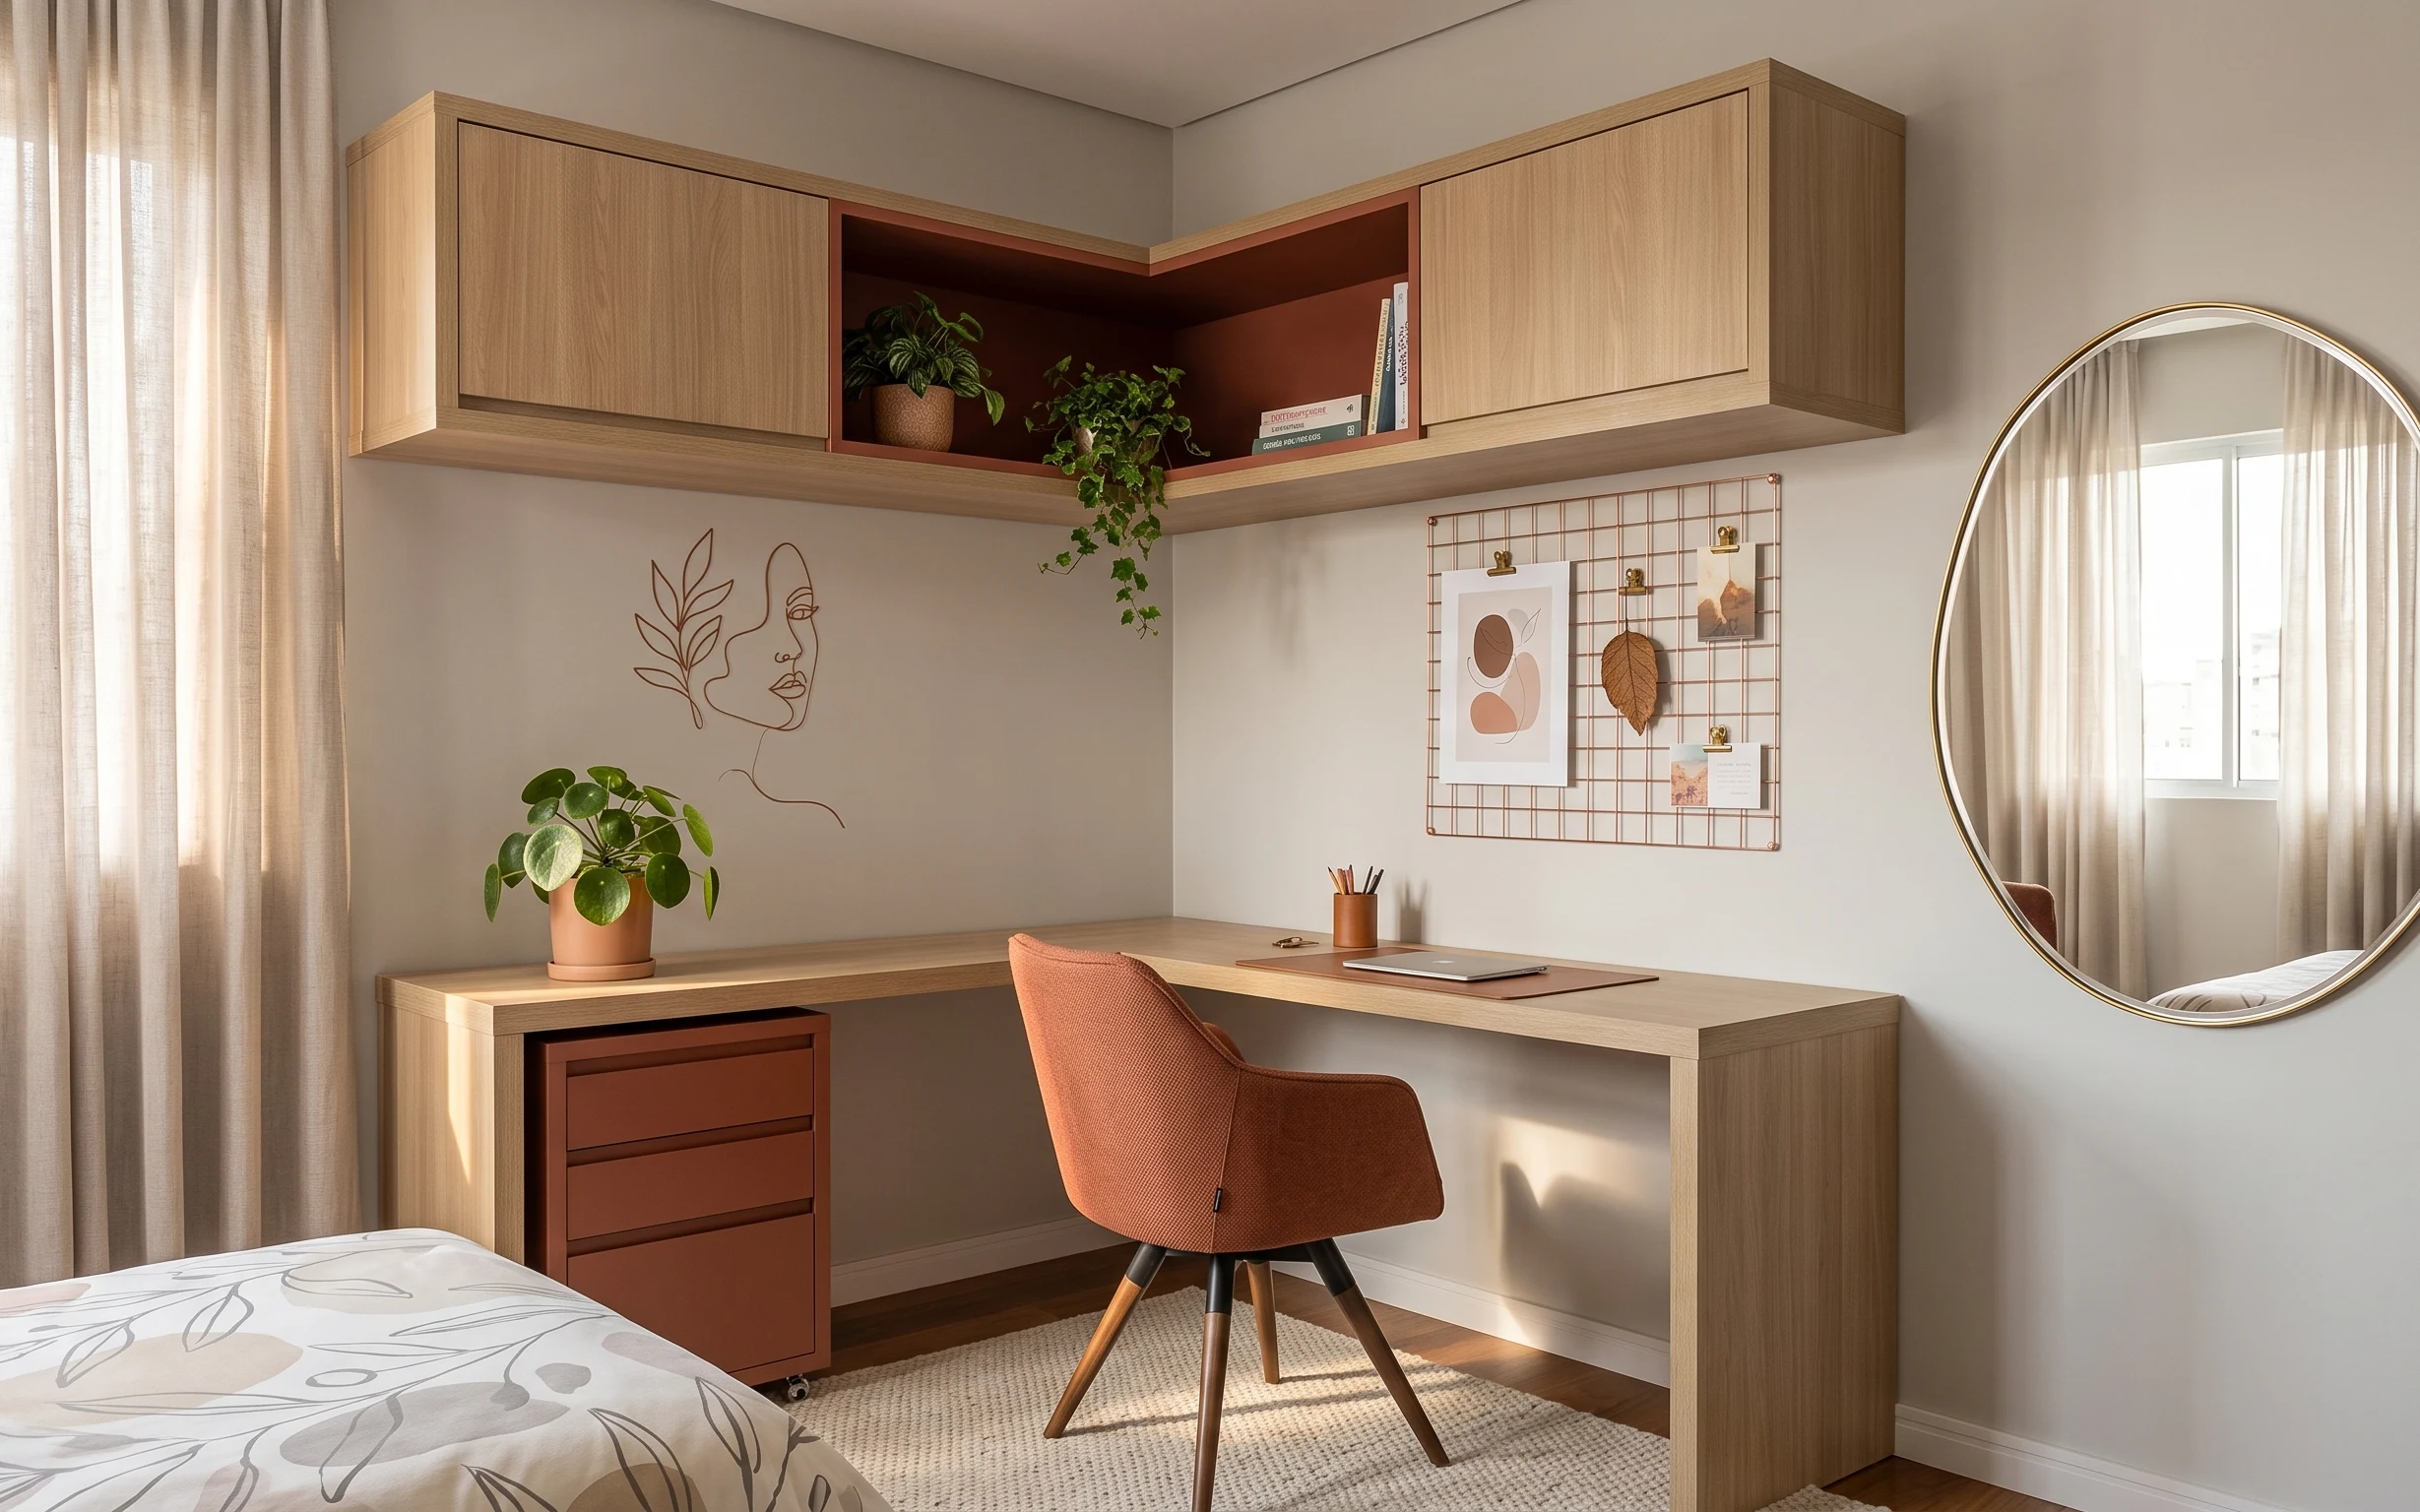
Under $500: terra-cotta desk nook refresh for renters
A renter-friendly home office nook refresh you can build for under $500. Swap in a soft beige rug and curtains, hang a brass-framed mirror,…

Under $700: 7 budget upgrades for a walk-in closet nook
A warm wood walk-in closet nook gets noticeably better with 7 weekend-friendly upgrades—rug, lighting, mirror, and a calmer wall-art moment…