
- Best for
- Weekend bathroom refresh with one paint + two style swaps
- Cost
- Under $700
- Difficulty
- Moderate
- Time
- 6–10 hours (plus drying/curing)
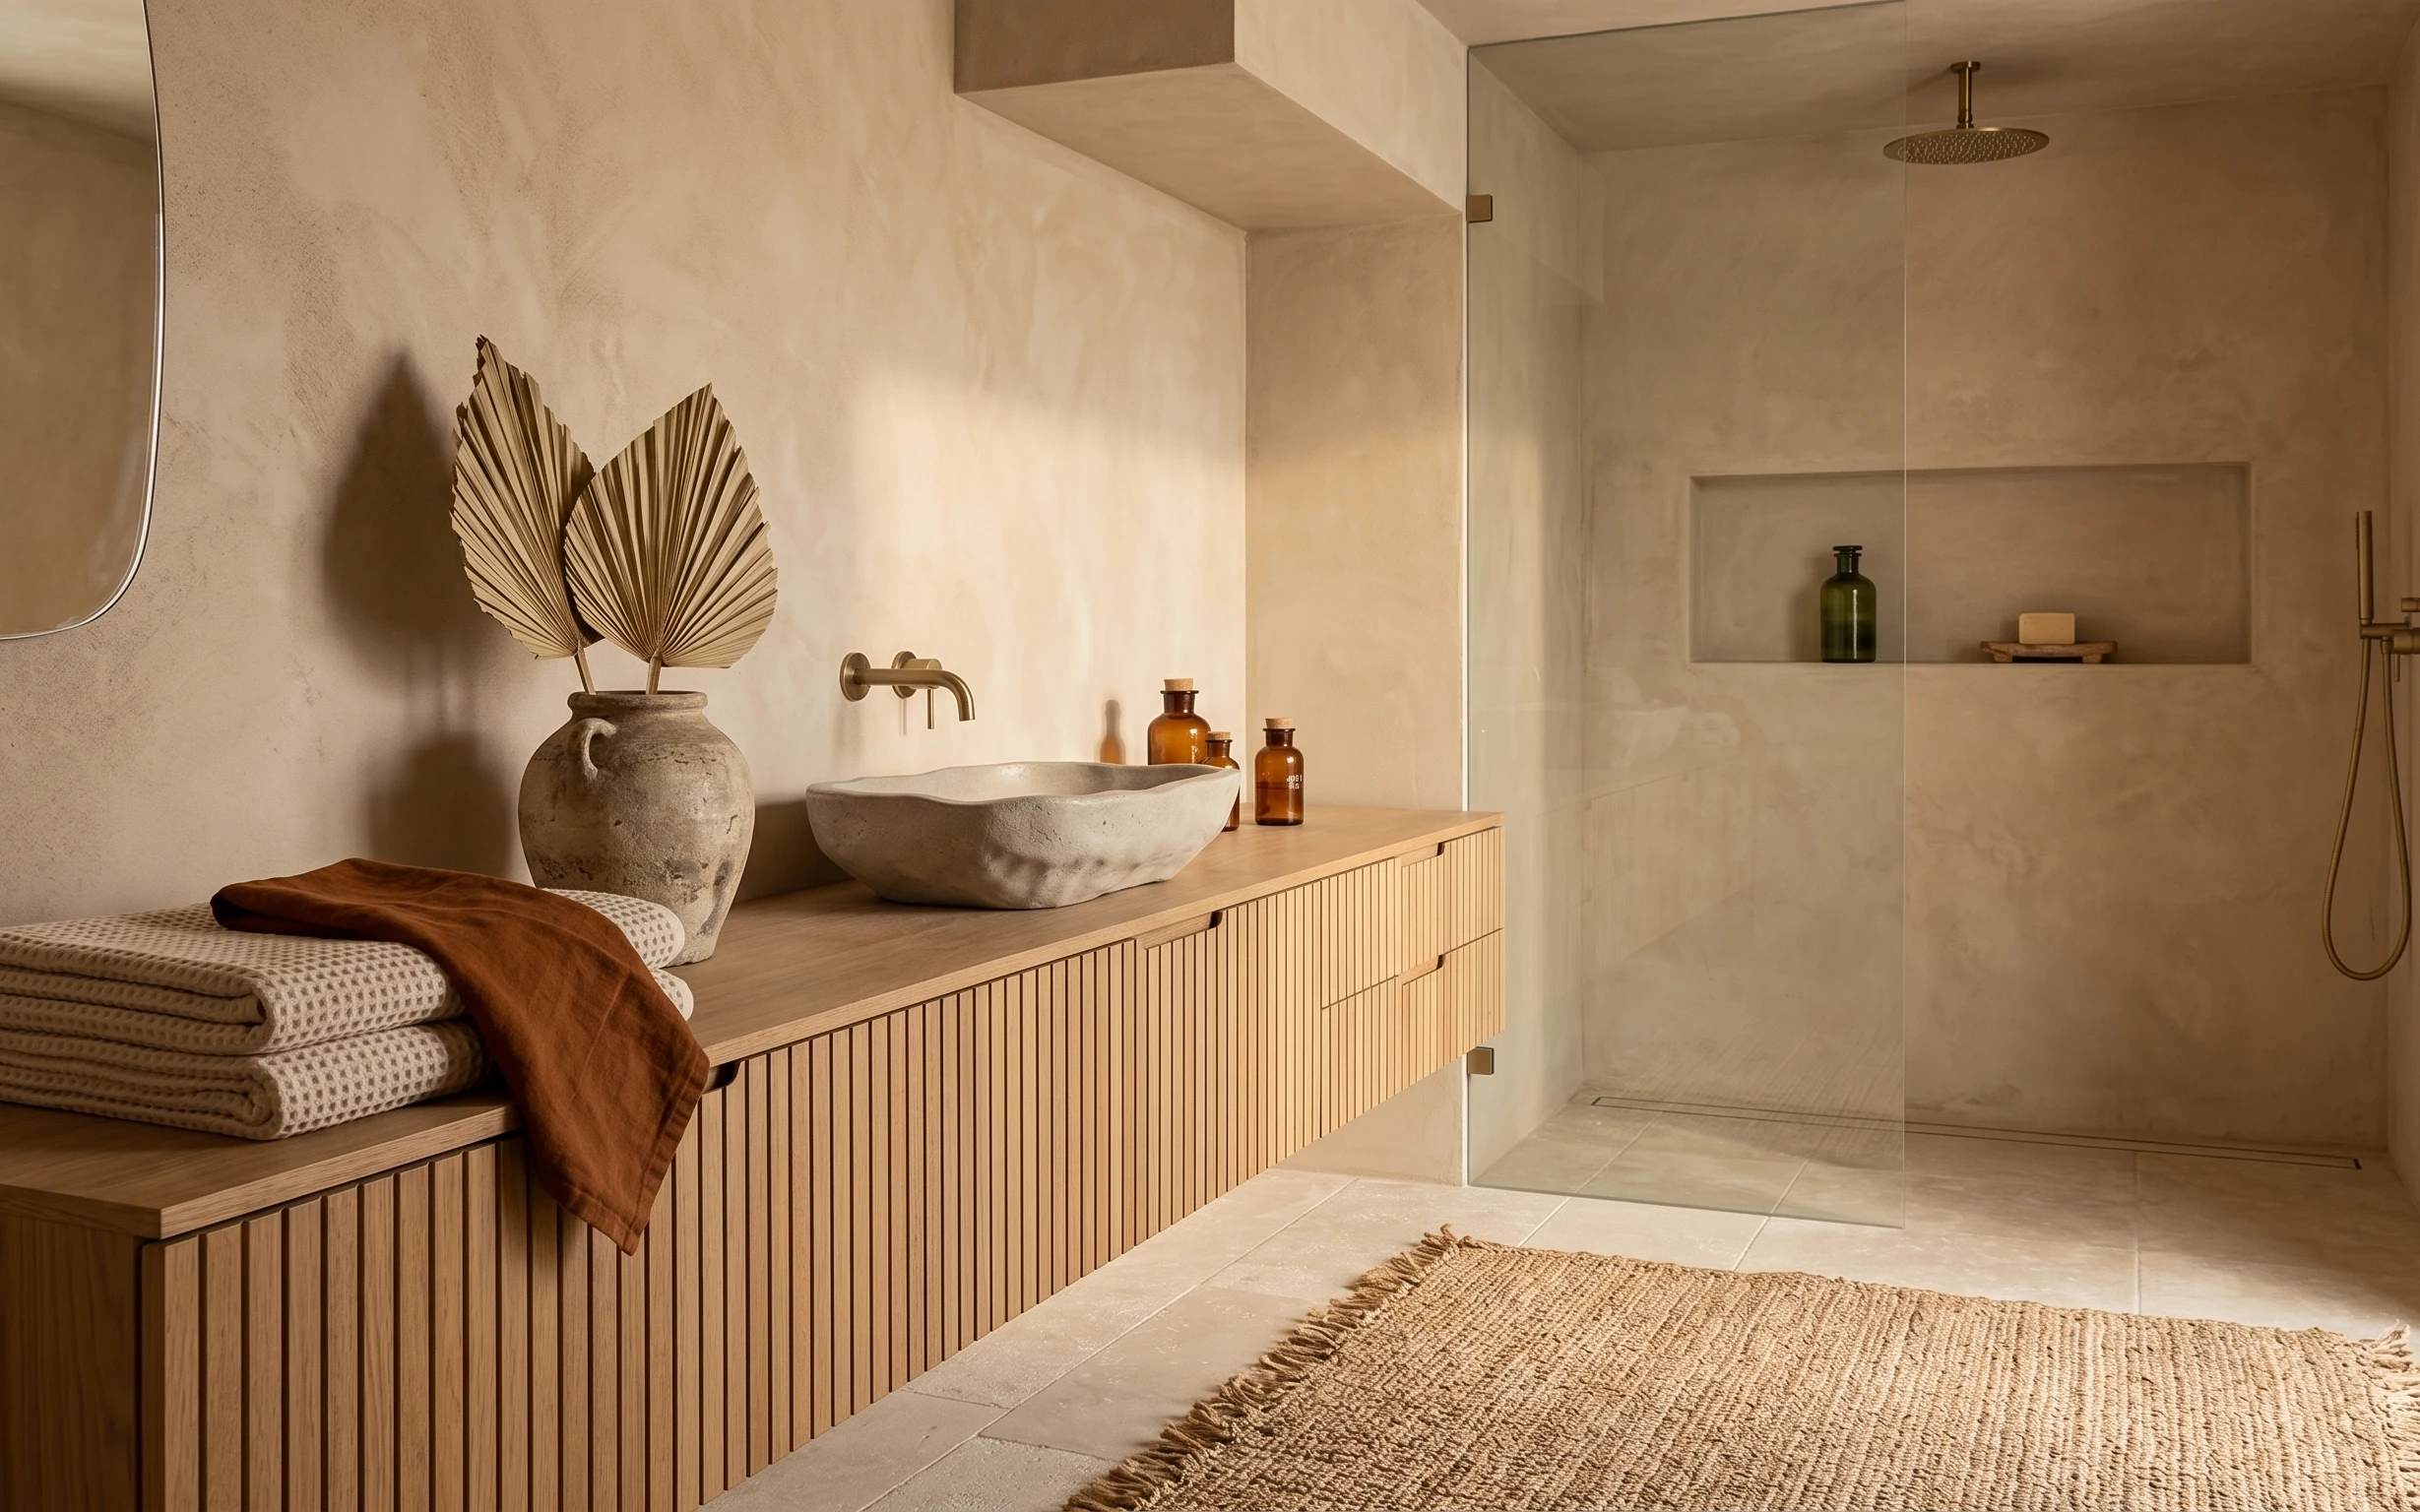
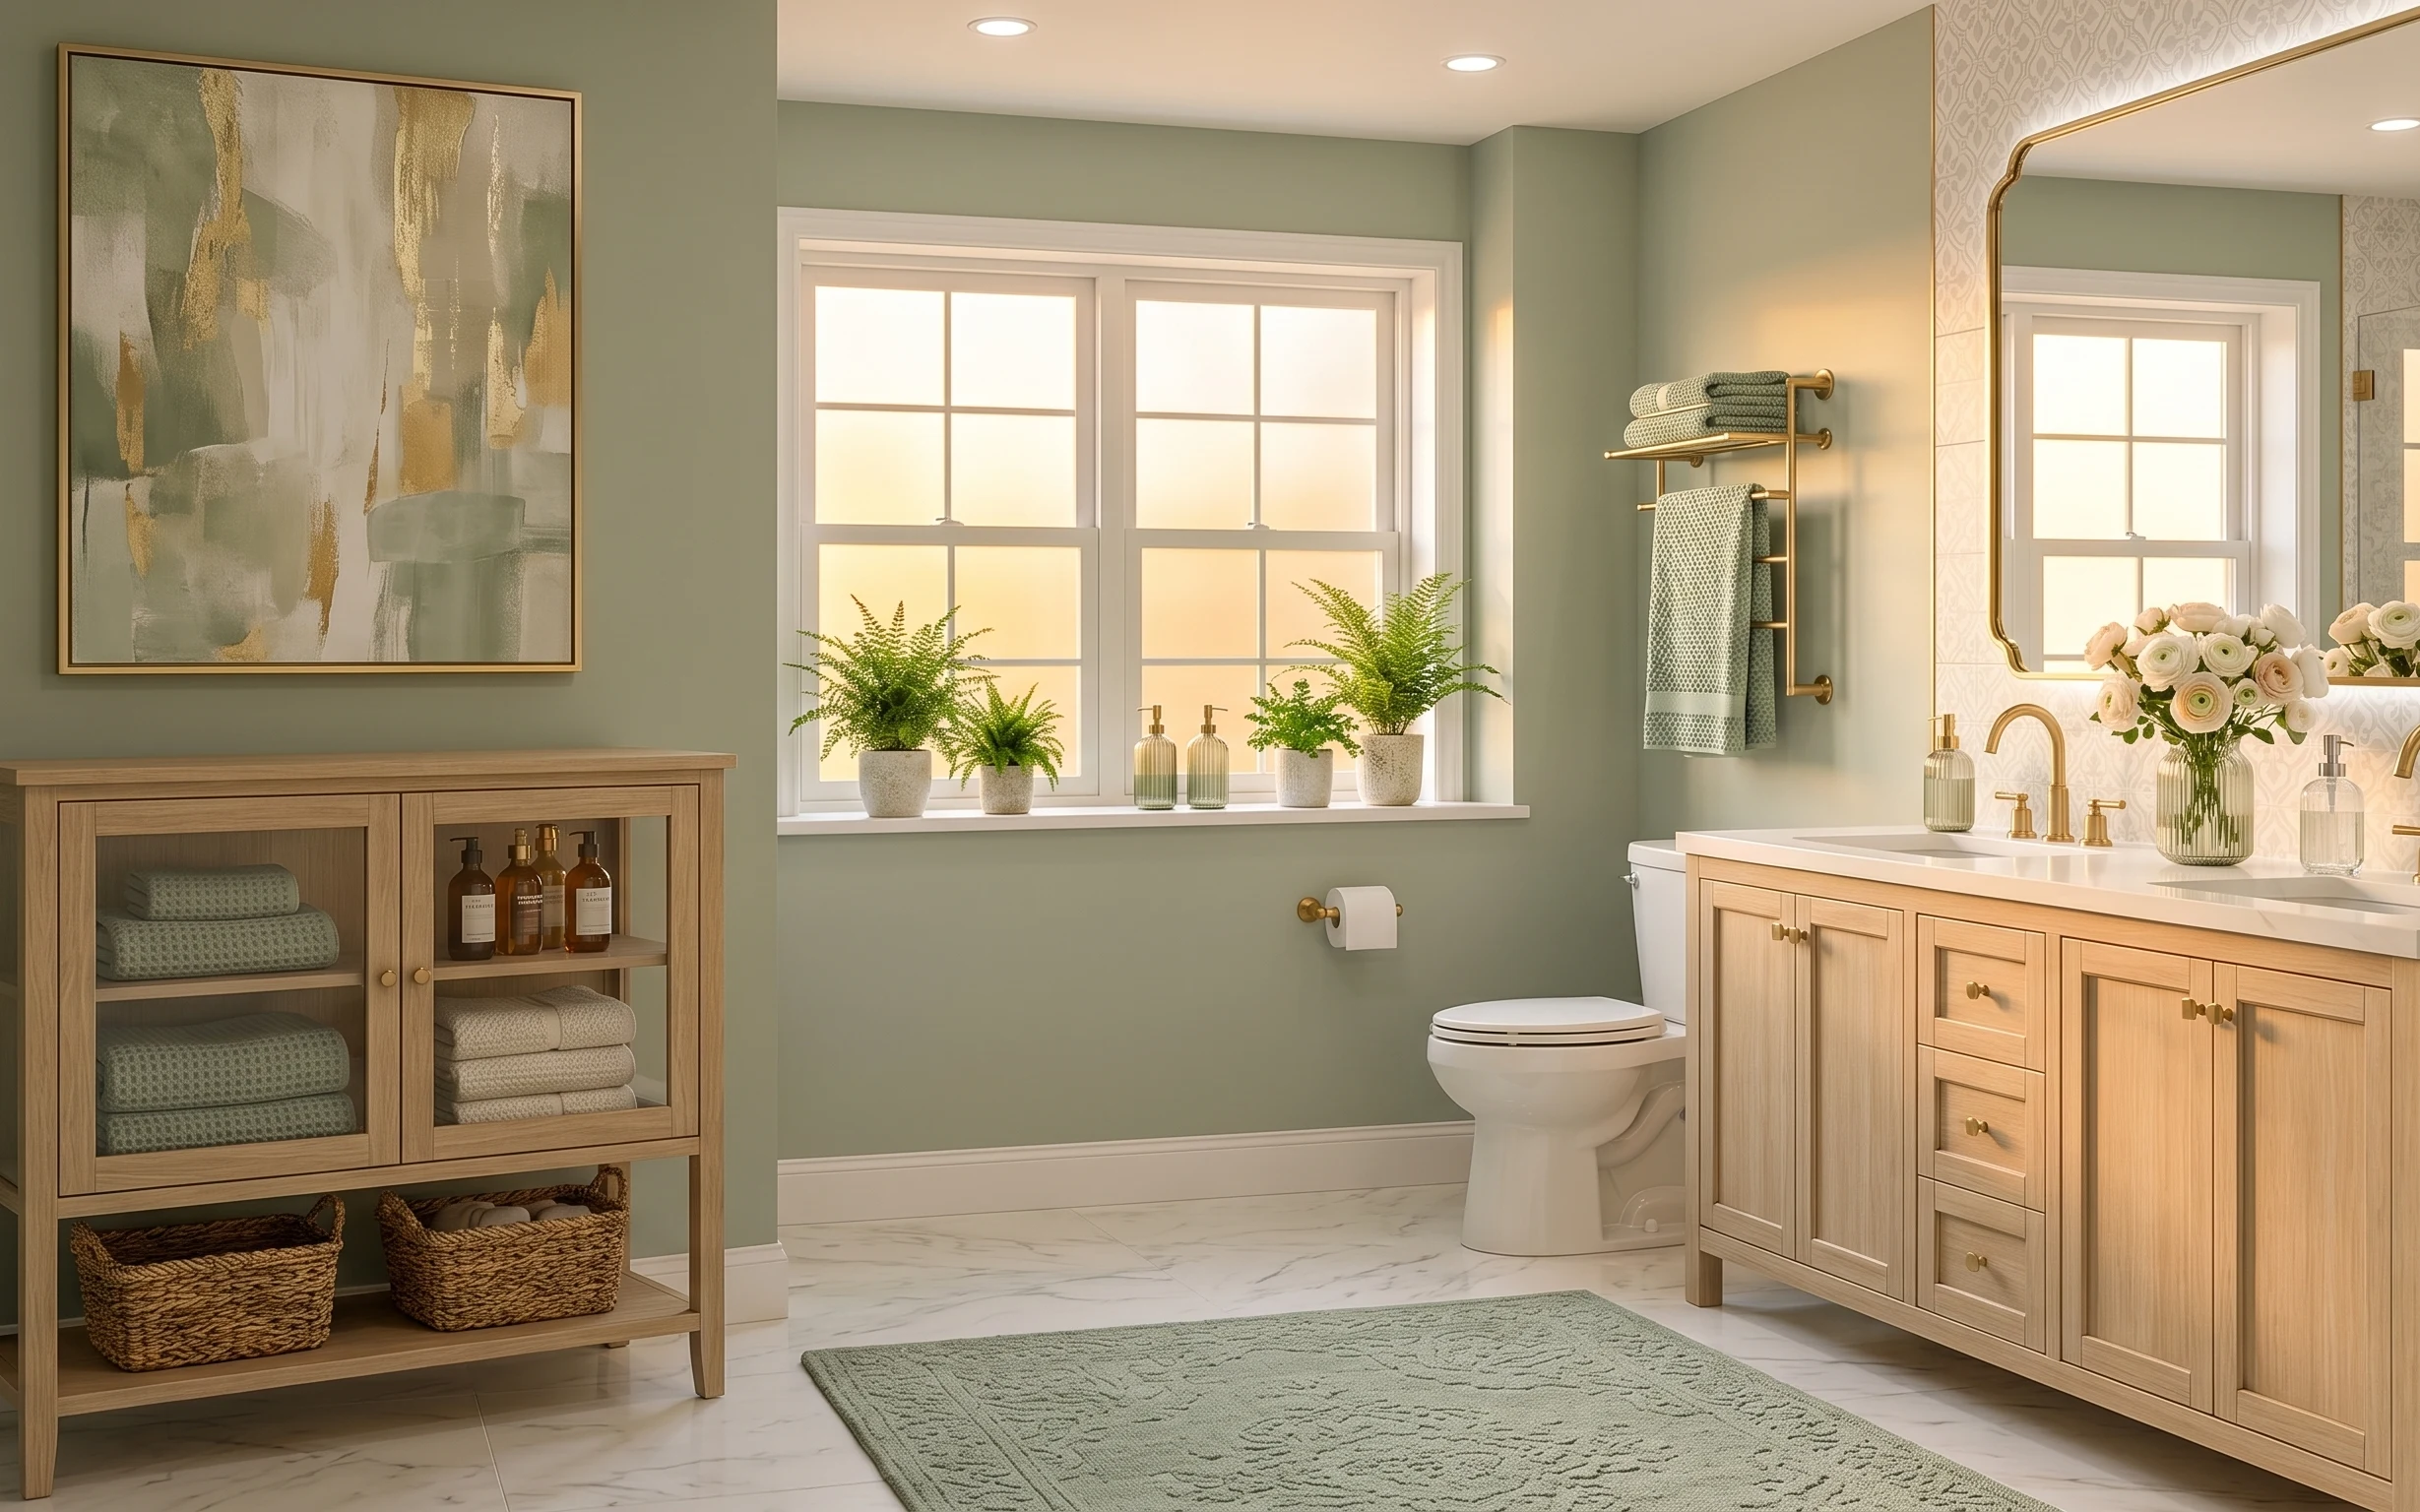
Why warm tan-and-brass details are the spa bathroom nook of 2026
That counter-to-floor line is doing a lot already: the wood ribbing reads clean, while the light beige walls and cream-toned stone keep everything calm. What makes it feel “spa” comes from tactile layering—textured towels, a woven-looking rug, and that heavy ceramic vase with dried stems. You can build the same mood with one weekend’s worth of swaps and a paint refresh (no demolition needed). The best part for homeowners is you can choose the highest-impact option—like a matte vanity paint—because you’re not trying to undo it later.
I almost made my own bathroom too matchy once—same brown towel, same beige jar, same height on every surface. It looked tidy, but it also felt flat. The fix was simple: keeping the white towels as the “light” layer, letting warm brown be the “weight” layer, and then adding one contrast shape (those fan-shaped dried stems) so the eye has something to land on. This layout works the same way: soft textures up top, then grounded neutrals down at the floor.
Layer 1 — Textured neutral area rug 5×7 ($200) Hides water spots and anchors the whole floor
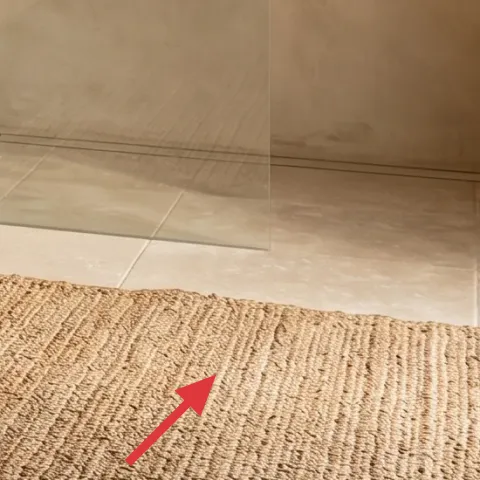
A 5×7 textured neutral area rug gives you two practical wins in this spa bathroom nook: it visually softens the hard stone tile and it helps disguise everyday splash marks near the front edge. Keep the color in the same warm family as the floor (think cream-to-tan), and choose a fiber with visible texture so it reads intentional even when it’s not freshly vacuumed. The alternative—going with a smooth low-pile—usually shows footprints and wet footprints faster. Trade-off: textured rugs need a quicker shake or vacuum pass, but they’re worth it for the warmth underfoot.
Stick to warm neutrals
Warm-beige rug fibers keep the space cohesive with the wood vanity and light stone, even when the rest is varied (glass, ceramics, towels).
Layer 2 — Cotton towel set in white plus warm brown ($60) Adds that spa-fold rhythm
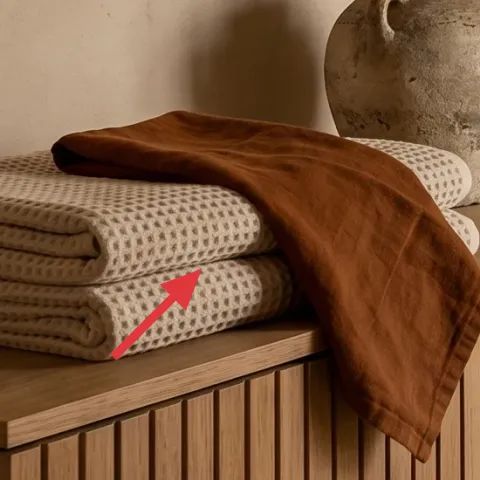
The folded towels are a styling tool here, not just linens: white makes the counter feel brighter, while warm brown adds contrast against the light wall and light stone. For the look in the photo, stack the whites a touch taller, then drape or nestle the warm brown towel/throw where it creates a second “layer line.” This is why buying two separate matching sets is usually a mistake—it makes it easy to overdo the same tone. Trade-off: the more you fold “on purpose,” the more you’ll notice if they’re not reset after guests.
Let towels set the height map
On a long counter, varying towel height is what creates depth without adding extra decor.
Layer 3 — Large ceramic vase for dried stems ($35) Brings sculptural height without clutter

That large ceramic vase is doing the heavy lifting visually: it’s weighty, matte, and imperfect in a way that feels calm instead of precious. With the dried fan-shaped stems, you also get movement and negative space—exactly what keeps a spa bathroom nook from looking like “a shelf full of stuff.” I’d choose ceramic over glass here because ceramic holds warmth and hides small surface scuffs. The obvious alternative is a small bud vase, but it won’t scale to the height of the counter-to-wall niche. Trade-off: dried stems shed a little, so keep an old washcloth nearby for quick cleanup.
Skip shiny finishes
If the vase is too glossy, it can reflect the room light and make the whole nook feel harsher.
Layer 4 — Amber glass bottles for counter styling ($25) Keeps the palette warm and eyes interested
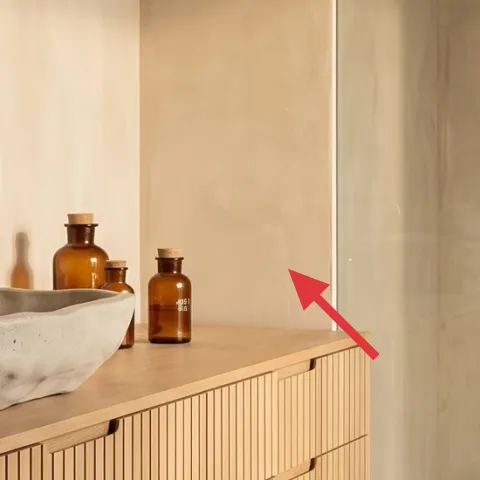
Those amber glass bottles (with their warm, honey-like tone) are the “color punctuation” in the middle of all the neutrals. They read cohesive with the brass faucet hardware and they echo the earthy warmth of the wood vanity. When styling, vary the bottle heights slightly and keep the labels minimal—clean shapes look better than a dozen tiny labels competing for attention. The alternative is using plain white containers everywhere, but then your warm accents disappear. Trade-off: if you want bottles to look clean, you’ll wipe dust off more often than you’d expect from closed cabinets.
Group by height, not by number
Two or three bottles at different heights create a rhythm that looks curated without needing a tray full of items.
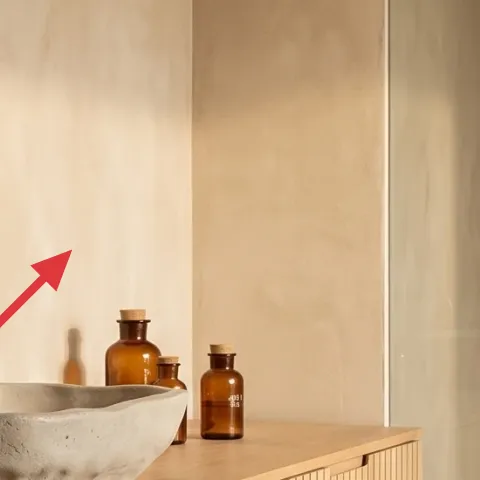
Layer 5 — Paint vanity front and counter trim in warm matte ($70) Makes the wood ribbing read cleaner
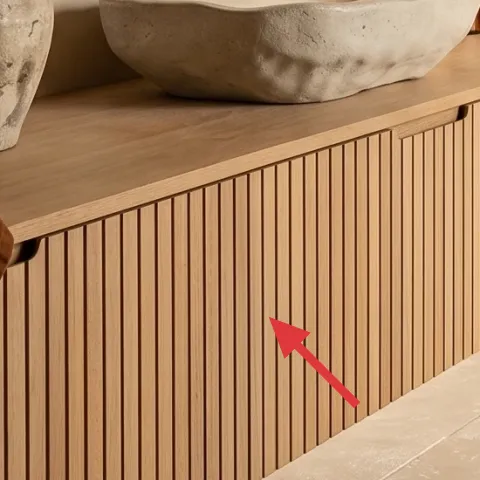
This is the most satisfying “weekend impact” layer because it changes the biggest surface area in the nook: the ribbed vanity front and counter trim. A warm matte paint tone will tone down uneven wood grain and make the whole space feel more even with the light beige walls. I’d aim for a finish that won’t look plasticky—matte keeps it spa-soft. The alternative is just adding more decor, but that usually makes the room feel busy rather than finished. Trade-off: you’ll need to prep properly so the finish doesn’t cling to dust in the ridges.
Make it instead of buying it
DIY-paint the vanity front and counter trim in a warm matte so the ribbing looks intentional and cohesive with the light beige walls.
Materials
- Cabinet/trim paint (quart) — 1 — store — $30
- Degreaser — 1 bottle — store — $8
- Sandpaper/sanding sponge (220-grit) — 1 pack — store — $7
- Painter’s tape + edge tool — 1 set — store — $6
- Disposable foam brushes or mini roller covers — set — store — $8
Steps
- Remove surface dust and wipe the vanity front and trim with degreaser.
- Lightly sand the ribbing and trim so the paint sticks (no deep scuffing needed).
- Vacuum and wipe again, then let the surface dry fully.
- Tape off the stone countertop edges and any parts you don’t want painted.
- Stir paint thoroughly, then cut in corners and creases with a foam brush.
- Roll or brush on the first coat, pushing paint into the ridges for even coverage.
- Let the coat dry, then lightly sand any rough spots and wipe clean.
- Apply a second coat and remove tape while paint is still slightly workable.
- Let everything cure fully before stacking towels again on the counter.
- Replace your vase and bottles once the finish feels dry to the touch and non-tacky.
Total DIY cost: $59 — saves about $11 over buying.
Layer 6 — Brass wall-mounted bathroom faucet swap ($120) Adds a warmer, cleaner metal note
Metal finishes are what make a spa bathroom nook feel pulled together, and the brass faucet is one of the most visible touches in the whole photo. Swapping to a matching brass tone (or matching the existing brass as closely as possible) makes the scene look intentional instead of “collected.” If you keep the rest of the palette warm—beige walls, cream stone, tan rug—brass reads like a natural highlight rather than a shiny distraction. The obvious alternative is leaving the faucet as-is and focusing only on soft goods, but metal is what anchors the color temperature. Trade-off: this is a weekend-friendly swap if plumbing access is easy; if wiring or hookups are complex, call an electrician or plumber for safety.
Match the brass undertone
Look for the same warm/yellow brass tone so it doesn’t clash with the ceramic and amber glass.
Layer 7 — Peel-and-stick wallpaper on wall niche back panel ($150) Adds depth behind the bottles without repainting
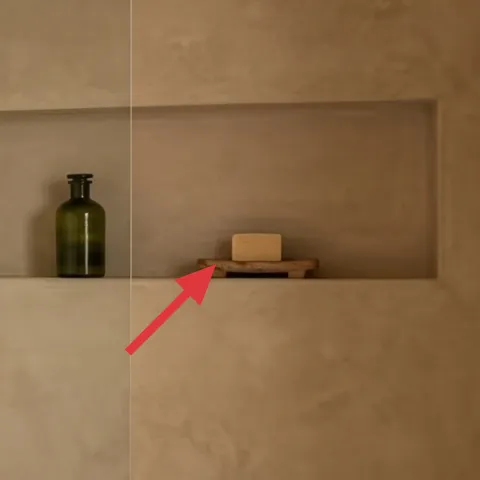
The wall niche back panel is a perfect place for pattern without taking over the whole bathroom. A peel-and-stick wallpaper in a subtle texture (linen-look, strié, or small botanical linework) gives you depth behind the amber bottles and keeps the display from sitting “floating” on plain beige. This also solves a common homeowner problem: you don’t want to repaint the whole wall, but you do want the niche to look designed. Trade-off: wallpaper needs clean, flat surfaces—wipe the niche area thoroughly so the adhesive bonds evenly.
Choose a low-contrast pattern
When the rest of the room is warm and minimal, low-contrast wallpaper keeps attention on the counter styling.
The cost, layer by layer
| Layer | Item | Cost |
|---|---|---|
| 1 | Textured neutral area rug 5×7 | $200 |
| 2 | Cotton towel set in white plus warm brown | $60 |
| 3 | Large ceramic vase for dried stems | $35 |
| 4 | Amber glass bottles for counter styling | $25 |
| 5 | Paint vanity front and counter trim in warm matte (DIY) | $70 |
| 6 | Brass wall-mounted bathroom faucet swap | $120 |
| 7 | Peel-and-stick wallpaper on wall niche back panel | $150 |
| Total | $660 | |
If the full faucet swap feels like too much, keep the fixture and use a cheaper rug ($120) plus a peel-and-stick niche pattern ($90). The room will still read warmer because the rug texture and niche backdrop do most of the visual work.
What worked, what didn't (across the whole room)
The biggest wins are the “texture first” choices: the textured rug and towel stack make the spa feel instantly cohesive without needing lots of decor. The warm metal note from brass plus amber glass keeps the palette from going flat. The main miss would have been going too matchy—same exact shade of brown across everything—because that makes the nook look less layered and more monochrome.
What worked
- The textured neutral rug softens hard tile and makes the floor feel intentional, not bare.
- White towels brighten the counter while warm brown adds contrast against the light beige walls.
- The ceramic vase scales to the vanity height and anchors the dried stems as a sculptural focal.
- Amber glass bottles add warm color punctuation that pairs naturally with brass hardware.
- Painting the ribbed vanity front makes the surface look even and calmer from any angle.
- Niche wallpaper gives depth behind the bottles so styling feels “finished,” not temporary.
What didn't
- Using only one towel color (all white or all brown) removes the height and depth rhythm.
- A smooth low-pile rug shows footprints and water marks faster near the shower area.
- If the vase is too glossy, the light reflections can make the nook feel sharper.
- High-contrast wallpaper patterns pull attention away from the counter items and brass metal.
- Skipping sanding/degreasing before vanity paint can lead to uneven coverage in the ridges.
What we'd skip if we did it again
Skip the trend-driven color changes. In a spa bathroom nook like this, the safest “big win” is sticking to warm beige, cream stone, and brass-adjacent tones, then changing finishes (matte paint, texture, or pattern) instead of chasing a new color every year.
Skip matching sets that leave no room for variation. It’s tempting to buy a whole coordinated towel, bottle, and tray set, but the photo works because height and material mix (ceramic, amber glass, textured fabric) give the eye places to rest.
Skip the expensive decor pile. If the budget is tight, invest in the textured rug and one focal (ceramic vase with dried stems). Everything else should stay minimal—just two or three styled objects in the niche and a properly stacked towel zone.
Frequently asked
How long does this spa bathroom nook refresh take on a weekend?
If you’re doing the paint DIY, plan for prep and two coats, plus drying time in between. The rug and towel styling can be done in an hour or two, and the vase/bottles are basically instant. The peel-and-stick niche wallpaper is usually a half-day task if the niche surface is clean and dry. Overall, expect 6–10 hours plus drying/curing, not constant work.
What if I rent—can I still get this look?
For renters, focus on the textiles and styling layers first: towel color mix, a textured rug, and the ceramic vase/dried stems. Wallpaper can work only if your lease allows it and the backing is truly peel-and-stick (and removable). Avoid painting the vanity or swapping the faucet unless permission is granted, since those are the most permanent changes.
My bathroom is smaller—should I change the rug size?
In a smaller spa bathroom nook, you can go down from 5×7 to a smaller textured rug, but keep the same warm neutral family. The key is that the rug still reaches far enough to cover the “traffic zone” in front of the shower or where towels land. If the room is narrow, a runner can work, but the texture should still be visible (avoid super-smooth fibers).
Can I do only one upgrade and still feel a difference?
Yes. The fastest visual change is a textured rug paired with a properly stacked towel set. The second-best single upgrade is painting the vanity front in a warm matte, because it changes the largest surface area. If you only do one “hard” project, the vanity paint usually gives the biggest payoff per weekend.
Where should I shop to keep it under $700?
Start with the rug and towels at home goods or discount retailers that carry neutral textures in multiple sizes. For the ceramic vase and amber bottles, thrift stores and home decor resale shops often have the right shapes and tones for much less than buying new. For the niche wallpaper, pick peel-and-stick rolls from big box or online home decor sites to avoid paying for installation.
What’s the biggest mistake people make in spa-style bathroom styling?
The biggest mistake is making every surface the same “level of attention.” If the towels, bottles, and niche all compete, the nook feels busy instead of calm. Aim for one focal (the ceramic vase or the niche backdrop), keep the rest quiet, and build height with towels and bottle groupings rather than stacking more and more decor.
More in Bathroom
Under $700: spa bathroom nook refresh with 7 budget wins
Under $700 spa bathroom nook refresh for homeowners: swap in a textured neutral rug, re-style towels and counter glass, and paint the vanit…
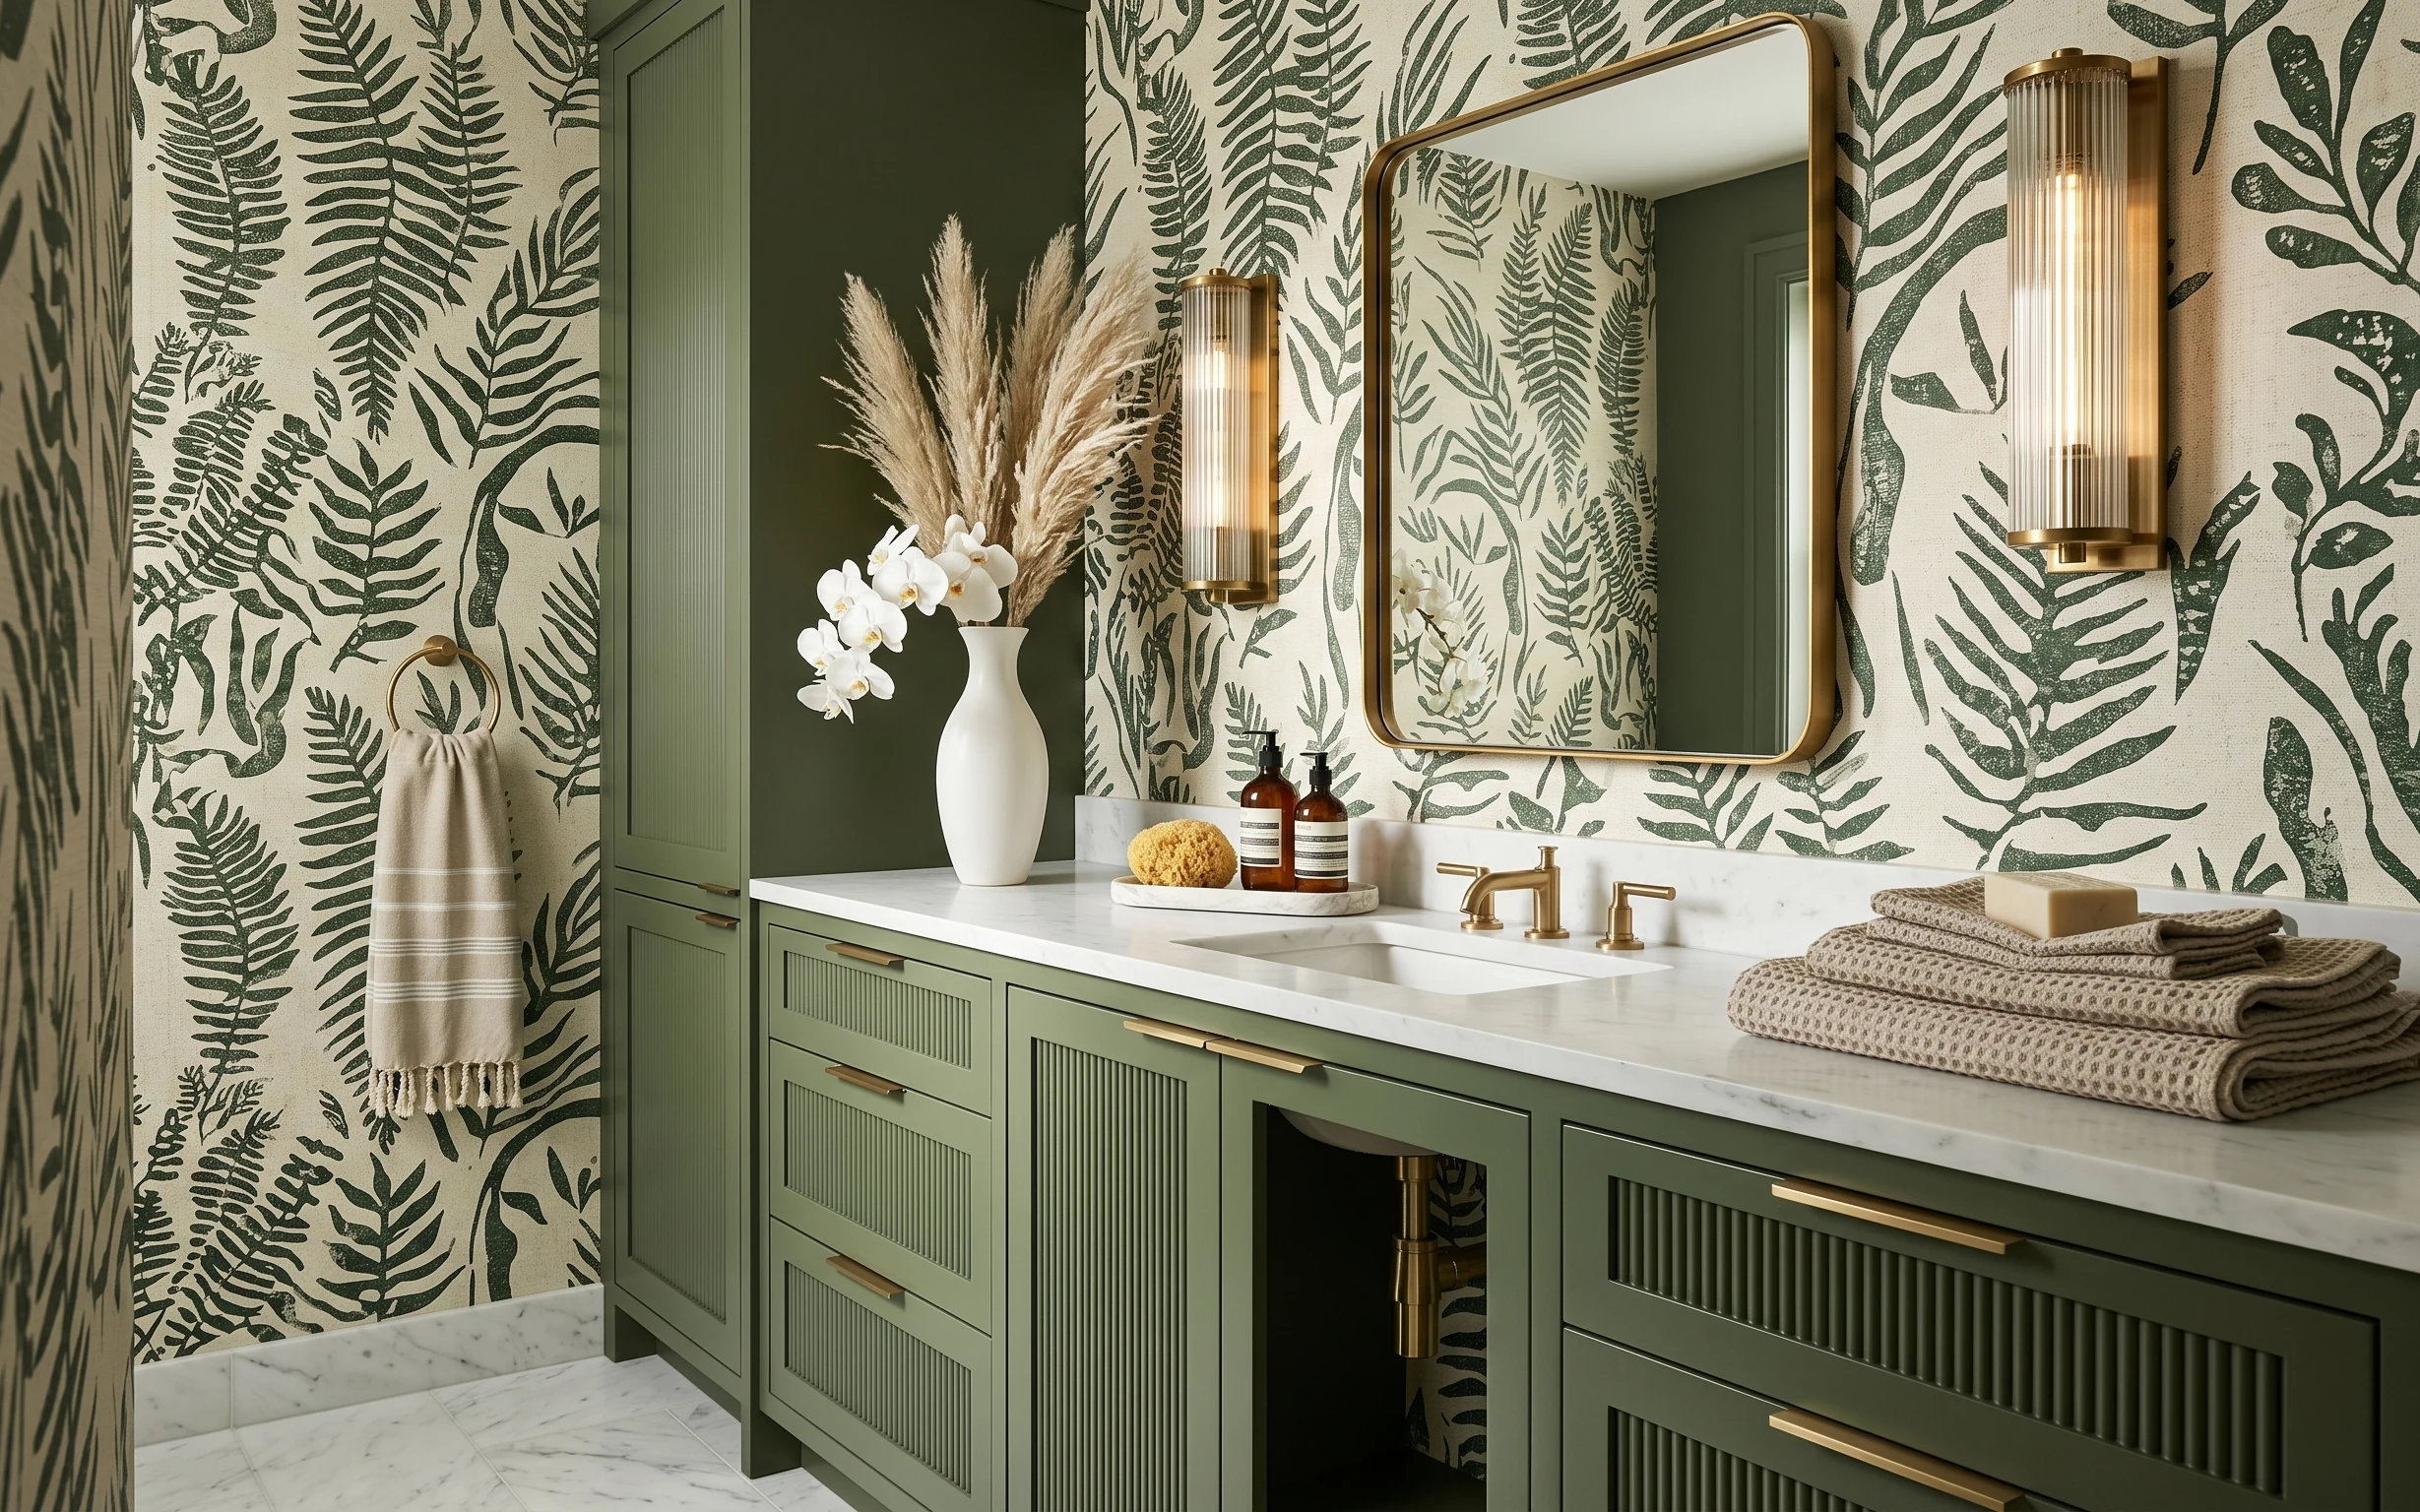
Under $300: botanical bathroom vanity refresh with 7 layers
A botanical bathroom vanity refresh you can pack into boxes: 7 move-friendly swaps for towels, countertop styling, and a mirror moment. Tot…
Under $400: 7 move-friendly bathroom swaps for a spa look
A renter-friendly bathroom refresh that keeps the look airy and styled: swap in a textured bath rug, add framed art, update towels, and sty…