
- Best for
- First-time homeowner bathroom refreshes
- Cost
- $705 total for 7 layers
- Time
- 1 weekend (about 6–9 hours)
- Renter-safe
- Yes (swap-in textiles, styling, and repaint-only details)
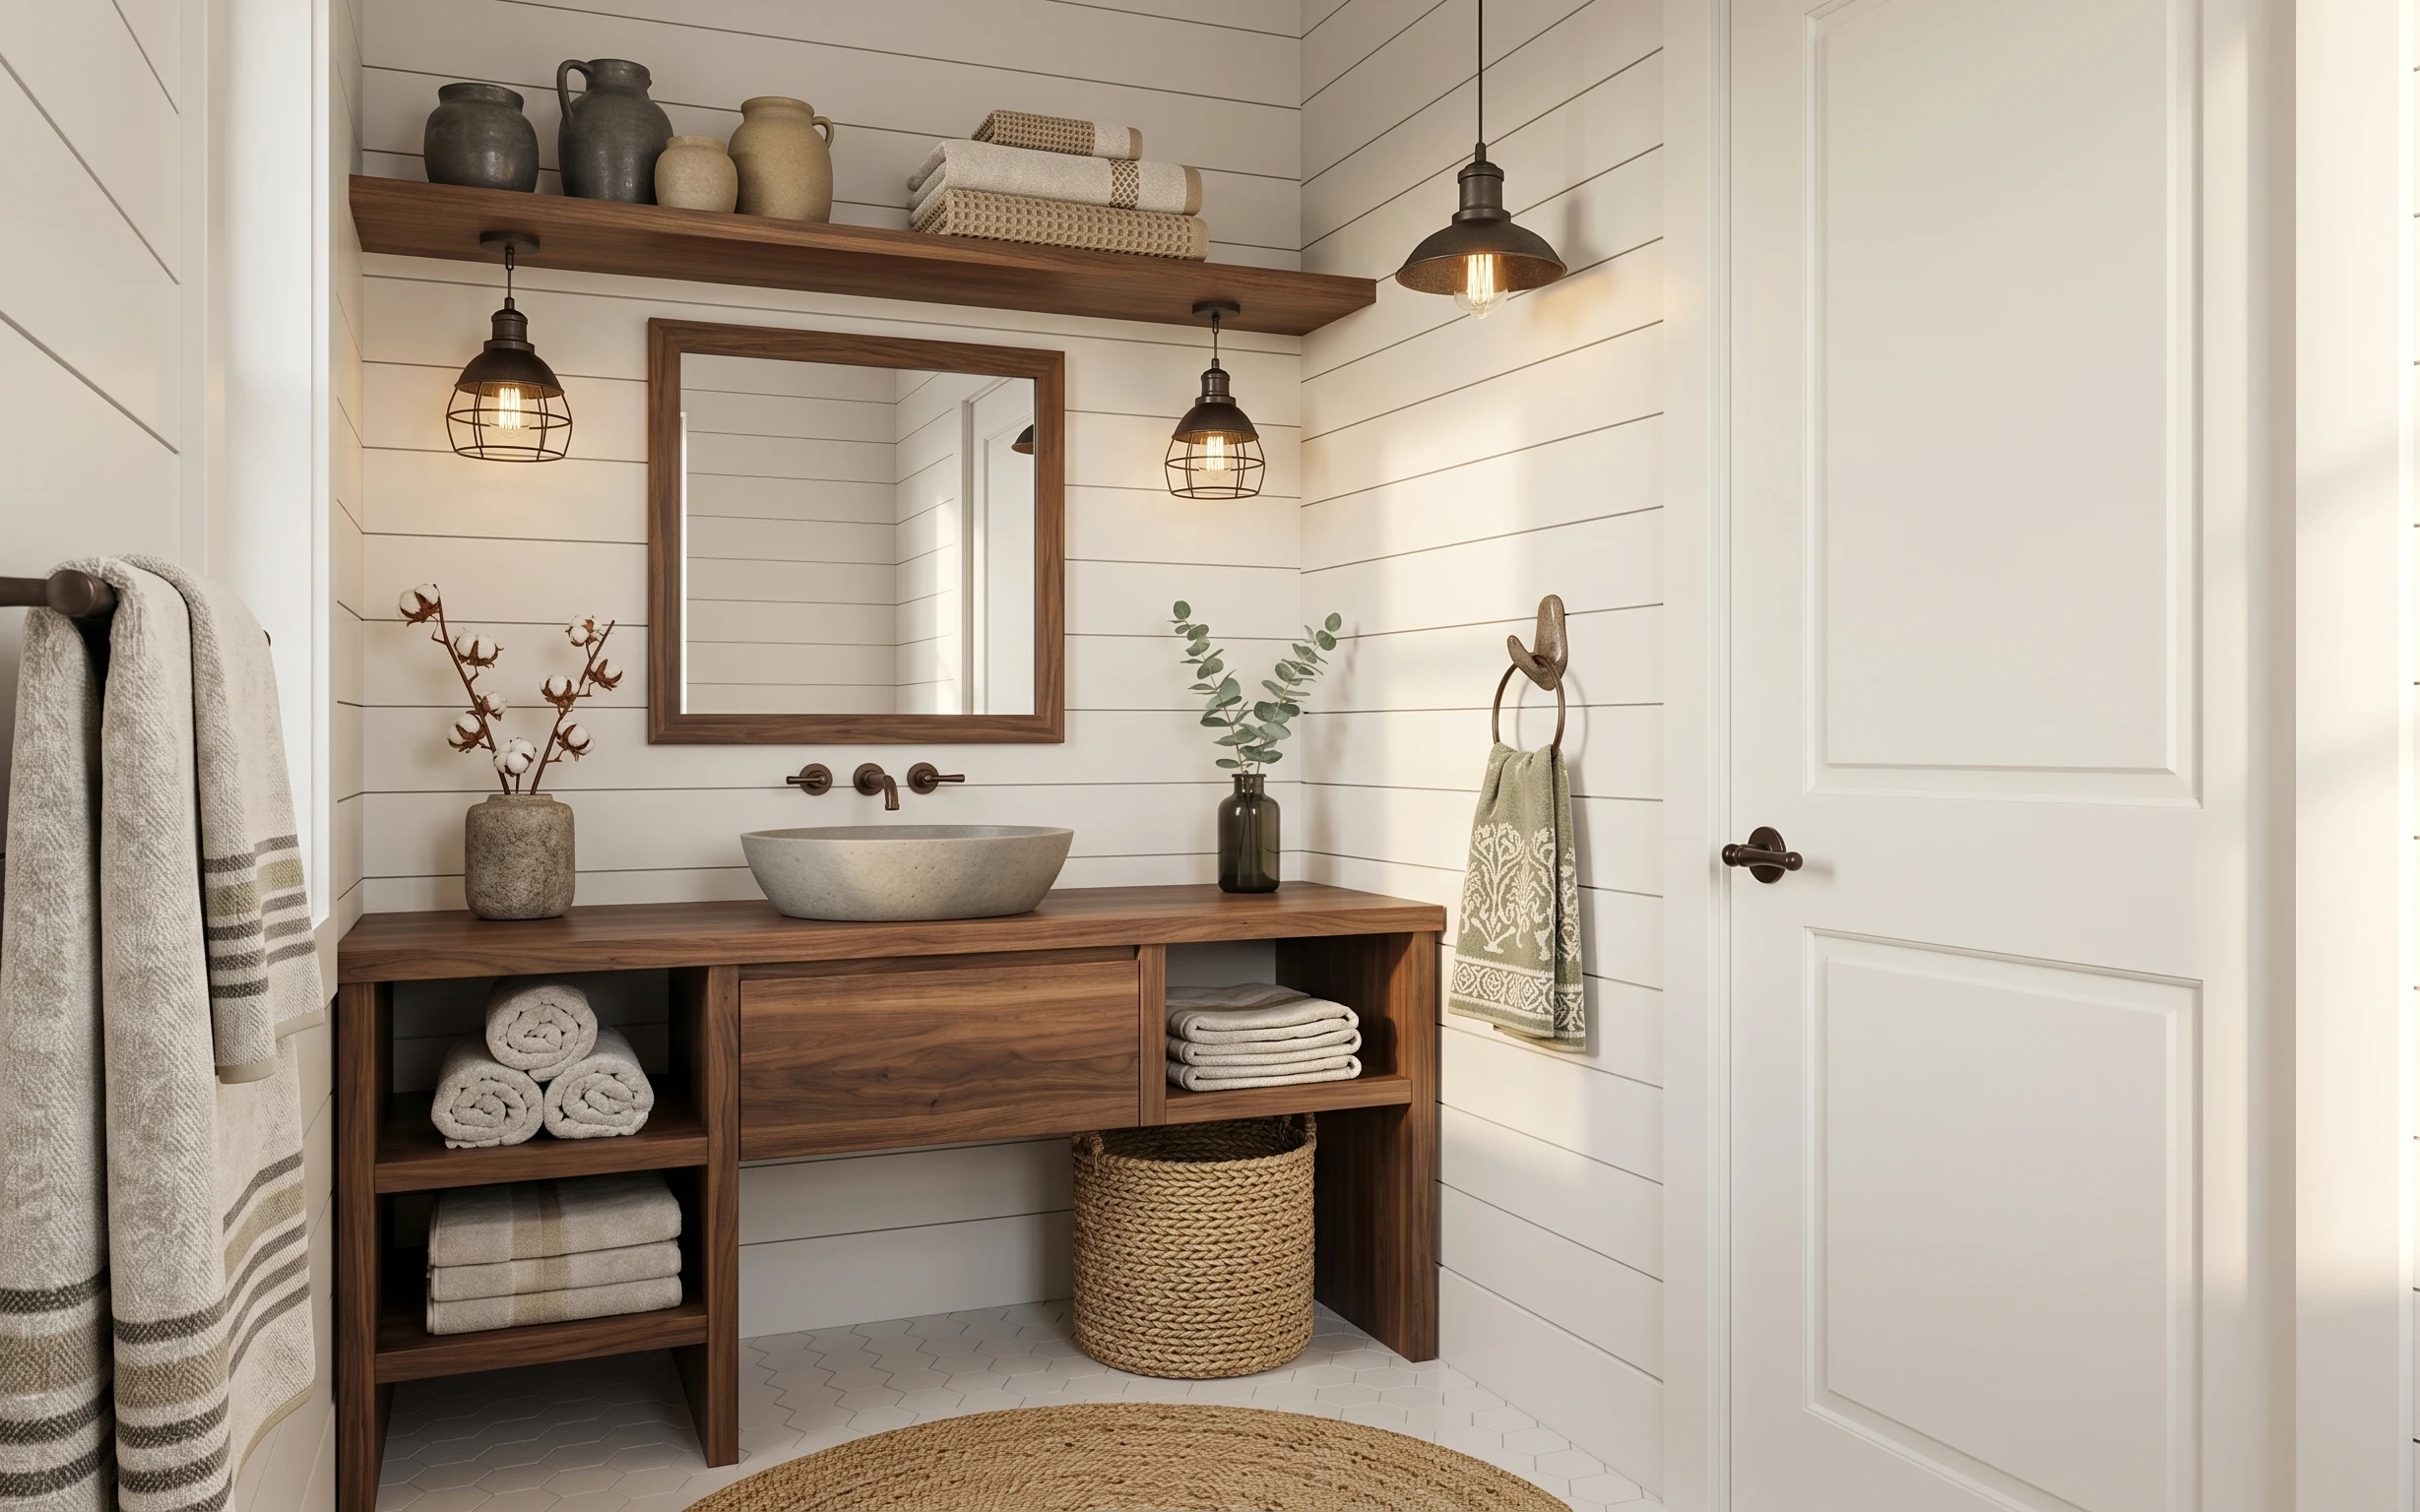
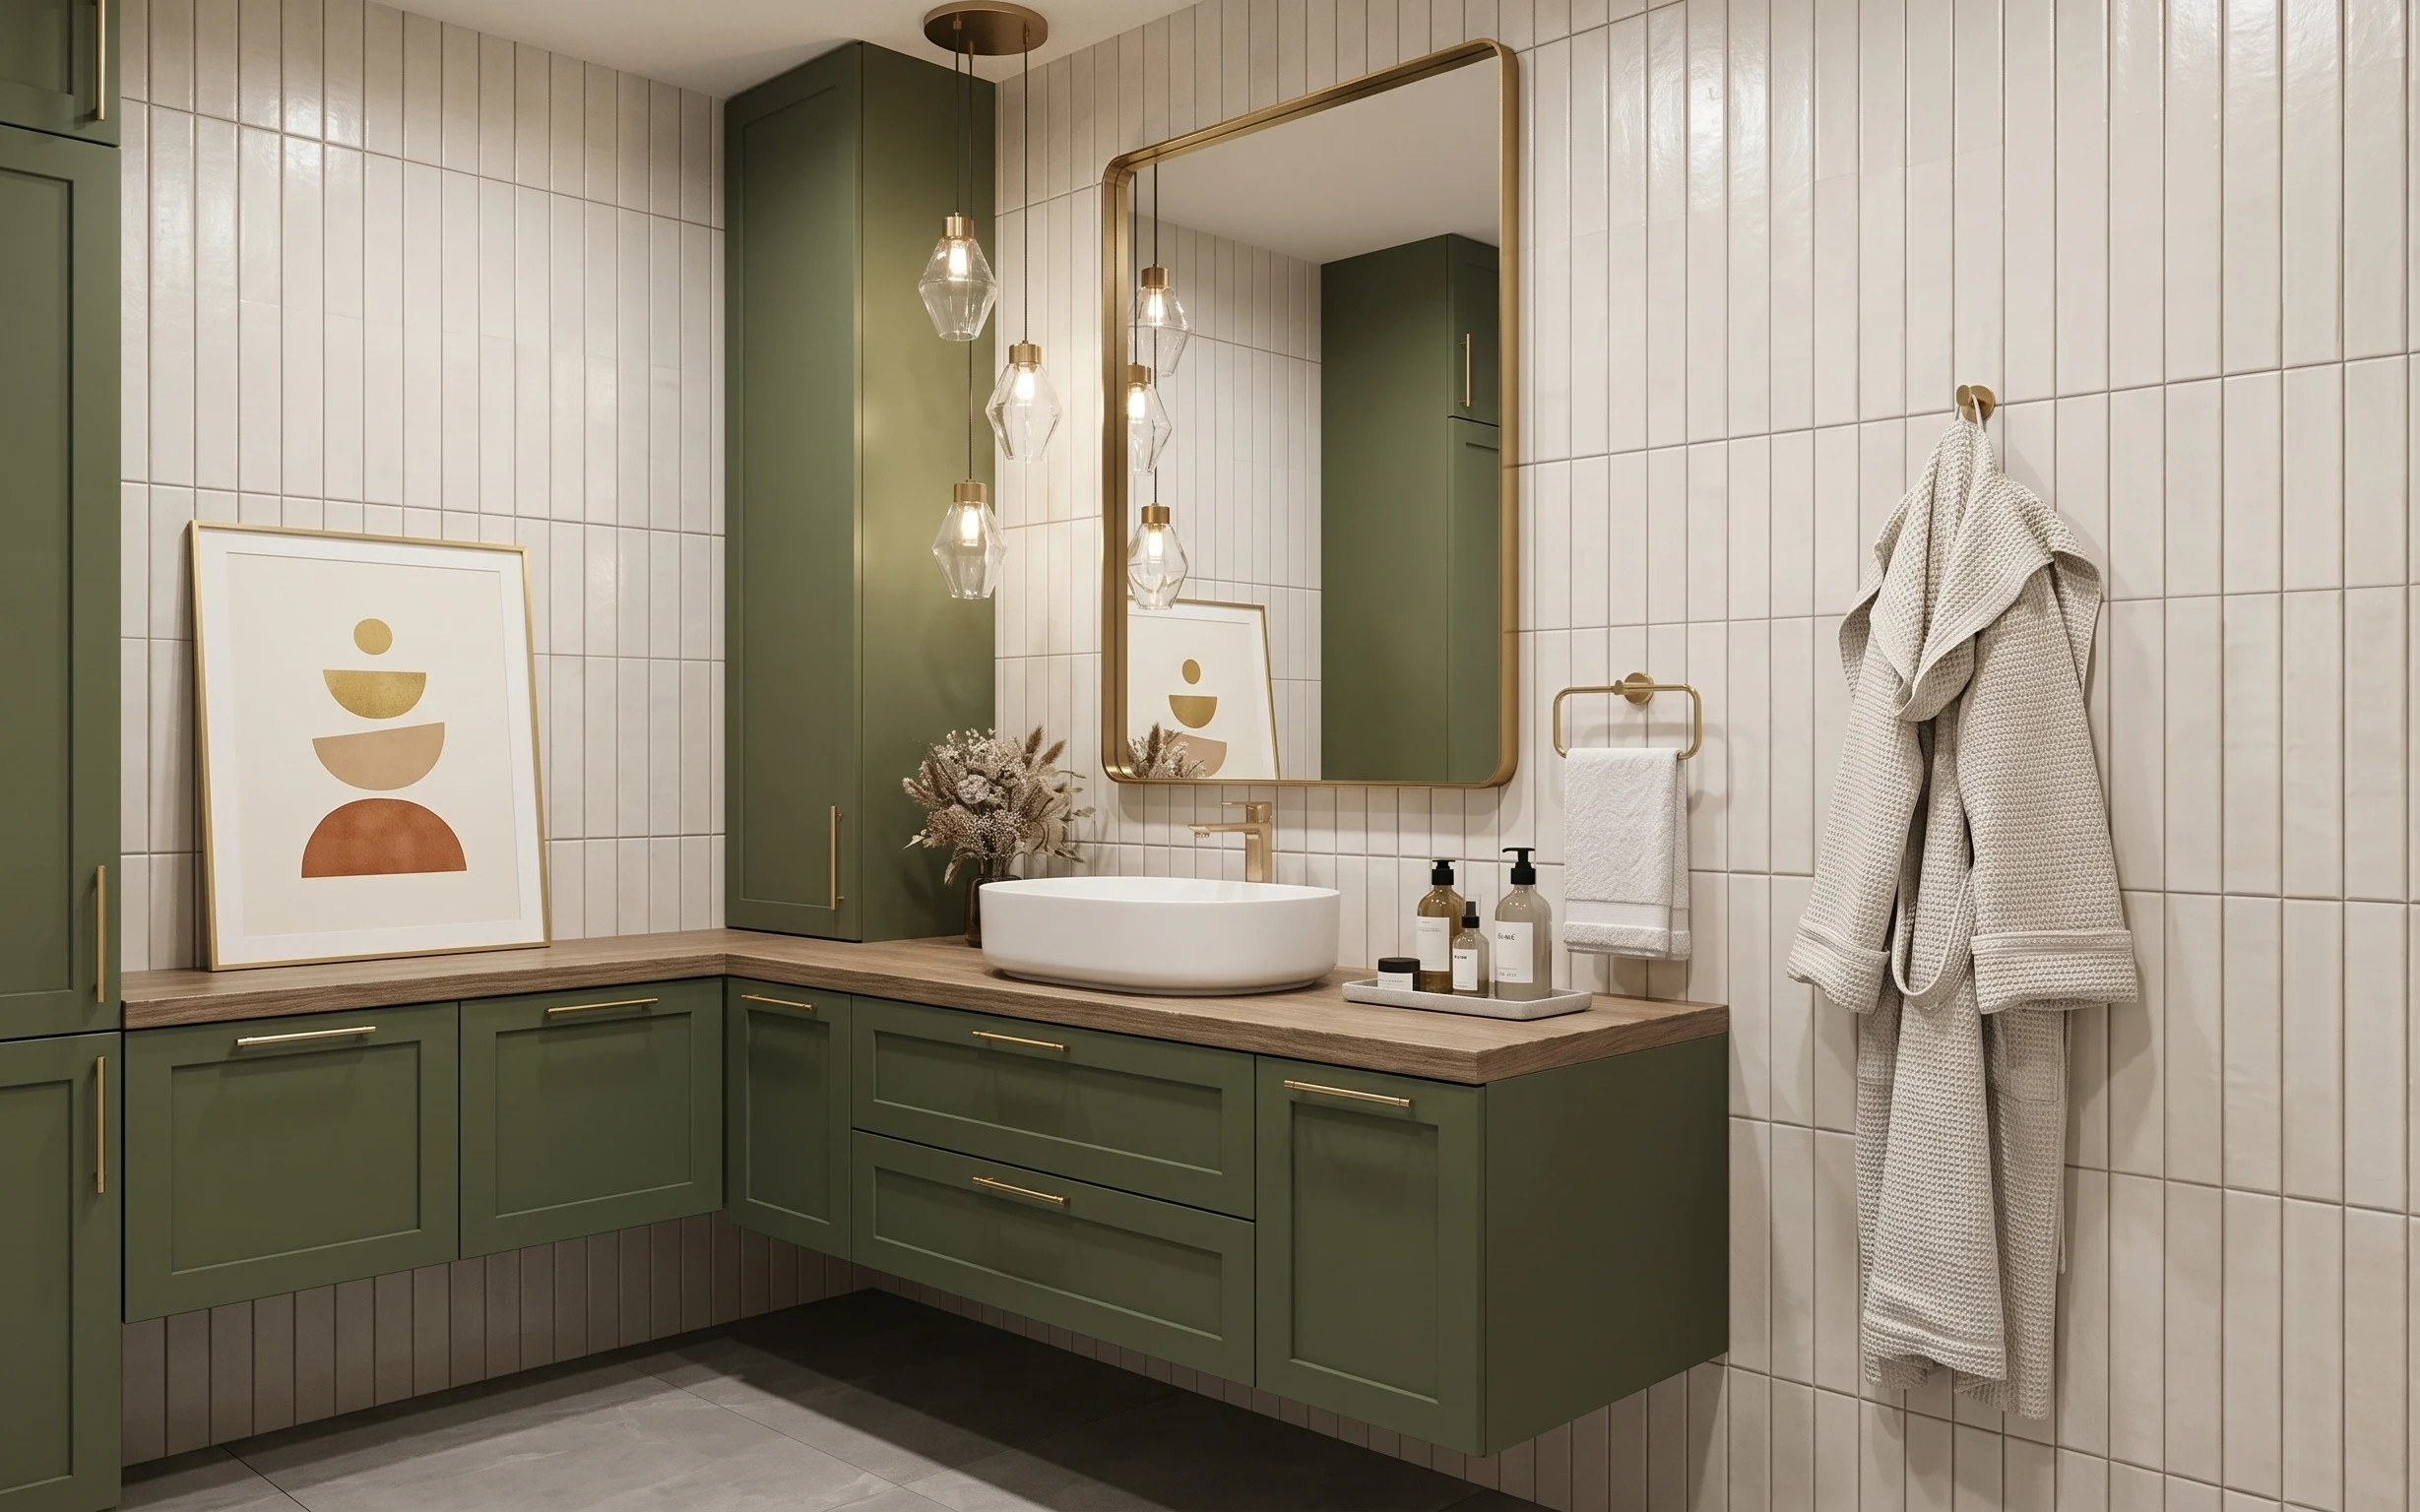
Why warm wood-and-stone finishes are the bathroom vanity nook of 2026
The fastest way to make a bathroom feel finished is to treat the vanity wall like a small “room within a room.” In this setup, the white shiplap-style paneling gives a clean backdrop, while the light walnut wood on the shelf and vanity brings warmth you can feel. The taupe/stone textures (rolled towels, the ceramic pieces, and the woven basket) keep it from feeling too bright. I’m also loving how the black cage pendant-style lights add contrast without making the space heavy.
My first instinct on a bathroom like this was to buy matching decor sets so it would look “cohesive.” That’s how I ended up with a shelf that felt like a retail display instead of a lived-in nook. The fix was choosing a simple color story—white, wood, and stone-gray—and then mixing textures: matte ceramic, woven fibers, and soft towels. Once the textures started layering, the whole vanity wall looked styled even when I wasn’t trying that hard.
Layer 1 — beige and taupe area rug ($80) Foot-friendly hex tile coverage
A beige-and-taupe area rug grounds the vanity zone and makes the hexagon tile floor feel less echo-y. In the photo, it sits right where you’d step in front of the sink, so it does double duty: it softens the hard surface and visually warms up the whole bathroom. The reason to choose a neutral rug instead of a bold pattern is practical—bathrooms change with towels, seasonal decor, and even which plants you rotate in and out. The trade-off is that neutrals show lint and water spots a bit more, so a quick shake or spot clean is the price of this calm look.
Rug stays put with a pad
If you can, use a rug pad made for hard floors so the rug doesn’t creep when the door swings.
Layer 2 — wood framed rectangular mirror ($120) Repaint to match your wood tone
The framed rectangular mirror is the focal point for this whole vanity wall, and repainting the frame is an easy way to tune the color to your existing wood (instead of forcing everything to match the mirror). In the photo, the mirror frame echoes the light walnut on the shelf and vanity, which makes the wall feel intentional rather than scattered. Buying a new mirror is expensive and often requires rerouting or patching, so the cheaper win is restoring the frame you already have. The trade-off: if the mirror already has heavy wear, it may need a couple of coats for full coverage.
Make it instead of buying it
Repaint the mirror frame so it matches the light walnut tone already in the vanity and shelf.
Materials
- Sandpaper (medium + fine) — assorted sheets — $8
- Bonding primer for slick/painted surfaces — 1 quart — $20
- Angled paint brush (for corners) — 1 pack — $12
- Cabinet/trim paint (warm wood tone) — 1 quart — $50
- Painters tape + plastic drop cloth — 1 set — $6
Steps
- Scuff-sand the frame with medium grit, then follow with fine grit for a smooth finish.
- Clean off dust using a damp cloth, then let it dry fully.
- Tape off the mirror glass and protect nearby surfaces with the drop cloth.
- Apply bonding primer in thin, even coats; let it dry per the can.
- Lightly sand the primed surface with fine grit for better top-coat adhesion.
- Brush on the trim paint in thin coats, keeping the strokes consistent around edges.
- Let the frame dry and assess for coverage; add a second coat if you can see through.
- Remove tape carefully and reinstall/handle the mirror once fully dry.
Total DIY cost: $96 — saves about $24 over buying.
Layer 3 — wooden vanity cabinet ($250) Storage that looks built-in
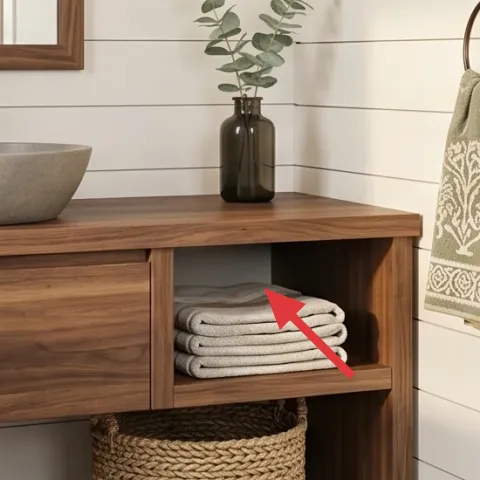
This wooden vanity cabinet is the anchor piece, and you feel it immediately because it holds the “visual weight” of the room. In the photo, the open shelving and lower cubbies are doing serious work: the rolled towels stay tidy, and the front shows texture instead of clutter. The reason to prioritize the vanity cabinet (even if your version is plain) is that it’s the largest continuous surface in the bathroom, so small styling and color alignment makes a big difference. The trade-off is that wood shows fingerprints and water spots, so wipe-down is part of the routine. If your vanity already has good bones, the easiest upgrade is reorganizing and styling the compartments.
Think in vertical stacks
Roll towels and stack ceramics so the compartments read as organized, not random.
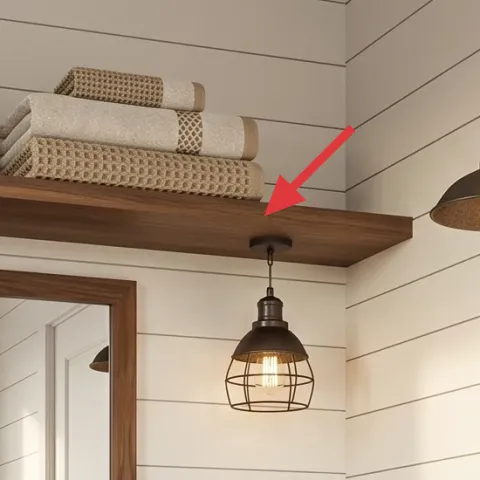
Layer 4 — black cage pendant light ($60) Warm glow with industrial contrast
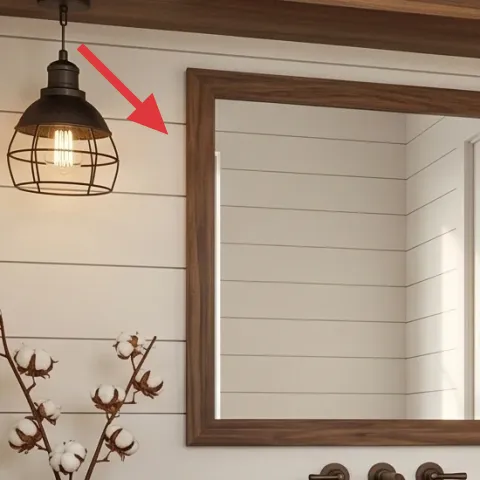
The black cage pendant-style light adds contrast against the white shiplap-style wall without overpowering it. Those visible bulbs and open framework create a softer glow than a fully shaded fixture, which matters in bathrooms where bright light can feel harsh. The choice to go with black (instead of matching the wood) helps your eye move between warm and cool tones, so the whole vanity nook looks layered rather than flat. Trade-off: the cage style shows more bulb visibility, so picking a warm bulb temperature (around 2700K) is key. If you’re working with existing wiring, plan the fixture height so it doesn’t glare into the mirror.
Check clearances before mounting
Measure from the vanity top to the fixture so you don’t end up with a light that feels too close when you’re using the sink.
Layer 5 — wood floating shelf ($120) Extra display space above the mirror
A wood floating shelf above the vanity creates that “moment” where decor looks intentional instead of floating on the countertop only. In the photo, the shelf holds the warmest color family (wood tone) and turns everyday items—rolled towels and ceramics—into a curated vignette. The reason it works better than spreading decor across the entire countertop is focus: your eyes land on one horizontal line, then drop to the mirror and vanity. The trade-off is that a shelf can look cluttered fast, so stick to a repeatable grouping: one tall element, a couple of medium pieces, and a folded-textile layer. Keep the styling slightly asymmetrical so it doesn’t look staged.
Use odd numbers on the shelf
Group decor in 3s (or 5s) so the arrangement looks balanced without being perfectly symmetrical.
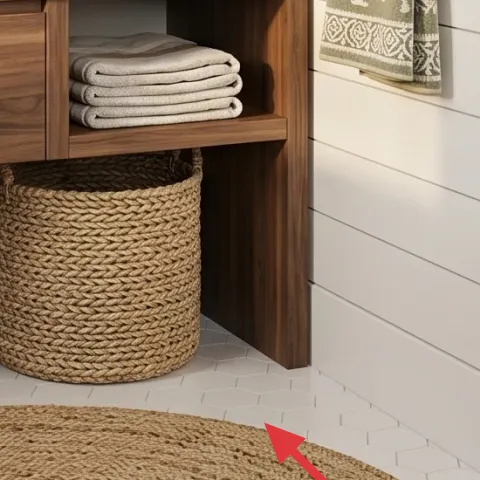
Layer 6 — woven storage basket ($50) Hidden texture near the floor
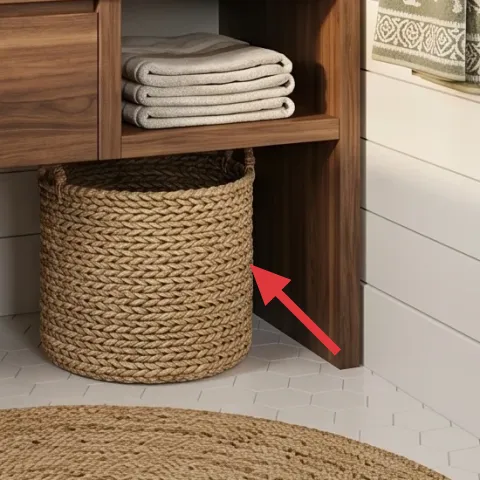
The woven basket gives you stylish storage and a grounded texture at floor level, which is why it belongs in this exact spot. Here, it’s positioned near the vanity so it can hold extra towels or bath linens without adding visual clutter to the countertop. Woven fibers also soften the clean lines of the white wall and keep the room from feeling too sleek. The reason not to replace it with a plastic bin is simple: the basket blends with the farmhouse palette and looks better even when it’s slightly full. Trade-off: woven baskets can snag on towels, so choose a basket with a smoother interior and line it if your fabrics catch easily.
Match the basket texture to your towels
A similar weave tone (natural or taupe) keeps the storage from looking “random.”
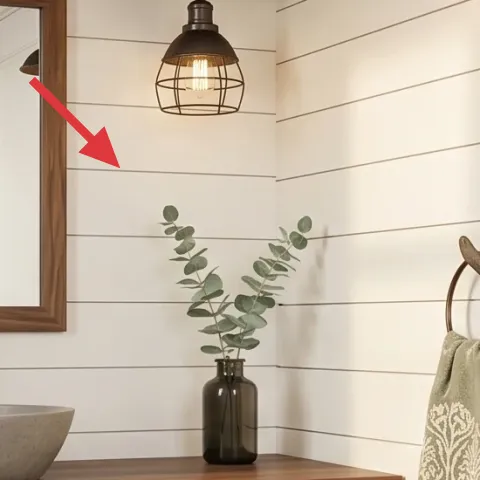
Layer 7 — green eucalyptus stems in jar ($25) Soft greenery that reads fresh
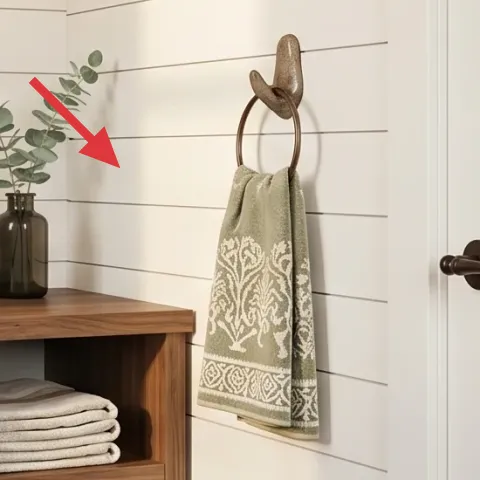
Green eucalyptus stems are small but high-impact because they add color and a little organic movement right next to the sink. In the photo, they sit in a glass bottle/jar on the vanity, which makes the greenery look light instead of bulky. This is also a better alternative than a large potted plant in a bathroom niche—eucalyptus is easier to swap and it won’t steal attention from the mirror. The trade-off is maintenance: stems will eventually need refreshing, but that’s also what keeps this look from feeling dated. If you want longevity, trim stems and refresh the water regularly.
Trim for a cleaner silhouette
Cut stems so the tallest leaves sit just above the decor height, not past the mirror line.
The cost, layer by layer
| Layer | Item | Cost |
|---|---|---|
| 1 | Area rug, 5×7 neutral ($80) | $80 |
| 2 | Wood framed rectangular mirror ($120) | $120 |
| 3 | Vanity cabinet, 24–36 inch wood ($250) | $250 |
| 4 | Black cage pendant light ($60) | $60 |
| 5 | Wood floating shelf ($120) | $120 |
| 6 | Woven storage basket ($50) | $50 |
| 7 | Eucalyptus stems in jar ($25) | $25 |
| Total | $705 | |
For a cheaper variant, swap the mirror frame update for a darker wood stain look only if your frame is already in decent condition, choose a smaller rug (or a runner), and use one lighting fixture instead of matching multiple cage styles.
What worked, what didn't (across the whole room)
This vanity nook works because every upgrade supports the same goal: warm wood against crisp white walls, anchored by soft textiles and a couple of repeatable decor textures. The mirror and lighting do the heavy lifting, and the shelf styling makes it feel curated instead of random.
What worked
- The neutral rug keeps the hard hex tile from feeling cold in front of the sink.
- The mirror frame tone matches the wood shelf and vanity, so the wall reads cohesive.
- The cage pendant contrast adds depth without blocking the white shiplap-style panels.
- Rolled towels look intentionally styled inside the vanity cubbies, not like storage.
- The woven basket brings texture at floor level and helps hide extra linens.
- Small eucalyptus stems add freshness without overwhelming the vanity area.
What didn't
- If towels are folded flat, the cubbies look busy; rolling gives a cleaner rhythm.
- Too many ceramics on the shelf makes it feel like a display case instead of a lived-in nook.
- Cool-bulb lighting can make the black fixture feel harsher against the white wall.
- Picking a rug with a busy pattern fights the calm farmhouse palette.
- Using greenery with no height variation reads like a flat prop rather than decor.
What we'd skip if we did it again
Skip buying multiple small decor items in the same color family “to match.” A few intentional textures (ceramic, woven fiber, and towels) read more expensive than a pile of matching pieces.
Skip a patterned rug in front of the vanity. With white shiplap-style panels and black cage lighting, the room already has strong visual lines—an extra pattern will compete.
Skip crowded shelf styling. One tall element, a couple of medium pieces, and folded textile layers keep the shelf airy, which is what makes the whole bathroom vanity nook feel calm.
Frequently asked
How long does a bathroom vanity nook refresh like this take?
Plan for about 1 weekend. The rug, basket, and tabletop styling are quick swaps, while the mirror-frame repaint takes the longest due to sanding, priming, drying time, and a second coat if needed. If you’re only changing styling and not touching plumbing or wiring, 6–9 hours total is realistic for most homeowners.
Is this renter-friendly if I can’t change permanent fixtures?
Yes—most of the impact here comes from non-permanent choices: a neutral rug, towel organization, a woven basket, and countertop/shelf styling. For lighting, only do swaps if your landlord allows them or if you already have plug-in options. The mirror frame repaint is the only “permanent” risk, so consider leaving it alone if you’re not comfortable.
What if my bathroom is smaller than in the photo?
Keep the same palette but scale down one element. A smaller rug or a shorter countertop arrangement will preserve the clean lines. On the shelf, reduce the number of ceramics to three pieces total and keep the eucalyptus stems shorter so they don’t visually crowd the mirror height.
What if my bathroom has darker walls or less light?
Lean into warm wood tones and brighter neutrals. Choose a rug with a lighter beige, keep the mirror frame in a warm finish, and use a warmer bulb temperature to avoid glare. If your shelf feels heavy, style fewer objects and add more negative space so the wall still reads airy.
Where should I shop for the key items?
For the rug, focus on neutral tones that won’t fight your towels. Mirrors and lighting can come from home stores or secondhand marketplaces—especially if the frame can be repainted. For the basket and ceramics, thrift and artisan markets are great because texture matters more than matching.
Biggest mistake people make with bathroom vanity styling?
Overfilling the shelf and countertop. This look works because it uses texture, not clutter: a few ceramics, a simple plant, and stacked towels. If everything is the same height and density, it feels busy fast. Leave breathing room around the mirror and let the wood shelf create the line your eye follows.
More in Bathroom
Under $800: weekend bathroom vanity nook refresh with 7 layers
A bathroom vanity nook can feel brand new without a full remodel—just 7 focused swaps. This refresh leans warm wood, stone-gray textures, a…
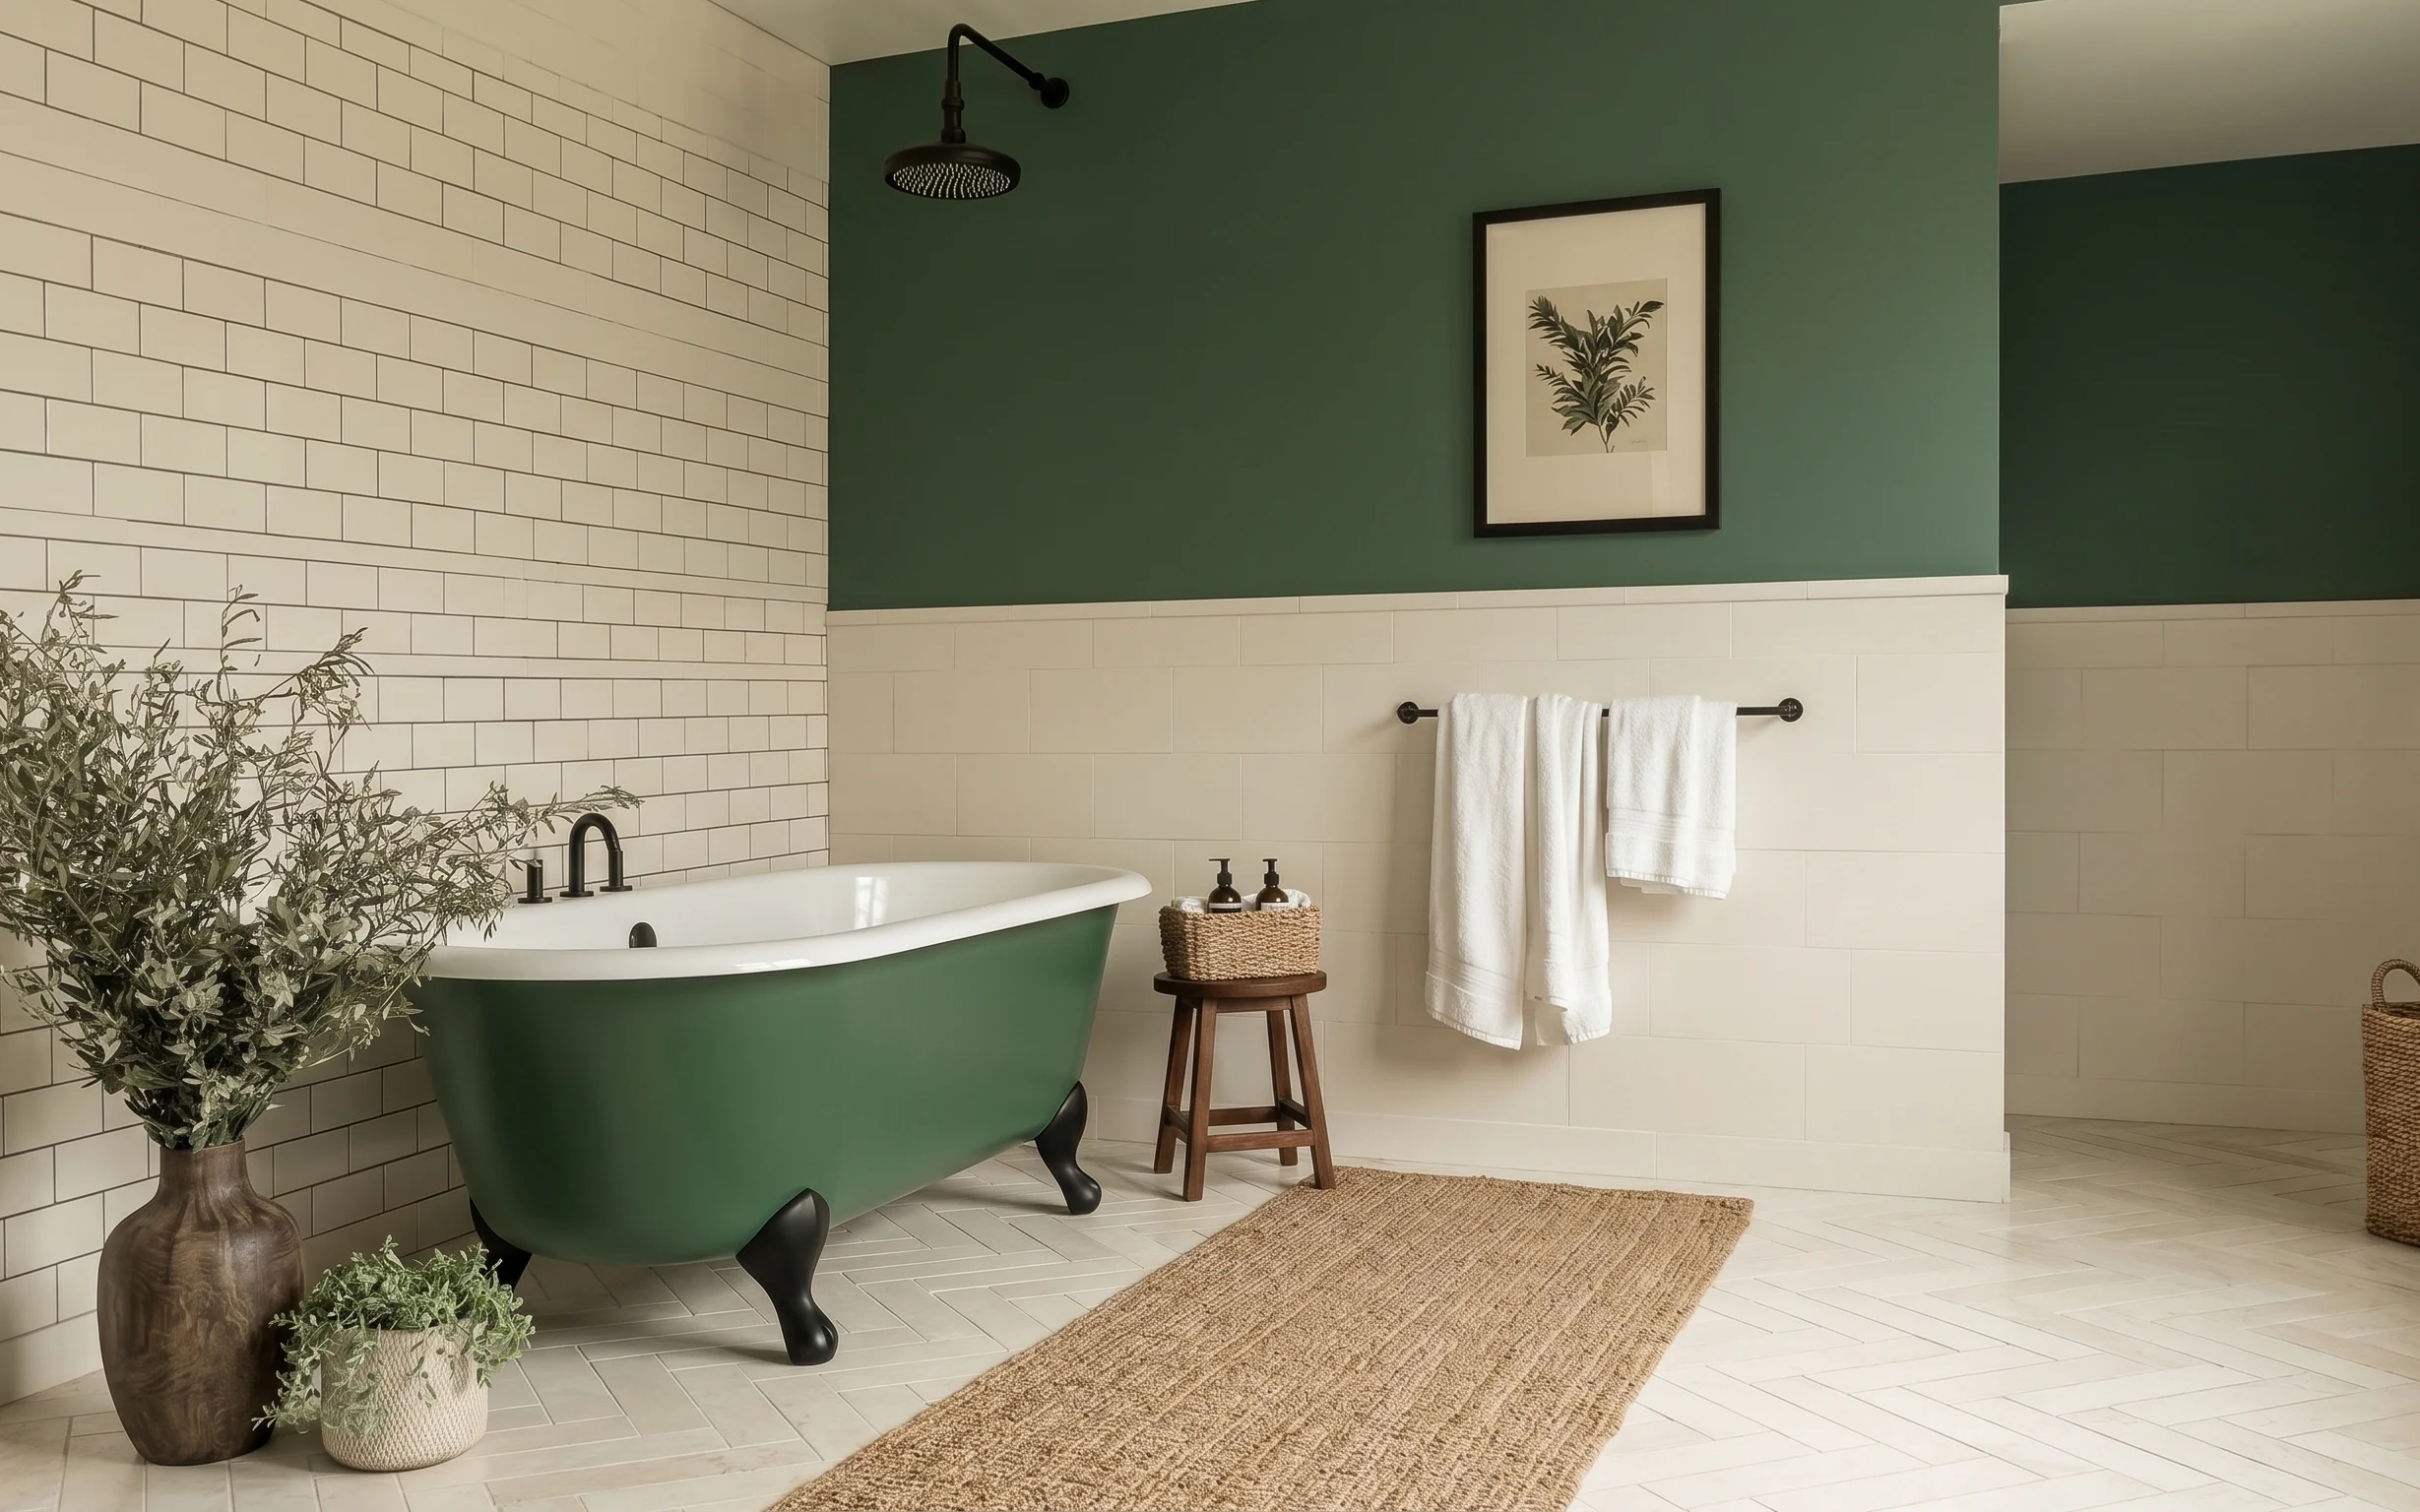
Under $800: budget bathtub nook refresh with 7 layers
A weekend bathroom refresh that leans on sage-green upper-wall color, warm textiles, and a framed botanical print. This bathtub nook makeov…
Under $250: vanity wall refresh with spa-green details
A spa-green vanity wall makeover for shared housing, done with move-safe swaps: a refreshed framed print, arched mirror styling, textured t…