- Best for
- Texture-first bathroom vanity styling
- Cost
- About $300 for 7 renter swaps
- Difficulty
- Beginner-friendly (no tools needed)
- Renter-safe
- Yes—everything is removable
Why warm earthy-neutrals is the bathroom vanity area of 2026
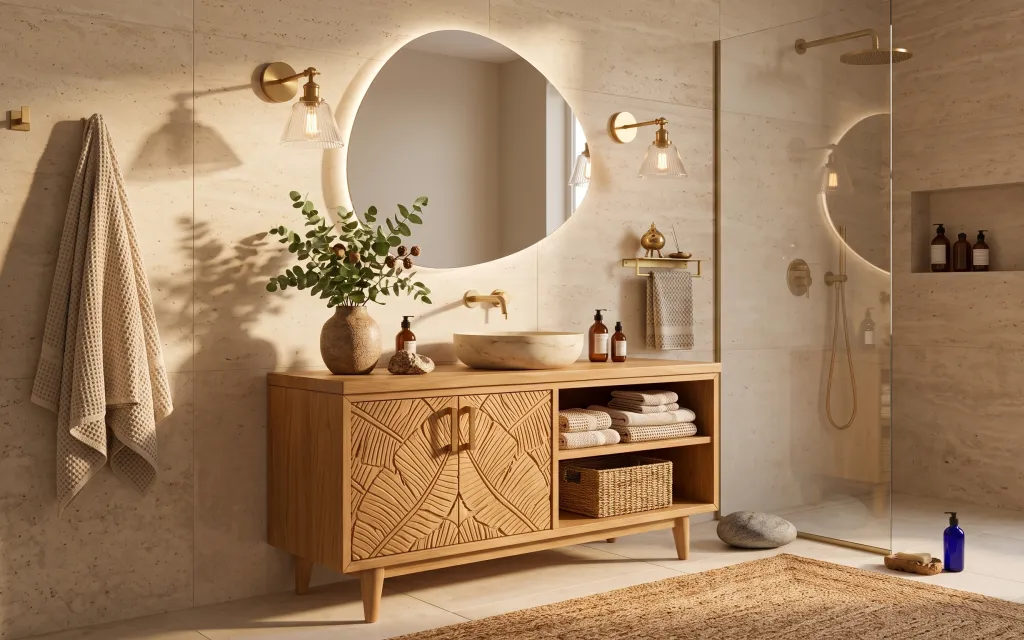
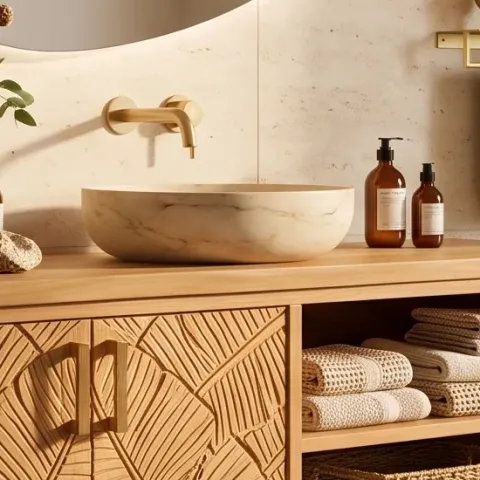
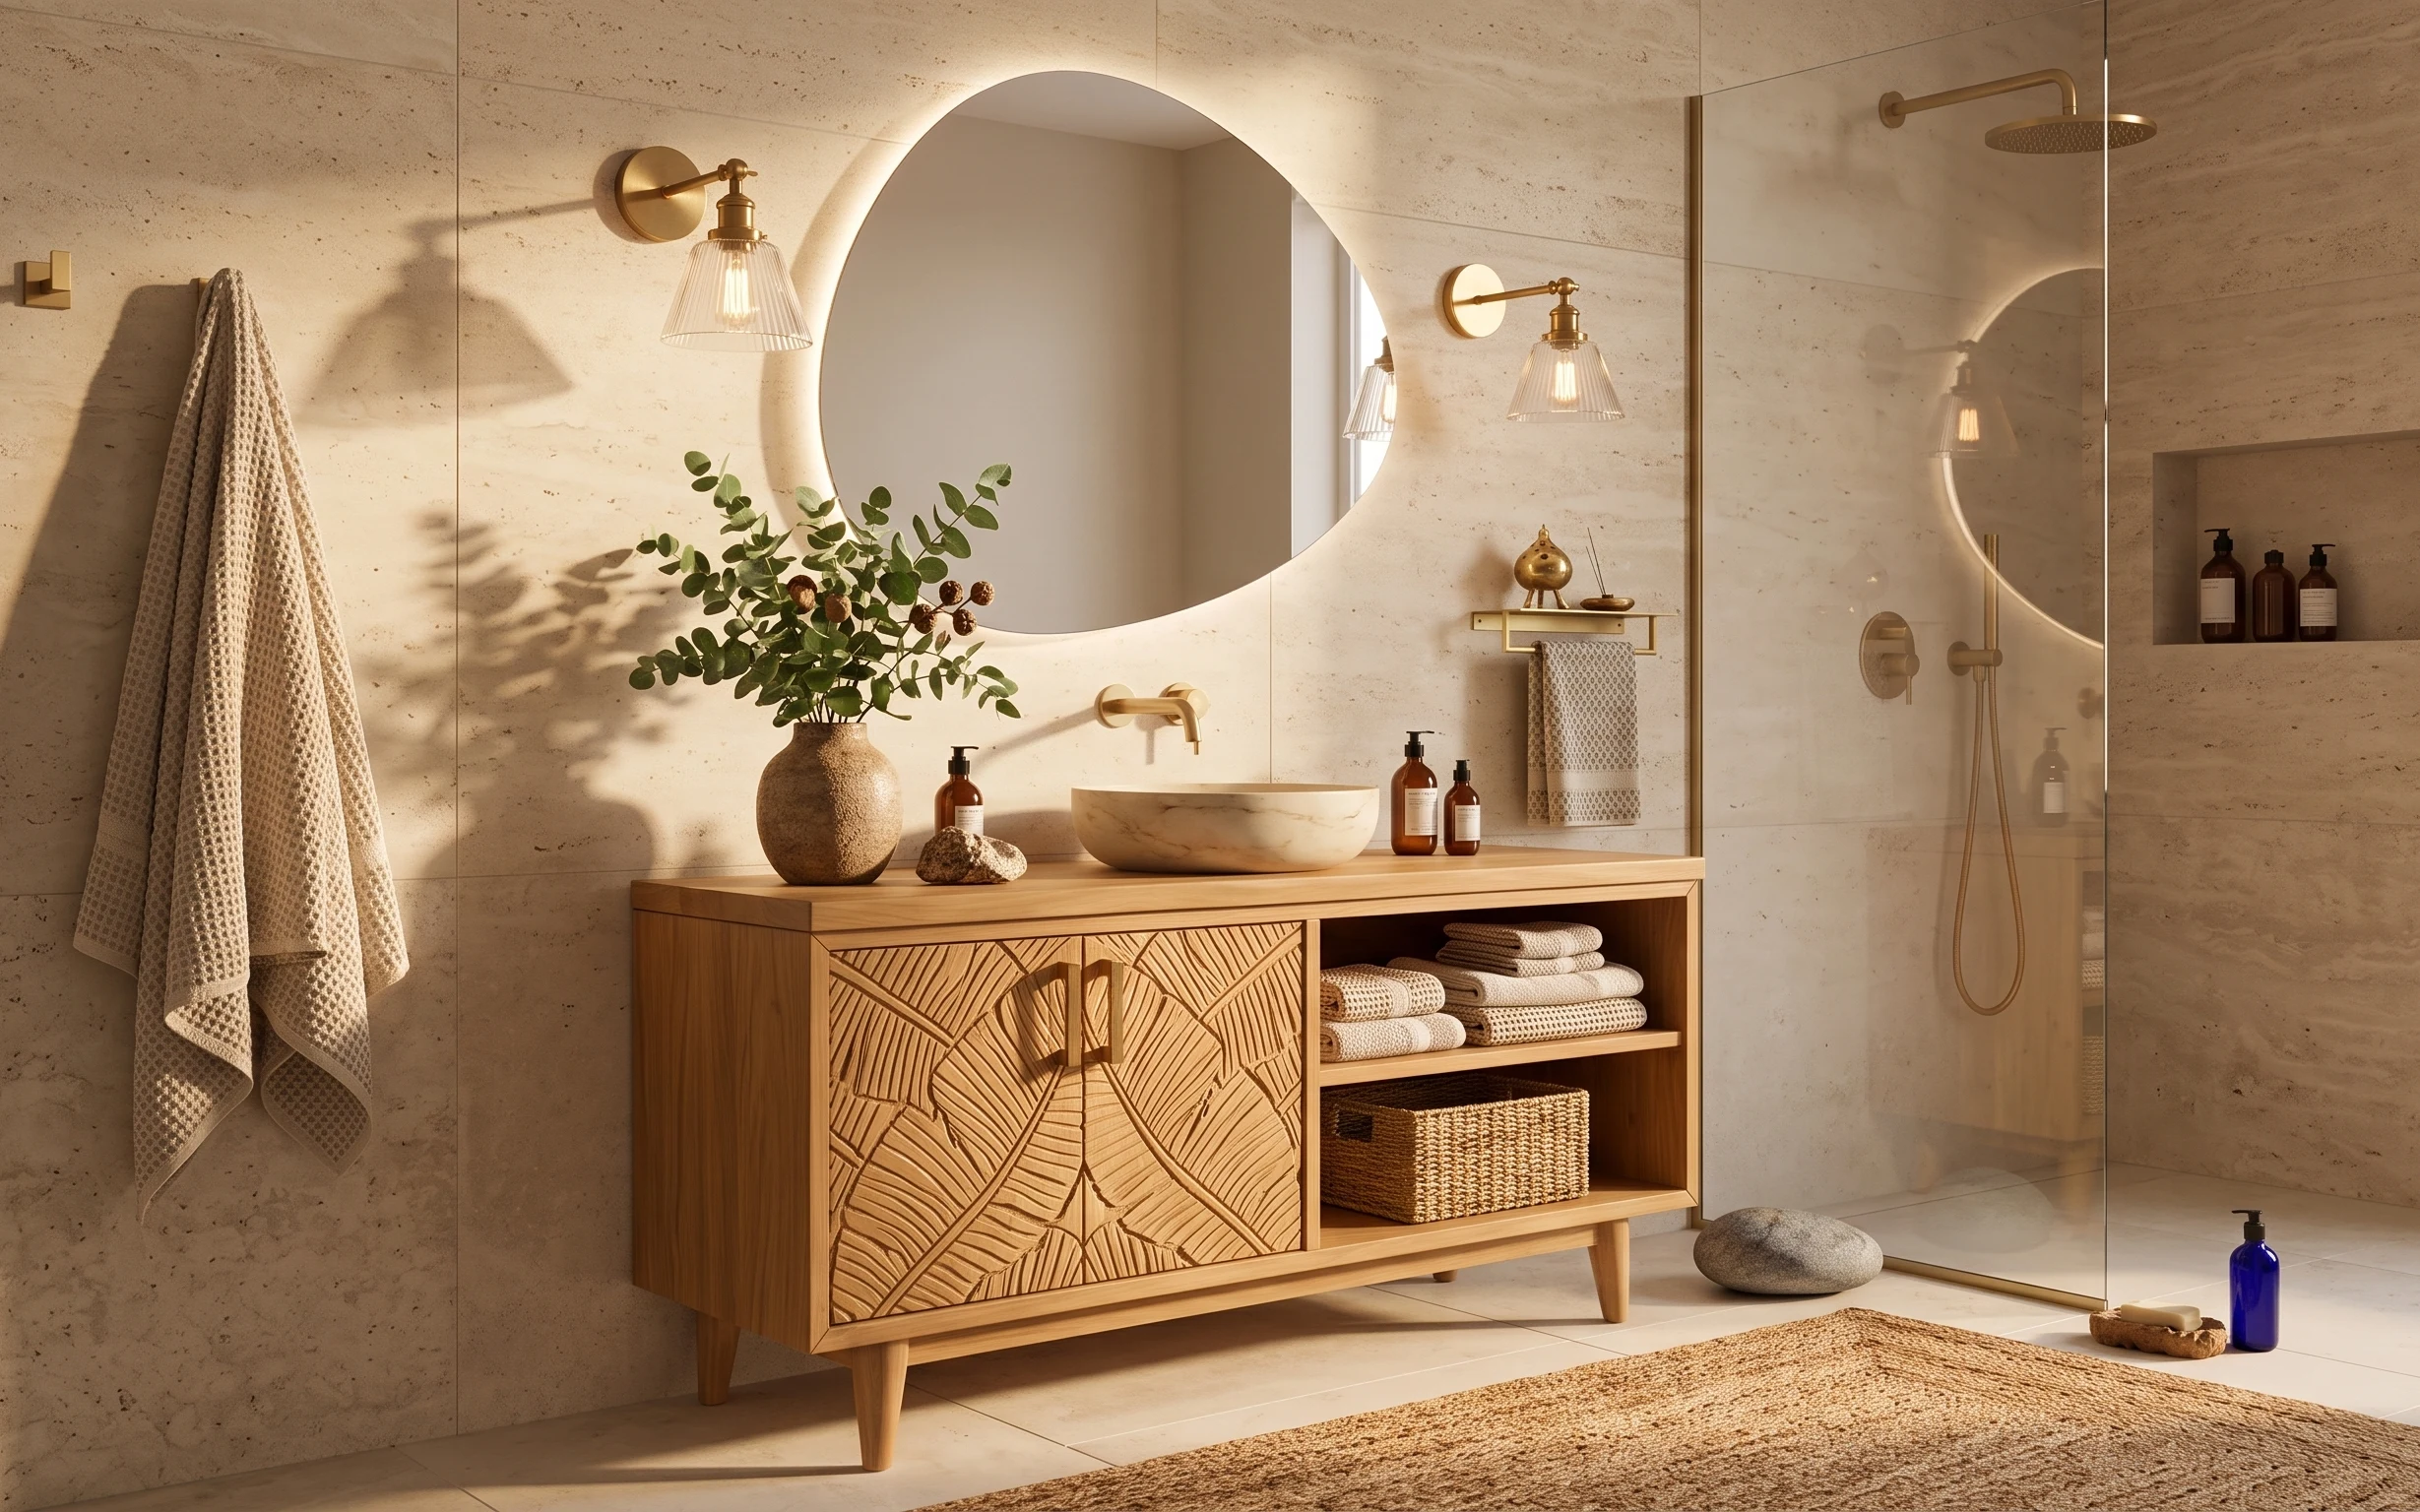
The photo sells a quiet, spa-like rhythm: warm beige tile, light wood, and brass gold show up in the same places over and over. You can mimic that effect without touching the landlord-installed fixtures by focusing on textures you can bring in—an earthy rug underfoot, woven towel and basket surfaces, and a ceramic vessel for greenery. The mirror shape already frames the center of the vanity, so small styling pieces (tray + plant + one brass accent) feel intentional instead of cluttered. For US renters, this is the kind of look that comes from layering, not permission.
I used to over-buy decor for my rentals, thinking more items meant more “designer.” Then I realized I was creating visual noise around the most functional spot—the sink zone. Once I narrowed it down to three textures (woven, ceramic, and linen-toned) and repeated that warmth in the rug, the whole setup looked calmer. The trade-off is you have fewer objects on the counter, but each one reads clearly.
Layer 1 — Beige area rug 5×7 ($120) Underfoot softness that hides the “renter bare tile” problem
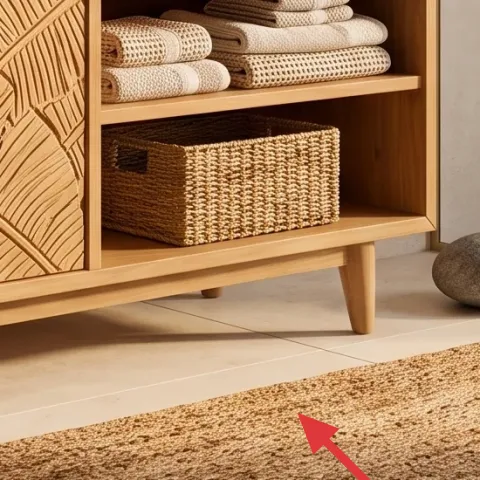
Start with the beige area rug because it instantly warms up the light tile and softens the bathroom’s hard lines. In the hero, the rug sits near the vanity and extends into the walkway zone, so it does two jobs: it feels cozy when you step out of the shower, and it visually anchors the styling on the vanity. A jute-look or low-pile natural-fiber style is best here—high pile can trap moisture, and slick flat rugs slide on hard floors. Yes, the landlord’s tile is already neutral, but without a rug the whole space reads like a showroom.
Place it so it touches the “work zones”
Let the rug overlap the vanity area by a few inches so towels and baskets don’t look like they’re floating on bare tile.
Layer 2 — Woven bath towel on the left ($25) Adds texture where bare wall otherwise shows
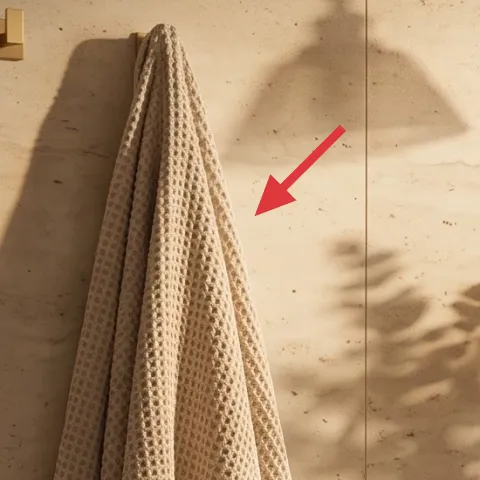
That hanging woven towel on the left is doing more than drying off—it’s adding the first texture note of the whole palette. In a bathroom with lots of smooth surfaces (tile and glass), a woven towel brings a subtle pattern that reads “lived-in,” not staged. Choose a towel in the same warm beige family so it doesn’t fight the brass and light wood. The trade-off is you’re committing to one main towel color instead of rotating bright seasonal ones, which is actually a win for a cohesive look. This also works for renters because towels are completely portable and wash well.
Keep the weave visible
If you fold it too small or hide it behind a bulky storage piece, the texture effect disappears from a distance.
Layer 3 — Stack of folded towels ($25) Builds the “spa shelf” feeling without extra wall decor
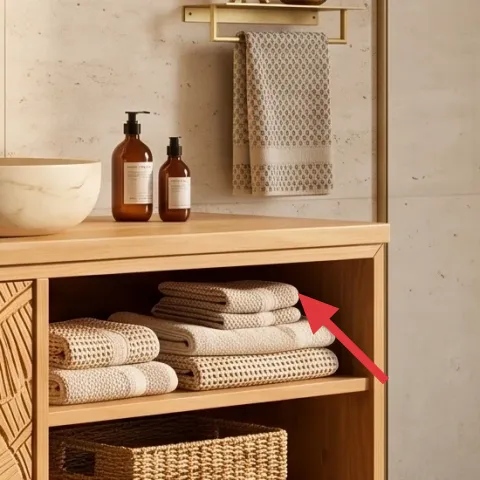
The stacked folded towels inside the vanity opening create a neat, intentional backdrop for the counter styling. You’ll notice the hero uses warm, slightly varied neutrals—folds that read like linen and terry texture rather than one flat color. For renters, this is an easy way to make built-in storage look styled without adding permanent fixtures. Keep the stack at a visible height and use two fold sizes (one taller, one shorter) so it looks curated, not shoved in. The trade-off is you’ll do a quick fold-reset now and then, because the stack is always in view.
Fold for height, not perfection
A light roll on one side and a tighter fold on the other gives that “picked, not arranged” look.
Layer 4 — Woven storage basket ($30) A natural organizer that looks decorative, not messy
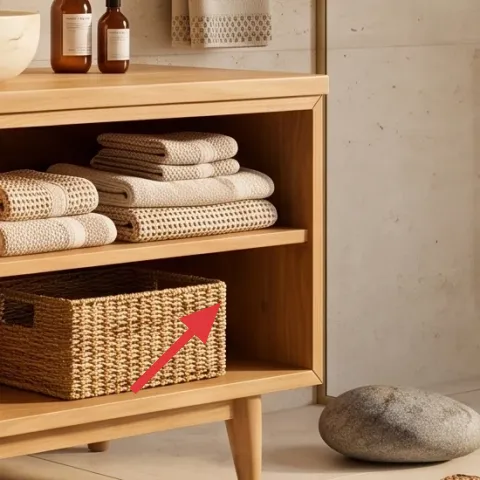
The woven basket on the lower shelf adds an organic texture that ties the towel and rug together. It also solves a real bathroom storage problem: small odds and ends disappear inside something breathable instead of visually taking over the vanity. In the hero, the basket’s warm color sits under the counter, so it feels like part of the shelving system rather than a random accessory. Look for a medium-size basket with sturdy weave and a shape that won’t collapse when you pull towels out. The trade-off is baskets take up a bit of shelf space, but you gain instant order.
Avoid super-light, flimsy weaves
Very delicate baskets can warp if they’re in a constantly humid spot.
Layer 5 — Decorative tray on the vanity top ($20) Makes countertop styling look “grouped”
The decorative tray is what turns a few separate items into one composition. On the vanity top, the tray visually sets the boundary for the plant, small objects, and the everyday bottles, so the counter doesn’t look cluttered even when it’s functional. Choose a tray in a warm neutral—think wood-tone or natural ceramic—so it harmonizes with the light wood and brass accents already in the room. The trade-off is you’ll have to commit to keeping the same “station” of items; otherwise the tray reads like an empty base. This is also a renter-friendly win because trays are fully removable and wipe clean.
Let the tray edge guide spacing
If items overlap the tray edge, scale looks off; aim for a small gap around the perimeter.
Layer 6 — Ceramic vase with green plant stems ($45) Textured greenery that reads intentional, not accidental
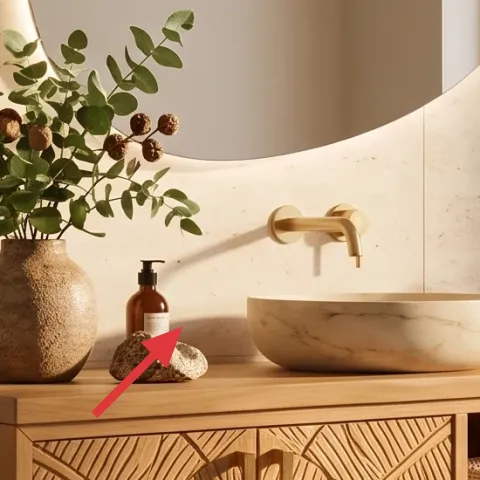
The green plant stems in the textured ceramic vase are the focal “life” element of the whole scene. The vase shape and speckled texture are doing the same job as the woven towel: they add detail that looks good in natural light and close-up views. For a renter-friendly refresh, this is ideal because the whole vase-and-plant combo is portable and you can swap it with seasonal stems when you want a change. A simple trade-off: real fresh stems won’t last forever, so many renters keep dried or semi-dried greenery for consistency. This layer is also where the look becomes cohesive—plant + tray + rug textures all speak the same warm-earth language.
Make it instead of buying it
This DIY painted terracotta planter set gives you the same textured, earthy vessel look as the ceramic vase—without dealing with fragile ceramics or pricey decor.
Materials
- Terracotta planters, 2 sizes — small set — craft store — $15
- Acrylic paint in warm beige/umber — 1–2 small bottles — craft store — $10
- Foam brush/round brush set — 1 pack — craft store — $8
- Disposable tray/cover paper — 1 pack — grocery/arts store — $4
- Painters tape — 1 roll — hardware store — $3
Steps
- Wash and dry the terracotta so paint sticks evenly.
- Mask simple bands or sections with painters tape for controlled texture.
- Paint the base color with a foam brush for a speckled, organic finish.
- Layer a darker acrylic wash (lightly brushed) in crevices for depth.
- Pull tape while paint is still slightly tacky to keep edges crisp.
- Let the pieces cure fully (follow the paint label drying time).
- Assemble: place a small plastic liner or use a removable insert if you’re using greenery.
- Style with greenery so stems fill the opening and hide any liner.
Total DIY cost: $40 — saves about $5 over buying.
Layer 7 — Small brass decorative object ($18) Adds one “brass note” so the bathroom feels styled
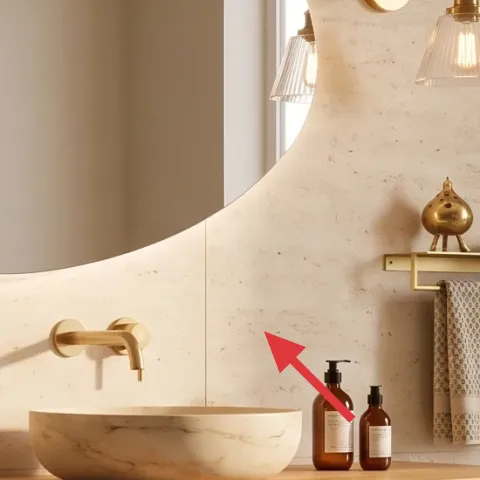
That small brass decorative object on the wall shelf is a simple way to echo the room’s brass accents without adding another fixture. In this kind of bathroom, repeating one metal tone keeps the look intentional, especially when the counter already has bottles and the mirror draws the eye upward. Choose an object with a rounded or sculptural form so it feels organic next to the plant and woven textures. The trade-off is scale—this piece should stay small enough that it doesn’t compete with the plant or the towel bar. It’s also easy to move between rentals or swap out when the shelf feels too bare.
Pick one metal, then stop
If everything becomes “brass + silver + gold,” it starts to look accidental.
The cost, layer by layer
| Layer | Item | Cost |
|---|---|---|
| 1 | Area rug 5×7 in beige tones | $120 |
| 2 | Woven bath towel in warm beige | $25 |
| 3 | Folded towel stack (2–3 towels) | $25 |
| 4 | Woven storage basket for shelves | $30 |
| 5 | Decorative tray for vanity counter | $20 |
| 6 | Painted terracotta planter set (vessel look) | $45 |
| 7 | Small brass decorative object | $18 |
| Total | $283 | |
If the vibe is close but the budget needs trimming, downsize the rug to a smaller 3×5 and choose one main woven basket. Keep the plant in the same spot, but reduce countertop items to just the tray + vase. That preserves the warm, spa-like feel while lowering the biggest spend.
What worked, what didn't (across the whole room)
The best wins are the texture repeats: woven towel + basket + rug create a cohesive layer pattern around the vanity. The plant-and-tray setup also made functional bottles feel more intentional, not random. What didn’t work was trying to add more decor—when the counter had extra small objects, everything started competing with the mirror frame instead of reading calm.
What worked
- The beige area rug softened the tile and made the vanity zone feel warmer.
- Woven towel texture added visual detail without introducing new colors.
- Stacked towels created a “ready for guests” shelf look in a renter-safe way.
- The woven basket hid smaller items while staying breathable and easy to access.
- The tray grouped counter objects so everyday bottles looked styled.
- Textured earthy planter styling tied the plant to the light wood and brass tones.
What didn't
- Overcrowding the tray made the center feel busy, especially with the mirror drawing attention.
- Using only one texture (no woven + no ceramic) made the look flatter from across the room.
- Choosing a cooler-toned neutral for towels made the brass and wood feel mismatched.
- Keeping the plant stems too low left the counter feeling top-heavy and unfinished.
What we'd skip if we did it again
Skip adding more wall-mounted decor to “fill space.” The mirror shape already frames the vanity, so extra pieces on walls or shelves usually steal attention from the plant and counter grouping.
Skip mixing metals (brass, silver, and gold together). The hero already leans warm brass; sticking to one metal tone keeps the bathroom reading spa-cohesive instead of trend-chasing.
Skip choosing a rug that’s too thin or too slick. If it doesn’t stay in place comfortably, the whole setup loses the polished feel, and the rug becomes more maintenance than style.
Frequently asked
How long does this bathroom vanity refresh take?
Plan for about 2–3 hours total if everything is already clean and staged. The biggest time blocks are washing/rolling towels, arranging the tray and plant, and making one quick pass to adjust spacing so the counter and shelves look intentional. Most swaps (rug, towels, basket, decor) are simple set-in-place changes with no install steps.
Is this truly renter-friendly if my lease doesn’t allow changes?
Yes. The key layers here are items you can take with you: a floor rug, towels, a woven basket, a tray, and portable decor. The DIY planter is also move-ready and doesn’t require attaching anything to walls. As long as the landlord-installed fixtures stay as-is, the look comes from styling, not renovations.
What if my bathroom is smaller or my vanity is narrower?
For a smaller space, choose a rug that still covers the “step zone” in front of the vanity but doesn’t extend too far into the doorway. On the counter, use just the tray + vase combo and keep the rest to one functional item. The folded towel stack can be thinner—two folds instead of three—so it reads styled without taking up precious shelf width.
Where should I shop for the rug, basket, and tray?
For budget-friendly options, look at home departments and online marketplaces with filterable materials (jute look, woven, ceramic-tray styles). Thrift and consignment are also great for baskets and tray shapes if you match the warm beige/brass direction. For the plant vessel look, a craft store terracotta + acrylic paint DIY route usually lands close to the hero for less.
What’s the biggest styling mistake people make in this type of bathroom?
Overcrowding the tray and counter. When there are too many small items competing in the same footprint, the mirror makes it look busier. Keep to a simple grouping: one anchor (plant in vessel), one organizer (tray), and one supporting texture (towel/basket). If you add anything, remove something else first.
More in Bathroom
Under $300: renter-friendly bathroom vanity refresh
A warm, spa-like bathroom vanity setup is achievable on a $300 renter-friendly budget. This refresh focuses on a soft area rug, layered tex…
Under $600: renter-friendly spa bathroom refresh
A renter-friendly spa bathroom refresh built around texture (a large shag rug), warm wood tones, and sage-green details. This look uses sev…
Under $400: warm shower nook refresh for shared bathrooms
A warm, modern shower nook can feel intentional even in a shared rental. This $400-style bathroom refresh uses 7 move-ready swaps (rugs, to…