
- Square footage
- 60–120 sq ft feel
- Cost
- Under $300 total
- Difficulty
- Easy (textiles + styling)
- Renter-safe
- Yes, removable-only
Why warm white-and-walnut storage setup is the under-stair entry nook of 2026
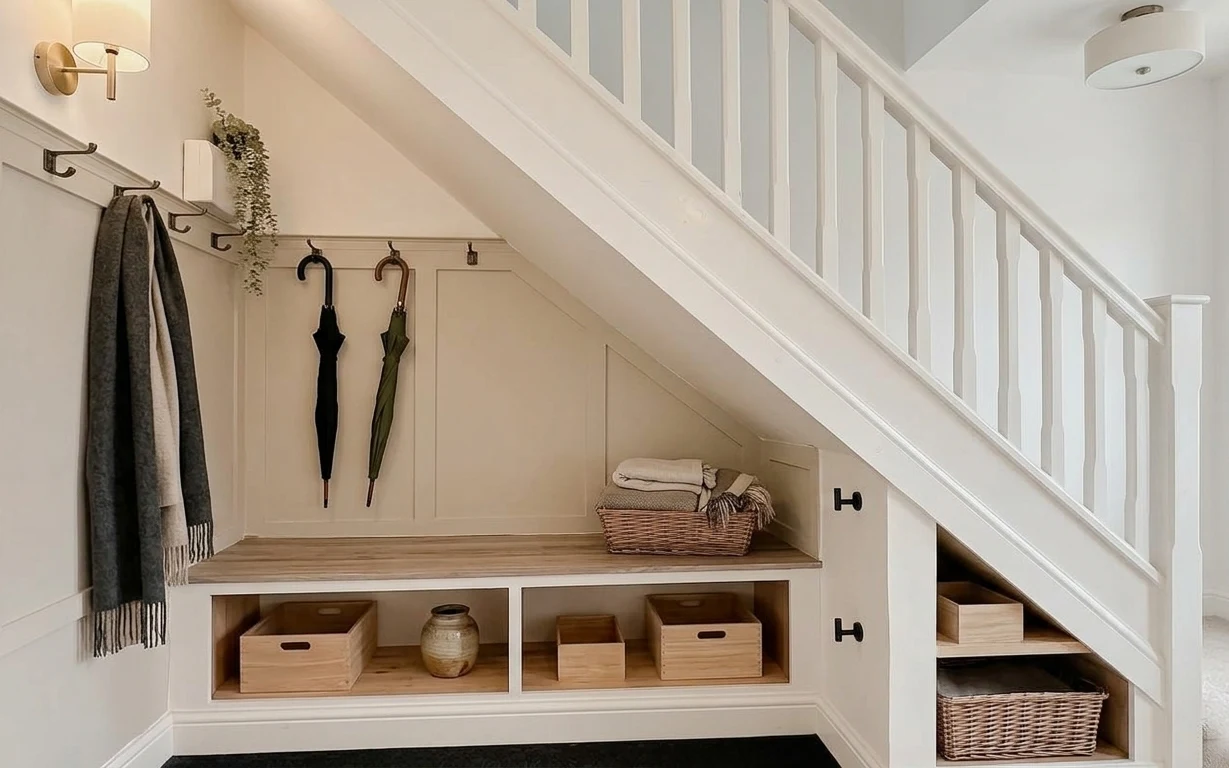
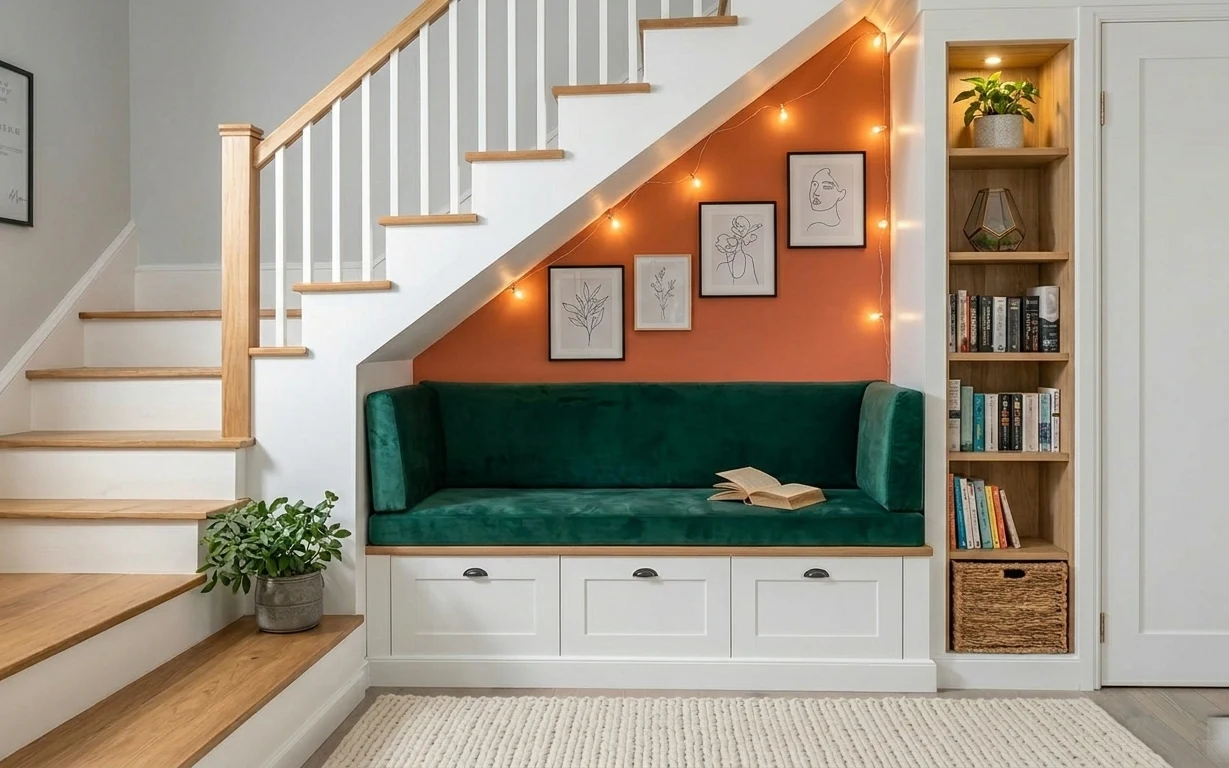
The under-stair bench and cubbies are already doing most of the heavy lifting, so the refresh is all about what you place on top. In the photo, you can see a folded throw blanket with a soft neutral texture, a ceramic vase, and woven wicker baskets tucked into the openings. The wall side stays clean because the umbrellas and scarves are “visual storage” on the black hooks. I’m borrowing the same idea you see in House Beautiful’s styling galleries: keep your color palette tight (white, walnut, and black) and repeat one material texture across surfaces.
I used to overdo entries—more baskets, more bins, more everything—until the whole nook looked like a garage sale. The change for me was choosing fewer containers, then styling them with one repeated texture: woven. Here, the wicker baskets and the greenery garland make the space feel intentionally layered instead of just packed.
Layer 1 — folded throw blanket on the upper ledge ($45) Softens the bench line
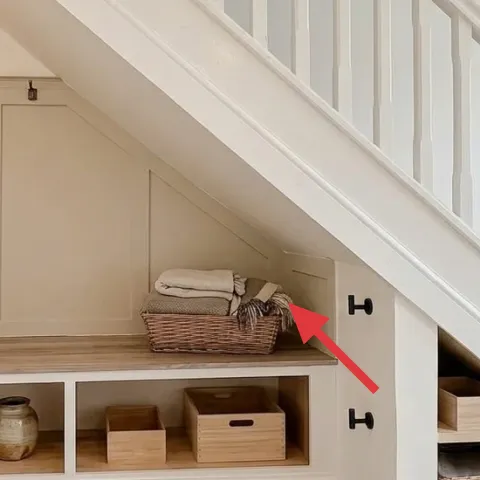
That folded throw blanket on the upper ledge is what makes the bench feel like a “landing zone” instead of pure storage. The neutral tone reads warm against the white paneled wall, and the soft texture makes the whole nook feel less harsh—especially next to the crisp black hooks. I’d skip the obvious alternative of using another flat basket or box on top, because that tends to make the ledge look like a staging table. The trade-off: a throw needs a quick weekly shake and a real spot to land, but it’s also one of the easiest items to swap at move-out.
Layer by height
Keep one soft textile up high (like this ledge blanket) so the nook still feels complete even when cubbies are partially empty.
Layer 2 — ceramic vase on a cubby shelf ($25) Adds a glazed pop
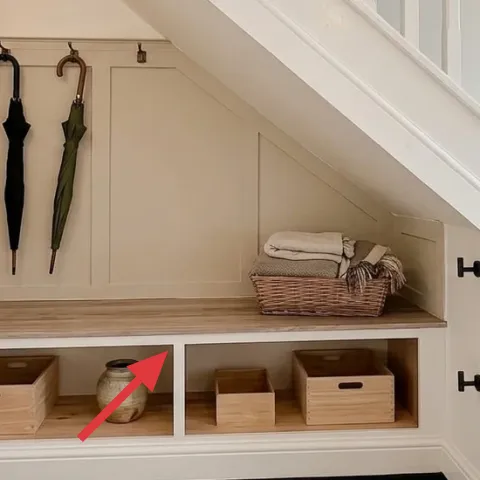
The ceramic vase in the left cubby brings shine where most of the nook is matte—wood crates, woven baskets, and painted wall. Its rounded shape also breaks up the strong boxy geometry of the cubbies, so the arrangement feels more curated and less “storage grid.” I’m choosing a single vase instead of multiple small trinkets because too many objects fight in a narrow entry. The trade-off is simple: ceramics are easier to knock over than flat decor, so this spot works best when the door traffic isn’t bumping the shelves.
One hero object
Pick one container/shape you can see from the doorway, then let the rest of the cubbies be quieter.
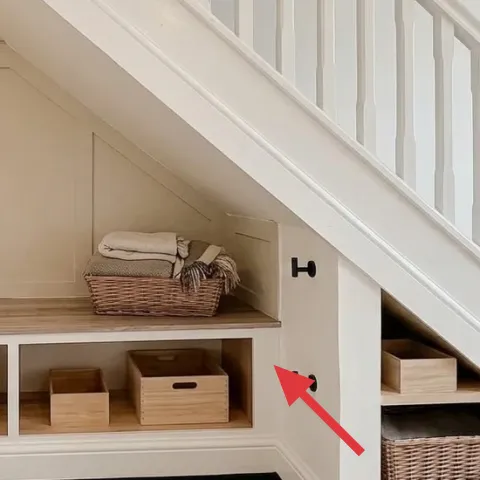
Layer 3 — wicker basket in a right cubby ($40) Hides mess without hiding texture
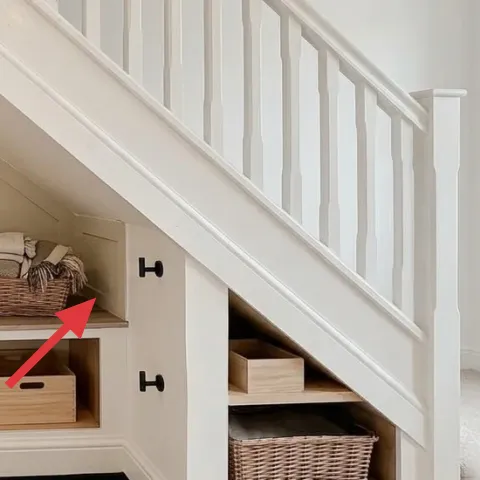
This right-side wicker basket is doing double duty: it keeps smaller items contained and it adds that classic woven texture that reads cozy in farmhouse spaces. Because the basket sits inside the cubby, it looks “built-in” rather than like an add-on, which matters in a small nook where every visual inch counts. I’d avoid the alternative of using only hard plastic or only wood boxes, since you’d lose the soft texture contrast you see in the photo. The trade-off is weight and access—wicker looks great, but it can take a minute to lift and swap when you’re restocking seasonal items.
Use baskets for the in-between stuff
Think gloves, charging cables, or a roll of paper towels—things that don’t deserve a full box label.
Layer 4 — wood storage crate in a left cubby ($35) Matches the tone of the shelf
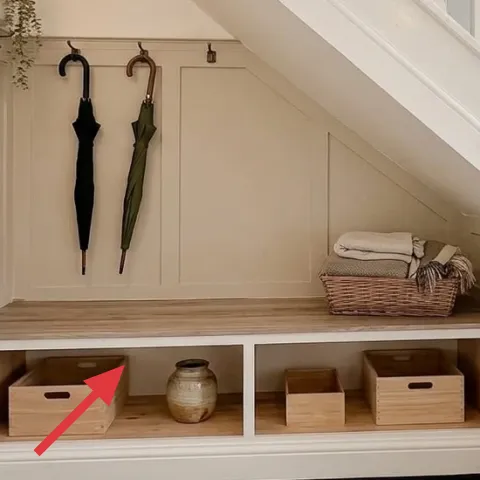
The wood storage crate in the left cubby keeps the palette consistent, and it makes the whole nook look intentional instead of mismatched. The light walnut tone bridges the warm undertone of the floor with the black hardware on the wall. If you swapped this for a fabric bin, you’d gain softness, but you’d lose the steady “structure” that wood adds in a paneled, high-contrast space. The trade-off: wood crates are a little more rigid to organize in, so it helps to keep similar item types together.
Let materials repeat
When your wall trim is white and your hardware is black, repeating walnut wood is an easy way to keep the eye calm.
Layer 5 — wood organizer box in a center cubby ($50) Gives you a neater front edge
That center cubby organizer box gives you a clean, straight visual line right where your eye lands first. Its slightly different scale from the left crate makes the nook feel styled rather than copy-paste, but it still belongs because it’s the same wood tone. The obvious alternative would be stacking more wicker or more small decor, but that quickly turns into clutter in an entry. The trade-off is that organizer boxes work best for items you can sort—like first-aid, keys extras, or seasonal accessories—so the box stays useful, not decorative.
Don’t overfill cubbies
If everything is “maxed,” baskets and crates stop looking curated and start looking like storage overflow.
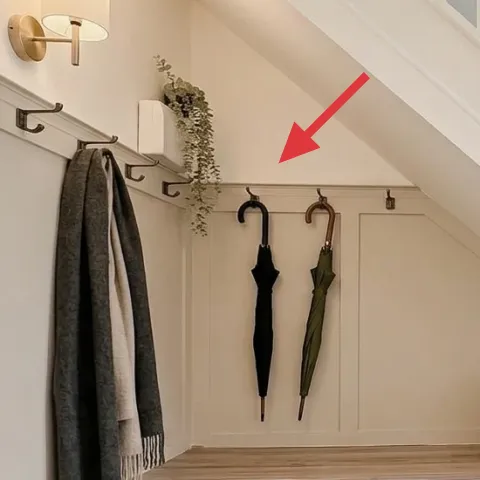
Layer 6 — hanging greenery garland near wall hooks ($35) Adds movement on a vertical wall
Make it instead of buying it
DIY a foraged dried greenery garland so it hangs over the hooks with the same airy texture—without paying for a store-made wreath-style piece.
Materials
- Foraged dried stems (mix of greenery) — 1 bundle — local foraging — $8
- Thin natural twine — 10–15 ft — craft store — $4
- Small wire loop/anchor (pre-made) — 1 pack — craft store — $6
- Jute ribbon for tie-off — 2 yards — craft store — $7
- Clear craft thread — 20 in — craft store — $3
Steps
- Bundle dried stems by thickness so you get a few “lanes” for volume.
- Tie the thick stems first with twine to create the garland base.
- Weave thinner stems around the base to extend length and add texture.
- Attach the garland to a small wire loop/anchor using clear thread.
- Tie off jute ribbon so the hang looks intentional and not like a knot.
- Fluff and trim the ends so the greenery drapes downward, not straight out.
- Keep the garland somewhere dry for storage so the dried stems don’t pick up moisture.
- Hang with removable hook hardware in a spot that won’t scrape the wall trim.
- Press stray stems back into the drape shape.
Total DIY cost: $28 — saves about $7 over buying.
Layer 7 — black umbrella hanging on wall hooks ($30) Practical styling that looks tidy
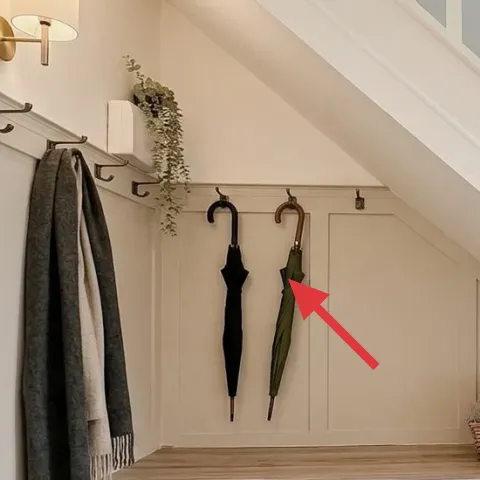
Having an umbrella on the hook is one of those rare entry details that is both functional and decorative. In the photo, the black umbrella coordinates with the black coat hardware, so it doesn’t look like random clutter—it’s part of the palette. I’d skip the alternative of storing umbrellas in a floor bin, because it steals visual space in a narrow nook and forces you to restyle the whole area whenever the bin gets messy. The trade-off: umbrellas take up a vertical lane, so aim for one or two max and keep the rest of the ledge clear.
Stick to a “pair” rule
Limit umbrellas/scarves to two visible items per side so the wall stays airy.
The cost, layer by layer
| Layer | Item | Cost |
|---|---|---|
| 1 | folded throw blanket on the upper ledge | $45 |
| 2 | ceramic vase on a cubby shelf | $25 |
| 3 | wicker basket in a right cubby | $40 |
| 4 | wood storage crate in a left cubby | $35 |
| 5 | wood organizer box in a center cubby | $50 |
| 6 | hanging greenery garland near wall hooks (DIY) | $35 |
| 7 | black umbrella hanging on wall hooks | $30 |
| Total | $260 | |
If you want a cheaper version, swap the wooden organizer box for a lower-cost wooden crate, and choose one fewer cubby basket. Stick with the throw blanket on the ledge and keep the greenery drape—those two details do the most visual work in a small under-stair setup.
What worked, what didn't (across the whole room)
This nook looks pulled together because the styling repeats a small palette (white, walnut, black) and mixes soft + structured textures. The ledge throw and the woven basket make storage feel intentional, not purely practical. The only time it would slip is if cubbies get overfilled and the wall side turns into too many visible items at once.
What worked
- The folded throw blanket softens the bench line and makes storage feel livable.
- The ceramic vase adds shine in a palette dominated by matte wood and woven textures.
- Wicker baskets keep small items hidden while still showing texture in a tight footprint.
- Wood crates tie visually to the warm floor tones, so the cubbies look cohesive.
- The hanging greenery garland brings vertical movement above the black hooks.
- Umbrellas used as “vertical storage” look tidy when they match the black hardware.
What didn't
- Too many objects on the upper ledge would flatten the look into clutter.
- Leaving cubbies un-sorted makes the nook read messy even with matching containers.
- If the greenery drapes too flat, it loses that airy, vertical impact.
- Using only hard containers (no wicker/soft textiles) would make the entry feel colder.
- Placing umbrellas in a floor bin would crowd the visual space under the stairs.
What we'd skip if we did it again
Skip adding more “stuff” on the upper ledge. In a small under-stair nook, the shelf becomes the first place clutter shows up, and the whole look stops feeling styled. Keep it to one soft textile (the throw) plus one hero object (the vase), then let the cubbies do the rest.
Skip matching sets that force everything to look identical. Instead of buying a full storage lineup, mix one wood crate and one wood organizer box, then add wicker for softness. That small mismatch keeps the nook from looking like a temporary storage corner.
Skip trend-driven greenery purchases that are meant to be seasonal decor. A foraged dried greenery garland stays airy and budget-friendly longer, and it packs up easily for move-out. When the garland feels “right,” the wall hooks and umbrellas look intentional instead of random.
Frequently asked
How long does this under-stair nook refresh take?
Plan for about 2–4 hours total. The non-DIY parts are mostly shopping and swapping items into the cubbies (throw, vase, crates, baskets). The dried garland DIY is the only time-heavy piece, and it’s still doable in one sitting if the stems are already dried.
What if I’m not allowed to add anything to the wall near the hooks?
Keep everything in the cubbies and on the ledge, and skip any garland that needs wall contact. The look still holds if the ledge throw and vase are centered, and if the greenery is replaced with greenery you can place inside a cubby basket or on top of the crate.
Can this work in a smaller entry with fewer cubbies?
Yes—use the same material logic, just fewer pieces. Keep the folded throw on the top ledge and choose either one wicker basket or one wood crate, not both. The key is repeating warm walnut plus one soft texture so the small footprint doesn’t feel bare or chaotic.
Where should I shop for the baskets and storage crates?
Look for natural-material baskets and wood storage boxes at home stores, discount retailers, and resale shops. Wicker baskets and matching wood crates are often cheaper secondhand, especially if you choose neutral tones. If you want the farmhouse vibe, stick to light walnut and natural fibers.
What’s the biggest mistake people make with under-stair storage?
Overfilling everything at once. When every cubby is packed to the top, the space stops reading as styled and starts reading as storage overload. Leave at least one cubby visually lighter, and keep the upper ledge curated so the whole nook feels breathable.
How do I make the renter-friendly items look consistent long-term?
Do a simple reset every couple of weeks: re-fold the throw so it stays flat, straighten the vase so it faces forward, and check that baskets sit at the same depth in the cubby. Consistency is what makes the nook look designed, even as you swap seasonal items.
More in Small Spaces
Under $300: under-stair entry nook refresh with renter swaps
A bright under-stair entry nook that feels organized, not cluttered. This renter-friendly refresh uses 7 move-friendly swaps—$260 total at …
Under $400: built-in bench nook refresh with 7 move-ready swaps
A built-in bench nook already has personality—so this refresh leans on move-ready swaps: a textured cream rug, warm string lights, framed b…
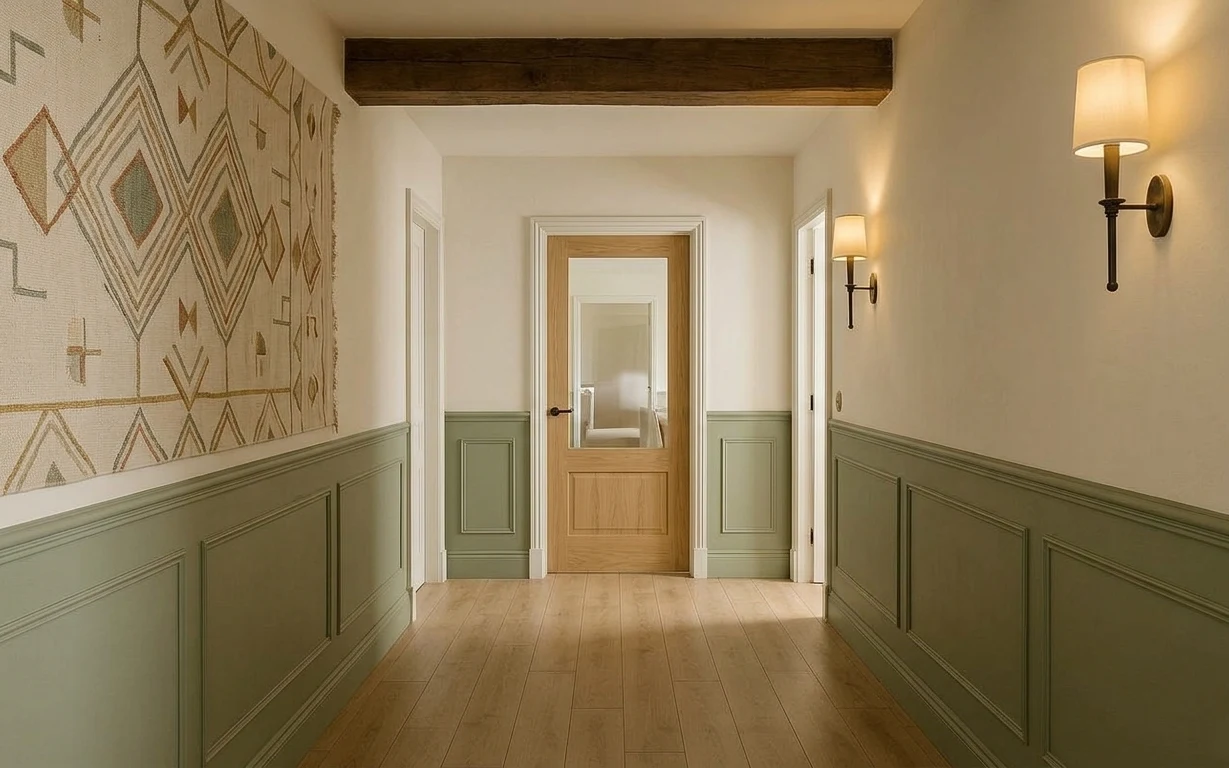
Under $500: renter-friendly hallway refresh with sage-and-cream charm
A sage-and-cream hallway refresh that feels intentional without drilling or painting. This move-friendly plan uses layered peel-and-stick t…