- Best for
- Warm renter-friendly styling in a built-in alcove
- Cost
- Under $350 for the full look
- Difficulty
- Easy (mostly textiles + hangable decor)
- Time
- 1 weekend, plus an hour for styling
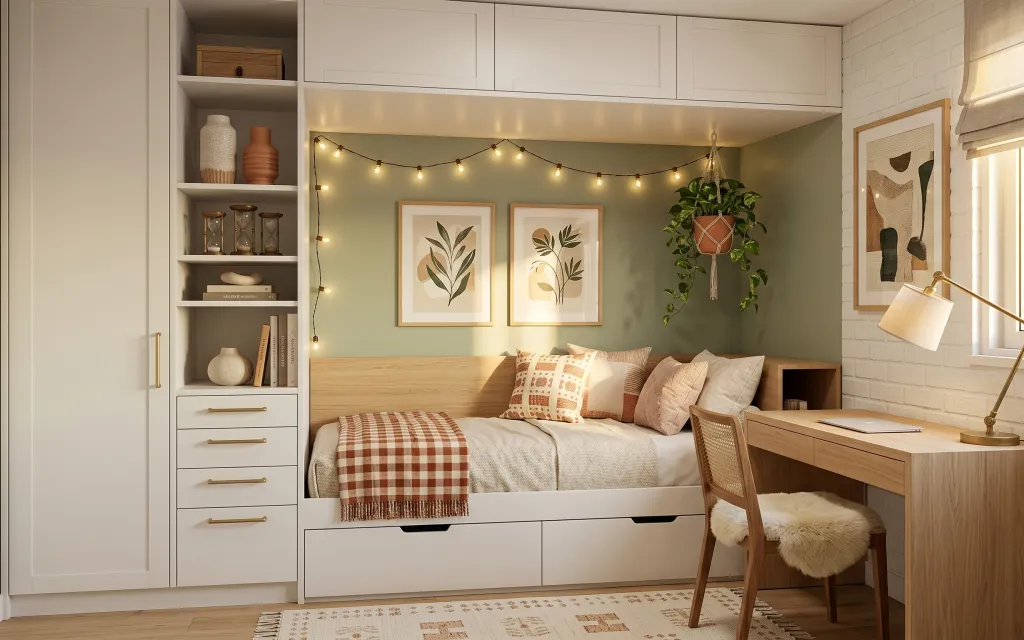
Why olive-and-terracotta accents are the daybed nook of 2026
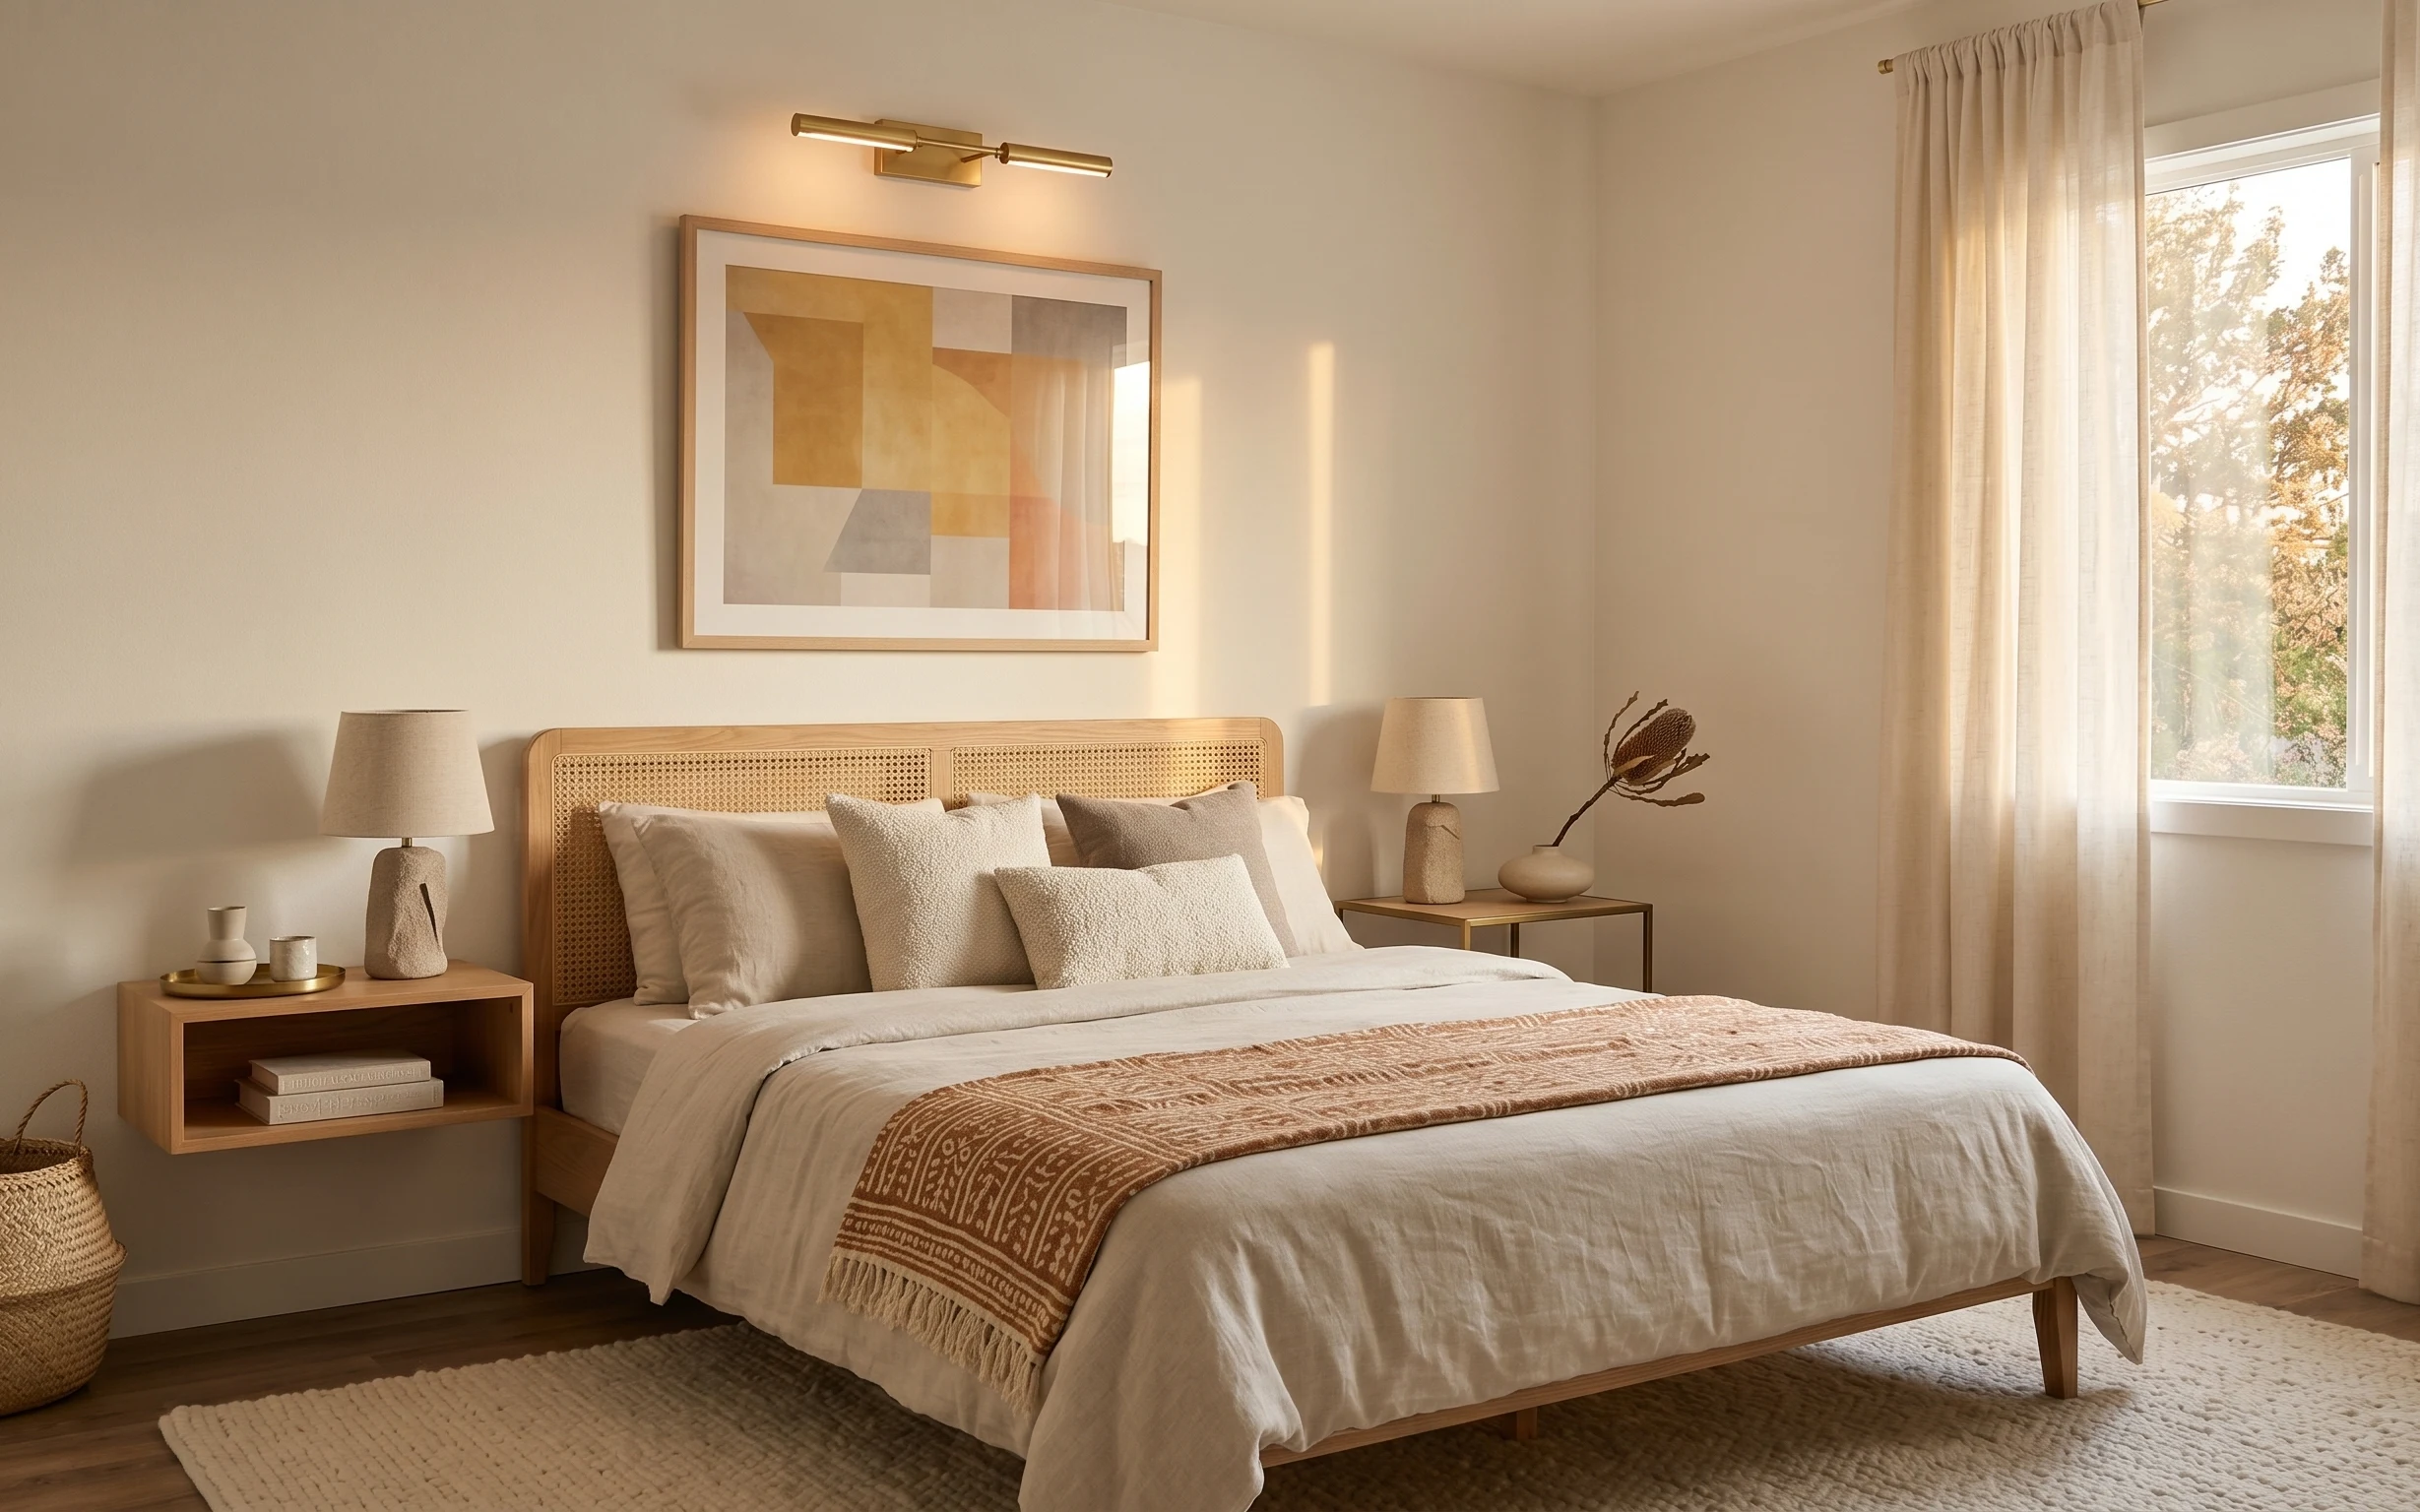
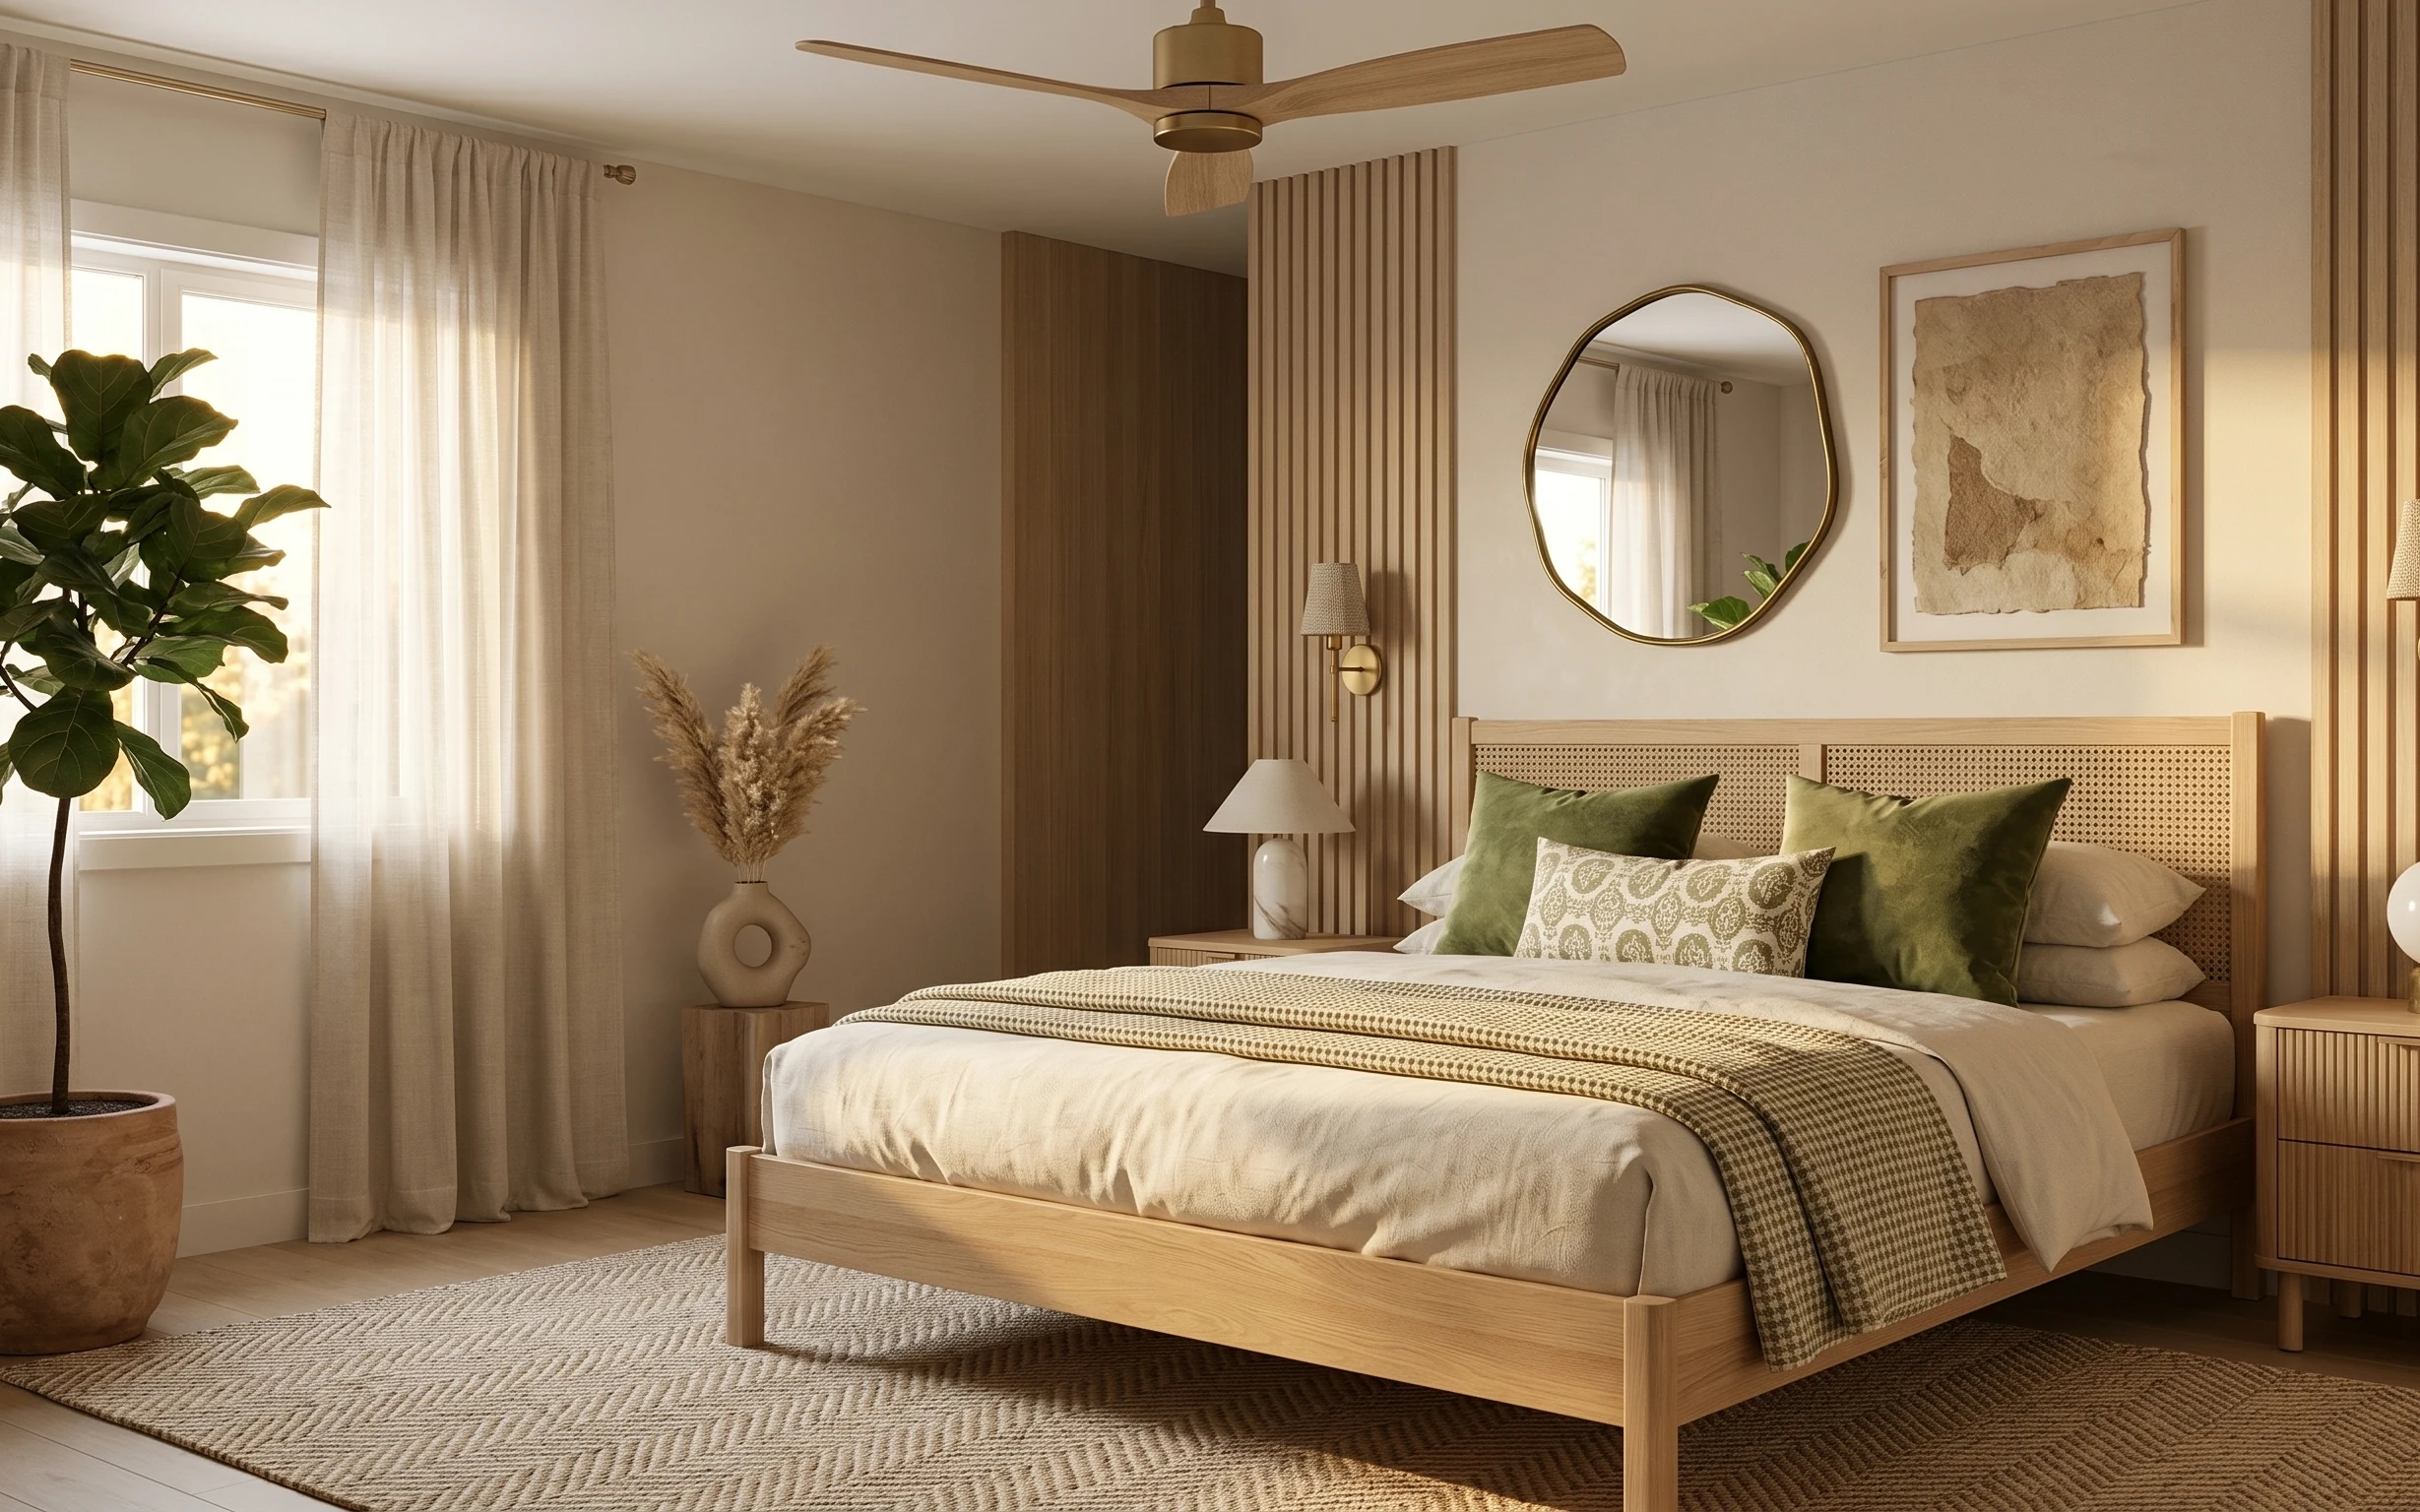
In this photo, the built-in shelf and drawer storage gives you structure, but the softness comes from textiles and warm lighting. The plaid throw blanket and the mix of pillow covers make the daybed feel intentional instead of temporary. Two framed botanical prints add a steady, airy pattern without cluttering the alcove. Then the string lights soften the whole corner, while the hanging plant brings a little boho movement above the head-level sight line. For renters, this combo is doable because everything you add can come down and pack up with the lease ends.
I tried to copy this look once by “matching” every color, and it got flat fast. The moment I switched to repeating just two tones—warm terracotta and soft sage-green—I finally got the calm, layered effect. I also used to overthink lighting placement, but draping the string lights along a natural line (where walls meet) makes it look curated instead of random.
Layer 1 — area rug ($80) Brings softness underfoot
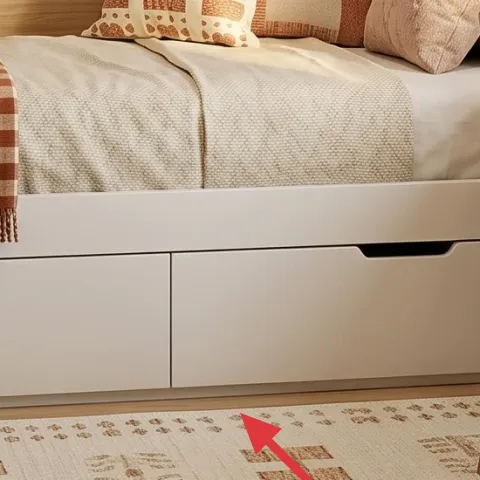
The area rug anchors the whole daybed nook and keeps the built-in cabinetry from feeling too showroom-clean. Choose a pattern with warm neutrals so it plays nicely with cream pillows and the light wood flooring. In the photo, the rug’s flat, earthy motif also helps the plaid throw read as cozy instead of busy. This is the swap I’d make even if you do nothing else, because rugs change how a room “sounds” when you walk on it—less echo, more comfort. The trade-off is that you’ll want a rug pad if you have any slipping, but that still stays renter-safe.
Pick a rug pattern that repeats one daybed color
Spot a warm tone from the pillows or the plaid and use that as your color “anchor.” It makes the rug look intentional instead of just functional.
Layer 2 — plaid throw blanket ($35) Adds texture at the front edge
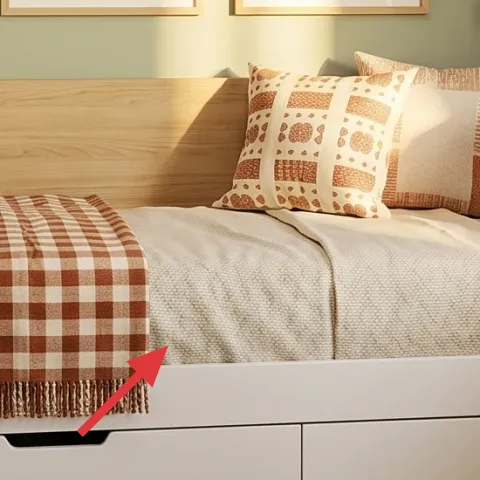
The plaid throw blanket sits across the front of the daybed and gives you instant visual texture without needing any heavy furniture changes. It’s a smart choice for this alcove because the blanket’s pattern breaks up the clean lines of the platform and shelves. In the photo, the warm rust-brown in the plaid ties into the terracotta pot and keeps the palette from turning icy. A plain solid throw would be easier to shop, but plaid adds that extra “styled” feeling even when the bedding underneath looks simple. The trade-off is that plaid reads best when it’s folded with intention—no loose, lumpy piles.
Let the plaid hang slightly off the edge
A small overhang makes the fabric look natural and lived-in, especially in a built-in nook where everything else is crisp.
Layer 3 — throw pillow covers ($18) Makes the bed look finished
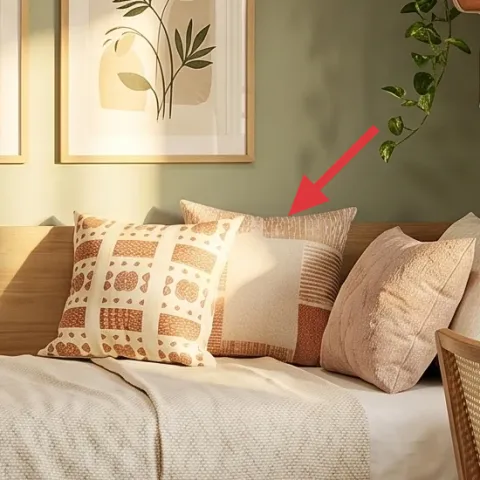
Throw pillow covers are the fastest way to make a daybed feel like a real sleeping setup instead of an “in-between” zone. Here, the pillows bring in warm beige and terracotta tones that echo the blanket and the hanging plant pot. I like choosing covers rather than replacing anything built-in because it’s the kind of swap you can do on day one and pack away on move-out day. The trade-off is you’ll need a little flexibility with mixing patterns—too many prints can look busy in a narrow alcove. The fix is to pair one patterned cover with solid or lightly textured neutrals.
Mix one pattern with two near-solids
This keeps the nook looking styled while still letting the botanical wall art and string lights do their thing.
Layer 4 — string lights set ($15) Softens the vertical lines
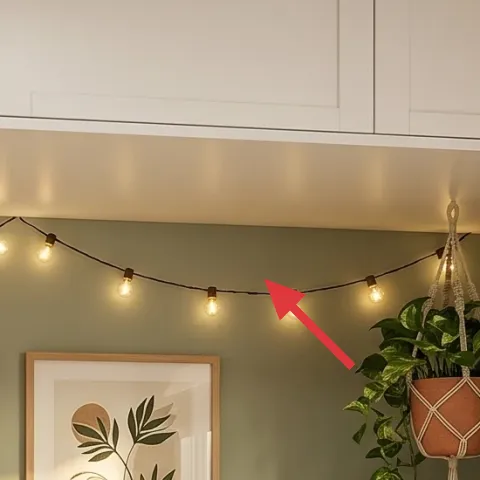
The string lights set creates that warm, gently glowing “evening” effect that makes the alcove feel curated. They’re especially effective in a built-in nook because you already have vertical surfaces to frame, and you can drape the lights along a natural boundary line. In the photo, the bulbs are spaced evenly and sit high enough that they don’t compete with the framed botanical prints. Buying a plug-in string lights set is the renter-friendly alternative to hardwiring or swapping fixtures. The trade-off is that you’ll want a tidy cord path so it doesn’t look tangled, but once it’s placed, you can just leave it up.
Avoid draping so low that it blocks your view
If the bulbs dip too close to the pillows, the light can look harsh and the nook feels cramped instead of cozy.
Layer 5 — framed botanical print ($80) Keeps the palette airy
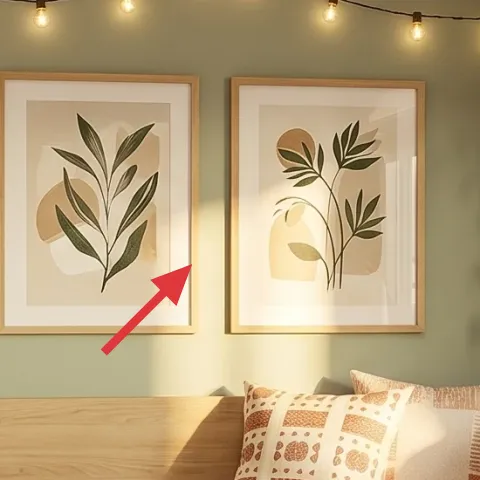
A framed botanical print brings that calm, organic theme without adding clutter—perfect for a narrow daybed nook. The botanical linework and leafy shapes echo the hanging plant, so the wall art doesn’t feel random. I’d choose prints like this over oversized abstract art because they visually “fit” the shelf-and-cabinet scale. You also get a big style win from something that’s removable for renters. The trade-off is that framed art can feel expensive compared with posters, but this is one place where a better frame matters; it makes the prints look finished rather than temporary.
Match frame color to your wood undertones
In this photo, the warm wood tones repeat across the lamp and furniture, so the framing reads cohesive.
Layer 6 — hanging indoor plant ($45) Adds movement and height
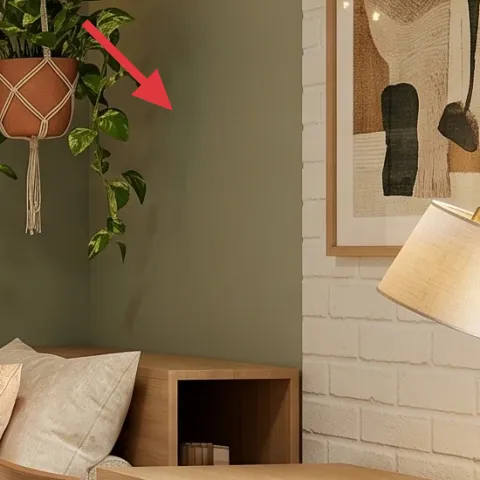
The hanging indoor plant brings height and softness, which is crucial in a space that’s otherwise dominated by built-in cabinetry lines. The leaves also repeat the botanical theme from the prints, so the alcove feels like one story instead of separate pieces. I like going for a fuller plant rather than a tiny stem because hanging decor needs enough volume to read clearly from across the room. This is also renter-friendly because you can use the same plant wherever you live next—your “planter setup” can come with you. The trade-off is maintenance: plan for a quick weekly check so the leaves stay perky, not droopy.
Choose a plant with broad leaves for better readability
Broad foliage shows up through string-light glow and looks intentional even from the bed.
Layer 7 — macramé wall hanging planter ($65) DIY the hanging planter look

The macramé wall hanging planter is what turns a basic pot into wall-level decor. In the photo, the rope pattern adds boho texture right where your eye naturally goes—above the bed, near the botanical prints. This is a great renter choice because you can mount it using Command hooks and avoid drilling into the wall. The trade-off is time: macramé takes patience, and the rope thickness affects how “open” the pattern looks. Doing it yourself is worth it here because the planter’s shape is small compared with the payoff, and it’s exactly the kind of piece you can remove and rehang later.
Make it instead of buying it
This macramé wall hanging gives you the same hanging planter texture using rope, a simple dowel, and Command hook mounting—move-ready for renters.
Materials
- Macramé cotton rope (approx. 200–250 ft) — 1 bundle — craft store — $18
- Wood dowel (about 12–16 in) — 1 — craft store — $14
- Command Strips (for hook) — 1 set — hardware section — $8
- Scissors (basic) — 1 pair — household — $7
- Decorative tassel yarn (optional for ends) — 1 small skein — craft store — $10
Steps
- Cut your rope strands to length so the finished hanger clears the plant pot with a little slack.
- Attach strands evenly over the dowel and tie the starting knot to secure them.
- Work repeating macramé knots in rows until the center section matches the pot width.
- Gather strands into the hanging point, then tighten and trim for even spacing.
- Trim ends, add tassels (optional), and make sure the pot sits level.
- Mount the Command hook to the wall, then hang the dowel so the planter centers above the daybed.
Total DIY cost: $57 — saves about $8 over buying.
The cost, layer by layer
| Layer | Item | Cost |
|---|---|---|
| 1 | Area rug | $80 |
| 2 | Plaid throw blanket | $35 |
| 3 | Throw pillow covers | $18 |
| 4 | String lights set | $15 |
| 5 | Framed botanical print | $80 |
| 6 | Hanging indoor plant | $45 |
| 7 | Macramé wall hanging planter (DIY retail equivalent) | $65 |
| Total | $338 | |
If you want it cheaper, swap the framed botanical print for a smaller set of unframed prints in matching frames—or buy one print now and add the second later. The string lights, plaid throw, and rug still do most of the heavy lifting visually.
What worked, what didn't (across the whole room)
The overall look works because the color story is consistent (sage, cream, terracotta), and the textures keep the built-in alcove from feeling stiff. Warm string lights plus layered textiles make the daybed feel lived-in, not staged. The only part that can go sideways is plant/lighting placement if the hanging pieces crowd the framed art.
What worked
- The area rug grounds the daybed nook and prevents the space from feeling too stark against white cabinetry.
- Plaid texture at the front edge makes the bed look styled even with simple bedding.
- Throw pillow covers add warm color repetition without changing anything built into the room.
- String lights soften vertical lines and create a cozy focal point above the pillows.
- Framed botanical prints echo the hanging plant theme for a cohesive nature palette.
- The hanging indoor plant adds height and movement where wall space is limited.
What didn't
- If string lights are draped too low, the glow competes with pillow shapes and looks cramped.
- A plant that’s too small reads as “random decor” instead of intentional wall-level styling.
- Too many competing patterns on pillows makes the alcove feel busy rather than calm.
- Framed art with a cool-toned frame can fight the warm wood finishes in the nook.
What we'd skip if we did it again
Skip a matching set approach. In this nook, the best results come from mixing one hero pattern (plaid) with simpler textures (pillow covers) and repeating color tones, not buying everything from the same brand.
Skip going too minimal with textiles. A daybed in an alcove looks finished only after you add at least one throw layer and pillow covers that show visible texture from bed height.
Skip hardwired or wall-fixed lighting. Use a plug-in string lights set instead, because renter-safe placement is the difference between a cozy focal point and a lighting headache at move-out.
Frequently asked
How long does this daybed nook refresh take?
Plan for about 2–4 hours for the swaps (rug, throws, pillow covers, and framing) and another 30 minutes to dress the string lights and hang the plant. If you DIY the macramé planter, add a few extra hours depending on knot familiarity. Most renters can finish everything in one afternoon plus a shorter styling session.
Will this work if my rental already has built-in shelves or cabinets?
Yes—the whole look is designed around a built-in backdrop. Rugs and textiles soften the cabinetry lines, while framed botanical art and a hanging plant add personality without needing wall paint. If your alcove proportions differ, keep the same principle: choose one strong pattern (the plaid) and repeat the color tones in pillows, art, and the plant pot.
What if my daybed nook is smaller or darker than in the photo?
For a smaller nook, use the same pieces but reduce the visual weight: pick a rug with less contrast and keep pillow patterns to one cover. For a darker room, go brighter with pillow covers (more cream) and ensure the string lights sit where you’ll see them from the bed. The botanical prints already bring airiness, so you don’t need extra large wall decor.
Where should I shop for the most renter-friendly swaps?
Shop textiles and decor first: rugs, throw blankets, pillow covers, and framed botanical prints are easy to swap and pack away. For lighting, pick a plug-in string lights set with a black cord that blends into corners. For the plant setup, look for a hanging indoor plant (real or high-quality faux) and a macramé-style hanger you can mount with Command hooks.
What’s the biggest mistake to avoid in a rental daybed alcove?
The biggest mistake is adding too many competing patterns at once—especially if your wall already has framed art and your lighting has glow. Stick to one hero pattern (plaid), then echo the same two colors across pillows, art, and plant styling. Keep the string lights tidy and high enough so they don’t crowd the framed prints.
More in Bedroom

Under $350: olive-and-terracotta daybed nook refresh
A renter-friendly daybed nook refresh that leans olive, terracotta, and warm lights. This look comes together with 7 swap-in layers (includ…
Under $700: warm neutral bedroom refresh with renter-safe swaps
A warm neutral bedroom makeover you can do without painting or drilling: pillows, a plug-in lamp, a DIY abstract print, a throw blanket, re…
Under $800: japandi wood-paneled bedroom refresh with 7 layers
A wood-paneled bedroom looks calmer and more expensive with 7 weekend-friendly changes. This refresh targets $800 total by swapping textile…