- Best for
- Making an island feel styled without remodeling
- Time
- 1–2 weekends
- Difficulty
- Easy swap + simple styling
- Cost
- About $305 total
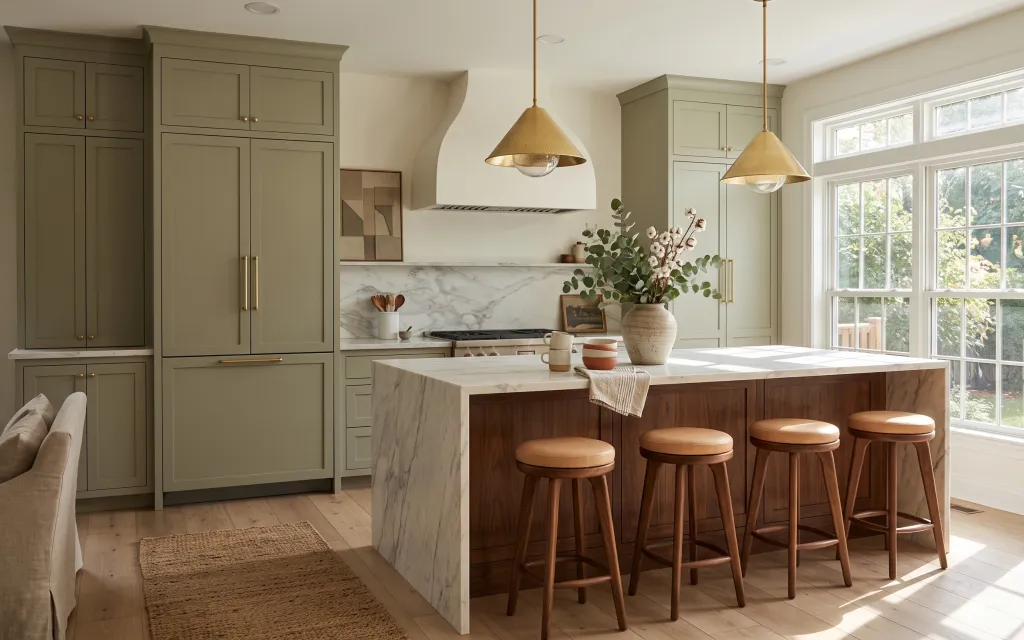
Why sage-and-cream kitchen island seating is the move-friendly look of 2026
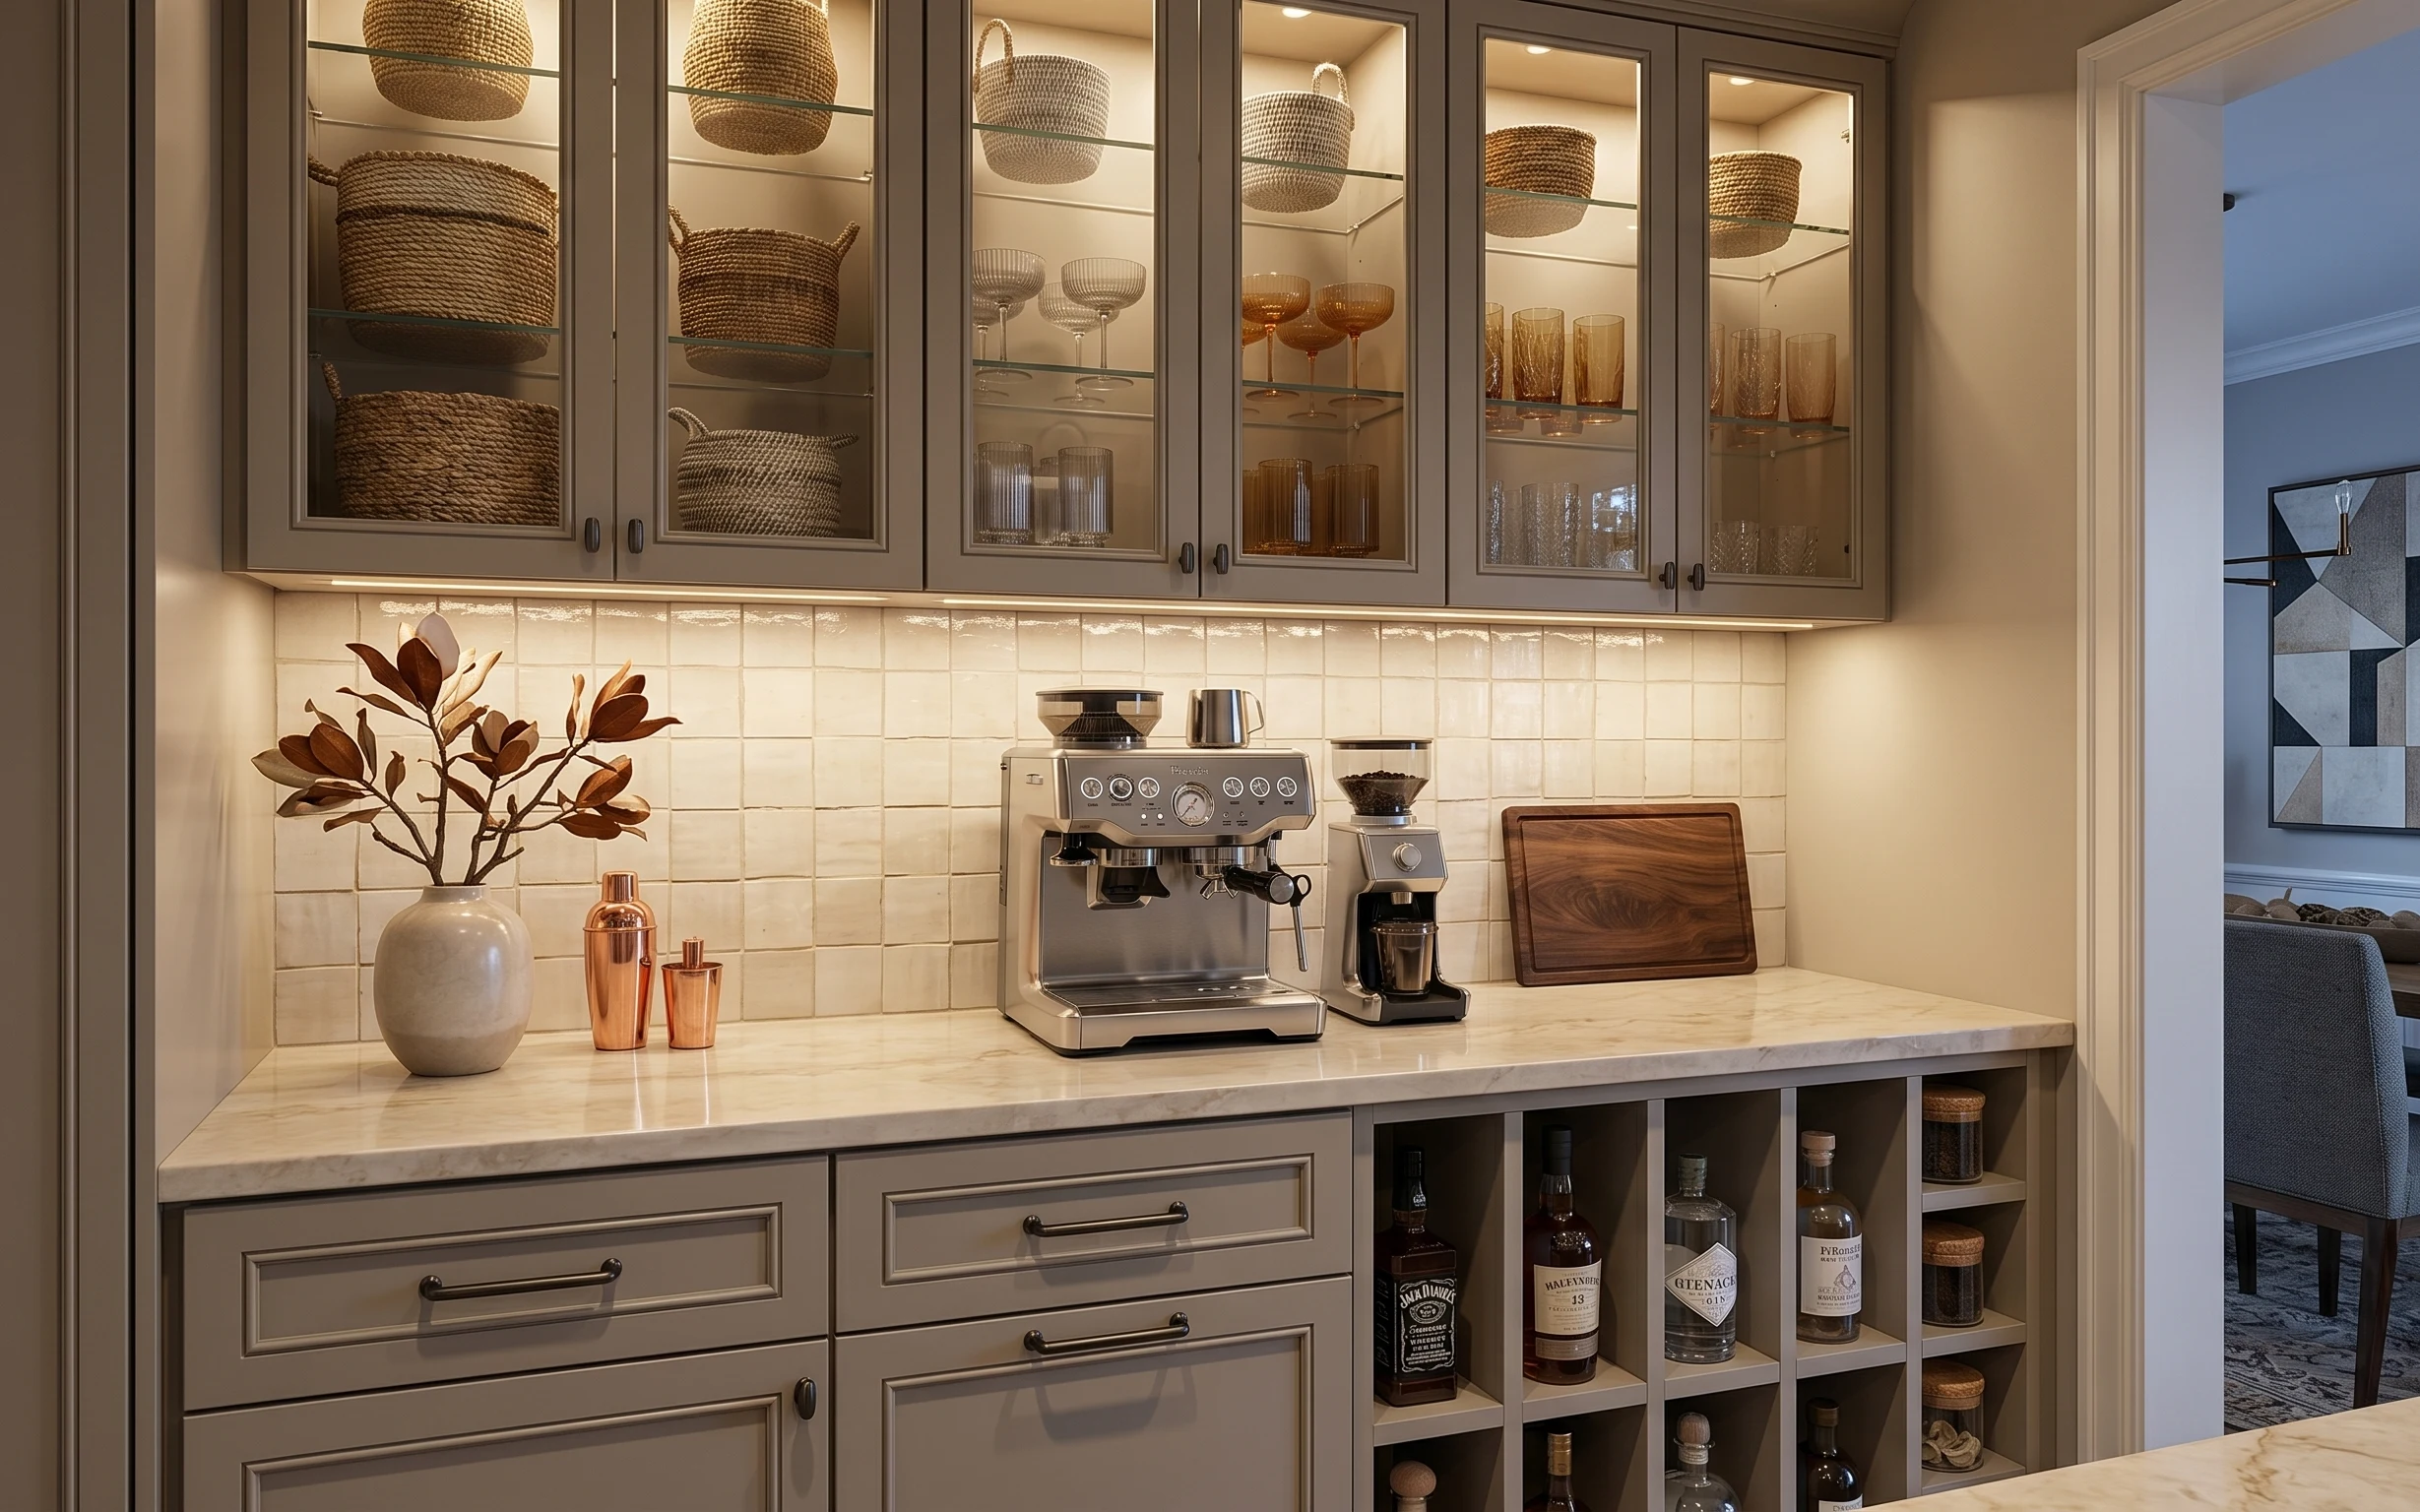
When a kitchen already has clean lines and sage-green storage, the fastest way to make it feel finished is to dress the “landing spots”: the floor, the island, and the seating. In this photo, the warm wood floor and marble counter read bright all day, while the jute rug adds texture underfoot and the linen towel softens the hard surfaces. The ceramic vase and eucalyptus give height without clutter. For renters, this approach avoids wall changes and focuses on things you can box up at the end of your lease.
I almost chased an obvious fix—like swapping more permanent elements—but then I reminded myself how often kitchens feel “stuck” when you can’t drill or paint. The moment I switched to washable textiles and removable styling, the whole island started to look intentional instead of decorative-by-accident. That’s the real win here: small items doing big visual work.
Layer 1 — jute area rug 5×7 ($80) Texture for the traffic zone

Start with the rug because it changes how the whole kitchen reads, not just one corner. This jute-style 5×7 is woven and slightly uneven, which mirrors the organic warmth of the wood stools and keeps the marble countertop from looking too hard. The biggest trade-off is that jute can snag if you have a heavy chair rolling around, but for island seating it’s low-stress. Compared with a flat, low-pile synthetic, jute’s texture is the move: it hides scuffs and makes all the neutral accessories look more layered.
Keep it practical with a rug pad
A pad helps the rug sit flat under bar-stool legs and reduces shifting every time someone scoots in.
Layer 2 — beige throw pillow cover ($30) Softer seating without changing furniture
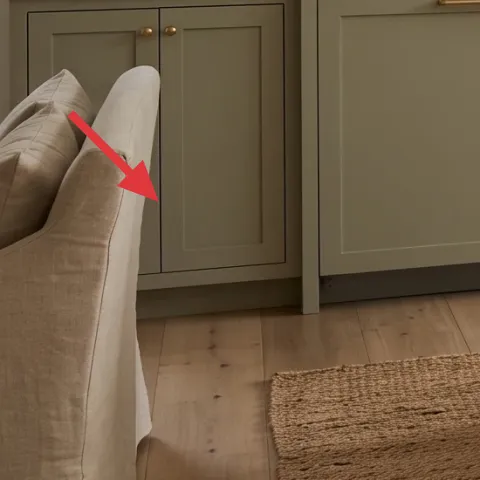
This beige throw pillow cover on the upholstered chair is the simplest way to pull the island neutrals into the seating area. Pick a washable cotton/linen blend that holds shape—then dye it slightly warmer or a touch deeper so it doesn’t fight the cool daylight. The trade-off is you’re not buying a whole new chair, but that’s the point: you get color control without replacing the furniture. Once the cover matches the vase-and-wood palette, the room starts to feel styled instead of “pretty pieces scattered around.”
Make it instead of buying it
DIY dyed pillow covers using a simple fabric dye so you can tune the beige to the exact warm depth of the ceramic and wood.
Materials
- Fabric dye (cotton-compatible) — 1 box — craft store — $10
- Cotton pillow covers (off-white) — 1 pair — discount home goods store — $12
Steps
- Pre-soak the cotton pillow covers in warm water so the dye saturates evenly.
- Mix the dye with hot water in a non-reactive bin according to the box directions.
- Submerge the covers fully and stir occasionally to prevent blotches.
- Let the covers process for the full time so the color reads solid when dry.
- Rinse in cool water until it runs clear, then wash separately to protect other items.
- Line-dry until fully dry, then fluff and re-stuff.
Total DIY cost: $22 — saves about $8 over buying.
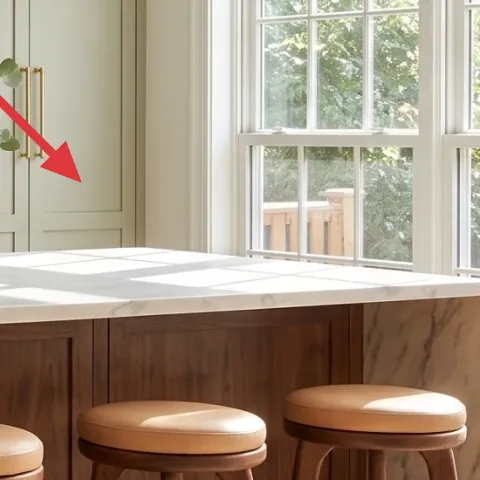
Layer 3 — folded linen towel/runner on island ($25) A small fabric moment that softens stone
A folded linen towel (or runner) on the island front is one of those details that looks “effortful” but only takes positioning. The texture reads like fabric on top of stone, which is exactly what this kitchen needs—everything else is cabinetry, countertop, and glass. Choose a cream or light oatmeal linen with visible weave and let one corner drape slightly. The trade-off is that it will need occasional straightening when you’re using the space, but that’s also why it stays realistic for renters. Compared with decorative placemats, a towel keeps the island airy instead of cluttered.
Don’t match perfectly—match the temperature
Aim for the same warm/cream undertone as the rug and ceramic, not the exact same shade.
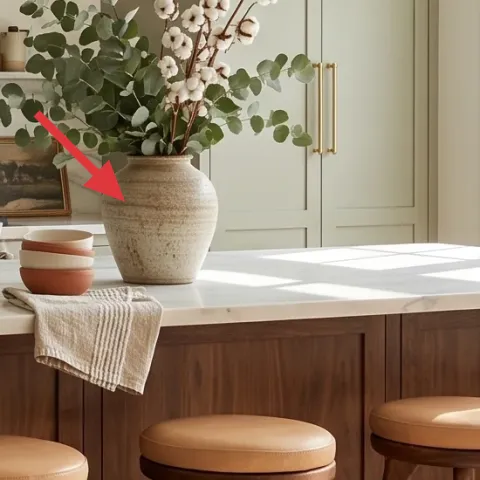
Layer 4 — large ceramic vase with stems ($30) Height that feels lived-in
A large ceramic vase with eucalyptus/cotton stems brings vertical shape to the island, which helps the space feel taller without adding more furniture. In the photo, the vase’s muted texture echoes the matte cabinetry finish and keeps the countertop from looking like a showroom surface. The trade-off is that floral stems need occasional refreshing, but you can swap stems seasonally while keeping the vase. If you went with smaller bud vases, the island would look busy; this scale works because it anchors the styling bowl-and-tray cluster around it.
Pick stems that read “soft,” not spiky
Dense eucalyptus and cottony stems fill volume and look good even when you don’t fuss with arrangement.
Layer 5 — framed art on kitchen shelf ($25) Warm wall texture you can take with you
That framed art on the kitchen shelf gives the backsplash area a visual pause, especially when the countertop is actively styled. Choose a print that includes browns, soft greens, or warm neutrals so it doesn’t clash with the sage cabinetry. The trade-off here is that shelf art takes a little curation—too busy and it competes with the vase—but with one mid-size frame, it adds rhythm. Compared with swapping out hardware, framed art is renter-safe and gives you an easy “personality dial” when you move.
Avoid fragile frames for move-out
If your lease move involves stairs or car loads, choose a simple frame you can wrap quickly.
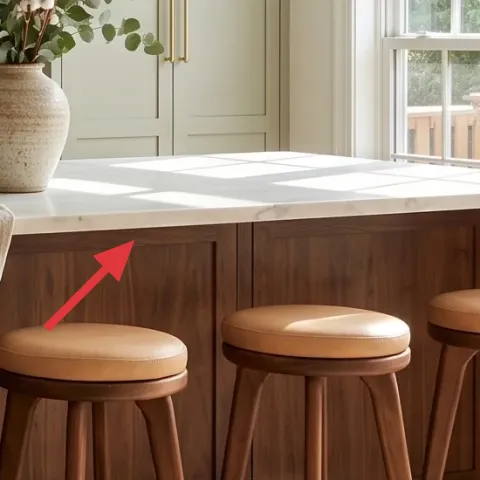
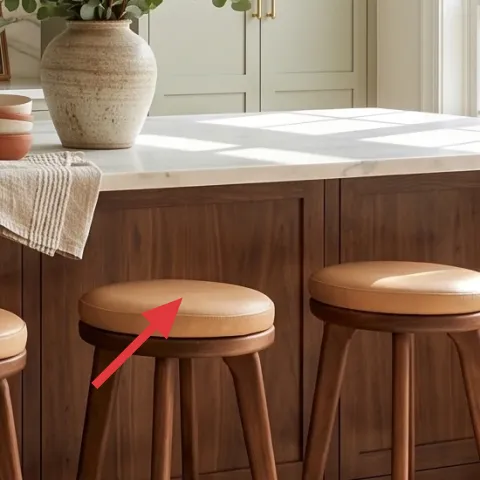
Layer 6 — wood bar stool seat (right side) ($100) Bring in more warmth where people land
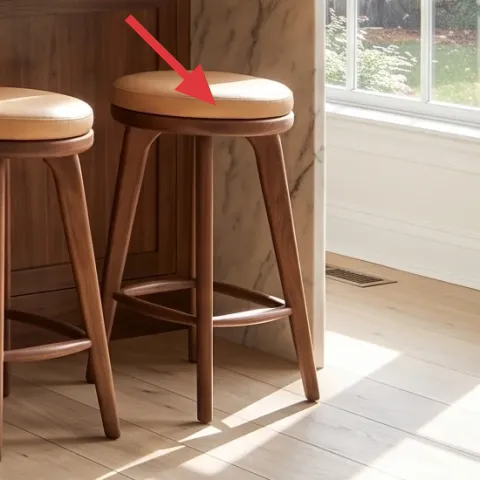
Bar stools are the functional centerpiece of kitchen island seating, so their finish matters more than you’d think. When the stools are a warm walnut tone, they tie the rug and ceramic together and reduce the contrast between the cool stone and the softer textiles. The trade-off is that higher-quality seats cost more than a quick cushion swap, but the “return” is better comfort and a longer-lasting look. Instead of adding a bunch of small decor items, investing in (or re-covering) stools gives you a cohesive base that everything else can reference.
Match the wood family, not the exact stain
Close reads best in warm neutrals—especially next to marble veining.
Layer 7 — decorative ceramic bowl on island ($15) One vessel for visual cohesion
A decorative ceramic bowl on the island is where the styling “clicks” because it creates one intentional container for smaller items. This particular bowl’s shape and warm tone play nicely with the vase and the linen towel, and it keeps the countertop from feeling empty on the non-window side. The trade-off is that bowls invite “stuff,” so the rule is to keep contents minimal—one stack or one single object—so the island still looks breathable. Compared with a tray full of mismatched pieces, a single bowl makes the palette read calm.
Limit the bowl to one role
Use it as a catchall for one category (spoons, napkins, or decorative stones), not everything at once.
The cost, layer by layer
| Layer | Item | Cost |
|---|---|---|
| 1 | Jute area rug 5×7 | $80 |
| 2 | Beige throw pillow cover (DIY equivalent) | $30 |
| 3 | Linen throw/runner for island | $25 |
| 4 | Decorative ceramic vase (with stems) | $30 |
| 5 | Framed art print on shelf | $25 |
| 6 | Wood bar stool seat (right) | $100 |
| 7 | Decorative ceramic bowl | $15 |
| Total | $305 | |
If you want a cheaper variant, swap the jute rug for a smaller neutral woven rug ($60) and choose a less expensive framed print ($18). Everything else can stay the same—ceramic vase, towel, and one bowl—because those details create the “styled” look without requiring a big budget.
What worked, what didn't (across the whole room)
The strongest wins came from adding texture at floor and seating level: the jute rug plus a dyed pillow cover makes the kitchen feel warmer immediately. The island looks more intentional when one tall vase and one single ceramic bowl share the same warm palette. The only place the look could fall apart is if the framed print is too dark or too busy compared with the eucalyptus tones.
What worked
- Jute texture softens the marble countertop and keeps the daylight from feeling sterile.
- A linen towel on the island adds fabric contrast without adding more bulky decor.
- A single large ceramic vase provides height so the island doesn’t feel flat.
- Framed art on the shelf balances the visual weight of the vase and countertop styling.
- Warm wood bar seating ties the palette together from floor to countertop.
- A decorative ceramic bowl prevents the island from looking “staged empty.”
What didn't
- Over-styling the bowl with too many small objects makes the island feel cluttered.
- If the pillow cover is dyed too cool-toned, it fights the warm wood and ceramic.
- A rug without a pad shifts under bar-stool traffic and looks crooked fast.
- If the framed art is too high-contrast, it competes with the eucalyptus texture.
What we'd skip if we did it again
Skip trying to “finish” the kitchen with more countertop clutter. A vase plus one bowl plus one fabric moment already gives you the layered look; adding extra small décor pieces usually turns the island into visual noise.
Skip replacing anything permanent when the lease rules make it risky. Instead, put the money into textiles and framed pieces that stay move-ready, because this kitchen already has the built-in bones: cabinetry color and daylight.
Skip a rug that’s too glossy or too low-texture. In bright kitchens, shine and flat surfaces highlight every footprint; a woven rug with texture hides marks and makes the whole palette feel warmer.
Frequently asked
How long does this kitchen island seating refresh take?
Plan on 1–2 weekends. The biggest time chunk is shopping and dyeing the pillow covers (rinse and dry time). Day-of decorating is quick: rug down first, then set the towel/runner, place the vase, and finish with the bowl and framed art. If you already own the rug and textiles, it can be a single afternoon.
Is this renter-friendly if my lease doesn’t allow any changes?
Yes. This look relies on swap-friendly items—rug, pillow cover, linen towel, a vase arrangement, a removable framed print, and small countertop ceramics. It avoids painting, drilling, wall anchors, and replacing any landlord fixtures. Everything can pack away and be returned to a neutral baseline at move-out.
What if my kitchen is smaller or my island is narrower?
Downsize by keeping the “roles” the same, not the exact pieces. Use a smaller rug size (or runner-style) and choose a slightly shorter vase with the same warm ceramic color. Keep the linen towel folded thinner and limit the ceramic bowl to one purpose, so you don’t crowd the working surface.
Where should I shop for the rug, pillow cover, and framed art?
For a woven rug and pillow covers, look at home goods chains and discount home stores for quick sizing options. For framed art, search for 16×20 prints and keep the frame simple so it’s easy to pack. The vase and bowl usually come from the same decor aisle—aim for warm neutrals with matte texture.
What’s the biggest mistake renters make with kitchen island styling?
The most common mistake is adding too many small items at once. A kitchen island needs breathing room because it’s already visually busy with surfaces and daylight. Stick to one tall element (vase), one grounding textile (linen), and one countertop container (bowl) so the look reads curated instead of crowded.
Can I skip the DIY pillow dye step?
Absolutely. If dyeing feels like too much, buy a ready-to-match cover in an oatmeal or warm beige tone. The key isn’t the exact color—it’s the warmth level compared to the wood stools and ceramic. Even a slightly deeper beige makes the whole seating zone look intentional.
More in Kitchen & Dining

Under $350: renter-friendly kitchen island seating refresh
A bright kitchen island seating update that swaps textiles and countertop styling for a warm, modern farmhouse look. This renter-friendly r…
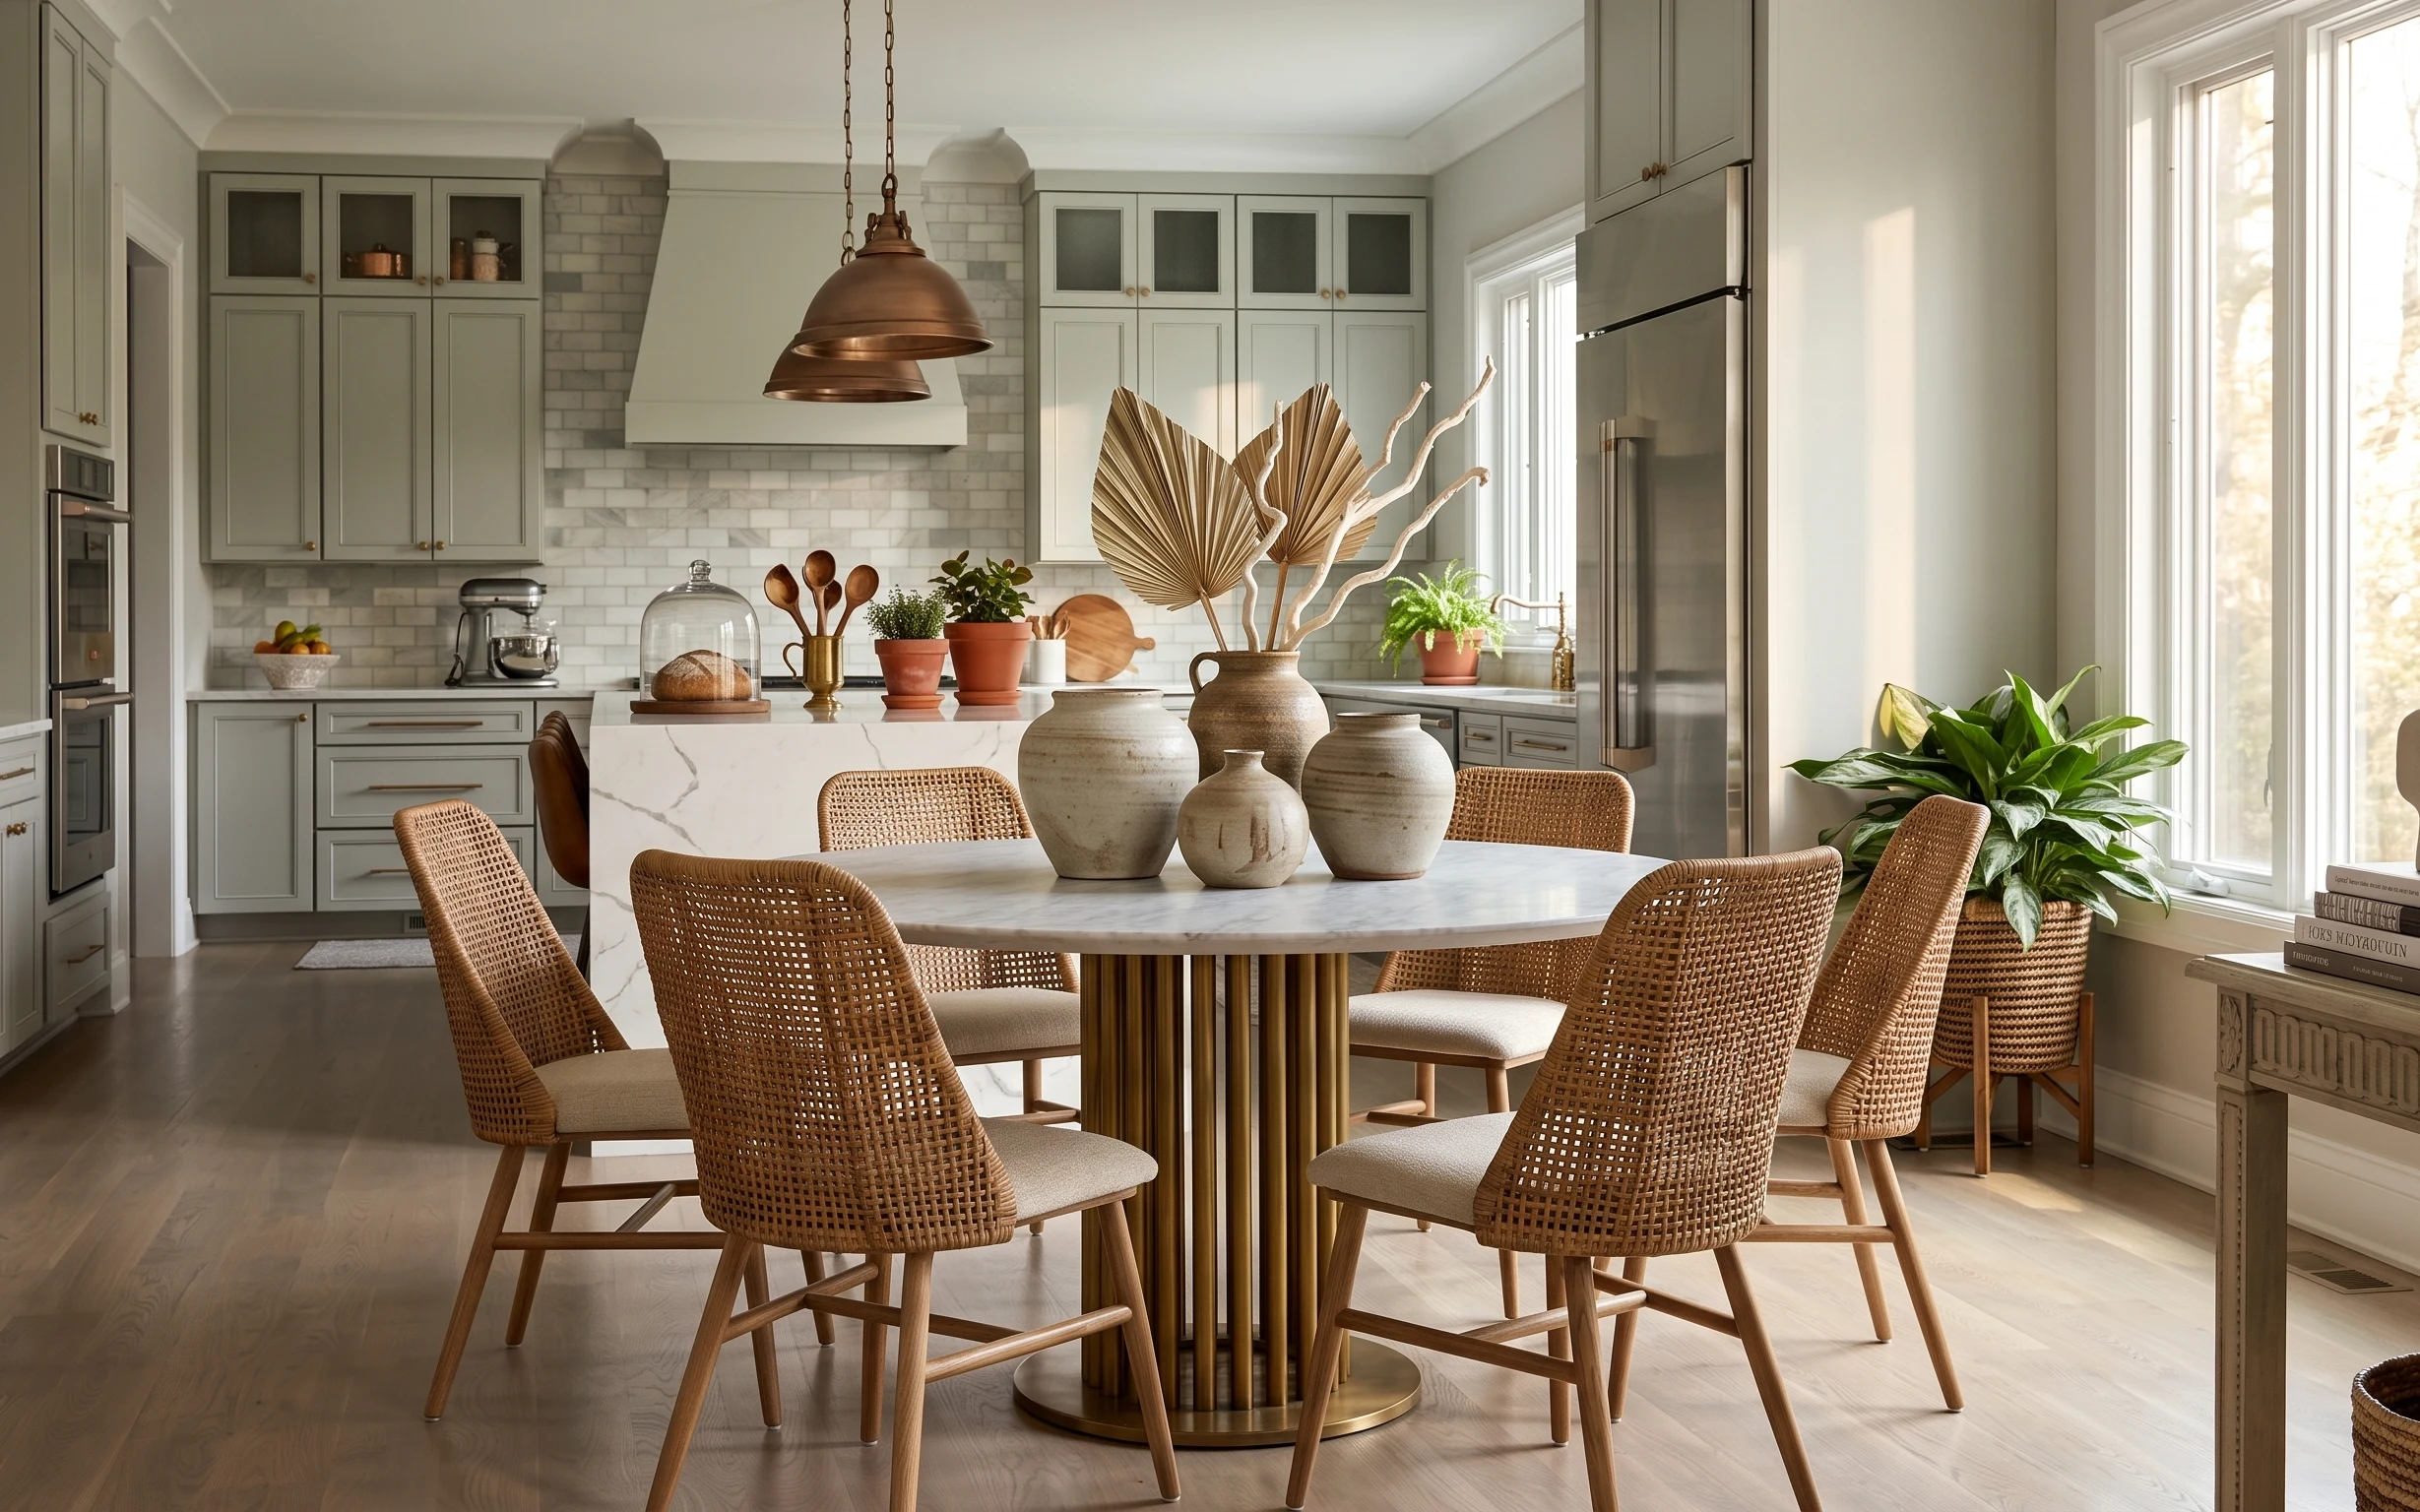
Under $700: warm rattan kitchen-dining nook refresh
A warm rattan-and-ceramic kitchen-dining nook look you can build in a rental—no painting or drilling required. This refresh uses 7 renter-s…
Under $600: 7 move-ready coffee bar corner refresh ideas
A coffee bar corner refresh for shared housing that packs into a few boxes. These 7 renter-friendly swaps use warm neutrals, copper accents…