- Square footage
- Small nook feel
- Cost
- Under $400
- Difficulty
- Easy, mostly swaps
- Renter-safe
- No drilling, packs up fast
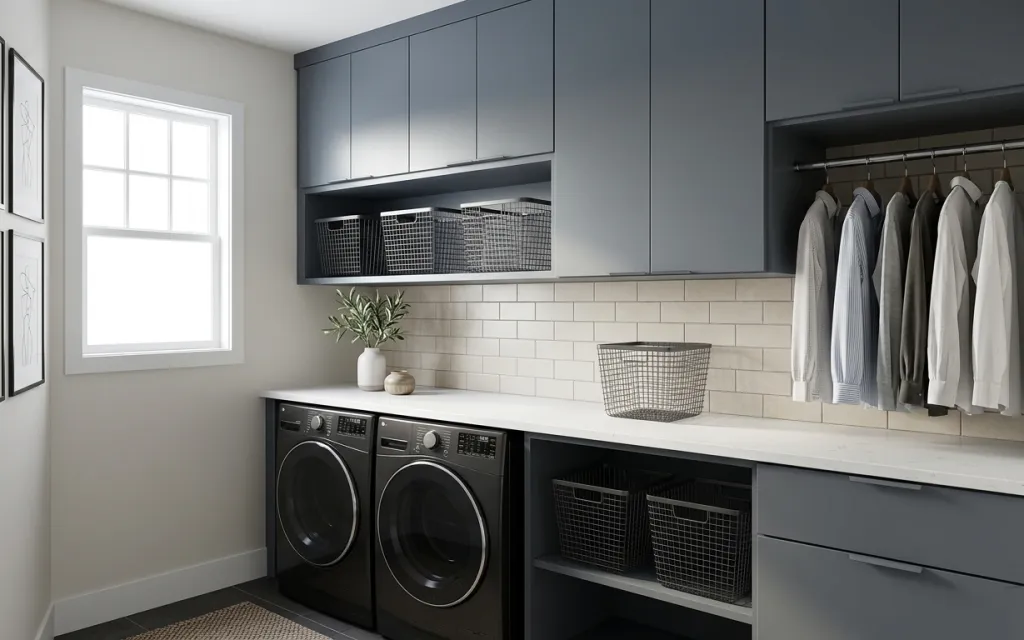
Why the gray-and-white laundry nook is the move-friendly setup of 2026
The first thing this space nails is its contrast: crisp white subway-tile, gray cabinetry, and a clean light countertop make everything feel organized even before adding decor. The second thing that matters is texture—wire baskets read airy, while the white ceramic vase and green stems soften the hard lines. I love that the framed line-art prints keep the look graphic, not cluttered. For shared housing, the best “make it feel finished” move is swapping small items you can pack (not repainting fixed cabinetry), and that’s exactly what this plan does.
I used to overthink laundry corners and tried to make them match every other room by adding too many matching pieces. In one apartment, that meant I had decorative jars everywhere and the nook looked busy instead of calm. This time around, the goal is fewer, repeatable materials: wire baskets + a single ceramic plant vessel + one graphic framed print. That combo keeps the shelves looking intentional while still being easy to take down when the lease ends.
Layer 1 — small decorative ceramic bowl ($15) neatens the shelf clutter
That small decorative ceramic bowl on the countertop gives the laundry nook a “staged” moment without adding bulk. In a tight space, a low-profile object is an easier win than a bigger plant or another basket, because it doesn’t compete with the washer/dryer footprint. Go for a white or light-gray finish so it harmonizes with the subway-tile backsplash and the gray cabinetry. The trade-off is that it won’t hide much storage by itself, so it works best paired with the baskets in later layers.
Layer it low, not tall
Keeping the bowl short helps the wall tile and countertop stay visually continuous.
Layer 2 — white ceramic vase with green stems ($30) softens the hard lines
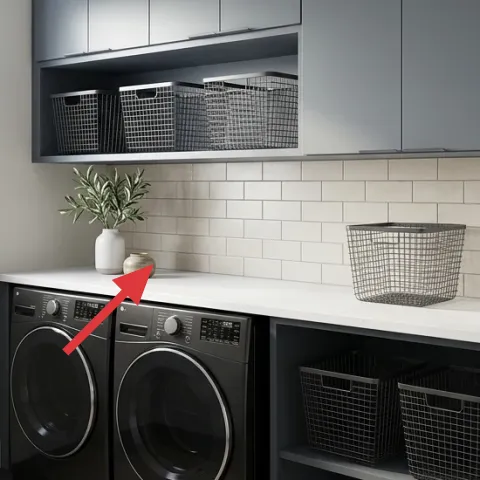
The white ceramic vase with green stems adds organic shape right where the room would otherwise feel purely architectural. Its matte, ceramic-like texture counters the glossy-white tile and makes the counter feel less like a work zone. Choose stems that stay slim and upright; wide greenery can crowd the basket lines and make the nook look smaller. The downside: if the stems get messy, the vase becomes a quick “reset” item, so plan to dust it often. That’s still easier than trying to change fixed surfaces.
Keep the color story simple
White + green reads fresh against gray cabinetry and looks clean in photos and in person.
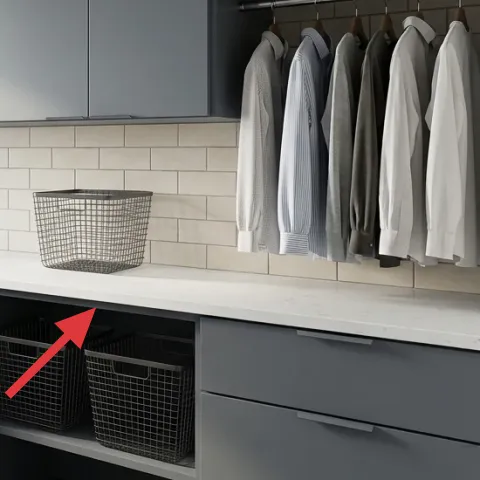
Layer 3 — wire storage basket on left lower shelf ($35) organizes the lower chaos
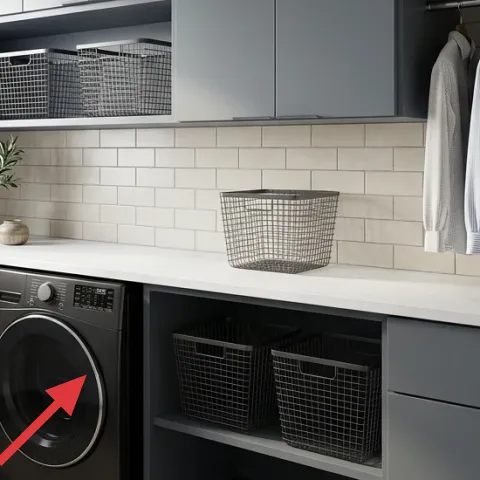
The wire storage basket on the left lower shelf turns “stuff that lives down there” into something visually controlled. Because wire is open and lightweight-looking, it doesn’t weigh down the gray cabinetry the way opaque bins can. Place items that you rotate through often—extra detergent, dryer sheets, or small laundry accessories—so you aren’t constantly opening drawers. The trade-off is that wire won’t fully conceal contents, so for a calmer look, use matching containers inside the basket or keep only a couple items in view.
Repeat one basket style everywhere
Matching the wire mesh texture across shelves makes the whole nook feel curated.
Layer 4 — wire storage basket on right lower shelf ($35) balances both sides
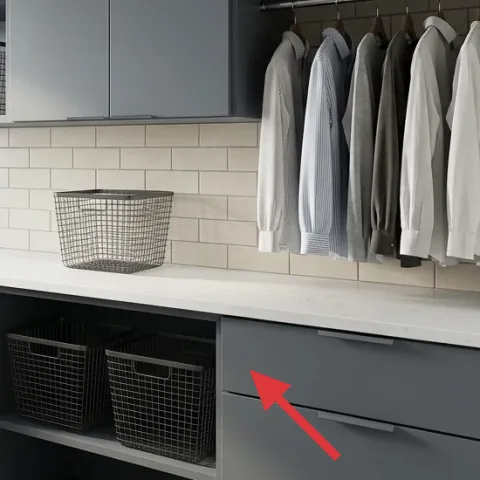
Adding the matching wire basket to the right lower shelf creates a symmetrical rhythm in a space that otherwise relies on built-in lines. That matters in small rentals: when the room has fewer places to “decorate,” visual balance does a lot of work. Keep the basket scale similar to the left one so the countertop doesn’t look like it’s floating over an unfinished storage system. The downside is you’ll want a consistent fill level—if one basket is empty and the other is packed, the mismatch becomes noticeable.
Use it for frequent-grab items
Baskets work best when they reduce drawer-digging instead of becoming another catch-all.
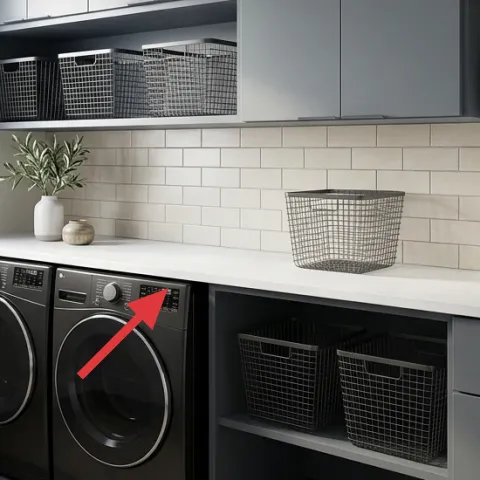
Layer 5 — large wire storage basket on countertop ($35) keeps the counter usable
The large wire storage basket on the countertop is the practical anchor of the look. Its open sides let you store folded items without making the counter feel “boxed in,” and the wire finish ties directly to the lower baskets. If the goal is a move-friendly setup, the basket is perfect because it’s light enough to pack into a rental van and easy to transfer to the next home. The trade-off is that a large basket can interrupt the clean countertop line if it’s crammed, so aim for a tidy stack or one category of items.
Don’t overfill the wire mesh
When baskets bulge, the nook reads messy—wire shows volume fast.
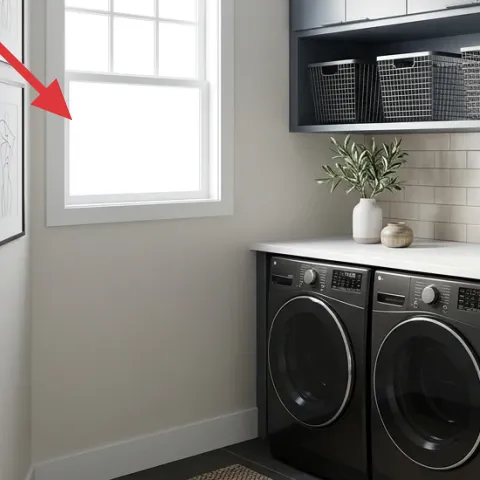
Layer 6 — framed line-art print on the left wall (small frame) ($80) adds a calm graphic note
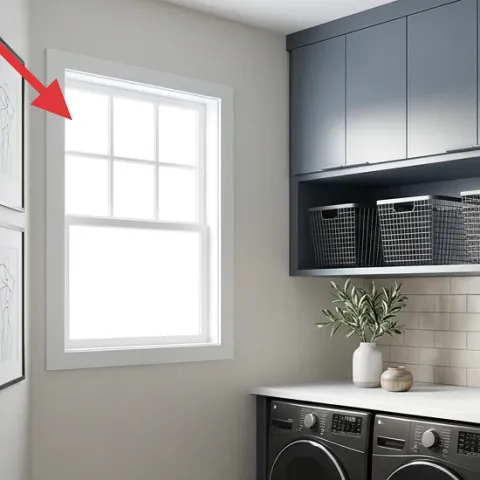
The small framed line-art print keeps the left wall feeling intentional instead of bare, especially near the window. Line art is a smart choice in a laundry nook because it’s visually light and doesn’t compete with the tile grid and the hardware lines. Stick to a palette that matches the room—white paper, gray marks, and a dark frame echo the existing tones. The alternative is a colorful print, but in a small space that can start to look loud fast. A restrained print keeps the nook feeling cohesive even when laundry is stacked nearby.
Match the frame finish
Using the same frame color maintains the modern look and avoids extra visual clutter.
Layer 7 — framed line-art print on the left wall (large frame) ($80) makes the wall feel “done”
Make it instead of buying it
This is the “large” left-wall framed print—replace the art inside the frame with a hand-painted abstract on cardstock so the wall stays modern but costs less.
Materials
- Cardstock (one sheet for the cut) — A4 or Letter — craft store — $10
- Acrylic paint or paint markers (gray and white set) — small set — craft store — $8
- Small foam brush or disposable brush — pack of 2–4 — craft store — $6
- Painter’s tape — 1 roll — craft store — $6
Steps
- Cut the cardstock to fit the frame opening and dry-fit it.
- Use painter’s tape to block in 2–3 abstract shapes in light gray.
- Paint or marker the shapes, then let dry completely.
- Add one thin dark-gray line detail for contrast, then let dry.
- Remove tape slowly, straighten edges if needed, and place the art into the frame.
Total DIY cost: $30 — saves about $50 over buying.
DIYing the large framed print is the easiest way to add personality without making the nook feel temporary. Line-art abstracts work especially well here because the room already has strong structure—tile, cabinetry seams, and the window frame—so the artwork just needs to echo that graphic calm. Choose a limited palette (gray-on-white with one darker line), and keep the forms simple so the laundry nook still reads clean. The trade-off is speed: DIY art takes an afternoon and small decisions, but it packs up instantly and looks intentional in the finished space.
Measure once, cut once
Cardstock sizing is the only “precision” part—small-fit artwork looks sharp in a frame.
The cost, layer by layer
| Layer | Item | Cost |
|---|---|---|
| 1 | Small decorative ceramic bowl | $15 |
| 2 | White ceramic vase with green stems | $30 |
| 3 | Wire storage basket (left lower shelf) | $35 |
| 4 | Wire storage basket (right lower shelf) | $35 |
| 5 | Large wire storage basket (countertop) | $35 |
| 6 | Framed line-art print (small frame) | $80 |
| 7 | Framed line-art print (large frame; DIY art) | $80 |
| Total | $310 | |
If the full baskets-and-art plan feels like too much at once, start with the lowest-cost “reset” items: the small ceramic bowl, the vase, and one framed print. Swapping one wall print and one basket first makes the nook look styled while you decide on the rest.
What worked, what didn't (across the whole room)
The strongest improvement is how the wire baskets repeat the same visual texture from lower shelves up to the countertop. That repetition makes the cabinetry lines and tile feel intentional instead of purely functional. The plant vase also helps the room read softer, not sterile. The only part that can go wrong is overfilling wire—when the basket volumes start to bulge, the nook looks cluttered fast.
What worked
- Wire baskets keep storage visible but airy, matching the modern cabinetry and white tile grid.
- The white ceramic vase adds organic shape, balancing the hard countertop and subway backsplash.
- Matching basket finishes creates a visual rhythm that reads “designed,” even in a rental.
- The small ceramic bowl adds a low, tidy moment without stealing countertop space.
- Framed line art keeps the left wall graphic and lightweight instead of busy.
- DIY art inside an existing frame avoids permanent changes and still feels custom.
What didn't
- Overfilling the countertop basket makes the wire look bulky and instantly less polished.
- If the two lower baskets aren’t the same style or fill level, symmetry breaks.
- Too many decorative ceramics at once would fight with the tile and frame lines.
- A high-contrast, colorful print would feel louder next to the gray cabinetry.
What we'd skip if we did it again
Skip adding extra “decor objects” that don’t serve storage. In a laundry nook, small items multiply quickly, and the wire baskets already provide the structure—ceramics should stay limited and low-profile.
Skip buying mismatched basket styles “just because they’re cute.” The modern look depends on repeating one texture, so it’s better to buy one basket line and keep the finishes consistent across shelves.
Skip colorful wall art. With gray cabinetry, white tile, and a bright window, a limited gray-on-white approach keeps the wall calm and makes laundry mess feel less visually loud.
Frequently asked
How long does this laundry nook refresh take?
Most of the work is swaps: setting up baskets, placing the vase and ceramic bowl, and swapping artwork inside the existing frame. In a shared-housing schedule, it usually lands around 2–4 hours total. The DIY framed art is the only part that takes real drying time, and that can be done while other swaps happen.
Is this renter-safe in a shared apartment?
Yes—the plan is built around movable items you can pack: tabletop ceramics, wire baskets, and framed art. It avoids painting, drilling, and permanent installs, which is the big rule for shared housing. The only slightly “careful” step is handling the framed art so the new cardstock fits cleanly.
What if my laundry nook is smaller than this photo?
Scale down the basket fill first. The visual trick is keeping the basket volume controlled so the wire doesn’t look bulgy. Use one basket for the counter and one pair for lower shelving, and limit the ceramic accessories to a single small bowl plus the vase.
What if my laundry nook has more wall space?
Add a second framed piece only if it matches the same line-art style and palette. Otherwise, keep the wall simple—laundry corners already have a lot of texture from tile and cabinetry. The calm look comes from repetition, not from adding more different patterns.
Where should I shop for the baskets and vase?
Look for wire storage baskets and white ceramic vases at home organization retailers, discount home stores, and craft stores. For the frame art, search for line-art prints in gray-on-white palettes. If you’re matching the existing frame, DIYing the art inside keeps cost down.
What’s the biggest mistake people make with laundry nook decor?
Overfilling. Wire baskets show volume fast, and too many decorative objects can make the nook look busy when laundry is piled nearby. Keep one decorative moment per surface, repeat the basket style, and prioritize easy-to-reach storage.
More in Small Spaces

Under $400: 7 renter-friendly laundry nook upgrades
A modern laundry nook already has great bones. This $400-style plan adds seven move-friendly swaps—baskets, a plant vase, small ceramics, a…
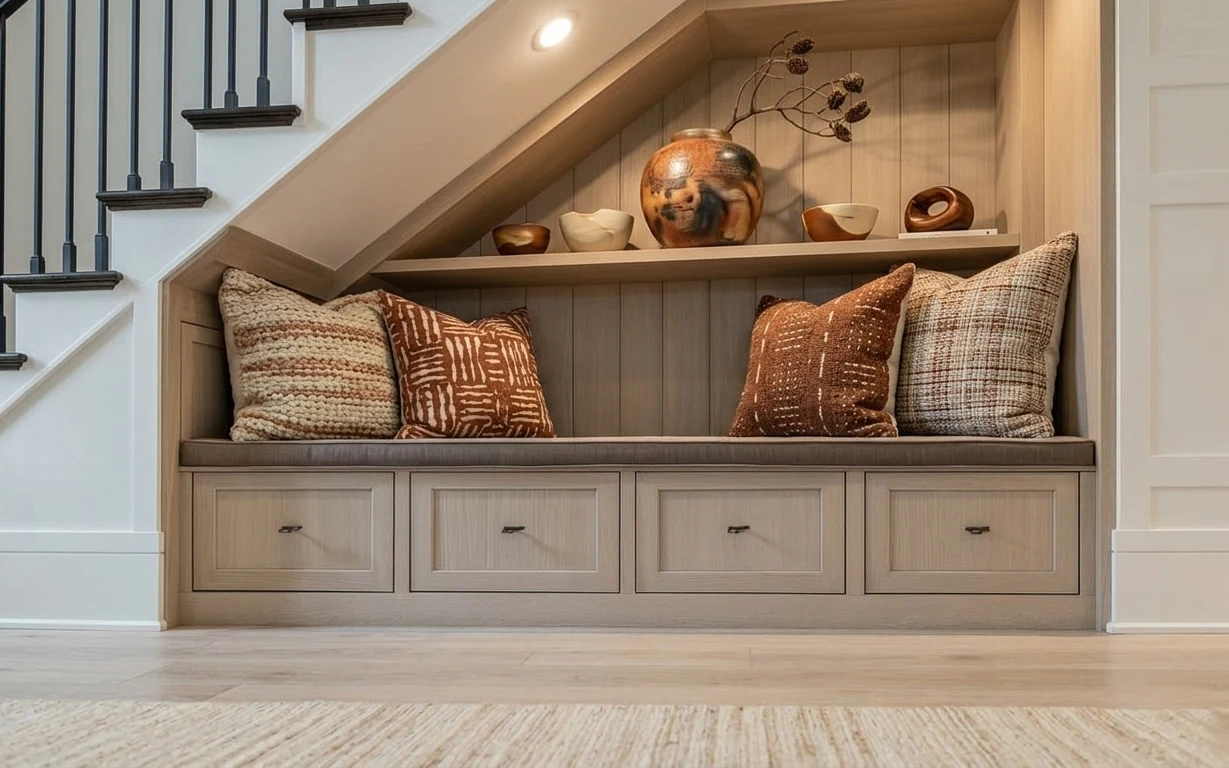
Under $300: boho daybed nook swaps for a renter-friendly refresh
A boho daybed nook already gives you the built-in base—now layer it with a warm rug, patterned throw pillows, and a styled copper vase arra…
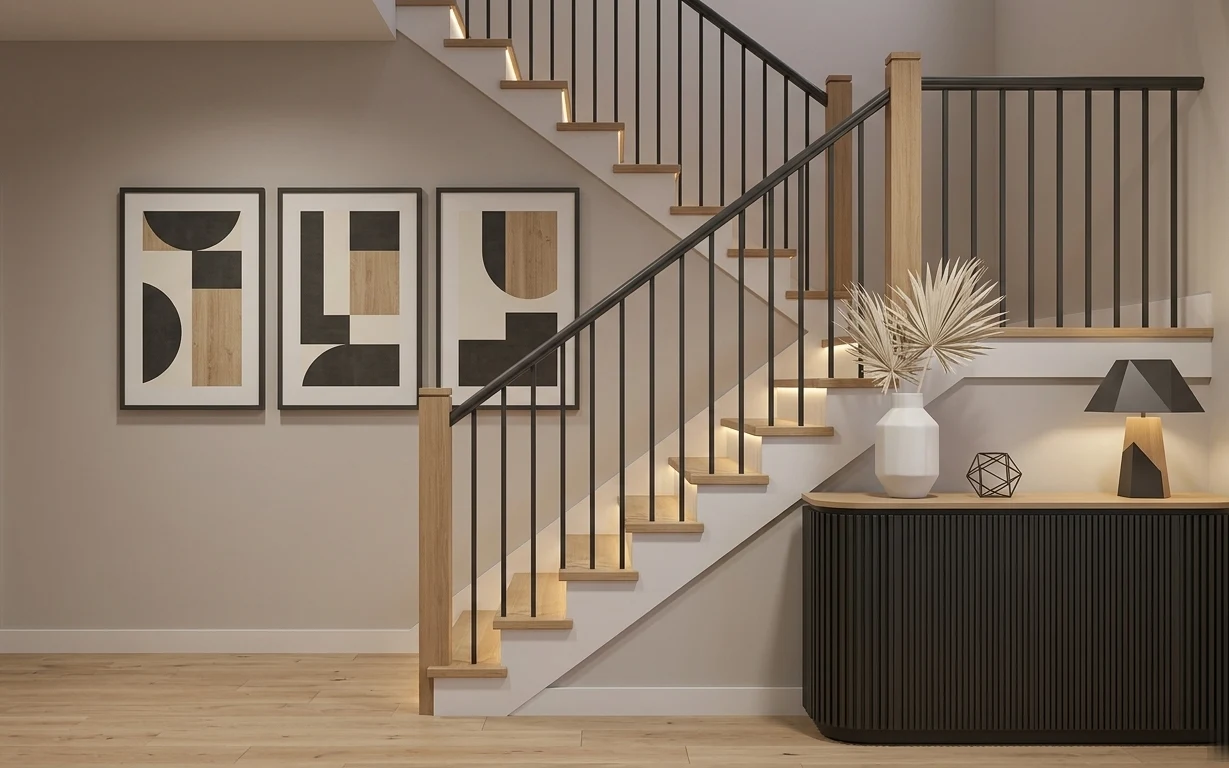
Under $600: modern entryway landing refresh with 7 move-ready swaps
A modern entryway landing refresh on a shared-housing budget: 7 move-ready swaps centered on a console cabinet, warm lamp glow, and framed …