- Best for
- Evening coziness + move-ready decor
- Cost
- About $400 total
- Difficulty
- Easy (mostly textiles + hang-ons)
- Time
- 1 weekend afternoon
Why warm terracotta accents is the outdoor patio lounge of 2026
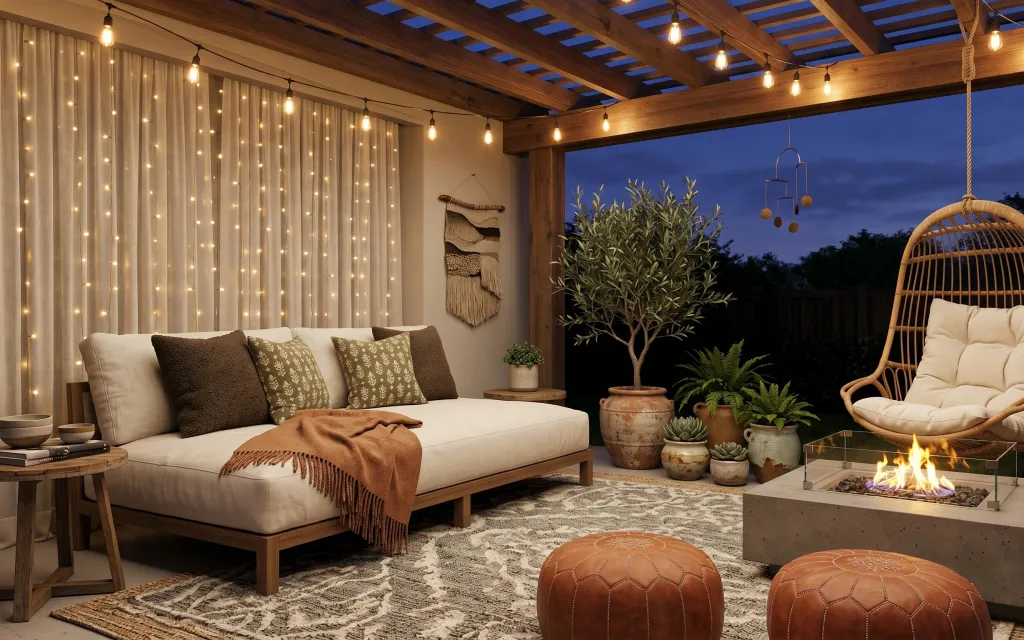
The fastest way to get that boho-outdoor feeling (without touching the structure) is to lean into textures you can take with you: the patterned area rug anchors everything on the ground, while the throw blanket and decorative throw pillows add depth in warm browns. The cream curtains and the warm string-light glow do the heavy lighting work, so the space reads cozy after dark. A woven macramé wall hanging brings height against the cream wall without needing permanent hardware. This mix is achievable for shared housing because each piece dismantles or packs flat into a few boxes.
My mistake the first time I tried this look was going too “matching set” on the pillows—same tone, same texture, and it ended up flat. The fix was adding contrast: a slightly warmer throw blanket and one patterned pillow so the bed zone feels styled, not stored. I also learned to treat string lights like decor, not wiring—clip, plug, and route the cord so nothing has to be mounted. That’s how the lounge stays easy to move when the next lease starts.
Layer 1 — area rug ($200) pattern underfoot that hides wear
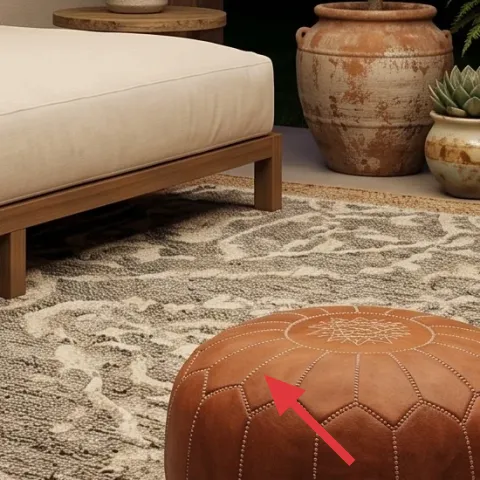
Start with the large area rug in the same neutral, woven-to-the-eye patterning. In the photo, it sits under the daybed and keeps the whole seating zone from floating—especially when the floor is wood and everything else is airy. Choosing a rug in a similar warm cream-and-brown palette also makes the terracotta planters read intentional instead of random. The trade-off: a textured pattern means the rug is doing more than one job—comfort and visual grounding—so it’s worth spending first. Anything added later (string lights, textiles) will look “designed” because the rug already sets the frame.
Pick a rug with contrast
Look for light fields plus darker lines so you can live with it through everyday scuffs and quick cleaning.
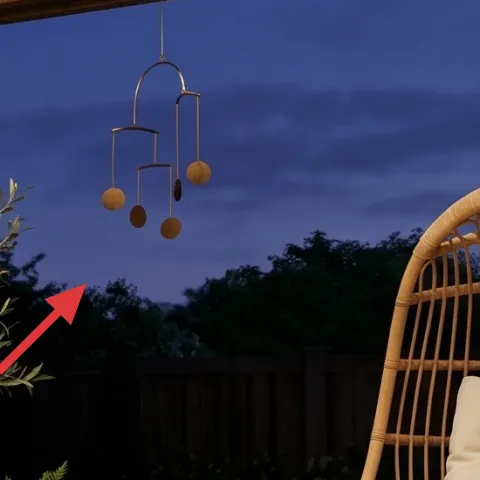
Layer 2 — string lights along the ceiling beams ($15) plug-in warmth that makes evenings work
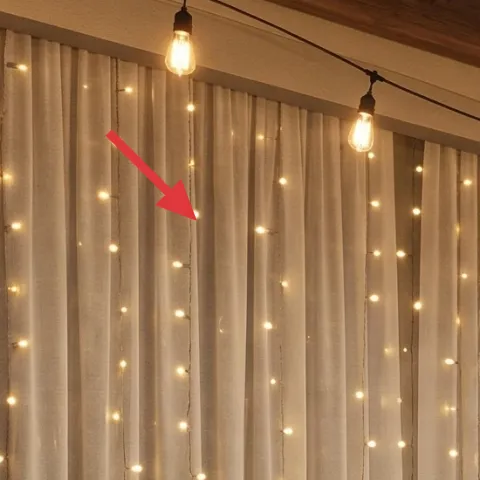
The string lights are what turn this patio lounge from daytime-casual into evening-ready. In the hero, the warm bulbs span the ceiling beams and create a soft halo effect around the seating—without harsh overhead glare. A single set of plug-in string lights also stays truly move-friendly: the lights roll up, and the only “hardware” needed is clip-on or hook-on. The trade-off is that perfect spacing takes a little patience, but the look is forgiving because the bulbs glow instead of showing installation lines. This is the easiest way to add atmosphere in a shared place where everything has to come with you.
Keep the plug location in mind
Route the cord so the plug lands near an outlet you’ll still use after you move furniture around.
Layer 3 — woven macramé wall hanging ($45) vertical texture for height
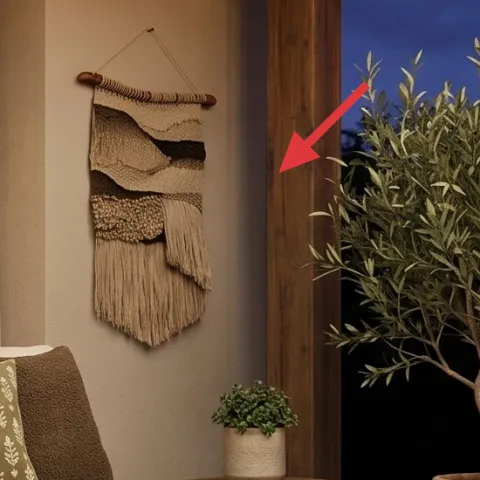
A woven macramé wall hanging adds instant vertical movement on the cream wall—exactly where the patio needs something that isn’t another plant pot or cushion. In the photo, it sits above the daybed zone and gives the whole composition a “built-in” feeling, even though it’s lightweight. The trade-off: macramé looks best when it’s centered and allowed to hang freely, so plan placement before committing to the final height. This layer also has the bonus of being very moveable: it rolls or folds for transport, and it can be re-hung in the next shared home.
Make it instead of buying it
A simple macramé wall hanging uses cord plus a small wooden dowel so the look matches the photo without drilling into the wall.
Materials
- Macramé cord — ~60–80 ft total — craft store — $10
- Wooden dowel — 1 piece, ~12–16 in — craft store — $8
- Command hook set — 1 multi-pack — big box store — $8
- Natural twine (for tying top loop + finishing) — craft store — $6
- Small fringe scissors/utility scissors (if needed) — household — $4
Steps
- Cut cords to length and sort into equal bundles so the hanging ends match.
- Attach cords to the dowel using a secure knot at the top to form an even fringe base.
- Create 1–2 repeating knot patterns down the panel so the center stays symmetrical.
- Finish the bottom with trimmed ends and a quick tie-off so strands don’t slip.
- Make a hanging loop at the top back side and test the drop length against the space.
- Hang using foam-core friendly Command hook placement on plaster-friendly areas.
Total DIY cost: $36 — saves about $9 over buying.
Layer 4 — large terracotta planter pot ($15) warm clay that reads intentional
A terracotta planter pot is the small-but-constant color cue that ties the lounge to the warm string lights and neutral rug. In the hero, the cluster includes large clay pieces that sit on the ground and visually “repeat” the terracotta tones in the throw blanket. Choosing one medium or large pot is enough to create that rhythm—no need to buy an entire matching set of containers. The trade-off is that terracotta looks best when it has texture or patina, so smooth new pots can feel less lived-in. A cheaper pot can still work if it’s the same warm earth family. Keep it light enough to relocate when furniture changes.
Group pots in odd numbers
A cluster of three reads fuller than a straight line and looks more like styling than storage.
Layer 5 — throw blanket draped over daybed ($30) color depth in one fold
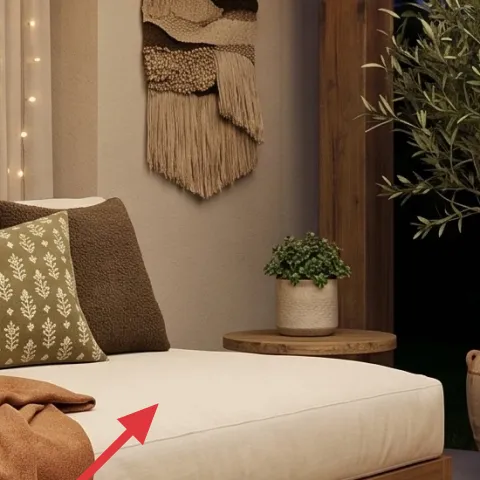
The throw blanket gives the daybed zone a casual layered look, especially when it’s draped rather than tucked flat. In the photo, it falls in warm brown tones over the front edge, which makes the daybed feel grounded under the string-light glow. A throw blanket also wins for shared housing because it rolls up, slides into a tote, and doesn’t require any removal from fixed furniture. The trade-off is that you have to style the drape each time you rearrange pillows, but it’s a two-minute adjustment. This is a high-impact layer because it affects both color and perceived softness across the entire seating area.
Let the drape hit the front edge
When the blanket drops past the seat line, it reads intentional and hides how the cushion is actually constructed.
Layer 6 — decorative throw pillows ($24) pattern contrast without changing the furniture
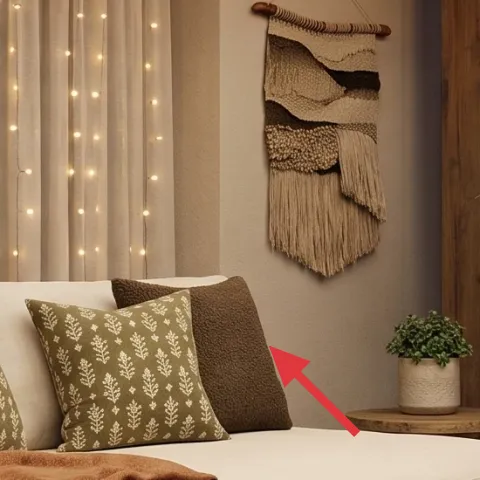
Decorative throw pillows are the easiest way to introduce pattern without altering the daybed itself. The hero shows multiple pillow covers in a mix of dark brown and lighter patterned fabric, which helps the rug and terracotta tones feel like one story. Buying two coordinated covers is often cheaper than replacing the whole textile setup and still gives that layered look. The trade-off: too many patterns can compete, so choose one dominant pattern and one supporting texture. This layer is also perfect for impermanence—covers can be packed and reused in the next shared bedroom or living room zone. It’s basically “decor that travels.”
Watch for sun fading on outdoor fabrics
Pick fade-resistant covers if this patio gets direct sun, or plan on rotating them seasonally.
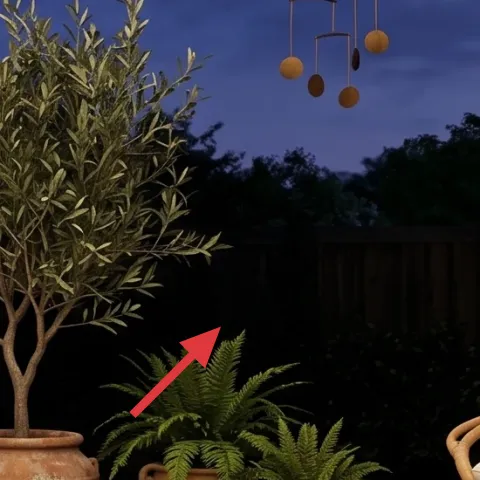
Layer 7 — large potted olive tree ($30) greenery volume that fills the corners
A large potted olive tree (or similar evergreen-style plant) creates the “still life” effect on the right side and balances the warm neutrals with organic greens. In the photo, it sits behind the clay pots and reads tall enough to frame the hanging chair and the fire pit area. A single larger plant can do more than several smaller ones because height changes how the lounge looks from the edges. The trade-off: larger plants can be heavier, so choose one that can still be moved by one person when needed. Even if the pot has to travel separately, the plant brings immediate life and makes the whole outdoor setup feel cared for rather than staged.
Anchor greenery with a pot cluster
Use the plant as the tall vertical, then repeat smaller terracotta planters at the base for cohesion.
The cost, layer by layer
| Layer | Item | Cost |
|---|---|---|
| 1 | Area rug 8×10 | $200 |
| 2 | String lights (set) | $15 |
| 3 | Woven macramé wall hanging | $45 |
| 4 | Planter / pot (medium) | $15 |
| 5 | Throw blanket | $30 |
| 6 | Throw pillow cover (pair) | $24 |
| 7 | Indoor plant (4–6 ft) | $30 |
| Total | $359 | |
If a rug in the 8×10 size is too much, go one step smaller (5×7) in the same warm neutral pattern and keep the daybed legs mostly on the rug. The look stays grounded, but the patio feels less “defined” around the seating zone.
What worked, what didn't (across the whole room)
This patio lounge refresh works because the upgrades are layered by function: the rug grounds the zone, textiles add softness, and string lights handle the mood after dark. The terracotta planters and the olive tree also add color and scale without needing any permanent changes. The one thing that can backfire is overbuying matching pieces—too much sameness flattens the texture story.
What worked
- The rug’s warm pattern makes the outdoor seating look intentional instead of temporary.
- String lights provide warm evening light without relying on fixed outdoor fixtures.
- The macramé wall hanging adds height so the daybed doesn’t feel blocked by plants.
- Terracotta pots repeat the blanket color, which makes the whole palette read cohesive.
- Pillow covers are the fastest “style dial,” especially when furniture gets rearranged.
- One tall plant fills corners and balances the hanging chair’s circular shape.
What didn't
- If the string lights are too sparse, the patio reads dim instead of festive.
- Smooth, brand-new terracotta pots can look a little flat against the rug’s texture.
- Too many pillow patterns at once makes the palette feel busy rather than curated.
- Large plants placed too close to the fire pit area can crowd the safest walking path.
- A blanket draped too short leaves the daybed edge looking unfinished.
What we'd skip if we did it again
Skip a matching “set” approach—matching pillow covers, matching planters, and matching textures in the same finish. It looks staged for about a week, then starts feeling repetitive. The better move is repeating one color family (terracotta and warm brown) while changing texture and pattern just enough to create depth.
Skip installing new outdoor lighting fixtures or hardwiring anything to the ceiling. The patio already has a structure-friendly look when the string lights are placed across beams with plug-in power. Permanent upgrades also don’t travel well in shared housing, and removals can get messy fast.
Skip very large decor items that require two people and a truck when you move. A tall plant, a rug, and string lights are manageable—just plan packing. The accessories that travel best are the ones that fold, roll, or come apart quickly: textile layers and lightweight wall decor.
Frequently asked
How long does this patio refresh take?
Most of the time goes into arranging the rug and styling the textiles—think about 2 to 3 hours. The string lights and the macramé hanging are quick once placement is chosen, and the rest is building plant clusters. If packing is the goal, the whole setup can be done in one afternoon because you’re not waiting on drying, curing, or build steps.
What if this patio is in shared housing and I can’t keep big decor?
Choose layers that travel: the rug rolls, pillow covers pack flat, and the macramé wall hanging can be folded. String lights are also compact and can be re-hung in the next place. For plants, consider taking the plant plus pot together, or repot into a lighter container if the next space is smaller.
Will this work if my patio is smaller than the photo?
Yes—scale down one anchor element and keep the layering logic. If the rug can’t fit 8×10, go 5×7 and center it under the daybed zone so the seating still feels defined. Keep the greenery to one tall plant instead of multiple pots. The macramé and string lights still give height and mood without crowding floor space.
Where to shop differently for a budget-friendly version?
Start with the rug and string lights at big retailers or home stores, then source pillows and planters at discount decor shops or thrift. For macramé, the DIY option is often cheaper than buying a “ready-to-hang” piece. Plant sizing can be flexible—look for a tall evergreen-style plant that’s easy to carry.
What’s the biggest mistake people make on an outdoor boho patio?
Overbuying matching pieces. When everything is the same finish and the same color value, the patio looks like it was assembled from one box instead of styled over time. Aim for one repeated palette (warm neutrals and terracotta) and vary texture: textured rug, woven wall piece, and soft textiles.
Is the macramé DIY actually renter-safe?
It can be, as long as the hanging method stays non-permanent. The project is designed to use a Command-style hook approach so removal leaves minimal residue compared with hardware that requires drilling. For plaster or delicate surfaces, foam-core friendly placement helps reduce the chance of pulling material when the hook comes off.
More in Outdoor & Patio

Under $400: boho outdoor patio lounge refresh with move-ready swaps
A renter-friendly, shared-housing outdoor patio lounge refresh under $400 using 7 move-ready swaps. Warm string lights, a bold area rug, an…

Under $400: 7 move-ready outdoor patio swaps for renters
A golden, farmhouse-leaning outdoor kitchen patio look—rebuilt with 7 portable swaps for shared housing. Keep it move-friendly with a woven…
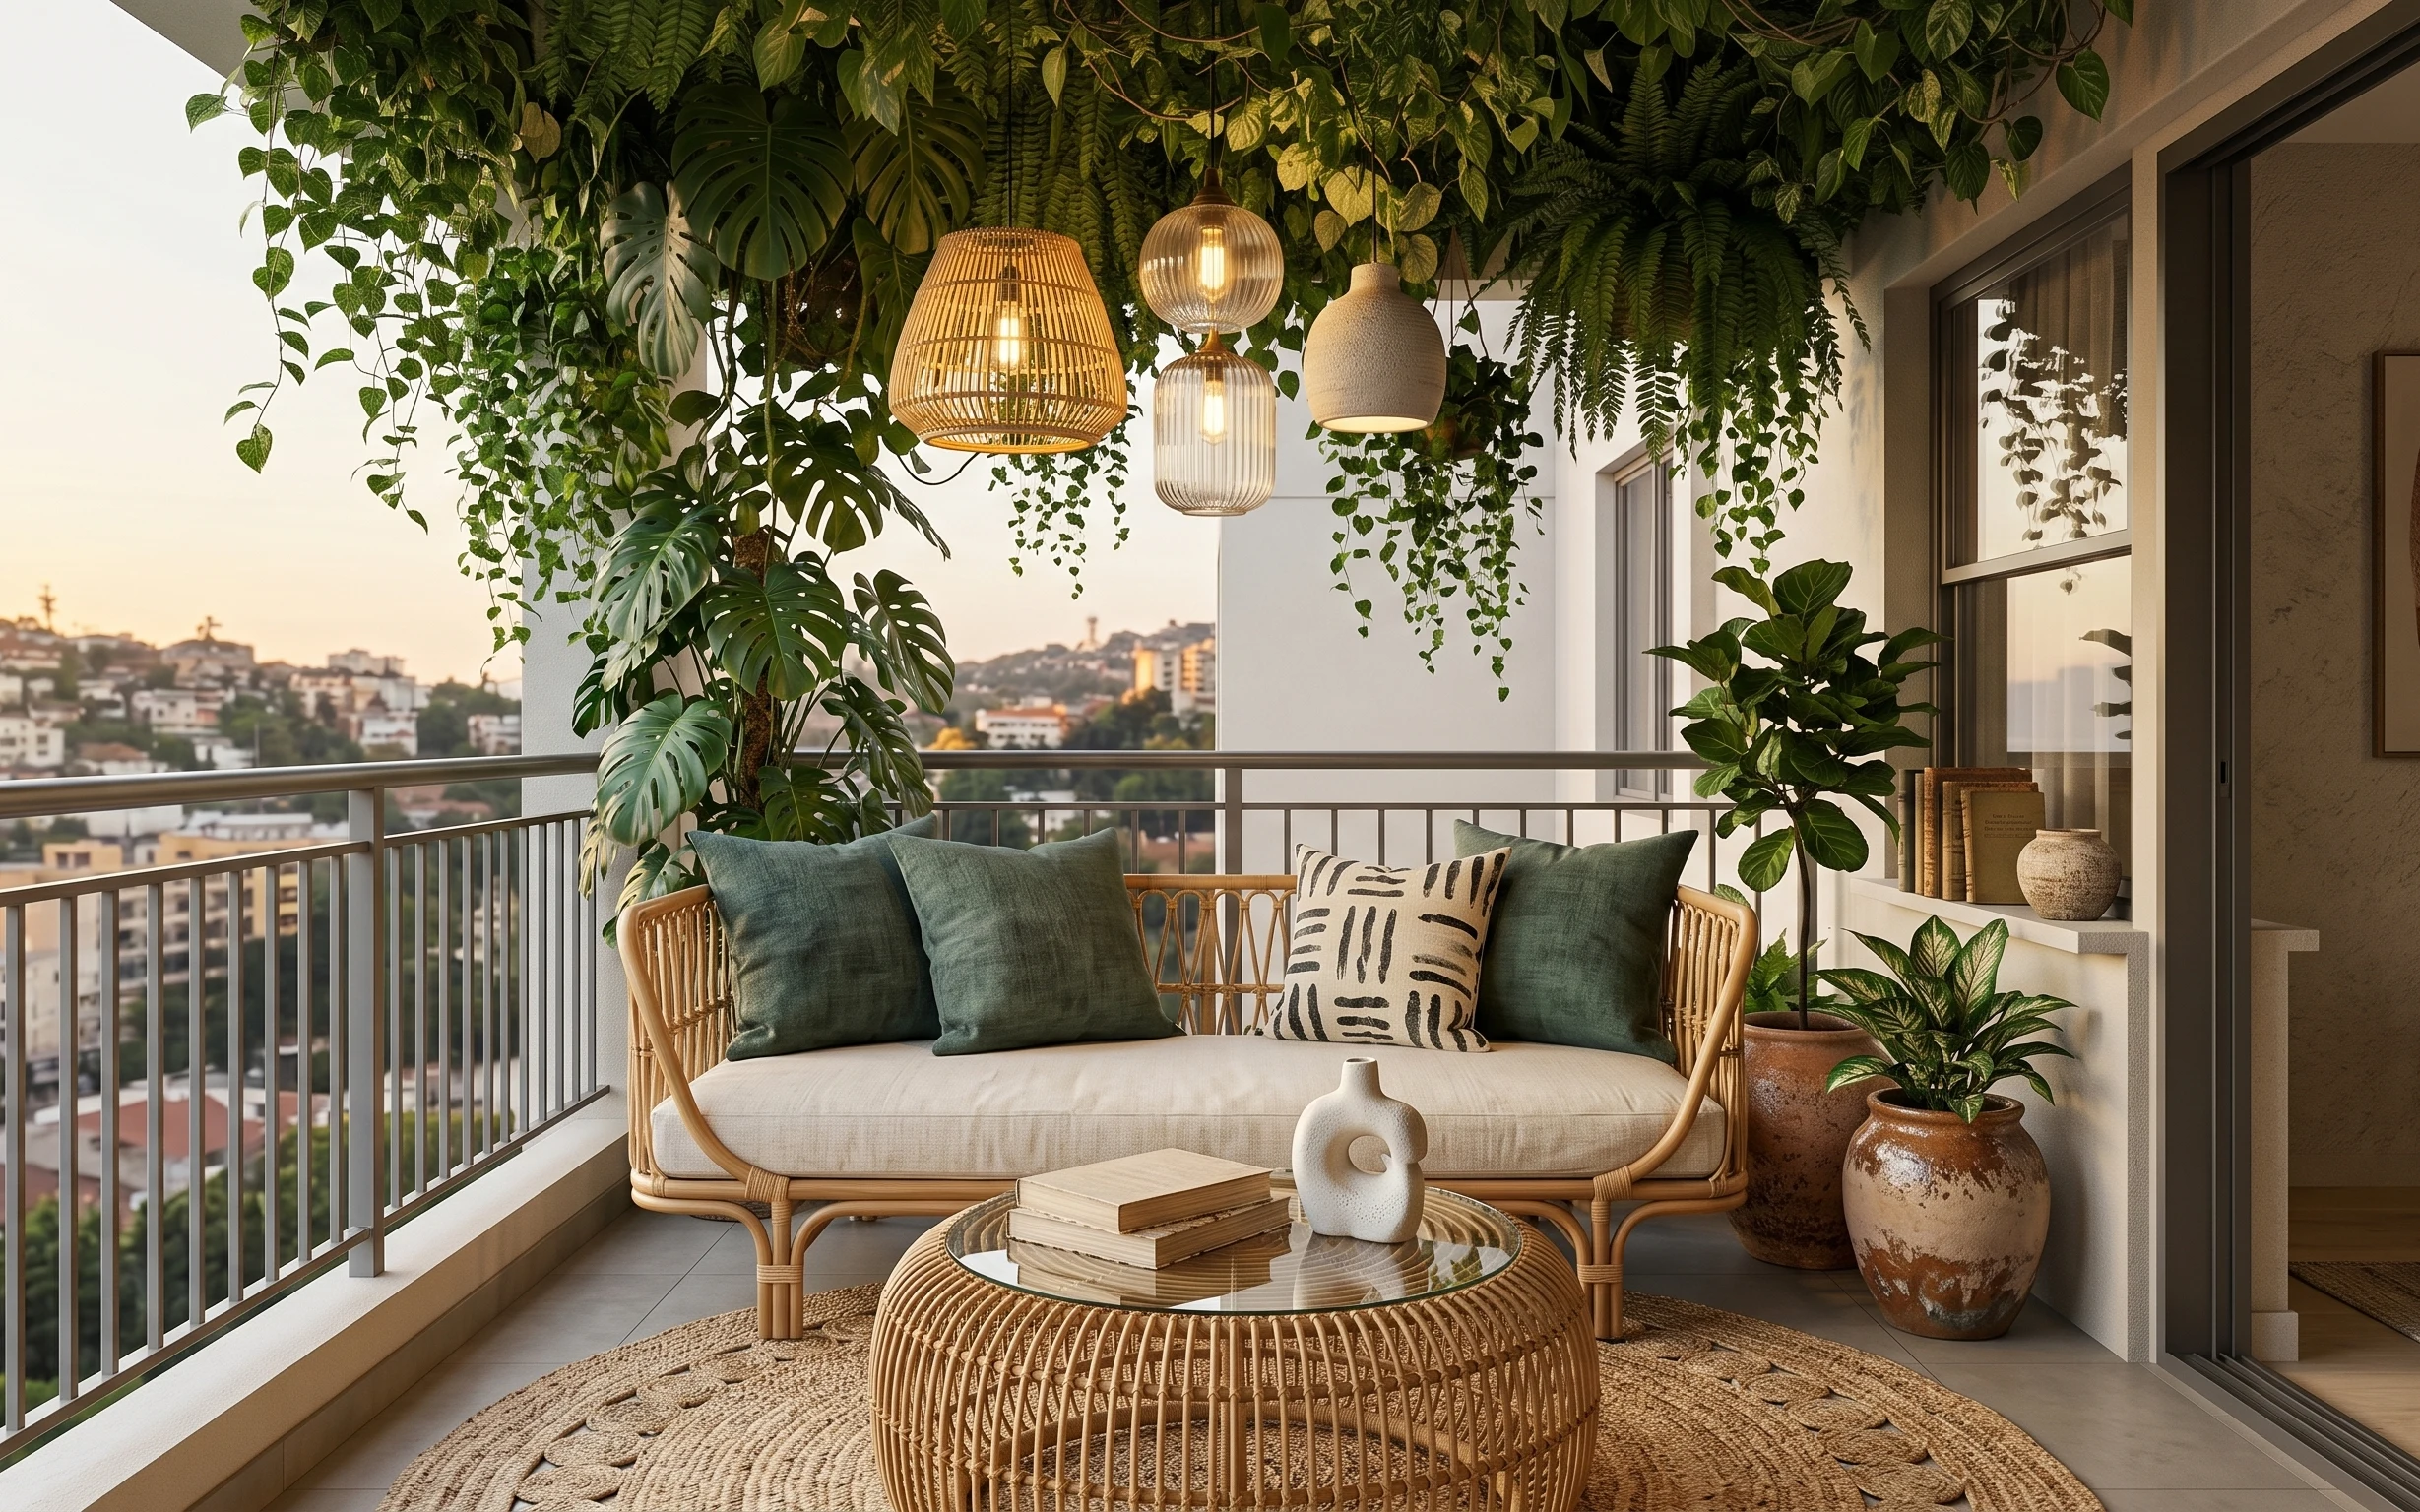
Under $700: green-and-rattan balcony lounge refresh
A warm, plant-filled balcony lounge can feel finished on a weekend. This refresh focuses on a jute rug, rattan daybed, bold green pillows, …