
- Best for
- Budget-friendly vanity styling
- Cost
- $500 ceiling
- Difficulty
- Moderate DIY
- Time
- 1 weekend
Why warm wood-and-brass refresh is the bathroom vanity wall of 2026
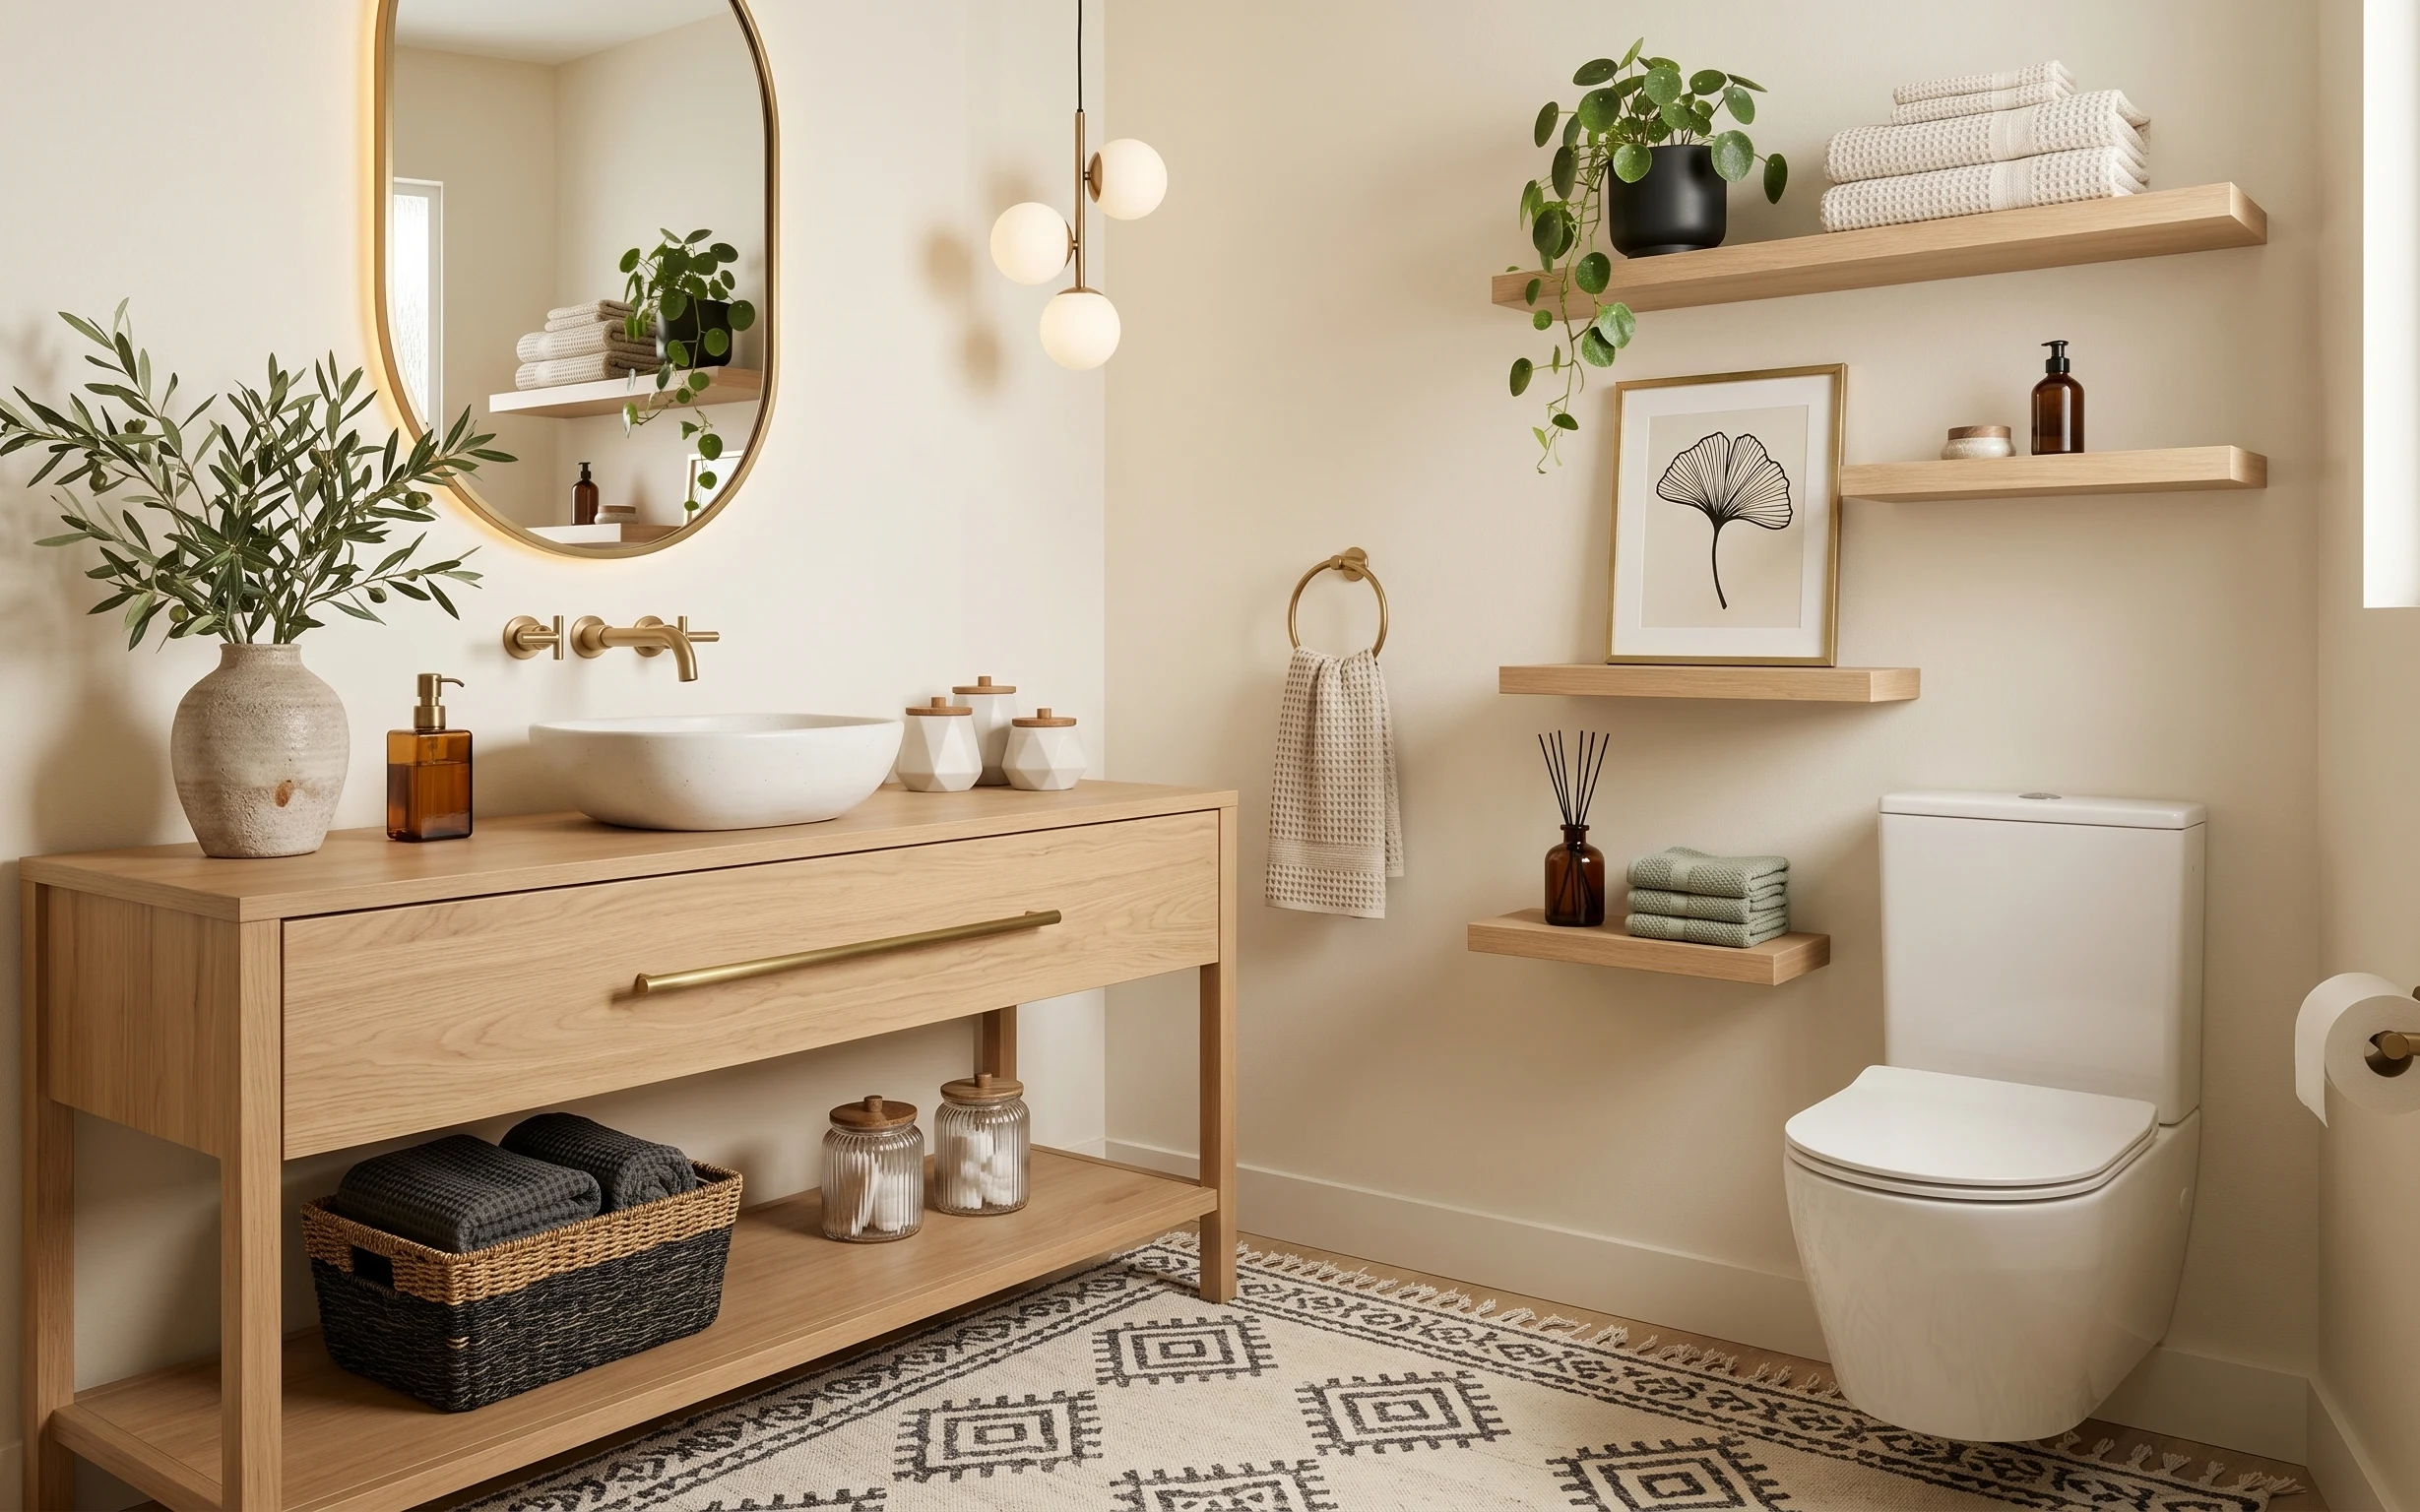
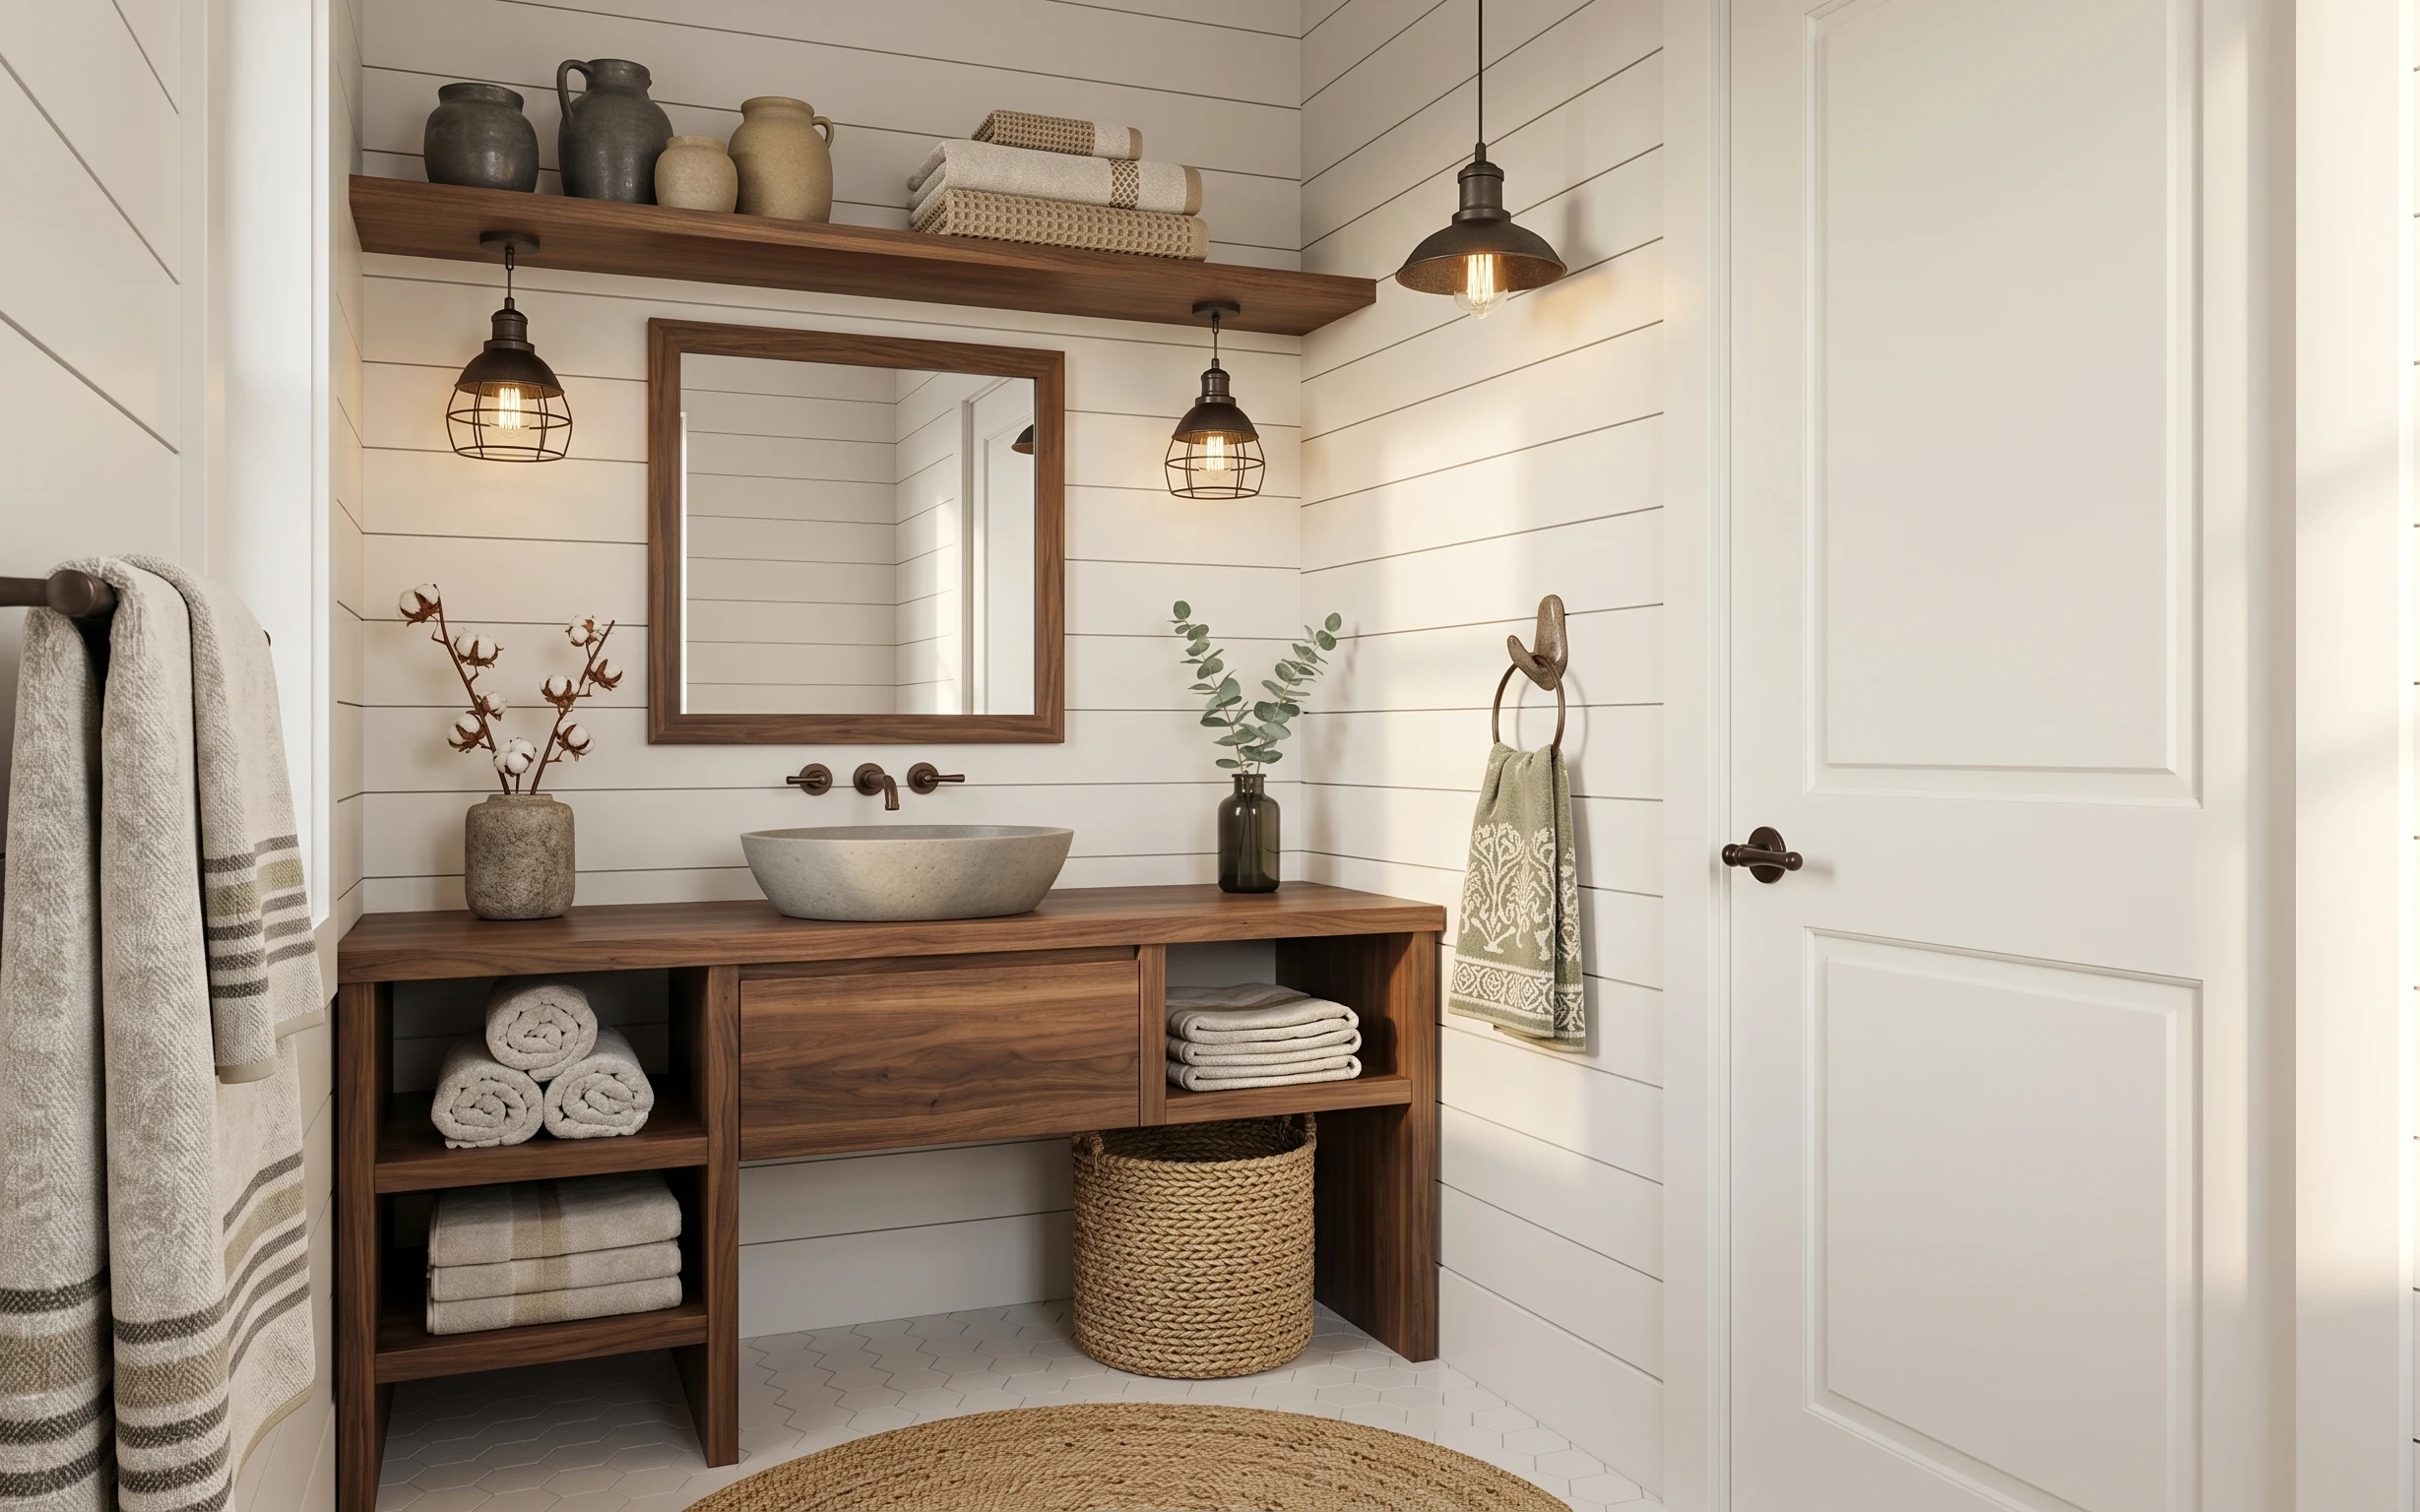
What I love here is how the vanity wall mixes practical storage with soft styling: the woven basket under the shelf keeps “stuff” contained, while the round gold mirror gives you that simple, centered focal point. You can see three distinct textures—smooth light wood, matte fabric towels, and glossy glass bottles—working together instead of competing. The styling also isn’t fussy: plants sit where eyes land, and shelves stack items at different heights. For homeowners, that’s the sweet spot: you can pick the most impactful option (mirror scale, shelf placement, frame finish) without waiting on permission or saving every change for later.
I almost overdid it the first time I painted a frame like this. My mistake was chasing a perfect “matching” match to the hardware and ending up with a flat, dusty look. This time around, the change was subtle: I aimed for the same family (warm metal tone) but chose a slightly richer finish so it looks intentional next to the brass and the light wood. That’s what makes the wall feel finished instead of decorated.
Layer 1 — Woven storage basket under vanity ($25) A basket that keeps towels off the countertop

A woven storage basket belongs under the vanity shelf because it turns the “landing zone” into something you can actually control. In the photo, it sits low on the open shelf where toiletries and extra towels naturally accumulate, but the basket’s dark texture makes it read like part of the design instead of visual clutter. The obvious alternative is leaving everything loose on the shelf, and that works for about two days. The trade-off here is fewer quick grab-and-go options, but the upside is that every time you walk in, the wall looks calmer.
Label what’s inside
If the basket holds folded towels and refill bottles, add a simple label on the underside so you don’t end up restocking by accident.
Layer 2 — Patterned area rug ($80) The grounded base for the whole bathroom wall
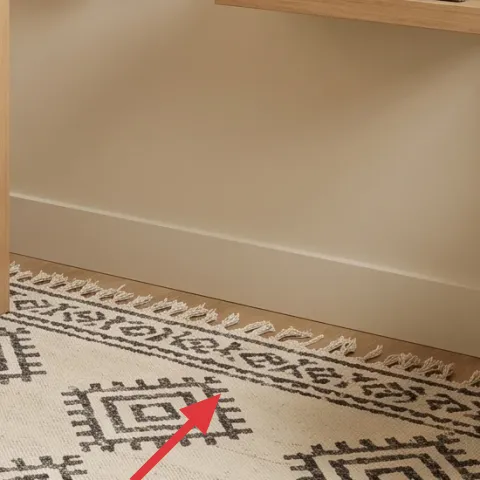
The patterned area rug is doing more than warming up your feet—it’s anchoring the vanity wall visually. Its neutral pattern and placement near the toilet line give the room a defined “zone,” so your eye doesn’t bounce off the tile and end up lost. The obvious alternative is a plain bath mat, but that usually looks small next to a full vanity and open shelving. With the rug, you accept that the pattern will matter, then you win by choosing one that echoes the warm beige and wood tones already in the space.
Pick a rug pattern with a similar value
Look for mid-contrast lines (not super-high black-and-white) so it stays japandi-calm rather than loud.
Layer 3 — Round gold mirror ($120) Centered, warm, and great for small bathrooms
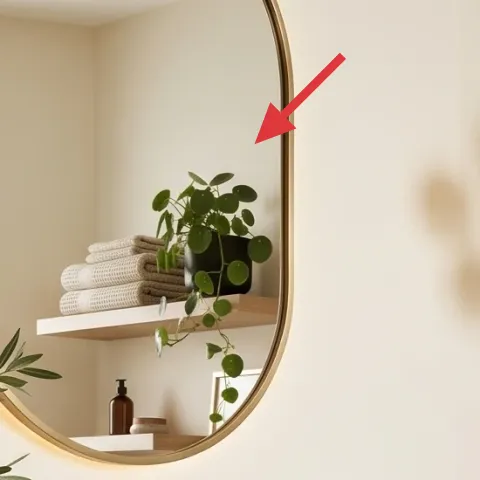
A round gold mirror is the easiest way to make the vanity wall feel styled instead of purely functional. In this setup it’s positioned to reflect light and visually soften the straight lines of the vanity and shelves, which is exactly what you want in a compact bathroom. The alternative—an oblong mirror—can work, but it tends to emphasize height and boundaries. The trade-off is scale: a mirror that’s too small looks like an afterthought, while the right size reads like a design choice you can feel.
Don’t let mirror size fight your shelf spacing
If you add shelves or artwork later, measure the clear gap first so the mirror doesn’t overlap the visual “stack.”
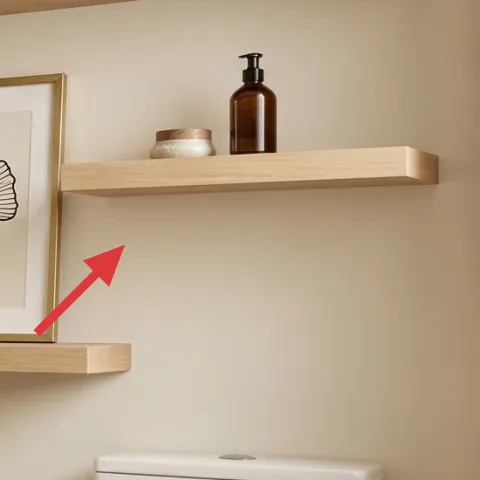
Layer 4 — Wood floating shelf on right wall ($90) A place for towels and small objects at three heights
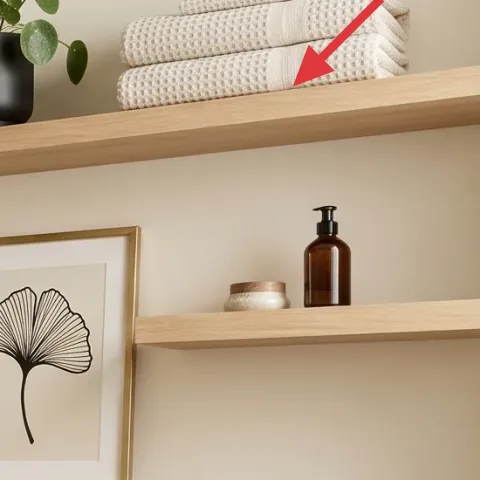
This wood floating shelf (the upper one on the right) creates a controlled height stack: towels on one tier, bottles and a plant nearby, and then wall art below. That vertical rhythm is what makes japandi styling look intentional instead of random. The alternative is a single long counter tray, but shelves add face-level viewing from the doorway and help you stagger items so the wall doesn’t feel flat. The trade-off is that shelves require a little editing: too many items makes the shelf look busy, but fewer items lets the materials—wood, glass, and fabric—read properly.
Style in odd numbers
Use 3 pieces across the shelf (for example: bottle, small container, plant) so the composition feels balanced without symmetry.
Layer 5 — Framed shell print ($80) Keep the art, upgrade the finish with paint
That framed shell print works because it adds a single, graphic natural element without competing with the plant and shelves. The DIY move here is the frame finish: paint it so it harmonizes with the warm brass hardware and the light wood, instead of looking like a separate “second style.” The alternative is buying a new frame, which costs more and often means you still end up with a finish that doesn’t match your room undertones. The trade-off with paint is you have to prep properly, but once it’s dry, the whole wall looks more cohesive.
Make it instead of buying it
Paint the existing framed shell print frame so it matches the warm gold and light wood tones already in the bathroom.
Materials
- Paint (enamel or cabinet paint), 1 small can — 1 — local hardware store — $20
- Sandpaper (medium + fine), assorted — 1 pack — hardware store — $8
- Small angled brush — 1 — hardware store — $10
- Painter’s tape + drop cloth — 1 set — hardware store — $6
- Clean microfiber cloth or tack cloth — 1 — hardware store — $8
Steps
- Remove the frame from the print and take off any glass backing if it’s removable.
- Lightly scuff the frame with medium sandpaper to help the paint grab.
- Wipe the frame with a microfiber cloth (or tack cloth) until it feels dust-free.
- Mask off the print edge and any areas you want to keep clean using painter’s tape.
- Apply the first thin paint coat with an angled brush, keeping strokes even.
- Let the coat dry fully, then sand lightly with fine sandpaper and apply a second coat.
- Allow the final coat to cure overnight so it resists fingerprints.
- Reassemble the frame, then hang it and step back to check it against the brass hardware tone.
Total DIY cost: $52 — saves about $28 over buying.
Go warm, not shiny
A satin or low-sheen finish blends better with wood than a high-gloss metal-look paint.
Layer 6 — Large potted plant ($35) Add the living “soft edge” near the mirror
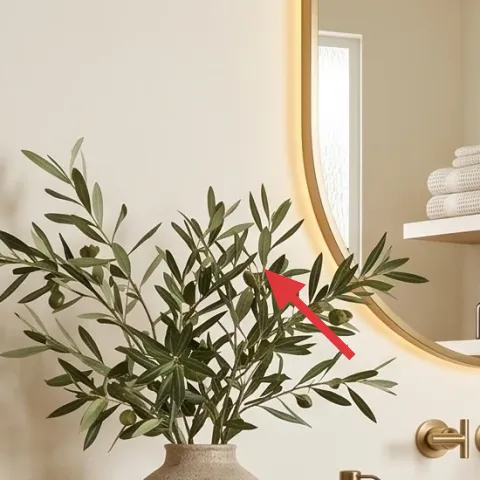
A large potted plant brings the japandi softness you can’t get from objects alone, especially in a bathroom where hard surfaces can feel extra crisp. In this photo, the plant sits near the left side and visually connects to the round mirror, so the whole vanity wall feels framed by greenery. The alternative is another vase or candle grouping, but that doesn’t add movement or color variation the way leaves do. The trade-off is maintenance: you’ll need to check watering habits and rotate the pot so the plant doesn’t lean toward one light source.
Wipe leaves before styling
Dust makes plants look dull; a quick wipe keeps the green tone rich next to warm metals.
Layer 7 — Amber pump bottle ($28) One warm glass moment for the countertop
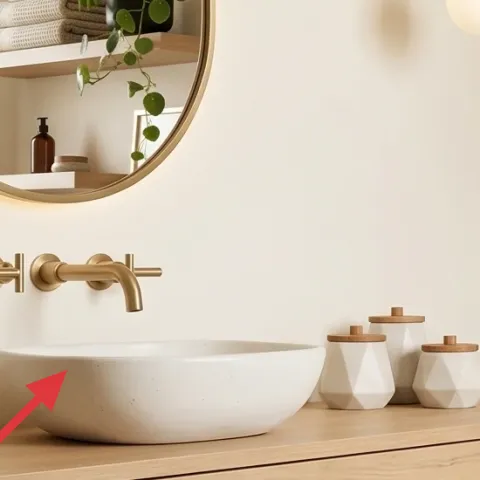
One amber pump bottle is a small choice that pays off because it adds warm glass color right where your hand naturally lands. The bottle in the photo sits on the vanity top near the sink area, and the color links to the brass tones in the mirror hardware and lights. The alternative is using whatever bottles came with your initial toiletries, but those are often mismatched and look temporary. The trade-off is picking one that you’ll like long-term—when the bottle looks good, you’re more likely to keep the countertop tidy because it doesn’t feel “urgent.”
Keep the pump off the edge
Place it slightly back from the front so water splashes don’t stain the label area.
The cost, layer by layer
| Layer | Item | Cost |
|---|---|---|
| 1 | Woven storage basket under vanity | $25 |
| 2 | Patterned area rug (5×7) | $80 |
| 3 | Round gold mirror (24–36") | $120 |
| 4 | Wood floating shelf (right wall) | $90 |
| 5 | Framed shell print (16×20) | $80 |
| 6 | Large indoor potted plant (4–6 ft) | $35 |
| 7 | Amber pump bottle | $28 |
| Total | $458 | |
If you want a cheaper variant, prioritize the rug, mirror, and frame first—those are the visual anchors. For the remaining pieces, shop for a smaller plant size, choose a simple floating shelf kit, and use a basic amber bottle you can refill so the countertop still looks intentional.
What worked, what didn't (across the whole room)
This vanity wall refresh lands because it repeats warm metals and light wood, then softens the space with textiles and greenery. The result reads designed without feeling sterile. The few weak points are mostly about scale and editing rather than materials.
What worked
- The round mirror softens the geometry of shelves and vanity, making the whole wall feel calmer.
- The floating shelf height stack keeps bottles, towels, and small decor visible without looking cluttered.
- The patterned rug defines a “landing zone” so the room feels finished even with open shelving.
- The woven basket hides supplies while still adding texture that matches the plant and towels.
- The warm amber bottle adds a color echo that ties countertop styling to brass accents.
- The framed shell print gives a simple natural graphic that doesn’t fight the greenery.
What didn't
- If the shelf is styled with too many small items, the wall turns busy fast.
- A plant that isn’t rotated can lean over and look unplanned near the mirror.
- If the rug is too small, the vanity area won’t feel grounded against the tile.
- Trying to match the frame finish perfectly to every brass piece can look flat instead of cohesive.
What we'd skip if we did it again
Skip adding extra decor just to “fill” shelf space. The shelf already has a height rhythm, and adding more items usually creates a busy look that fights the calm japandi vibe.
Skip buying a whole new frame if the print is already solid. A quick paint refresh on the existing frame finish makes the biggest visual difference for the least risk in a weekend refresh.
Skip a plain bath mat if you’re spending time on mirror and shelves. The rug pattern is what ties the vanity wall to the floor area, so you want an anchor that matches the scale of the room.
Frequently asked
How long does this bathroom vanity wall refresh take?
Most of the changes fit into a long weekend. Shopping and swapping the rug, mirror, and shelf items usually takes a few hours. The DIY frame paint is the time driver because it needs drying time between coats and a full cure overnight. If you already own basic tools for hanging shelves or setting items, the total is typically 6–10 hours spread across two days.
What if I rent—can I still do this look?
Yes, the styling approach transfers well. Swap in renter-safe shelf options (like tension setups or no-drill shelf systems) and use removable hardware where possible. The biggest “permission-free” wins are the rug, countertop bottle styling, and the potted plant placement near the mirror. For the framed print, you can paint or swap the frame without changing the underlying plumbing or walls.
My bathroom is smaller than the photo. What should I scale down?
Keep the mirror and art as your anchors, then scale the shelf footprint and rug size to match your floor space. A smaller rug can still work if it stays proportional—aim for coverage that includes the front of the vanity area. For shelves, edit down to fewer items and stick to three-height styling so the wall doesn’t feel crowded.
If my wall color is cooler or darker, will the warm brass palette still work?
Warm metals still work; you’ll just need to adjust undertones. Match the frame finish in a warm family (golden or honey rather than gray-gold) and choose textiles that pull the room back toward beige. The plant and the amber bottle help with warmth, so even if the wall reads cooler, the wall won’t feel disconnected.
Where should I shop for the biggest pieces without overspending?
Start with the rug and mirror, then build around them. For rugs, look for a 5×7 in a neutral geometric or trellis-style pattern that echoes warm beige. For mirrors and shelves, hardware stores and home decor retailers often have mid-range options, and thrift/marketplaces can be great for frames if you plan to repaint. For decor bottles, aim for one consistent color story—amber glass or clear with warm labels.
What’s the most common mistake on a bathroom vanity wall refresh?
The most common mistake is styling shelves like countertops—too many small objects with no height plan. When everything sits at the same level, the wall loses the intentional rhythm that makes japandi look “quietly designed.” Use odd-number groupings, keep negative space between items, and let the plant and framed print do most of the visual talking.
More in Bathroom
Under $500: japandi bathroom vanity wall refresh
A japandi bathroom vanity wall refresh for under $500, using swaps that make the mirror, shelves, and plant read cleaner together. This wee…
Under $400: renter-friendly bathroom vanity nook refresh
This bathroom vanity nook refresh leans on textiles, brass-friendly accessories, and move-safe swaps—no painting and no drilling. You can r…
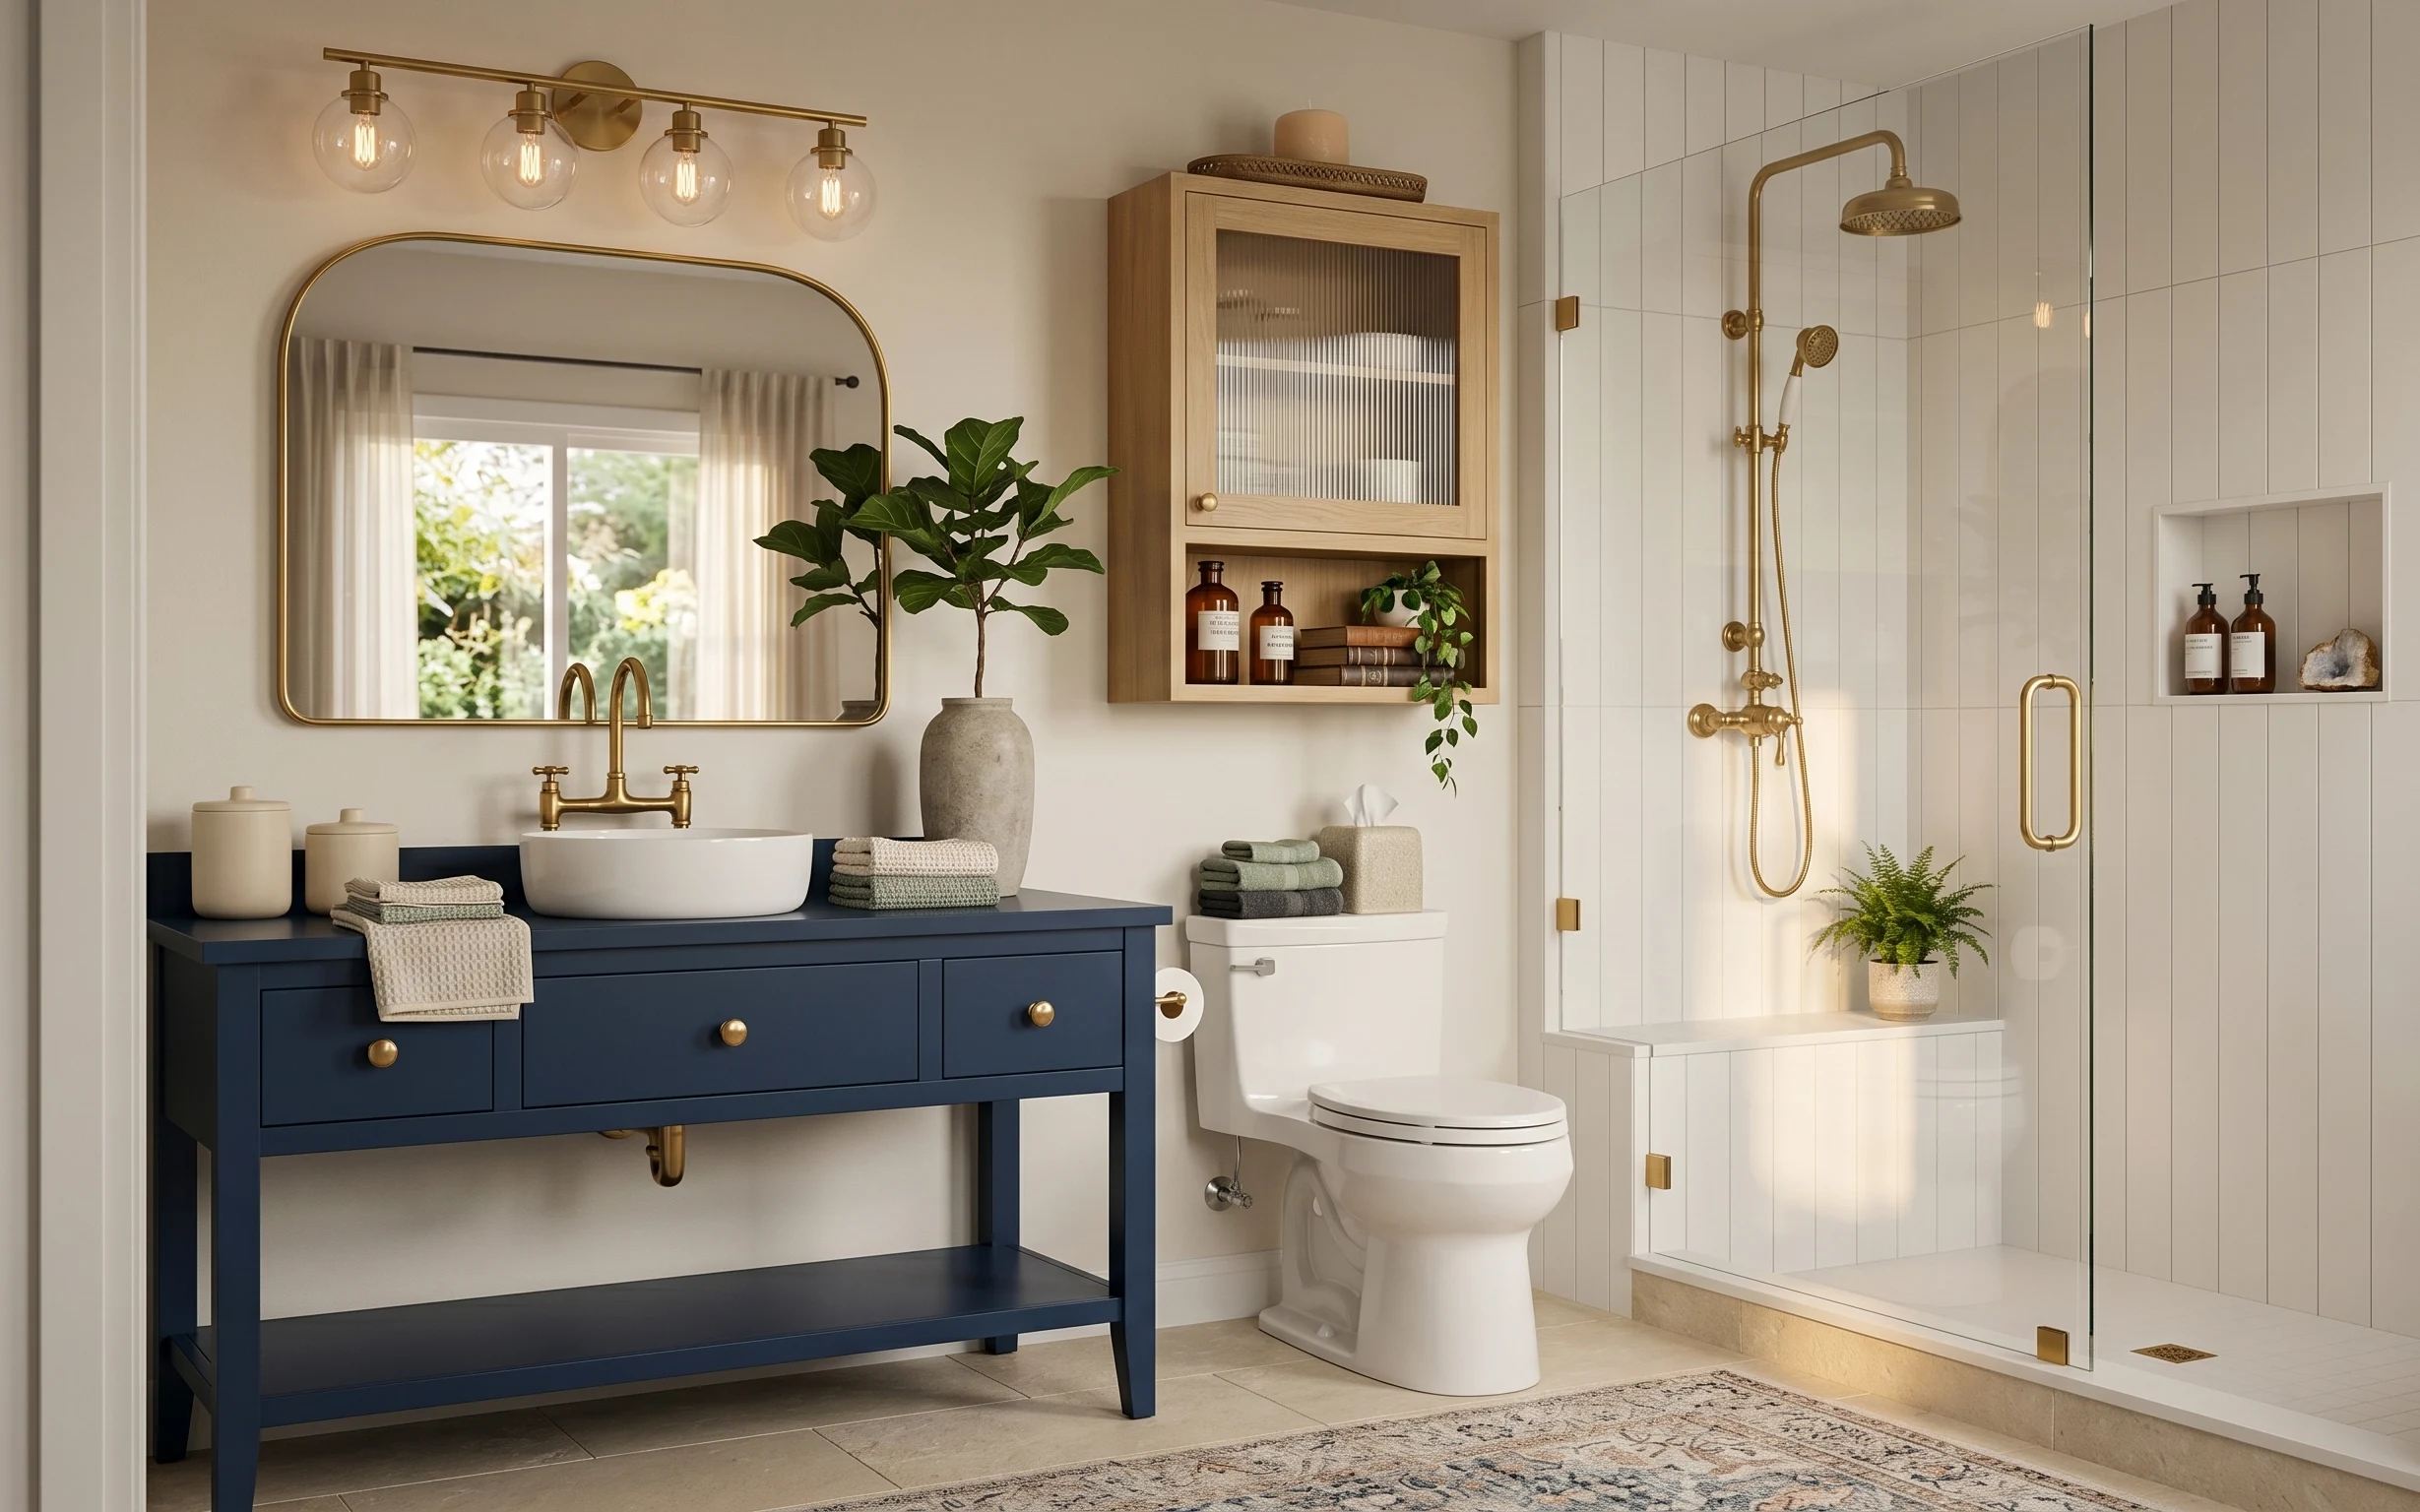
Under $800: weekend bathroom vanity nook refresh with 7 layers
A bathroom vanity nook can feel brand new without a full remodel—just 7 focused swaps. This refresh leans warm wood, stone-gray textures, a…