
- Best for
- Warm, boho corners with lots of texture
- Cost
- Under $600 for 7 renter-safe layers
- Difficulty
- Easy (mostly textiles + removable décor)
- Time
- About a weekend, plus one dry press for DIY
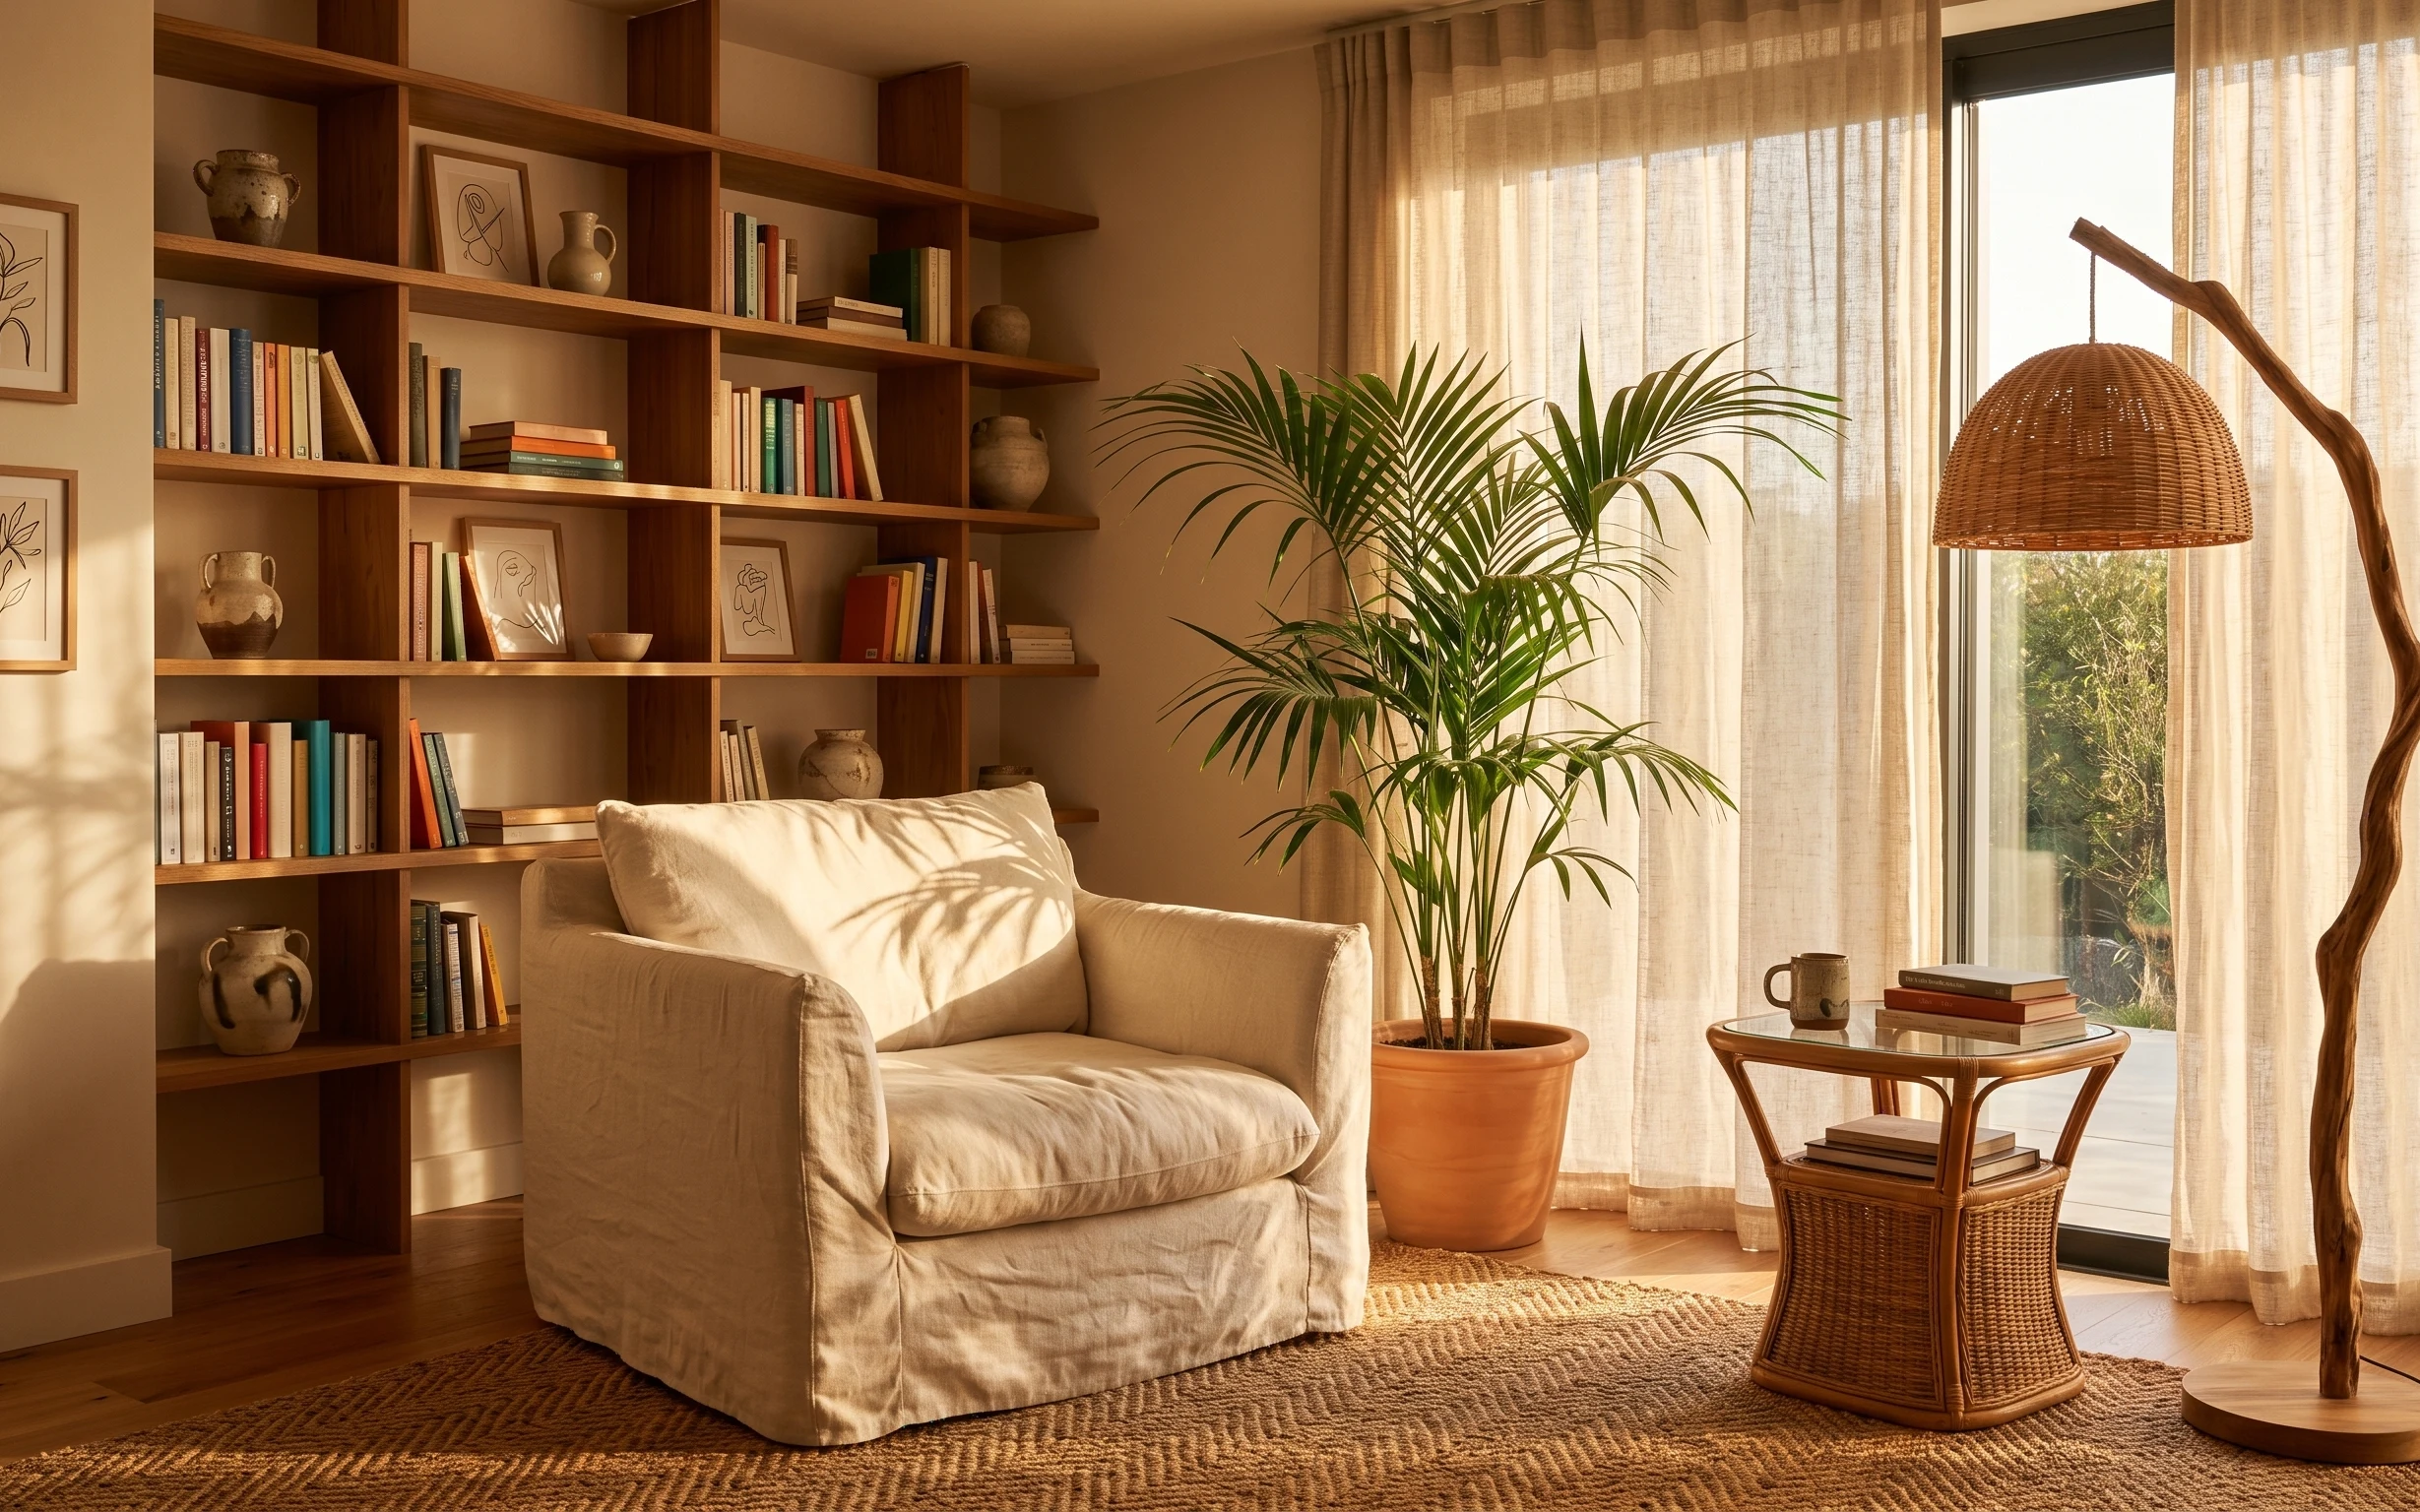
Why warm-beige shelves-and-terracotta is the reading corner of 2026
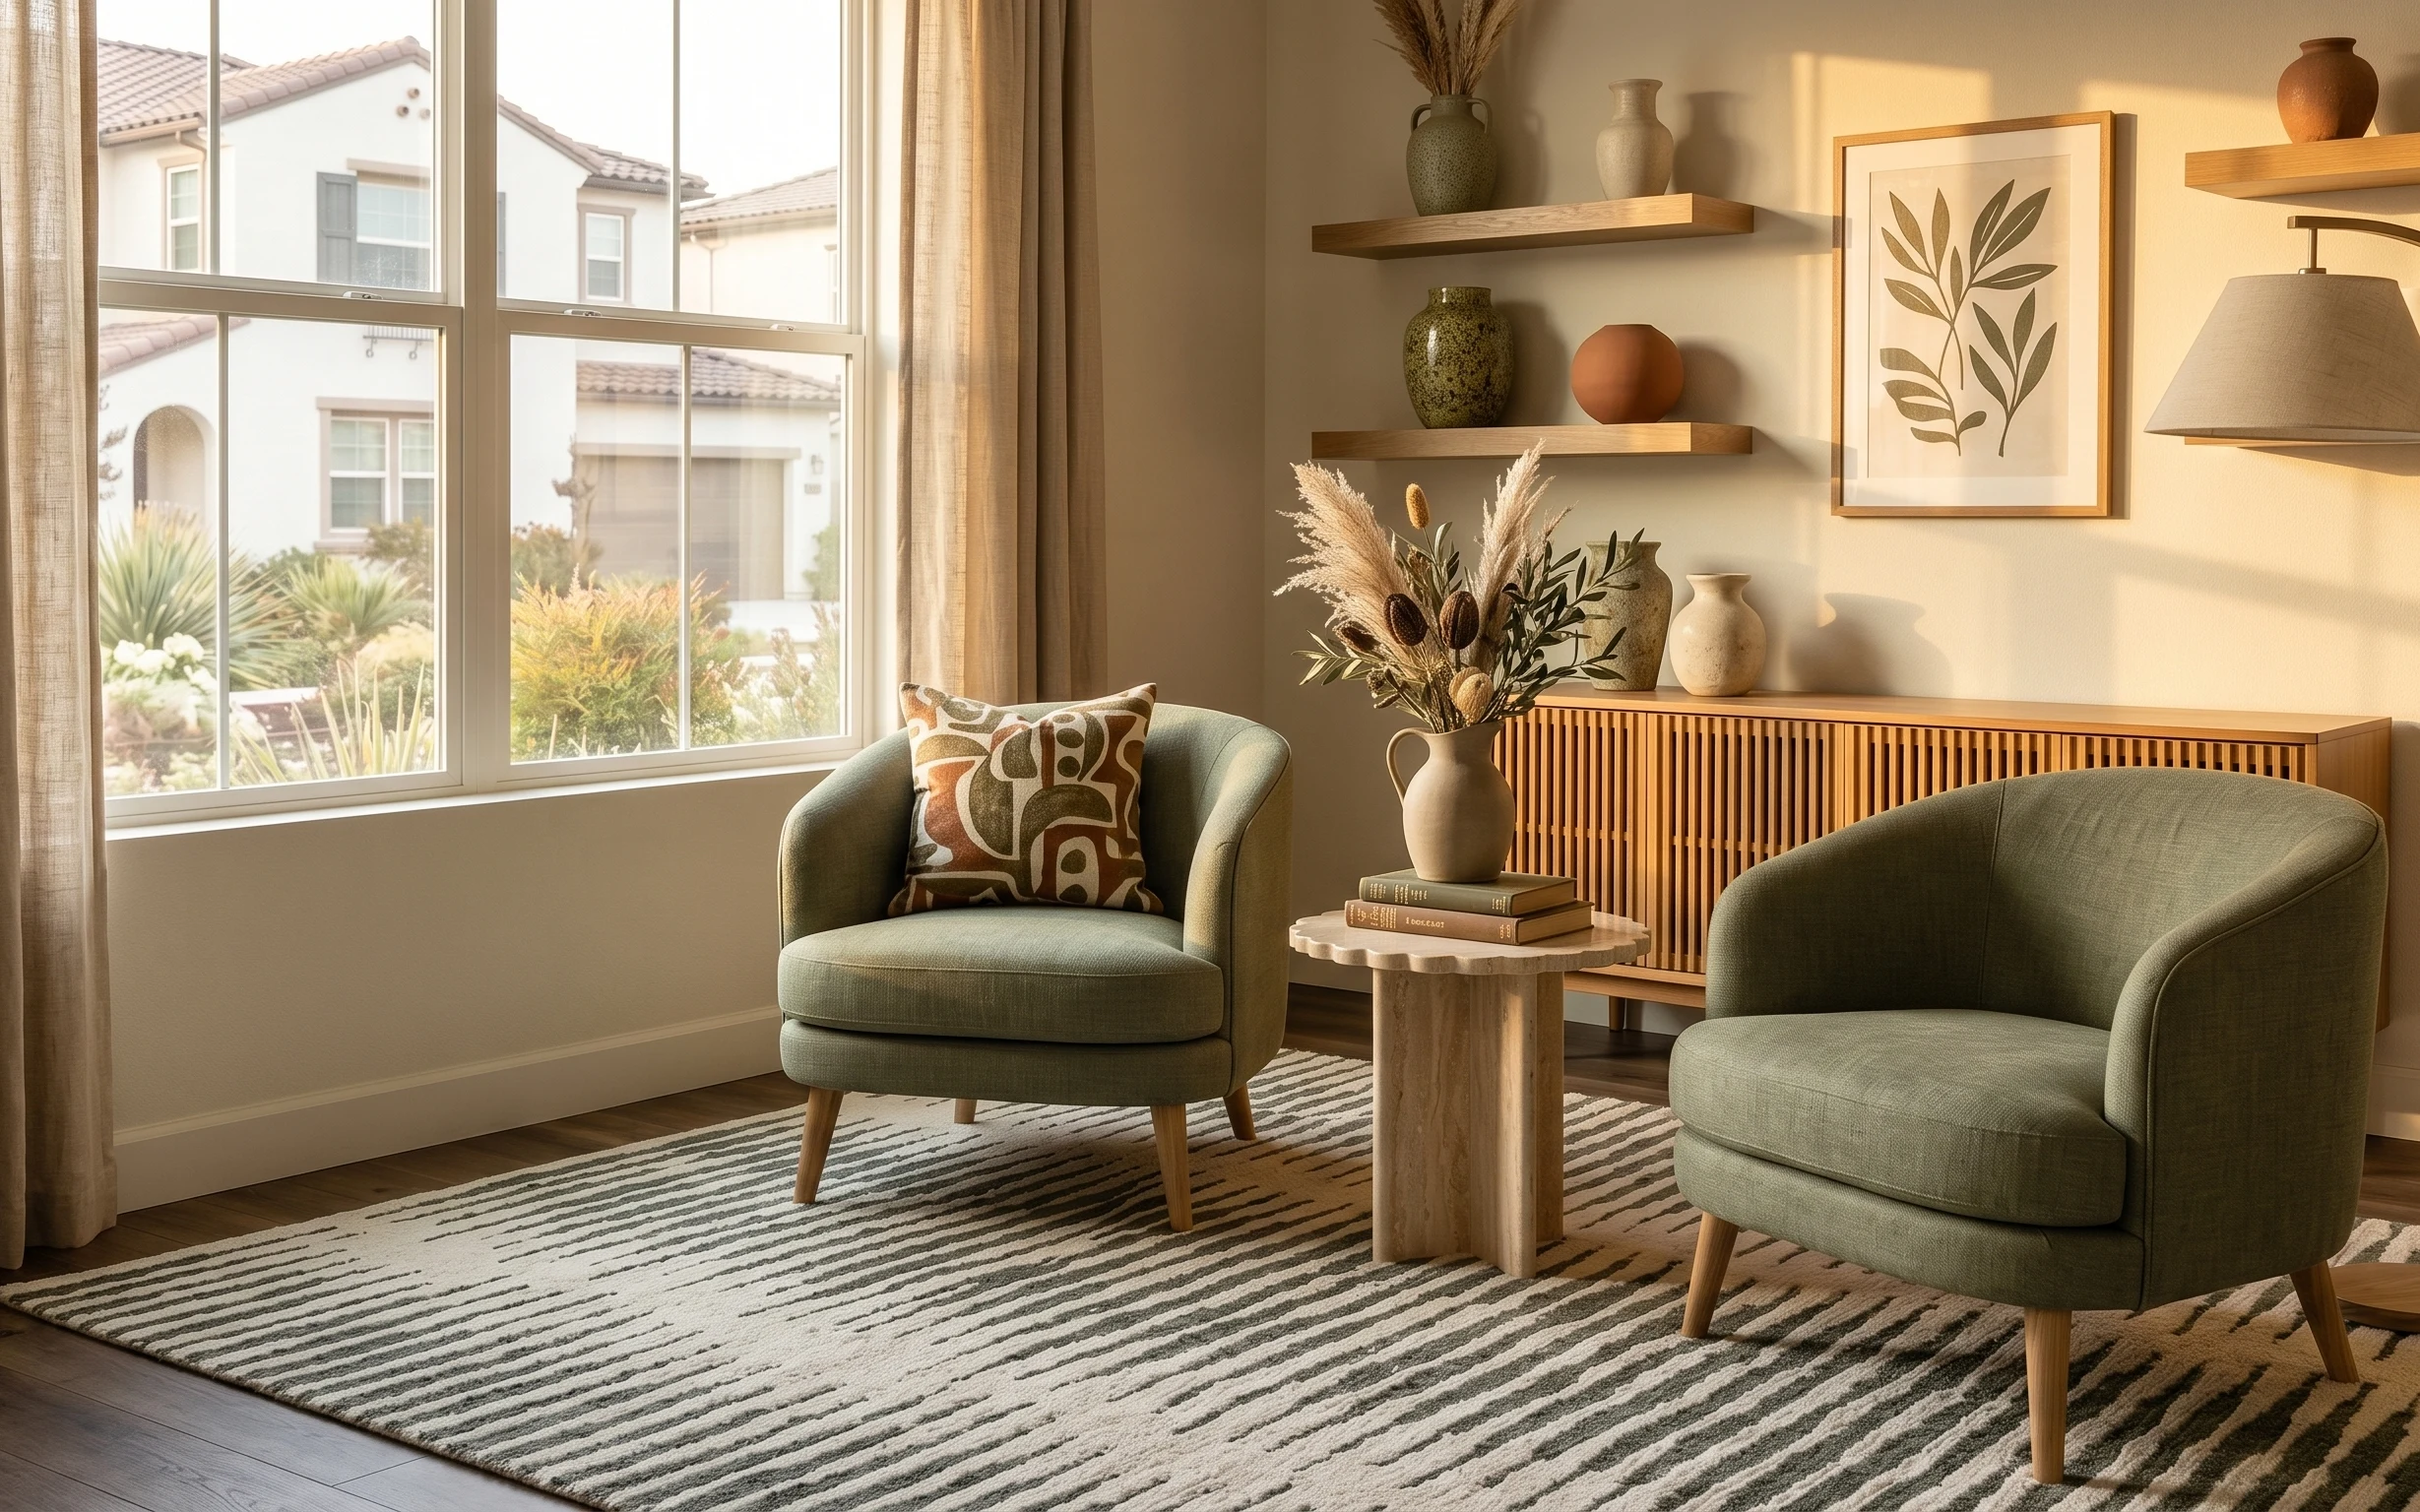
The starting point here is the cozy mix: warm wood shelving, sheer beige curtains, and a beige armchair that already reads soft and lived-in. What makes the look feel styled (not empty) is the repetition—botanical prints on the left wall, terracotta in the plant pot, and warm lighting from the rattan floor lamp. In a rental, you can keep the same “earthy neutrals” vibe by swapping the big tactile pieces first: the large textured area rug and the two throw pillows. For renters, this is budget-doable because the changes are mostly textiles and removable décor.
I almost overthought the wall art the first time I tried to copy this kind of mood—like I needed matching frames at every height. Then I noticed the balance was simpler: one botanical print higher up and one below, both with the same plant line-art style. That’s the trick I leaned into here, plus a taller plant for vertical movement near the curtain. Once the plant and prints “spoke the same language,” the rest of the room felt intentional.
Layer 1 — large textured area rug ($150) Grounding texture underfoot
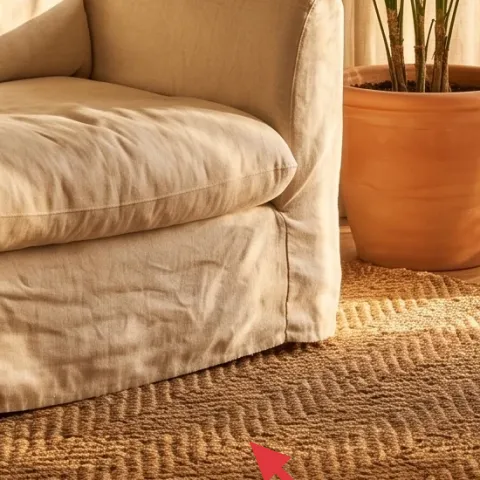
Start with a large, textured area rug in a warm neutral so the whole corner feels anchored. In the photo, the rug’s chunky weave and medium brown tone act like the room’s base layer, tying together the beige armchair and the honey wood shelving. Choosing a similar texture matters more than getting the exact shade—texture reads from a distance, even when lighting shifts. The trade-off: a higher pile or very delicate weave can be harder to vacuum, so go for something you can brush and live with. Size it to reach at least the front legs of the armchair for that “pulled together” rectangle.
Pick the rug texture, not just the color
When your floor stays visible around the edges, a woven surface hides small everyday marks better than flat, low-texture rugs.
Layer 2 — two beige throw pillows ($60) Softens the armchair without changing it
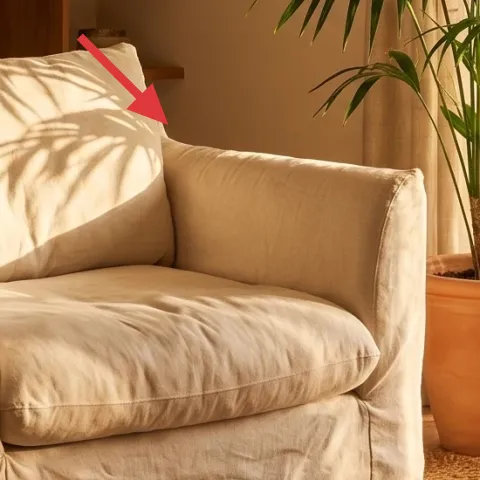
Next, give the armchair more surface softness with two beige throw pillows. The hero shows pillows with a slightly slubby, natural-looking fabric that makes the chair feel relaxed rather than stiff. I’d choose pillow covers in a similar warm beige (not bright white) so they echo the curtains and keep the corner cohesive. This is also an easy renter move: pillow covers swap fast and pack flat. The trade-off is that more pillows can look staged if they’re too perfectly matching—so pick two that are close in tone but not identical in texture. That’s the “lived-in” balance the photo nails.
Use pillows to repeat your palette
Even if the furniture stays fixed, textiles let you repeat beige-and-wood warmth without permission.
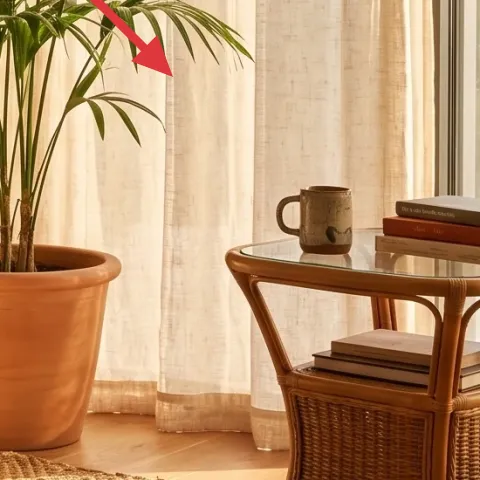
Layer 3 — wood-and-rattan side table ($80) Adds warm, breakable height
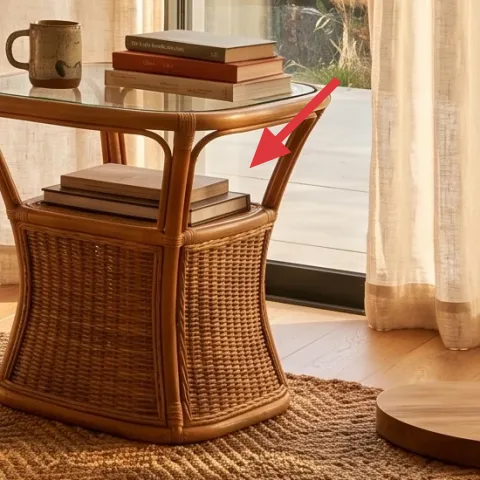
A wood-and-rattan side table keeps the corner airy while still giving you a place for “everyday things.” In the photo, the tabletop is near the chair arm height and the woven edges echo the rattan floor lamp, so the materials feel connected. I like using rattan here because it looks beachy-boho without going overboard, and it pairs well with the terracotta plant pot. The trade-off is that rattan furniture needs gentle care—avoid dragging heavy items across it and wipe with a dry cloth. This side table is also a practical move-friendly swap: it’s light enough to relocate, and it doesn’t require any wall work.
Match the material twice
When rattan appears in the lamp and the tabletop, the whole corner feels styled even with minimal décor.
Layer 4 — floor lamp with rattan shade ($120) Keeps the lighting warm and directional
The rattan-shaded floor lamp is what makes the corner feel calm after sunset. The shade casts a softer glow, and the warm tone works with the rug’s brown undertones and the plant’s greens. For renters, choose a plug-in floor lamp so you’re not dealing with hardwired fixtures. The trade-off: rattan shades can collect dust more than glass lampshades, so plan on quick dry dusting every couple of weeks. Position matters, too—this one sits to the right of the armchair, so the light lands on the side table area and keeps the corner visually bright without flooding the room.
Don’t pick an overly small shade
A tiny lamp shade can look decorative only; the right scale lets the light pool where you sit.
Layer 5 — upper framed botanical print ($60) Line-art detail with DIY option
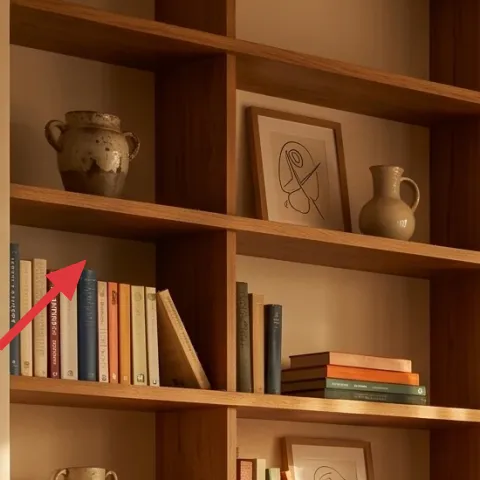
Two botanical prints are doing a lot of work in this corner: they add a clean, drawn element that contrasts the plant’s organic fronds and the rug’s texture. The upper frame sits higher on the wall, which helps pull the eye up and balances the tall plant by the window. Since this is a renter setup, Command-strip-friendly hanging is the way to go (no drilling, no permanent hardware). I also chose a similar line-art look because it reads “natural” without competing with the terracotta pot. The trade-off is that paper-based art needs a bit of care near high-humidity areas—so keep it away from steamy bathrooms.
Make it instead of buying it
This pressed flower frame mirrors the botanical line-art vibe, and it’s cheaper than a ready-made framed print while still looking intentional.
Materials
- Press-and-hold botanicals (dried stems/leaves) — assorted amount — foraged — $10
- Cardstock backing (mat size) — 1 sheet — craft store — $6
- Printable label paper (optional) — 1 sheet — stationery shop — $8
- Small frame with glass (choose 8x10 or similar) — 1 — thrift or craft store — $9
- Archival tape/hinge tape — 1 roll — craft store — $7
Steps
- Press and dry botanicals until flat (use books; change paper once or twice).
- Choose the frame size and cut cardstock to fit the inside opening.
- Lightly arrange dried botanicals on the cardstock to match the “centered” look.
- Fix each piece with tiny hinge tape points (so it won’t shift behind the glass).
- Optional: add a small label using printable label paper for a subtle botanicals touch.
- Close the frame and check alignment against the light.
Total DIY cost: $40 — saves about $20 over buying.
Keep the botanical style consistent
Matching line quality across both prints makes the wall feel curated, even when frames differ slightly.
Layer 6 — lower framed botanical print ($60) Balances the tall plant with calm repetition
Bring the botanical motif down with a second framed print placed lower than the first. In the photo, the lower frame sits just above the shelving line, so it visually “anchors” the left wall and prevents the corner from feeling one-sided. I’d repeat the same print style—again, line-art botanicals—so the pair reads like a set rather than random wall décor. If you can, keep both frames within a similar color family (warm wood or neutral mats) to echo the honey shelving. The trade-off here is spacing: too close together can feel crowded, while too far apart can look disconnected, so aim for a comfortable gap you can measure by eye from the armchair.
Use the chair as your spacing guide
When the frames visually “hit” around seated eye level, the composition feels natural.
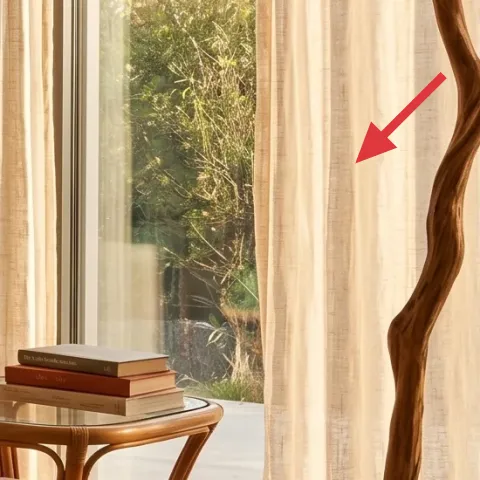
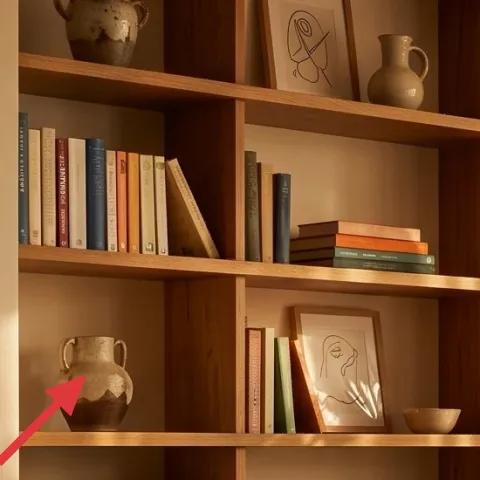
Layer 7 — indoor plant with terracotta planter pot ($40) Adds the vertical, earthy pop
This indoor plant is the living detail that makes the whole corner feel like it has a point of view. The long palm fronds create height near the sheer curtains, and the terracotta planter pot repeats the warm clay tone already showing in the room’s palette. In a rental, the easiest way to get this look is to choose a plant with similar leaf shape and place it in a planter pot that’s clearly terracotta or terracotta-leaning. The trade-off is maintenance: tall plants need light near a window and occasional rotation, so be ready to do small weekly checks. Position it where it won’t block walkways and where its leaves can “reach” upward.
Terracotta reads warmer than ceramic white
Even with minimal décor, terracotta brings instant earthiness next to beige textiles.
The cost, layer by layer
| Layer | Item | Cost |
|---|---|---|
| 1 | Large textured area rug | $150 |
| 2 | Two beige throw pillow covers | $60 |
| 3 | Wood-and-rattan side table | $80 |
| 4 | Floor lamp with rattan shade | $120 |
| 5 | Upper framed botanical print (DIY ~$40 materials) | $60 |
| 6 | Lower framed botanical print | $60 |
| 7 | Indoor plant with terracotta planter pot | $40 |
| Total | $570 | |
A cheaper version keeps the rug and lamp, but swaps the prints for unframed botanical art on cardstock in a single thrifted frame, and chooses a smaller plant with fewer fronds to reduce the upfront cost.
What worked, what didn't (across the whole room)
This corner succeeds because it repeats materials: warm wood, terracotta, and rattan show up more than once. The wall art placement also balances the height from the window-side plant. The main misstep risk is choosing items that are the right idea but the wrong scale.
What worked
- The textured area rug keeps beige from feeling flat under daylight.
- Two throw pillows add softness without committing to heavier furniture upgrades.
- The rattan floor lamp and rattan side table repeat the same material family.
- Botanical line-art prints add “clean” contrast next to the plant’s leaf shapes.
- Terracotta in the planter pot warms up the overall palette.
What didn't
- Using a bright white print or pillow would fight the warm curtains and rug undertones.
- A too-small lamp shade wouldn’t cast enough light for the seated side-table area.
- Placing the plant too far from the window can flatten the look because leaves won’t lift.
- Hanging both frames at the same height can make the left wall feel lopsided.
What we'd skip if we did it again
Skip swapping every textile at once. If you replace the rug, the pillows, and the wall décor in one go, it’s harder to notice what actually changes the mood, and you might end up with mismatched warm undertones. The photo’s success comes from choosing one anchor texture (rug), then echoing it with pillows and wall art.
Skip “perfect match” sets for frames and lamp components. The corner works because the materials feel related but not identical—botanical line art repeats, while rattan texture and terracotta bring variation. Mixing a slightly different frame wood tone with the same print style keeps it intentional without looking like a checklist.
Skip a plant with very sparse leaves. A small or thin plant can look like an afterthought next to sheer curtains and a high shelving unit, even if the pot color is right. If scale is the only thing to budget for, prioritize a plant with long fronds so the vertical movement is baked into the composition.
Frequently asked
How long does this kind of renter refresh take?
The non-DIY portion usually takes about 2–4 hours: rug placement, pillow swapping, lamp setup, and getting the two botanical prints centered. If you choose the DIY pressed-flower frame, add extra time for drying botanicals (you can press while you decorate). Hanging with Command strips also adds a small planning step for level/spacing.
Is this move-friendly when I leave my rental?
Yes—everything in the layer plan is either a soft good (rug, pillow covers, curtains if you add them) or a freestanding item (side table, floor lamp, indoor plant) or removable décor (framed prints). At move-out, you can pack the rug and textiles, move the lamp and table, and take the frames down without patching walls.
What if my living room is smaller than this corner?
If the room is tight, keep the rug but choose a smaller size that still sits under the front legs of the armchair. Scale down the plant pot slightly but keep the plant tall enough to add vertical line. For the wall, hang the two botanical prints closer together so they read as one composed unit instead of spreading out.
Where should I shop for these items without blowing the budget?
Look for the lamp and side table at big-box home stores for plug-in options, then shop secondhand for frames if you’re trying to keep costs down. The rug and pillow covers are easiest to search by texture keywords (woven, slub, textured). For the DIY frame, foraged botanicals help a lot—then you only buy a small frame and cardstock.
What’s the biggest mistake renters make when recreating this style?
Usually it’s picking pieces with the right colors but the wrong textures and scale. A flat rug and smooth pillows can make beige feel washed out, and a small plant can’t compete with the vertical space near curtains and shelving. Focus on texture-first, then repeat one material family (rattan) and one warmth cue (terracotta).
More in Living Room
Under $600: boho reading corner refresh with move-ready swaps
A warm, boho reading corner is achievable on a renter budget using rug, pillows, a rattan floor lamp, two botanical prints, and a leafy pla…
Under $500: 7 move-friendly living room corner swaps
A warm olive-and-cream living room corner refresh for shared housing, built from move-with-you swaps that pack fast. This $500 plan focuses…
Under $400: warm neutrals sofa-and-art living room refresh
A warm-neutral sofa-and-art living room refresh that renters can build without drilling, all under $400. The look hinges on a soft area rug…