- Best for
- Brighter dining lighting + wall styling
- Cost
- $680 total (aim for $700)
- Difficulty
- Easy-to-Moderate
- Time
- One weekend (about 6–10 hours)
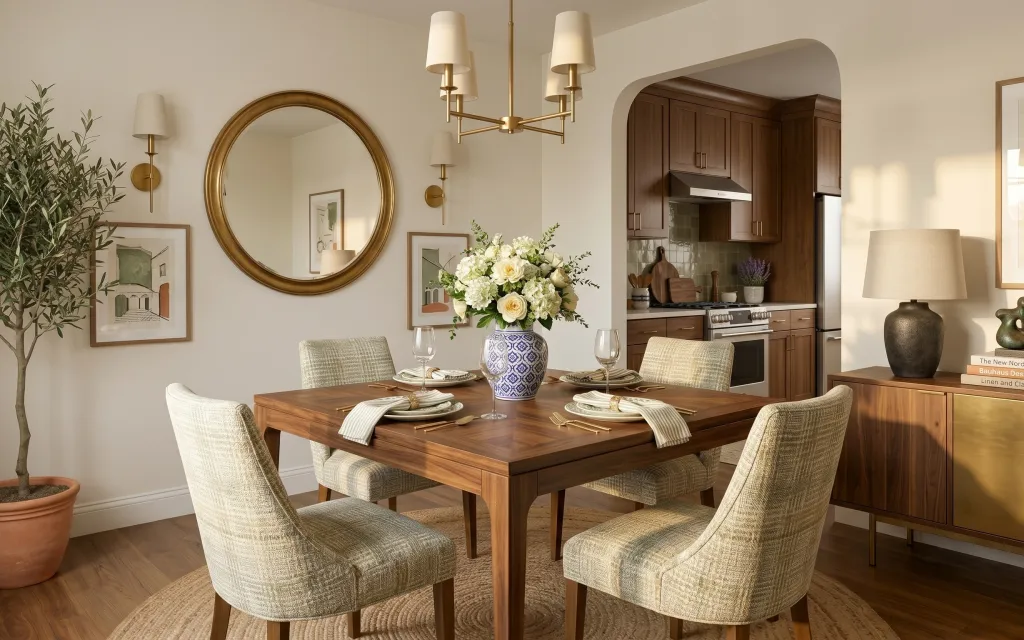
Why this olive-and-brass kitchen refresh is the dining nook of 2026
That round gold mirror and the warm brass lighting do most of the heavy lifting here, but the real “stays nice” move is texture layering: a woven area rug under the table, linen-like napkins, and a soft lamp shade that doesn’t bounce glare. The framed prints on the wall add color without adding clutter, while the dark wood cabinetry gives everything a solid, grounded backdrop. For homeowners, the best part is choosing a bolder, permanent-feeling look—like painting the planter pot to match the room—without having to redo the whole kitchen.
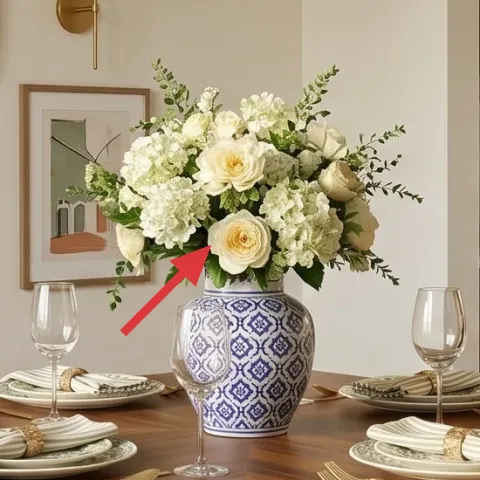
I almost bought another neutral pot in the exact same shade, because it feels like the safest choice. Then I noticed the terracotta planter is already doing its job by adding height—what it needed was less “orange on orange” and more coordination with the brass. Painting it gave the plant the same visual weight as the mirror, without fighting the dark cabinetry behind it. Once I did that, the whole dining nook looked calmer and more intentional.
Layer 1 — painted terracotta planter pot ($40) Match the pot to the brass
That tall terracotta planter on the left is a great structure-maker, but the classic terracotta orange reads louder than the rest of the palette. A quick paint job turns it into a quieter base so the small-leaf plant stays the focal point. Choose a muted finish (think warm cream or a softened gold tone) so it echoes the brass mirror and lamp rather than competing with them. The trade-off is time: you’ll need a little prep and a couple thin coats, but it’s far easier than swapping the plant itself or changing wall art later.
Make it instead of buying it
Paint the terracotta planter pot so the plant reads as part of the brass-and-white palette.
Materials
- Spray paint (warm cream) — 12–15 oz — hardware store — $10
- Sandpaper (medium grit) — 1 sheet — hardware store — $5
- Primer (for porous terracotta) — small can — hardware store — $6
- Clear coat (matte or satin) — small can — hardware store — $8
Steps
- Lightly scuff the pot with medium-grit sandpaper so the primer grips.
- Wipe off dust with a dry cloth.
- Apply a thin primer coat and let it dry fully.
- Apply 2–3 thin coats of spray paint, waiting for full dry time between coats.
- Check for any thin spots and touch those up with a light third pass.
- Finish with a clear coat to help the paint hold up near watering.
- Let the clear coat cure fully before moving the pot back into place.
- Reinsert the plant and refresh soil surface if it looks uneven.
Total DIY cost: $29 — saves about $11 over buying.
Keep paint thin, not thick
Thin coats avoid drips inside the pot’s ridges and make the finish look more “factory” than DIY.
Layer 2 — framed wall art print (left) ($80) Add color without taking over
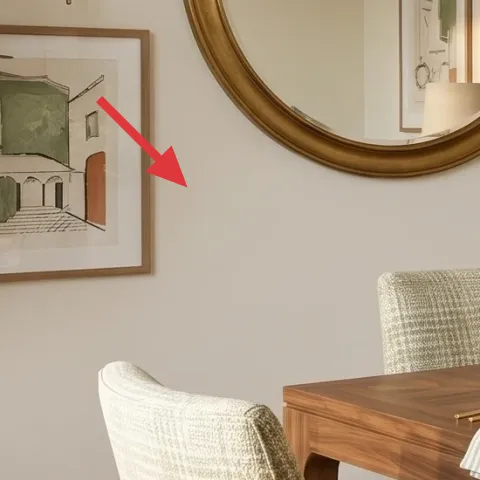
That left framed print is doing quiet work: it brings green tones into the space without turning the whole wall into a color sprint. Keeping the frame style consistent with the mirror (warm, metallic-leaning accents) helps the room feel designed, even when the art itself is simple. The alternative is matching everything too closely, but that can make the wall look flat against the dark wood cabinets. Instead, you’re aiming for contrast—green and warm neutrals—so the eye moves smoothly from plant height to mirror height.
Hang it at “eye level,” then fine-tune
Use painter’s tape to mark the top and center; shifting by 1–2 inches changes how the mirror reads.
Layer 3 — framed wall art print (center) ($80) Tie the wall to the dining table
The center framed print sits at the exact height your gaze naturally drops when you’re seated, which is why it feels like it belongs. It also repeats the room’s warm, earthy palette—so it supports the mirror instead of fighting it. This is the “better than adding more décor” choice: rather than stacking more objects on the sideboard, adding one well-placed print keeps the wall from going empty while staying balanced with the bouquet on the table. The trade-off is measuring: you’ll want consistent spacing so it doesn’t look accidental in a room with strong lines.
Match spacing, not perfection
Keep equal gaps between the frames even if the prints don’t line up perfectly with the mirror.
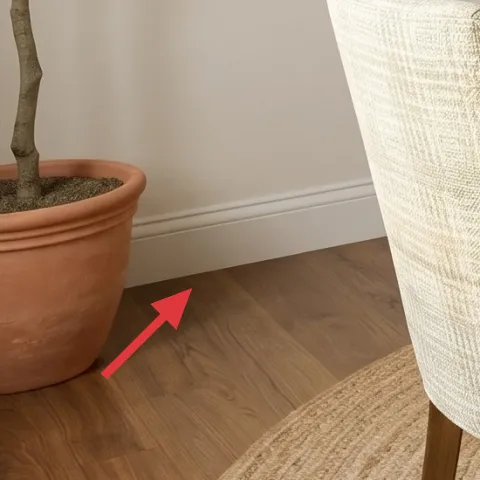
Layer 4 — woven area rug 5×7 ($200) Anchor the dining zone
A woven rug under the table is the foundation that makes everything else feel intentional. In this photo, the rug softens the hard floor and makes the chairs look like they belong in the same “zone,” even with the kitchen cabinetry in the background. Going with a neutral, woven texture (instead of a glossy pattern) also makes the brass mirror and lamp feel warmer, not shinier. The trade-off is size: a 5×7 needs a little strategy, like making sure chair legs stay on the rug when people sit and pull out.
Don’t size it too small
If chair legs miss the rug, the dining area starts to look like it’s floating over the floor.
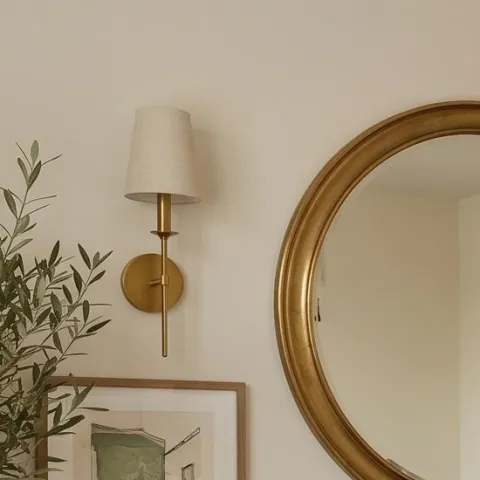
Layer 5 — large round gold mirror ($120) Expand the light around the room
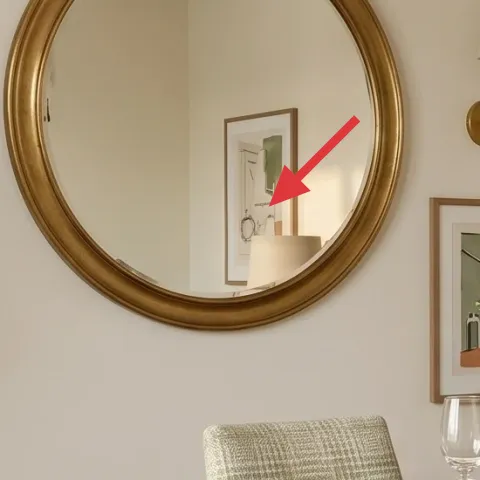
This large round gold mirror is the piece that makes the whole nook feel brighter and more open. The curve echoes the rounded lamp shades and softens the room’s sharper angles from cabinetry lines. A smaller rectangle mirror would be easier to source, but it wouldn’t create the same “halo” effect around the center wall art and the plant’s height. The trade-off is visual dominance: once you choose a large mirror, it’s worth keeping the surrounding décor simple and letting the framed prints and bouquet do the color work.
Clean the glass before you hang
New mirrors can have a film from handling; a quick wipe keeps the brass glow crisp.
Layer 6 — brass table lamp on sideboard ($60) Warm the right side after dark
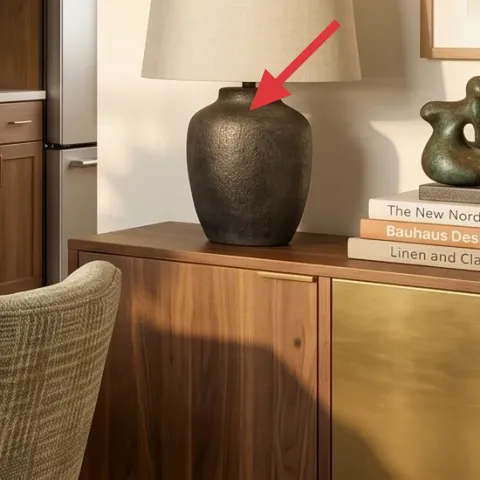
On the right, the brass table lamp adds a softer layer of light that complements the overhead chandelier. The cream shade is key because it diffuses the glow and keeps the room from feeling harsh, especially when the kitchen lights aren’t on. If you skip a lamp and rely only on overhead lighting, you tend to get shadowy corners—like the sideboard—where objects and styling get lost. The trade-off is placement: the lamp should sit where its pool of light reaches the table and wall, not where it shines directly into eyes.
Choose a warm bulb tone
Warmer bulbs help the brass read gold instead of yellow-green.
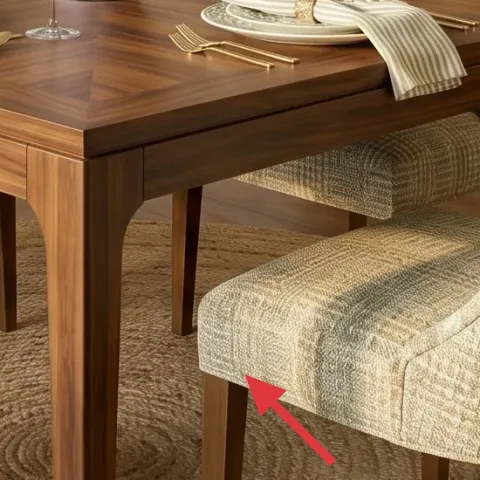
Layer 7 — upholstered dining chair ($100) Keep the seating visually consistent
The upholstered dining chair is what turns this nook from “pretty photo” to “actually comfortable to live in.” That fabric texture and neutral weave repeat the rug’s vibe, so the table setting doesn’t look too formal against the cozy background. Swapping only décor items would still leave the room feeling incomplete, but upgrading seating visuals ties everything together: rug texture, neutral napkins, and the plant’s soft greenery. The trade-off is price versus practicality—one solid chair refresh gives you the look without redoing all four at once, as long as the fabric color stays consistent across the set.
Use the same undertone as your rug
If the rug pulls more warm, keep chair fabric warm too so they don’t clash in daylight.
The cost, layer by layer
| Layer | Item | Cost |
|---|---|---|
| 1 | Painted terracotta planter pot ($40 at retail) | $40 |
| 2 | Framed wall art print (left) ($80 at retail) | |
| $80 |
For a cheaper version, use one smaller framed print instead of two, and go for a 4×6 woven rug (or a thinner jute blend) to keep the dining nook grounded without spending on the largest mirror.
What worked, what didn't (across the whole room)
The best wins here are the “light + texture” combos: the round gold mirror and the woven rug make the dining nook feel brighter and calmer at the same time. The framed prints add color in a way that doesn’t clutter the table area, and the lamp placement keeps the sideboard from going dark after sundown.
What worked
- The round gold mirror reflects warm brass tones and makes the center wall feel larger.
- The woven rug gives the chairs a defined dining zone, even with cabinetry in the background.
- Framed art placement at seated eye level keeps the wall visually connected to dinner time.
- The cream-shade lamp adds softer evening light to the right side and reduces corner shadows.
- Painting the terracotta planter calms the palette and lets the greenery read intentionally.
- Upholstered chair texture matches the rug, so the whole setting looks cohesive, not assembled.
What didn't
- Relying on overhead light alone made the sideboard look flatter and darker.
- Mixing cool-gray art tones with warm brass created a slight mismatch in daylight.
- Choosing a rug that’s too small would pull chair legs off it and break the zone effect.
- Leaving the terracotta pot unpainted made the orange color compete with the brass tones.
- Trying to add too many small décor items on the sideboard diluted the mirror’s impact.
What we'd skip if we did it again
Skip adding extra small décor on the sideboard just to “fill space.” With a brass lamp and a stack of books, the right side already reads intentional, and too many objects makes the dining nook feel busy against the cabinetry.
Skip a smaller, more generic wall mirror. In this layout, the large round shape is what carries the bounce of light and softens the room’s straight cabinet lines.
Skip oversizing the rug only because it feels safer. A rug needs to work with how chairs pull in and out, and the goal is staying anchored without dragging the dining set off the rug.
Frequently asked
How long does this kind of dining nook refresh take?
Most of the time goes to prep and placement: painting the terracotta planter, hanging the framed prints, and positioning the rug so chair legs stay on it. If frames are pre-built, the rest is quick styling—about 6–10 total hours for a weekend homeowner refresh. If patching/cleaning wall spots is needed for level hanging, add an extra hour.
Can I do this if I rent or I’m worried about wall damage?
Yes. Use removable picture-hanging hardware designed for rentals (and follow the weight limits). The mirror and framed prints can go up with no-drill methods if studs aren’t available. Keep the higher-impact changes (rug, lamp, painted planter) that don’t require lasting wall work, and the dining nook still looks fully “finished.”
What if my dining nook is smaller than this photo?
In a smaller space, keep one statement wall piece rather than multiple competing ones. A large round mirror can still work, but you may need narrower framed prints or tighter spacing. Choose a rug size where front chair legs remain on the rug, even if you can’t fit everything perfectly. The key is maintaining a defined dining zone.
What if my space is larger—do I need to buy more décor?
Bigger rooms usually need more scale, not more objects. Stick to the same palette and repeat the materials: woven texture, warm brass, cream textiles, and green in the plant or art. A larger mirror or taller plant can extend height, while additional framed prints can be added only if spacing remains intentional and doesn’t crowd the wall.
Where should I shop for these specific items?
For the rug and lamp, look at home stores and online retailers that offer actual sizing details (5×7 is common). Framed art prints can come from discount home sections or curated print shops—just keep the frame finish warm (brass/wood tone). The planter paint is easiest from a local hardware store so you can match sheen and coverage.
Biggest mistake to avoid in a dining nook refresh like this?
The most common slip is buying one big statement item (like a mirror) and forgetting the “texture + seating” support. Without the woven rug and cohesive chair fabric tone, the room can look staged instead of lived-in. The second mistake is choosing a rug size that lets chair legs fall off—it breaks the dining-zone effect fast.
More in Kitchen & Dining

Under $700: a brass-and-white dining nook refresh
A brass-and-white dining nook refresh for homeowners, built on a $700 weekend budget. Swap in warm textures (rug, mirror, lamp) and sharpen…
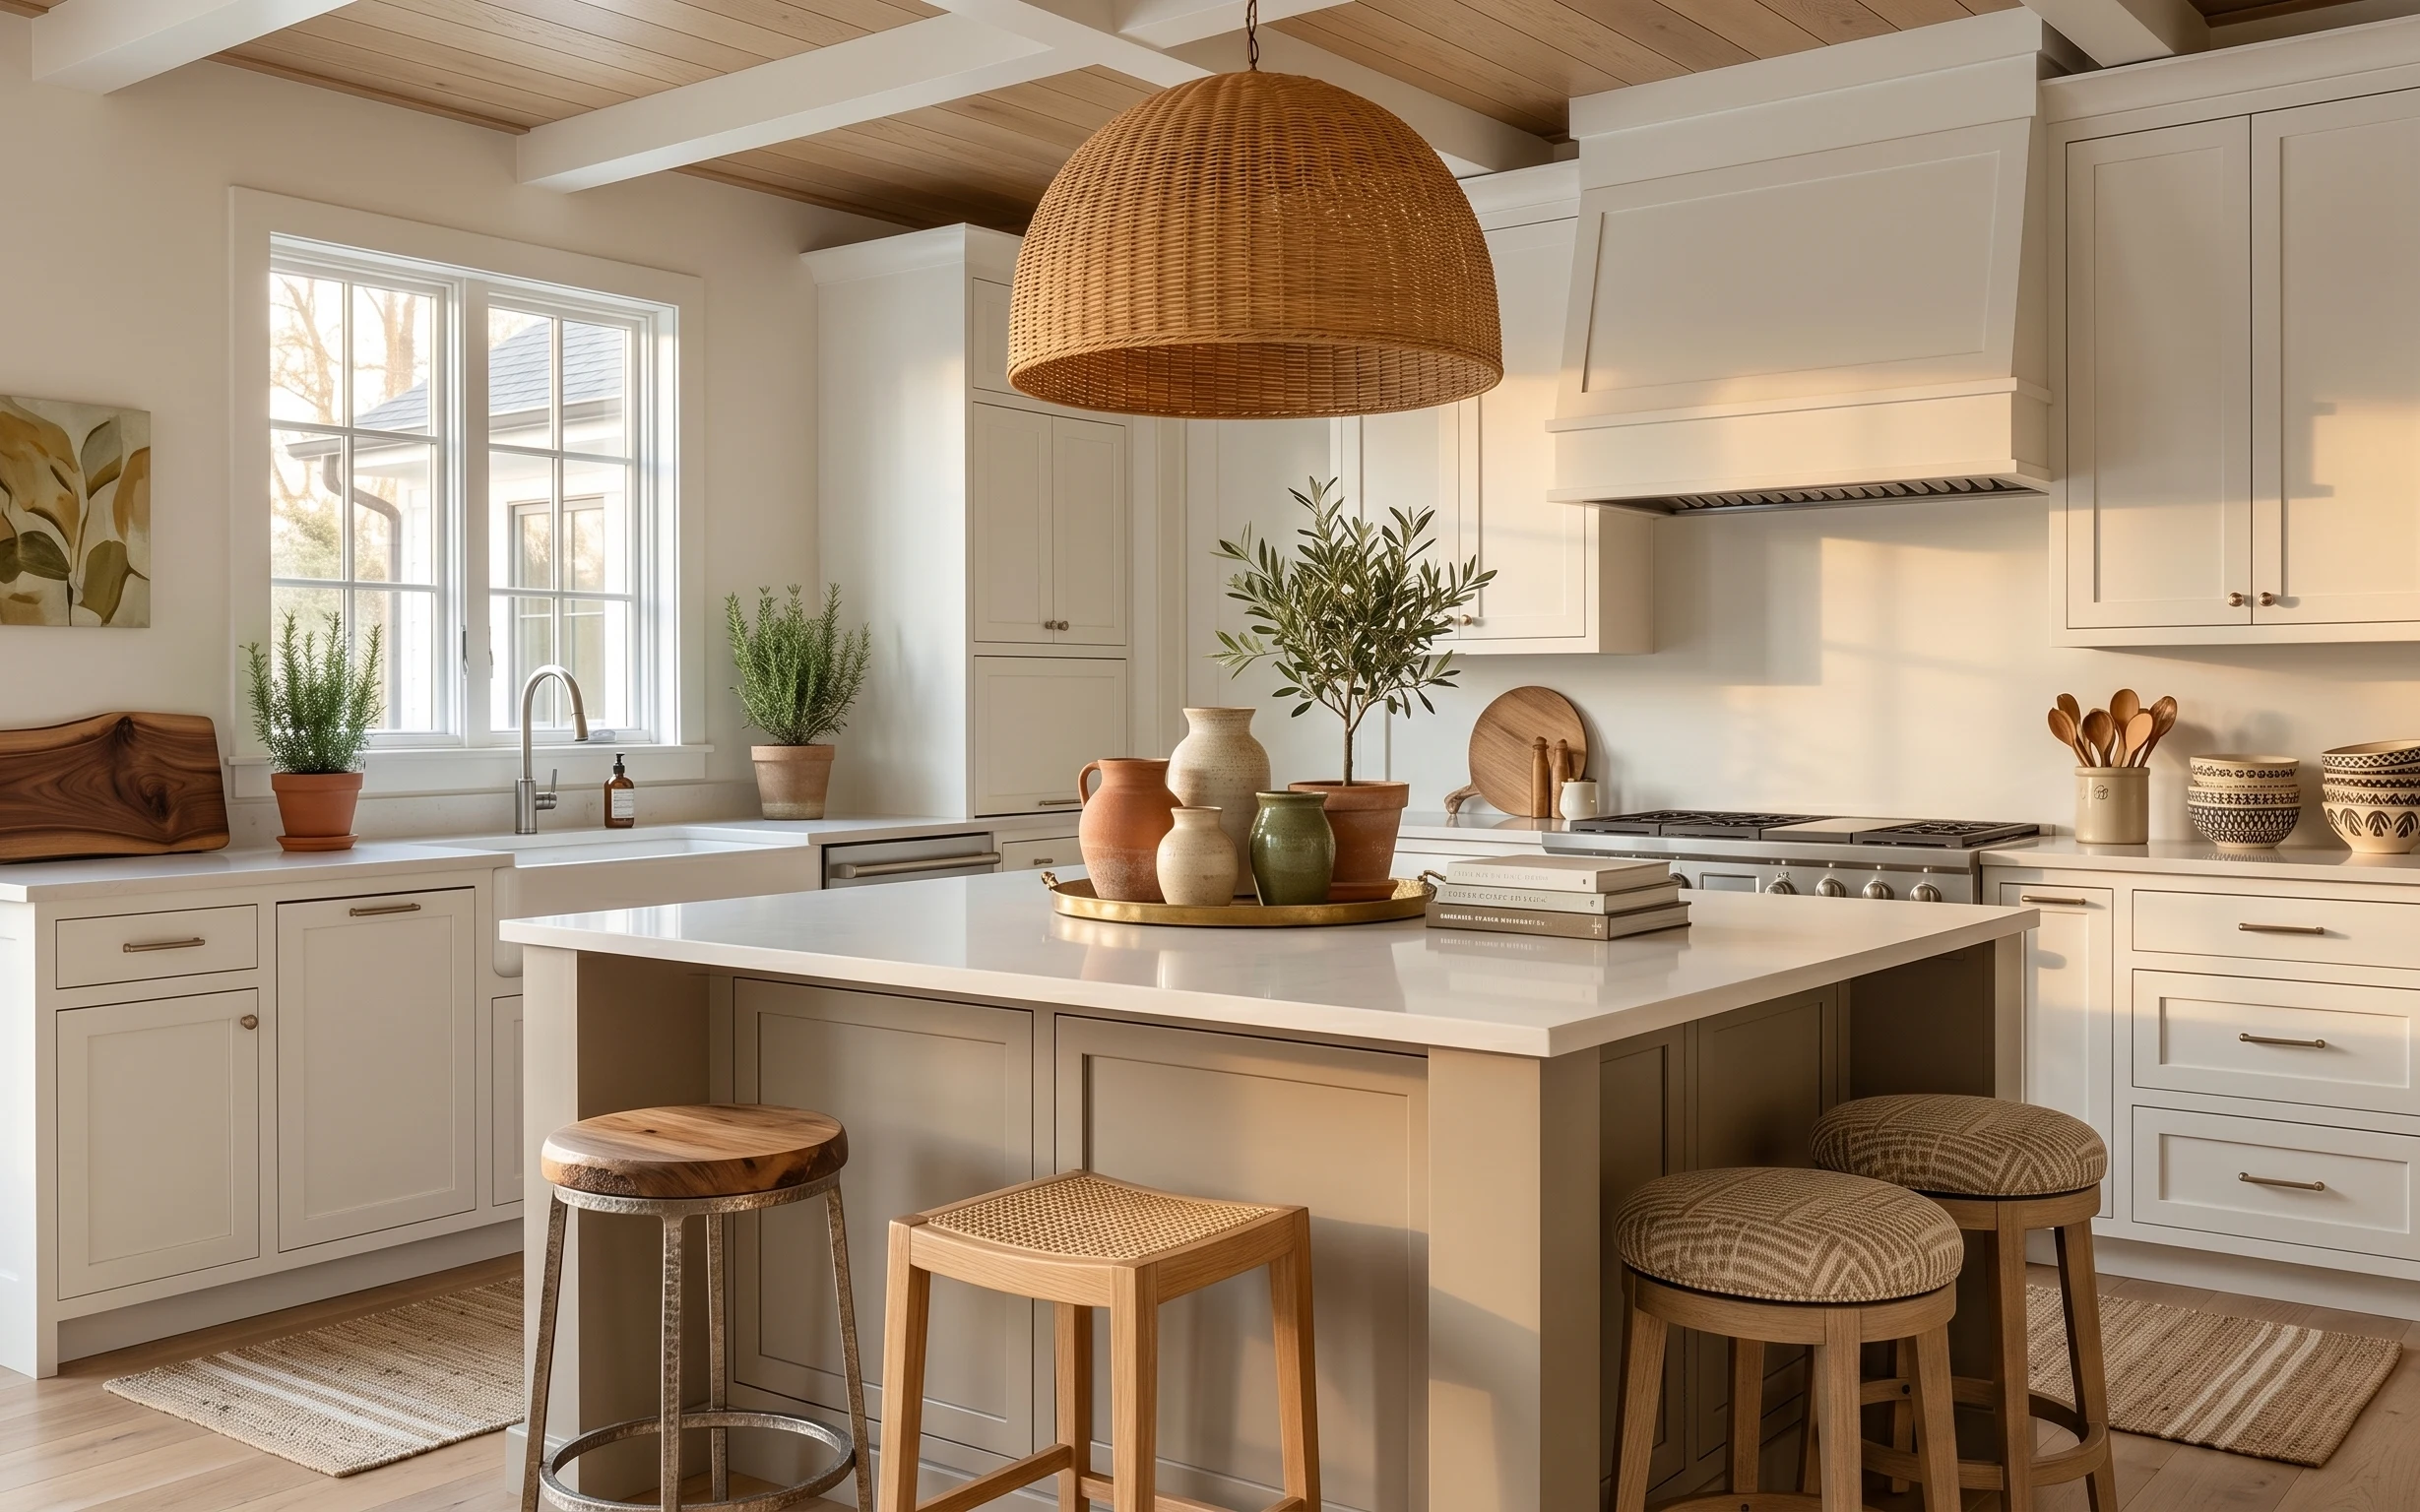
Under $600: 7 weekend swaps for a kitchen island nook refresh
Bright, airy kitchens don’t need a renovation to feel finished. This weekend-friendly island nook refresh uses 7 visible swaps—rug, art, li…
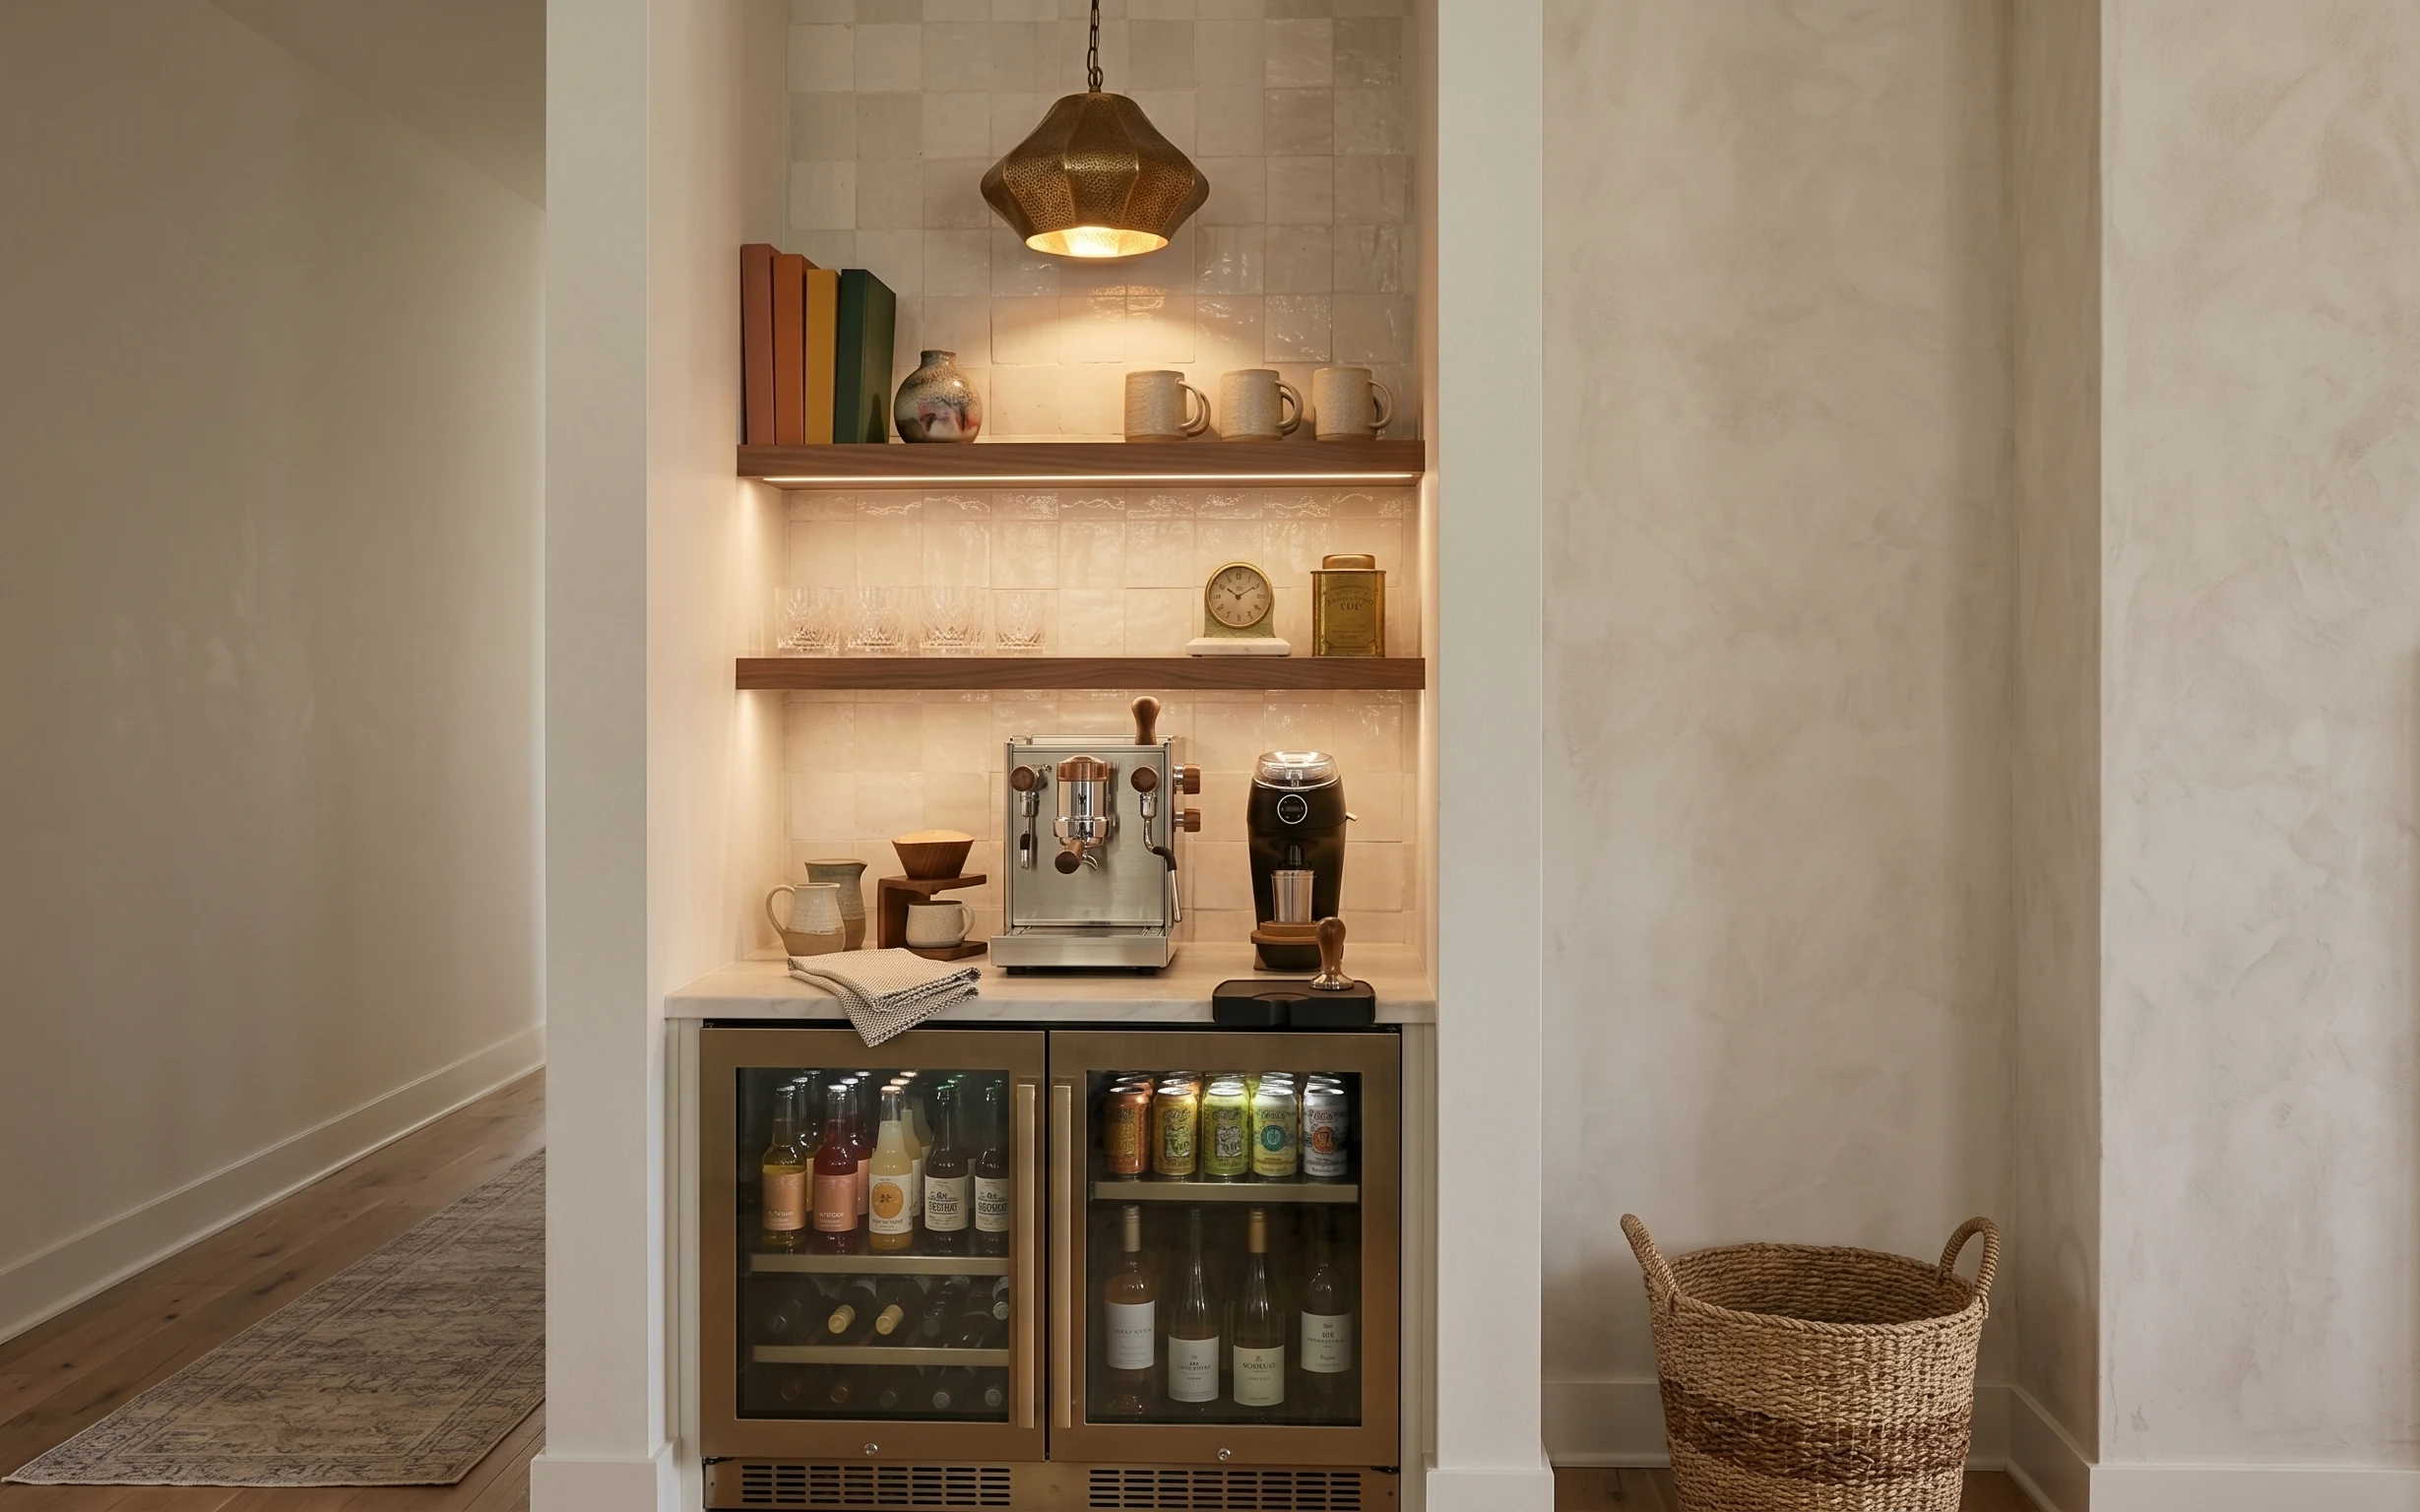
Under $350: coffee bar nook renter refresh with 7 swaps
Warm brass coffee bar nook refresh for US renters: a patterned rug, a wicker storage basket, a dish towel styling moment, and shelf swaps t…