- Best for
- Creating a leafy, gold-hour balcony seating zone
- Season
- Spring through early fall (bring candles/plant inside as needed)
- Weatherproof
- Use wipeable decor and protect candles from splashes
- Cost
- Under $700 for the full layered look
Why olive-green greenery-wall refresh is the balcony daybed corner of 2026
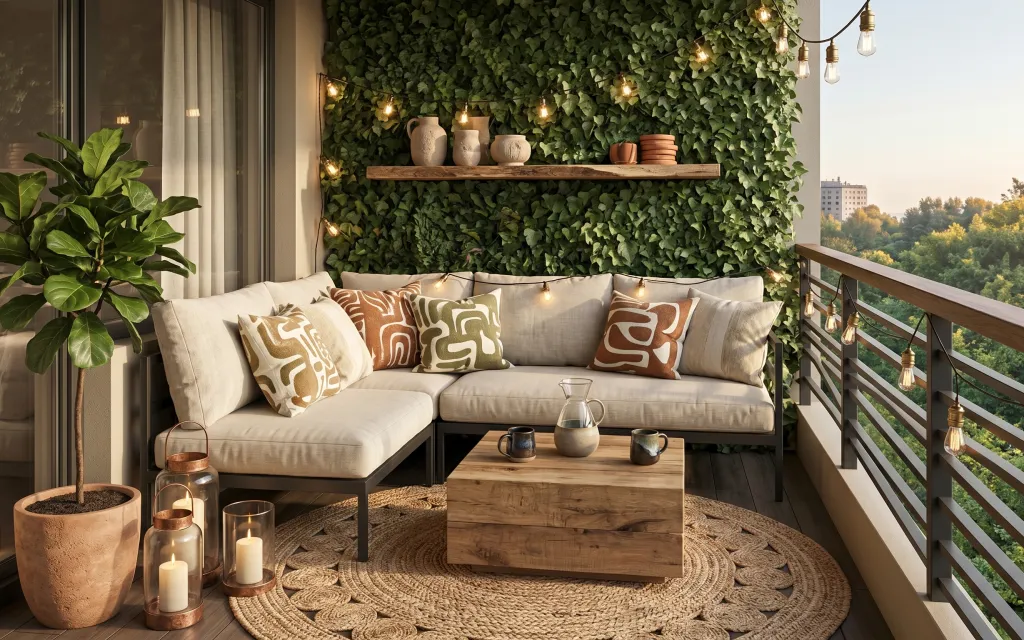
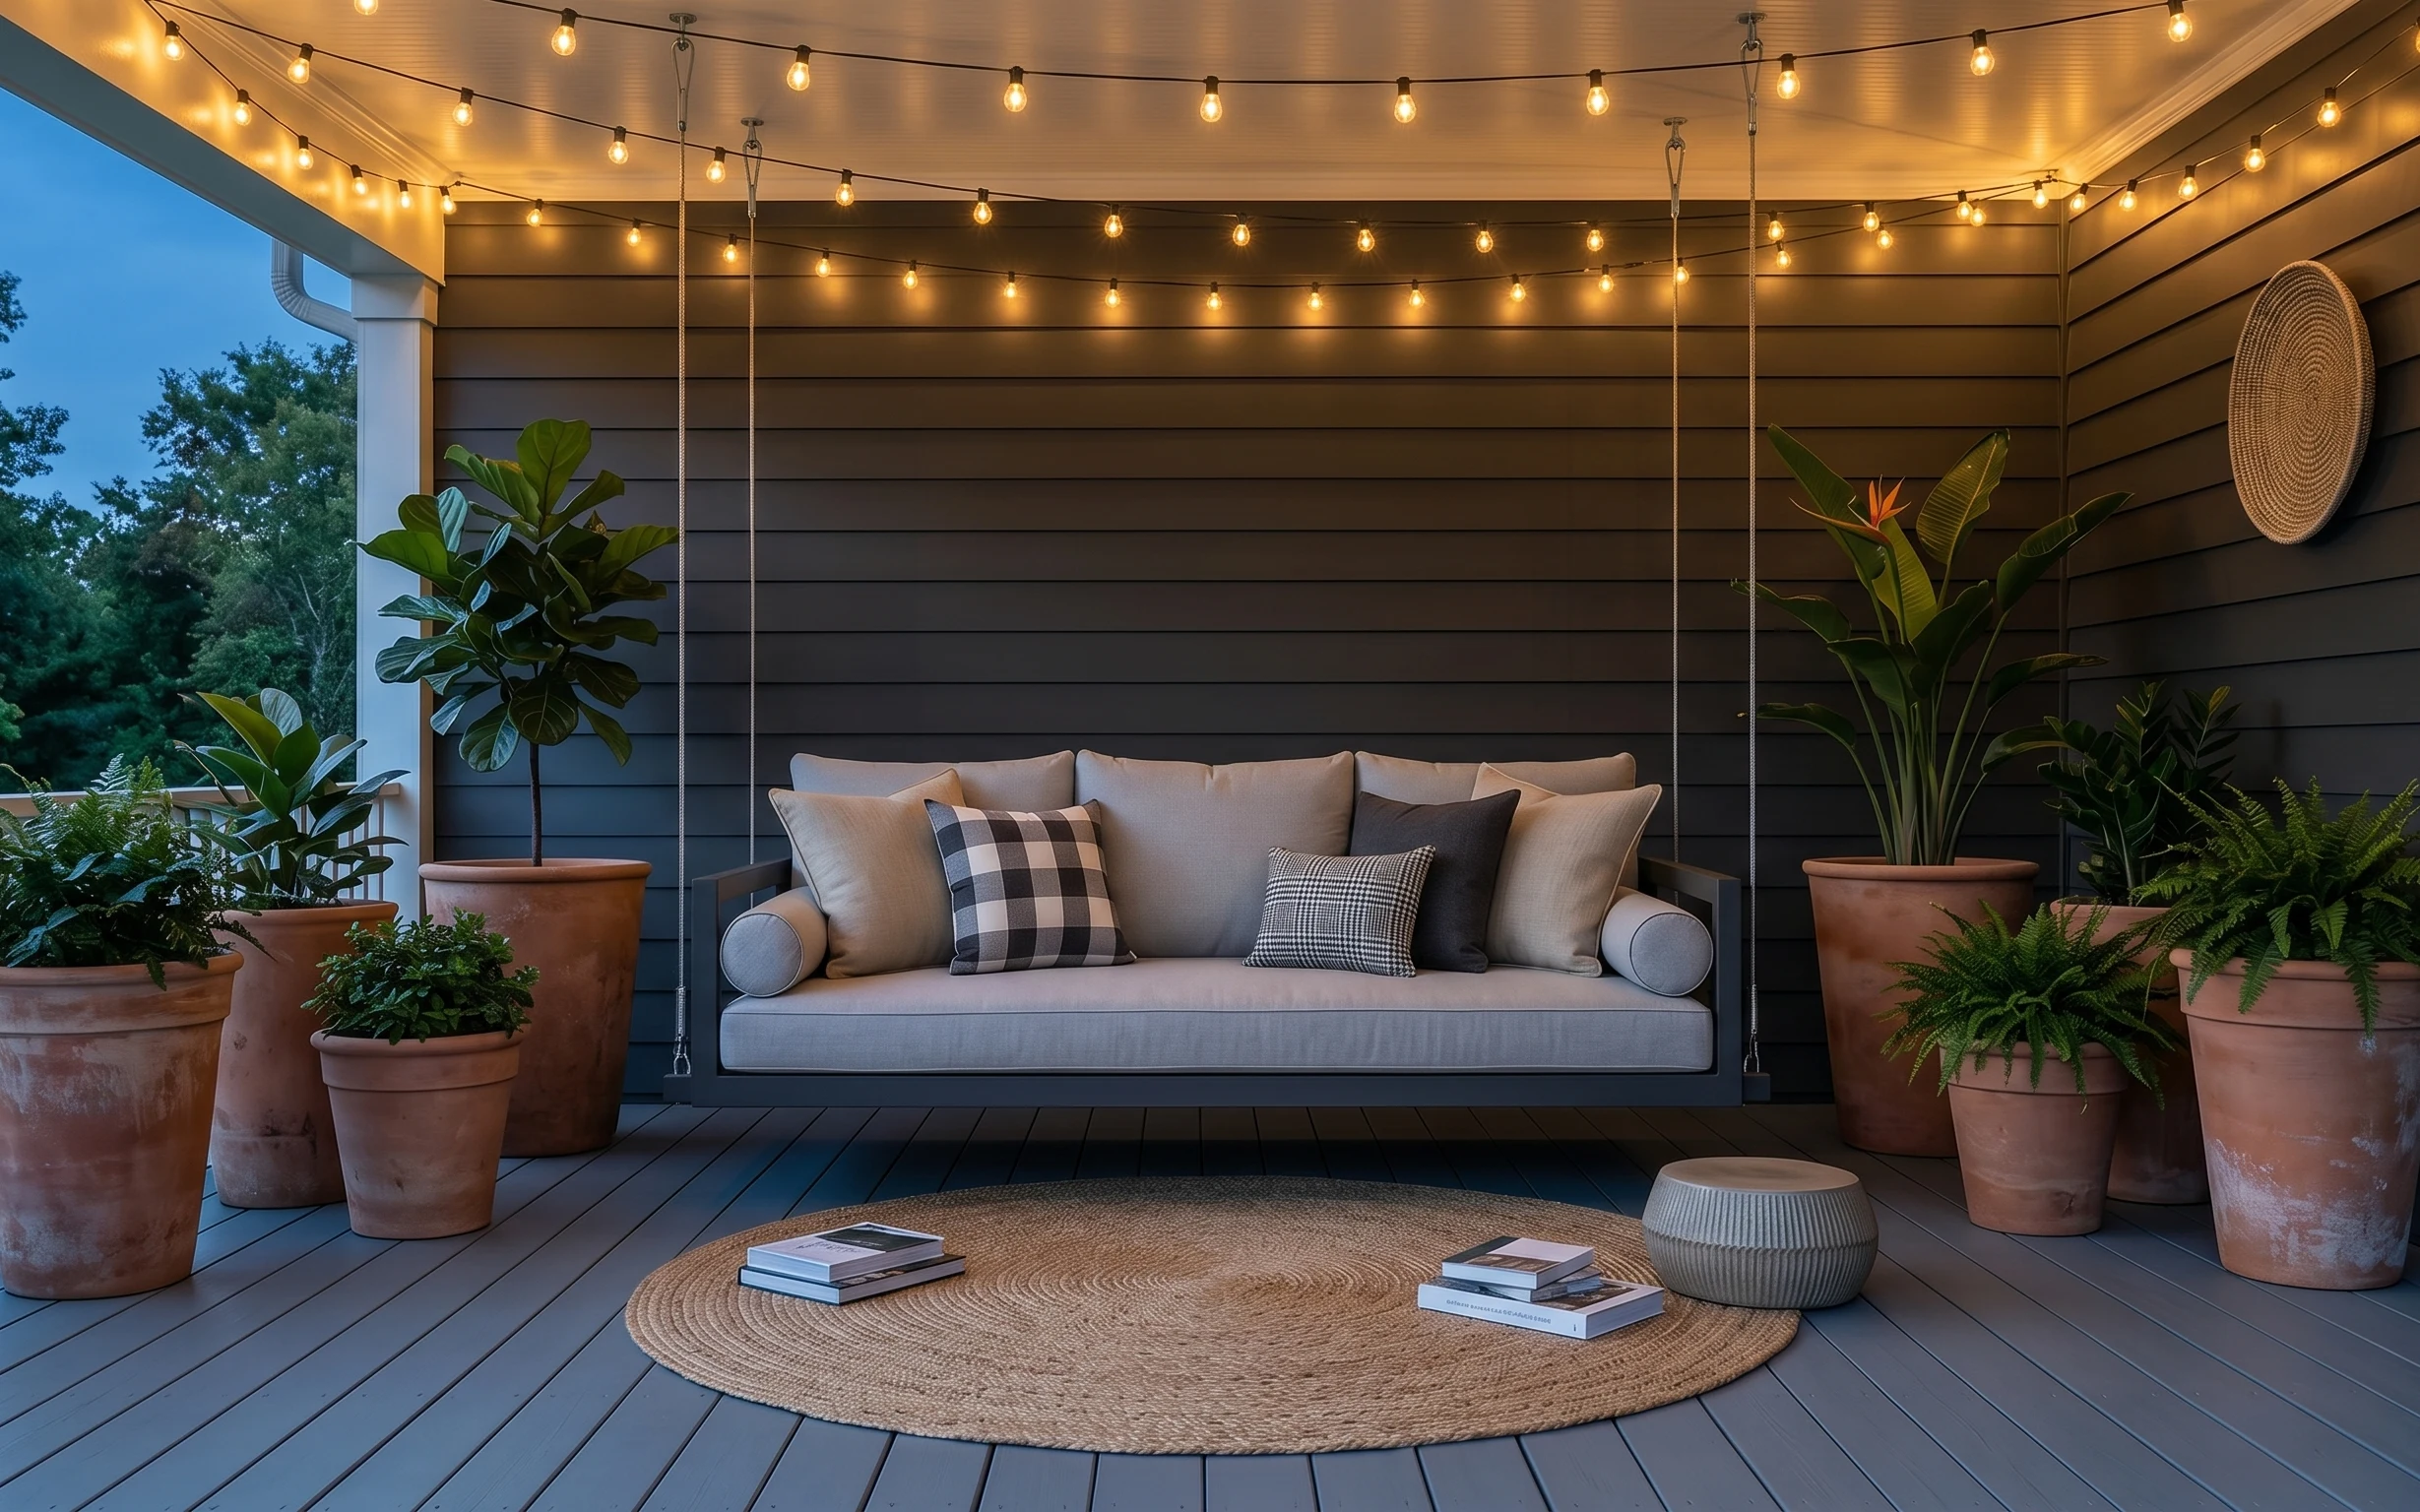
The fastest way to make an outdoor daybed feel intentional is to anchor it with one bold backdrop. Here, the leafy wall panel sits behind cream cushions and patterned throw pillows, then warms up at night with string lights. Notice how the textures do a lot of the talking: the beige area rug underfoot, the woven-looking pillow patterns, and the terracotta tones from the planters. Even on a rental budget, this is doable because every upgrade is removable and packs up when your lease ends.
I used to overthink these setups and tried to match every color exactly—until I made a beige-everything balcony feel flat. What fixed it for me was adding contrast: a deep green wall texture and warm metallic accents around the candles. Once the backdrop and lighting were in, I stopped chasing perfection and focused on shape—one big rug, four pillows that repeat the same palette, and a small grouping on the coffee table.
Layer 1 — area rug (beige, patterned oval) ($200) Ground the daybed with a soft, patterned base
This beige area rug with a busy pattern is the literal foundation under the daybed—visually it tells your eye where the “room” starts on the balcony floor. I’d choose a patterned oval or large rug like this over a plain flat weave because the busy surface hides weather-transfer scuffs and makes the layered pillows look richer without adding more items. The trade-off: busy patterns can feel loud if the rest is neon, so the pillow and planter palette stays warm-cream and terracotta. If your balcony is narrow, aim for a rug that reaches under the front edge of the daybed for the same grounded effect.
Let the rug edge disappear
When a rug sits partially under the daybed, the space looks bigger and less “staged.” Center it so the front feet area stays visually connected to the pattern.
Layer 2 — throw pillow covers (patterned mix) ($48) Repeat the same earth tones across every cushion
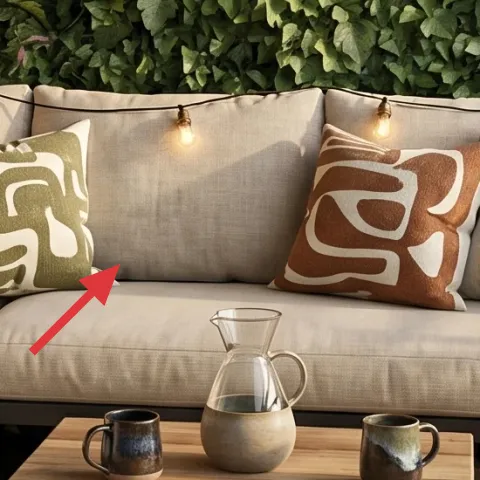
The patterned throw pillows on the daybed are doing two jobs at once: adding rhythm and pulling the palette into focus. Instead of buying one solid pillow in every color, the mix here repeats warm cream with tan and cocoa accents, so everything reads as one set. That’s why it works with the leafy backdrop—your eyes get pattern texture without fighting the wall. The trade-off is that patterned pillows can look messy if you pick too many different graphic styles, so keep the scale similar and repeat at least two colors across all the covers. These are also a renter-friendly swap compared to changing any built-in surfaces.
Choose covers you can swap back
If your lease limits changes, pillow covers are one of the easiest ways to “edit” the look without touching the daybed itself.
Layer 3 — peel-and-stick wallpaper (leafy greenery wall) ($150) Add depth without mounting anything permanently
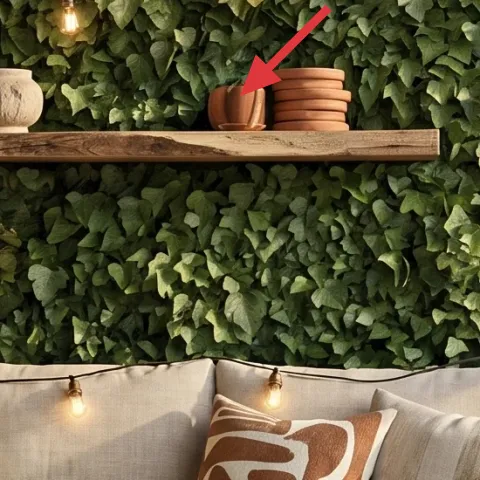
This leafy peel-and-stick wallpaper panel creates the exact kind of full-coverage backdrop that designers usually spend hours on—except you’re doing it with removable sheets. Placed behind the daybed, it gives the illusion of a private garden wall, which makes the cream cushions look brighter and the copper tones look warmer. I’d pick wallpaper like this over removable fabric panels because you get consistent leaf texture and a clean edge at the top. The trade-off is that you need a careful surface (smooth and free of grit) for the best adhesion. Still, it’s renter-safe and comes off when you move.
Skip glossy walls for better stick
If your wall surface is dusty or glossy, adhesion can drop and edges can lift—wipe first and test one corner before committing.
Layer 4 — string lights with exposed bulbs ($20) Make the whole corner glow after dark
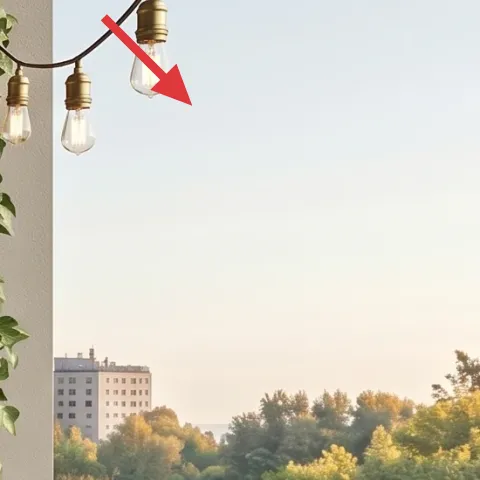
Those exposed-bulb string lights are what turn the daytime setup into a “linger on the balcony” moment. Because the bulbs hang across the upper section near the railing, they create warm light at multiple heights—so the green backdrop, pillow textures, and coffee table styling all feel connected. I’d choose plug-in string lights like this over a single overhead lantern because one light can cast harsh shadows on pillows and the rug. The trade-off is that cord placement matters: you want it to frame the daybed without wrapping around your seating. Use the existing railing layout as your guide and keep the plug accessible.
Route cords along structure
Run the wire along the railing posts or behind the shelf line so the light reads as intentional, not accidental.
Layer 5 — large potted leafy plant (terra-cotta pot) ($40) Bring real-life scale to the greenery theme
The large leafy plant at the left side adds height and softness that the wallpaper can’t replicate on its own. In this photo, the terra-cotta pot echoes the warm planters and copper accents, so the whole corner feels cohesive instead of “decor-on-top.” I like adding one bigger plant rather than several small ones because it anchors the corner visually and helps balance the big leaf wall behind the daybed. The trade-off is that big plants need basic care, and if you use indoor-style plants outdoors, you’ll want to bring them in during harsh weather. Still, for most rentals, this is an easy add that packs up later.
Match the pot color, not the plant
Even if you swap plant varieties, sticking to a warm terracotta pot tone keeps the palette consistent.
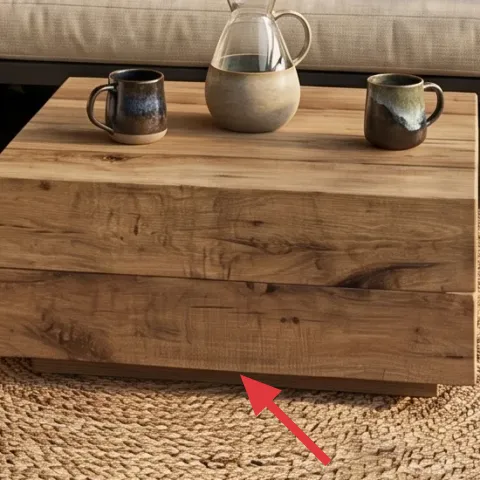
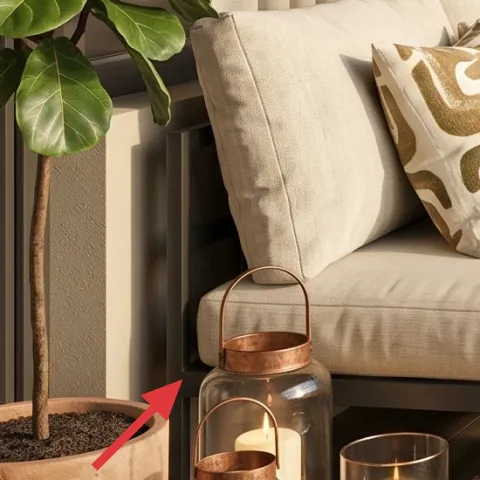
Layer 6 — wood coffee table (front plank style) ($140) Create a landing zone for candles and cups

A sturdy wood coffee table gives the setup a real “living room” function on the balcony. Here, it holds mugs and candle groupings without crowding the rug, which makes the daybed feel like a usable seating area. I’d choose a table with visible grain (like this plank-style top) over a glossy or ultra-light finish because warm wood ties the terracotta and copper details together with the beige rug. The trade-off is that outdoor-ready placement matters—if your balcony gets heavy rain, you’ll need to wipe it down and keep candles protected from splashes. Functionally, though, it’s the piece that makes styling feel practical instead of decorative.
Style in a tight triangle
Cluster items on the table into a triangle: one taller piece, two supporting items. That keeps the surface from looking scattered.
Layer 7 — candle pour (glass jar candles) ($35) Replicate the warm flames without buying a matching set
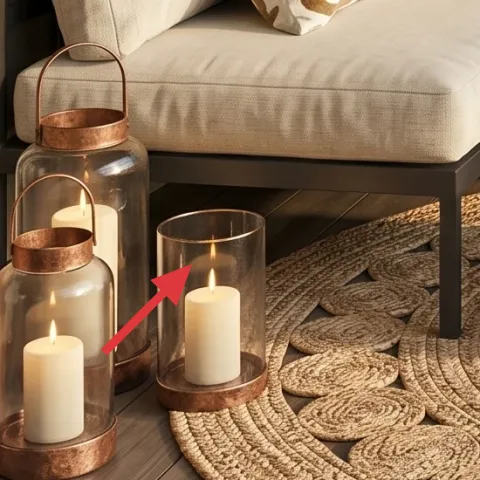
Make it instead of buying it
DIY simple glass-jar candles (for the same warm amber glow) so the balcony corner looks finished without hunting for an exact “set.”
Materials
- Candle wax (about 1 lb / enough for 2–3 small jars) — any soy/wax flakes — $15
- Wick + metal tab (2–3 wicks) — craft store — $5
- Glass jars (2–3 small jars) — thrift or craft store — $8
- Candle dye or fragrance oil (optional, small amount) — craft store — $2
Steps
- Set up your jars and test-fit the wick tabs so each wick sits centered.
- Gently melt candle wax in a heat-safe container until fully liquid.
- Stir in optional dye or fragrance for a subtle warm tone.
- Pour wax into each jar, keeping the wick centered as you go.
- Let the jars cool until the surface firms up and the wax stops shrinking.
- Trim wicks and light one jar at a time to check the burn pattern.
Total DIY cost: $30 — saves about $5 over buying.
The cost, layer by layer
| Layer | Item | Cost |
|---|---|---|
| 1 | Beige patterned area rug (8×10) | $200 |
| 2 | Patterned throw pillow covers (set of 4) | $48 |
| 3 | Peel-and-stick leafy wallpaper (one wall) | $150 |
| 4 | Plug-in string lights with exposed bulbs (set) | $20 |
| 5 | Large potted leafy plant (terra-cotta pot) | $40 |
| 6 | Wood coffee table | $140 |
| 7 | Glass-jar candles (DIY equivalent) | $35 |
| Total | $633 | |
If you want a cheaper version, downsize the rug (a 5×7) and use fewer pillow covers. Keep the leafy peel-and-stick wall and string lights—they’re the “big read” elements that make the whole corner feel designed even with less styling.
What worked, what didn't (across the whole room)
This look works because the heavy texture sits in two places: the leafy wall and the patterned rug. After that, lighting and warm-toned accessories do the rest. The main weakness is that too many competing patterns can crowd the daybed if you don’t keep your repeat colors tight.
What worked
- The leafy peel-and-stick wall makes the balcony feel more private and visually complete.
- Patterned pillow covers add movement without changing any rental-fixed pieces.
- String lights create warm, layered light at night that flatters the green backdrop.
- The beige rug keeps the daybed seating area from looking like it’s floating on decking.
- Terra-cotta and copper accents show up again through candles and planters, so nothing feels random.
- The wood coffee table gives a practical surface for mugs and candle groupings.
What didn't
- Too many different graphic pillow styles makes the corner look busy instead of curated.
- String lights placed too low can cast glare on pillow fabric and reduce comfort for sitting.
- If the plant looks “off palette,” it can fight the wall’s leaf tone—pot color matters most.
- A rug that’s too small forces your eye to stop at the deck boards instead of continuing into the seating zone.
What we'd skip if we did it again
Skip an all-one-color pillow set. The pattern mix is what makes the cream cushions look textured against the leafy wall, and it also keeps the copper-and-terracotta details from feeling isolated.
Skip buying a matching candle “collection” from one store. Mix candle heights and jar shapes instead, or DIY the candles—what matters is warm flame color and safe placement, not brand sameness.
Skip trying to add a second bold wall texture. The leafy wallpaper already does the heavy lift; if the wall has another pattern, it will compete with the rug and pillow graphics.
Frequently asked
How long does this balcony setup take to pull together?
Most of the time goes into the peel-and-stick wallpaper (measuring, lining up, smoothing) and arranging the first styling pass on the daybed and coffee table. Expect about 2–4 hours for the wall, plus another 1–2 hours for lights, pillows, and candles. If your surface isn’t perfectly clean, add a little extra time—clean contact matters for removable wallpaper.
Will this work in a smaller balcony?
Yes—scale down by choosing a smaller rug (like a 5×7) and using fewer pillow covers (keep the same earth-toned pattern family). The string lights can stay, but keep the cord runs tight to reduce visual clutter. The wall backdrop is still the key anchor; even a narrower leafy section behind the daybed will read as intentional.
What if I can’t stick peel-and-stick wallpaper to my balcony wall?
If the surface won’t hold peel-and-stick reliably, aim for a removable, full-width alternative that still covers the main backdrop area. The goal is the same: one dominant leaf texture behind the daybed. As long as the pillows and string lights remain consistent, the corner can still look cohesive without wallpaper.
Where do I shop for the string lights and pillow covers for this look?
String lights with exposed bulbs are easy to find at big-box home stores and online, especially in plug-in sets meant for patios. For pillow covers, search for “patterned throw pillow covers” in warm cream, tan, and cocoa tones—then verify the fabric weight so they lay smoothly on the cushions. Matching the colors matters more than matching the exact pattern.
What’s the biggest mistake people make with balcony daybed decor?
Overcrowding. If you add too many patterns and too many small objects at once, the leafy backdrop can feel chaotic instead of lush. Keep one bold texture (the leafy wall), one grounding textile (the large rug), and then repeat a warm palette through pillows, plant pot color, and copper accents.
More in Outdoor & Patio

Under $700: olive-green balcony daybed swaps for renters
A balcony daybed corner can look custom without landlord permission. This renter-friendly refresh uses a leafy peel-and-stick backdrop, pat…
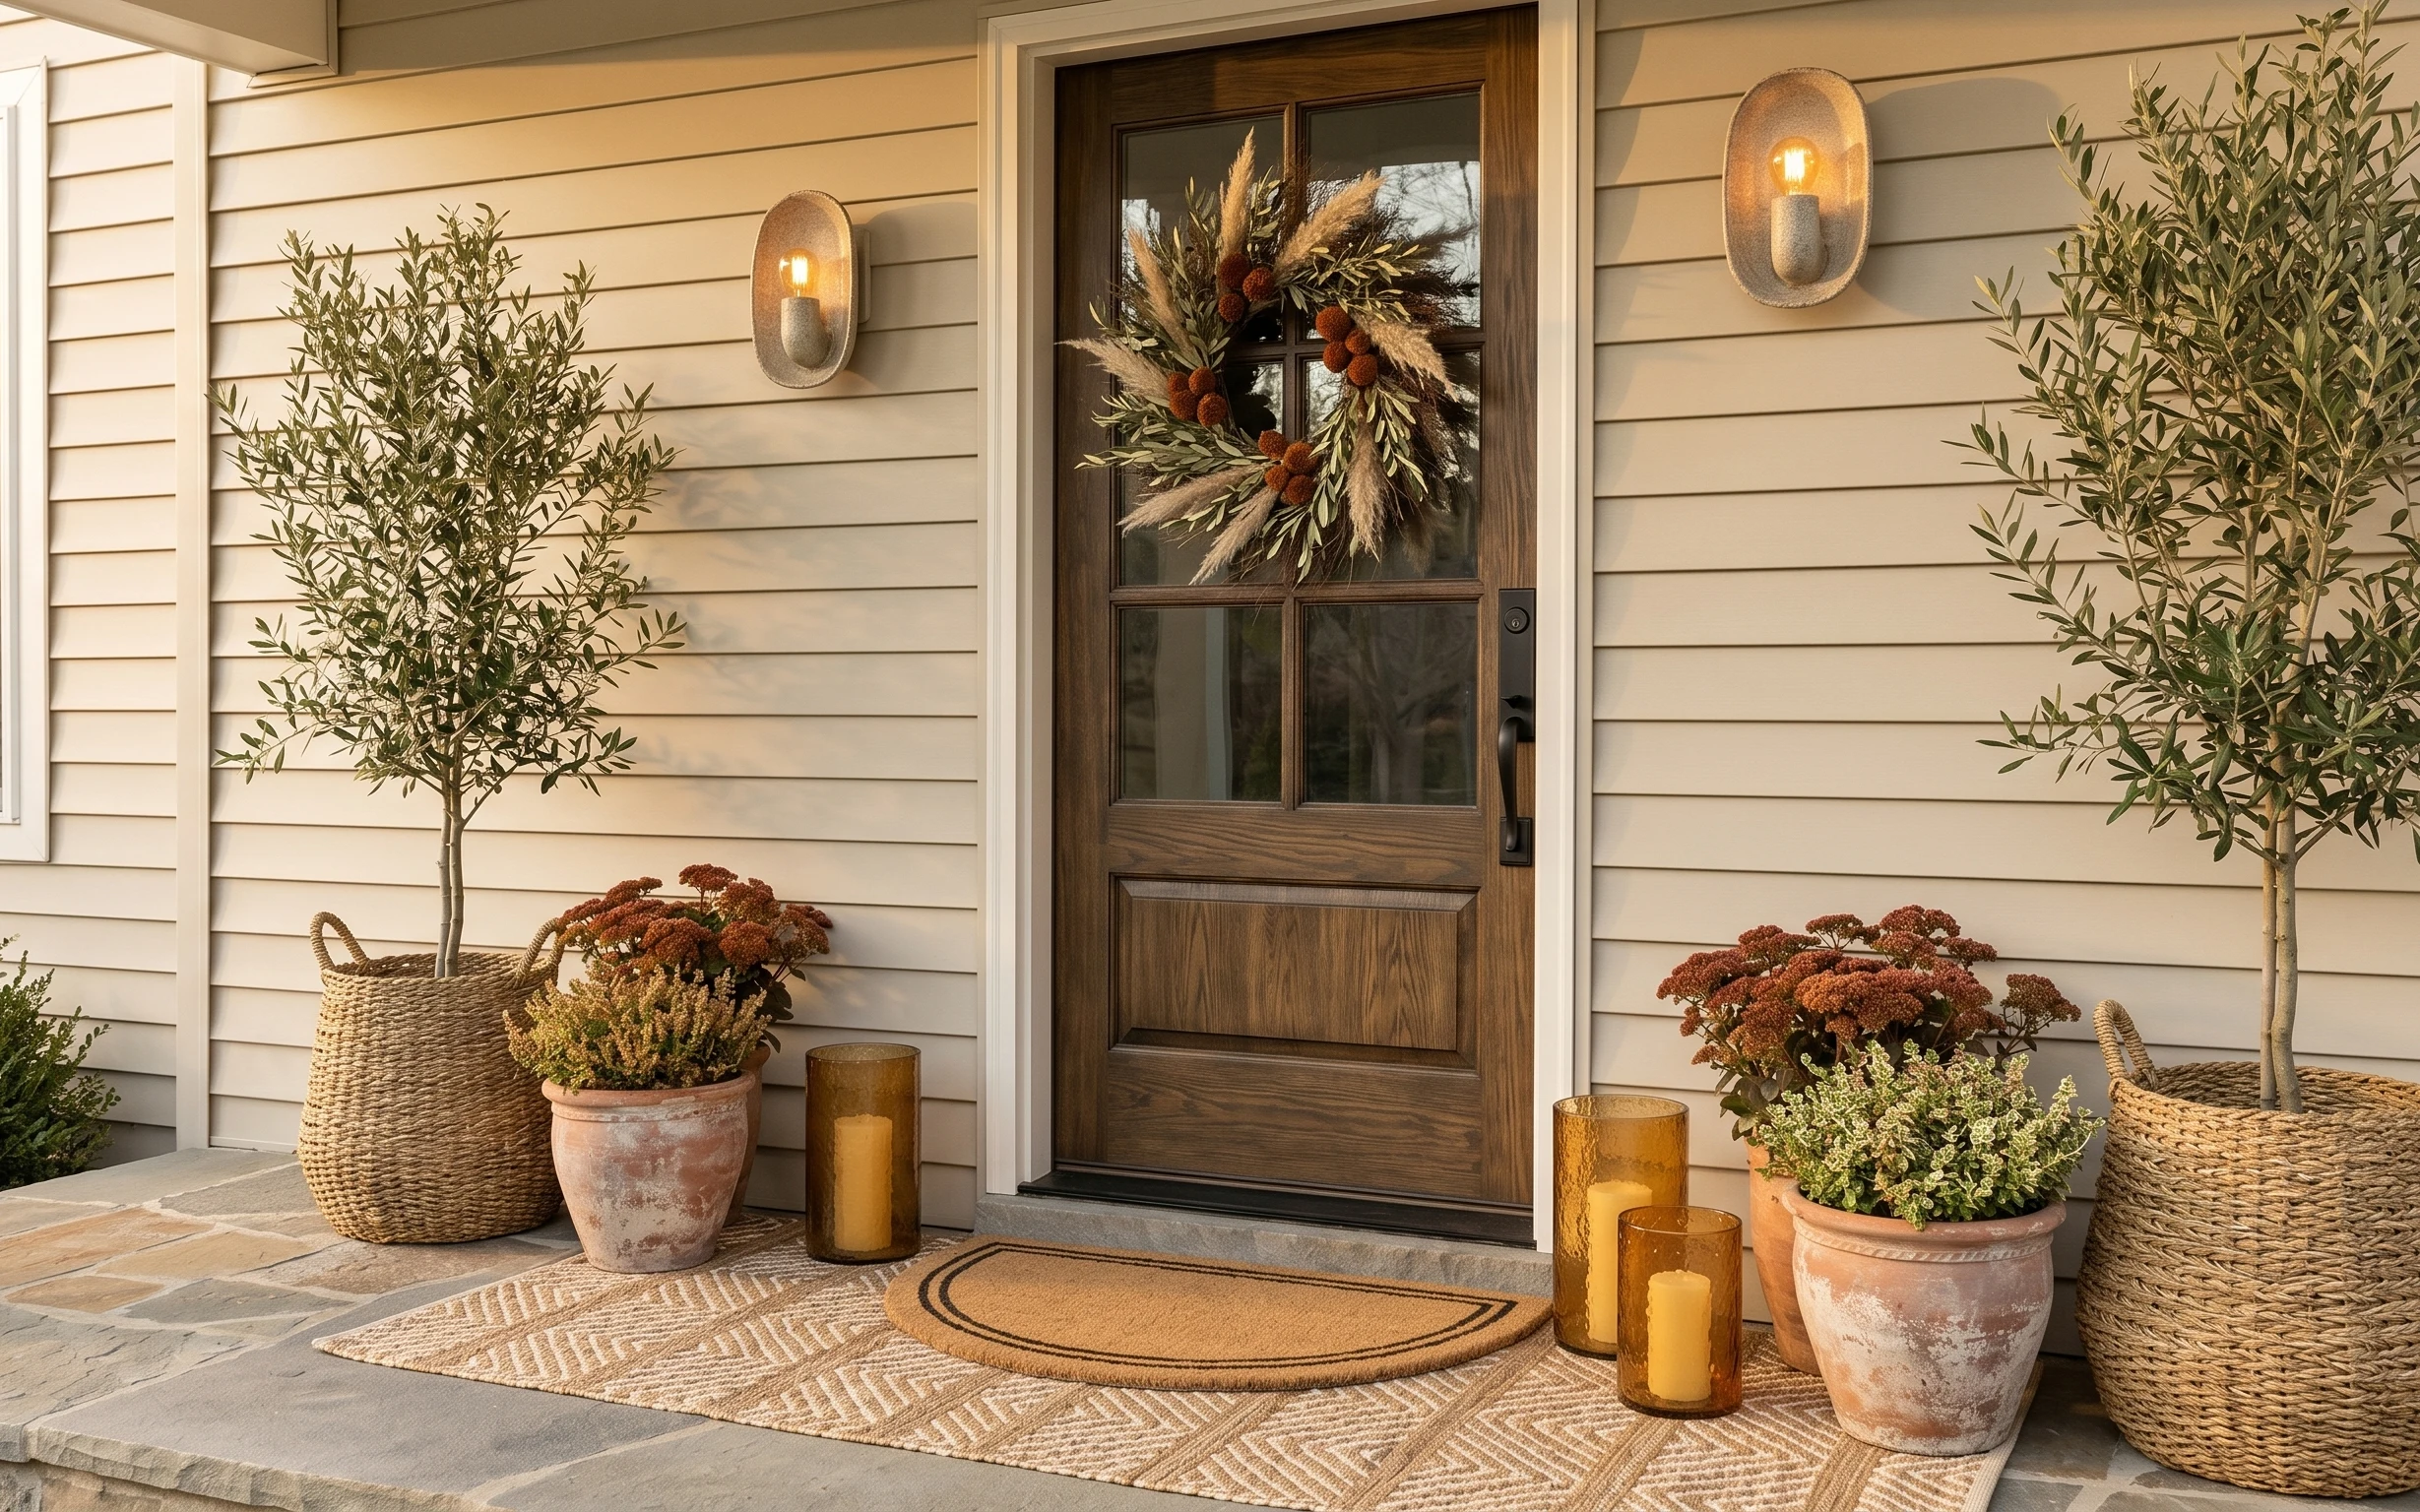
Under $600: warm tan-and-brass front porch entry refresh
Refresh a front porch entry with warm tan texture, brass-toned lighting, and layered planters. This $600 weekend makeover focuses on the ru…
Under $500: string-lit patio refresh with 7 move-ready swaps
A warm string-lit patio makeover that leans into terracotta planters, a round jute rug, and cozy throw pillows—without drilling or permanen…