
- Best for
- Adding softness + structure to a bedroom
- Cost
- Under $700 total (7 layers)
- Difficulty
- Confident DIY for the painted nightstand
- Time
- One weekend with paint-and-dry
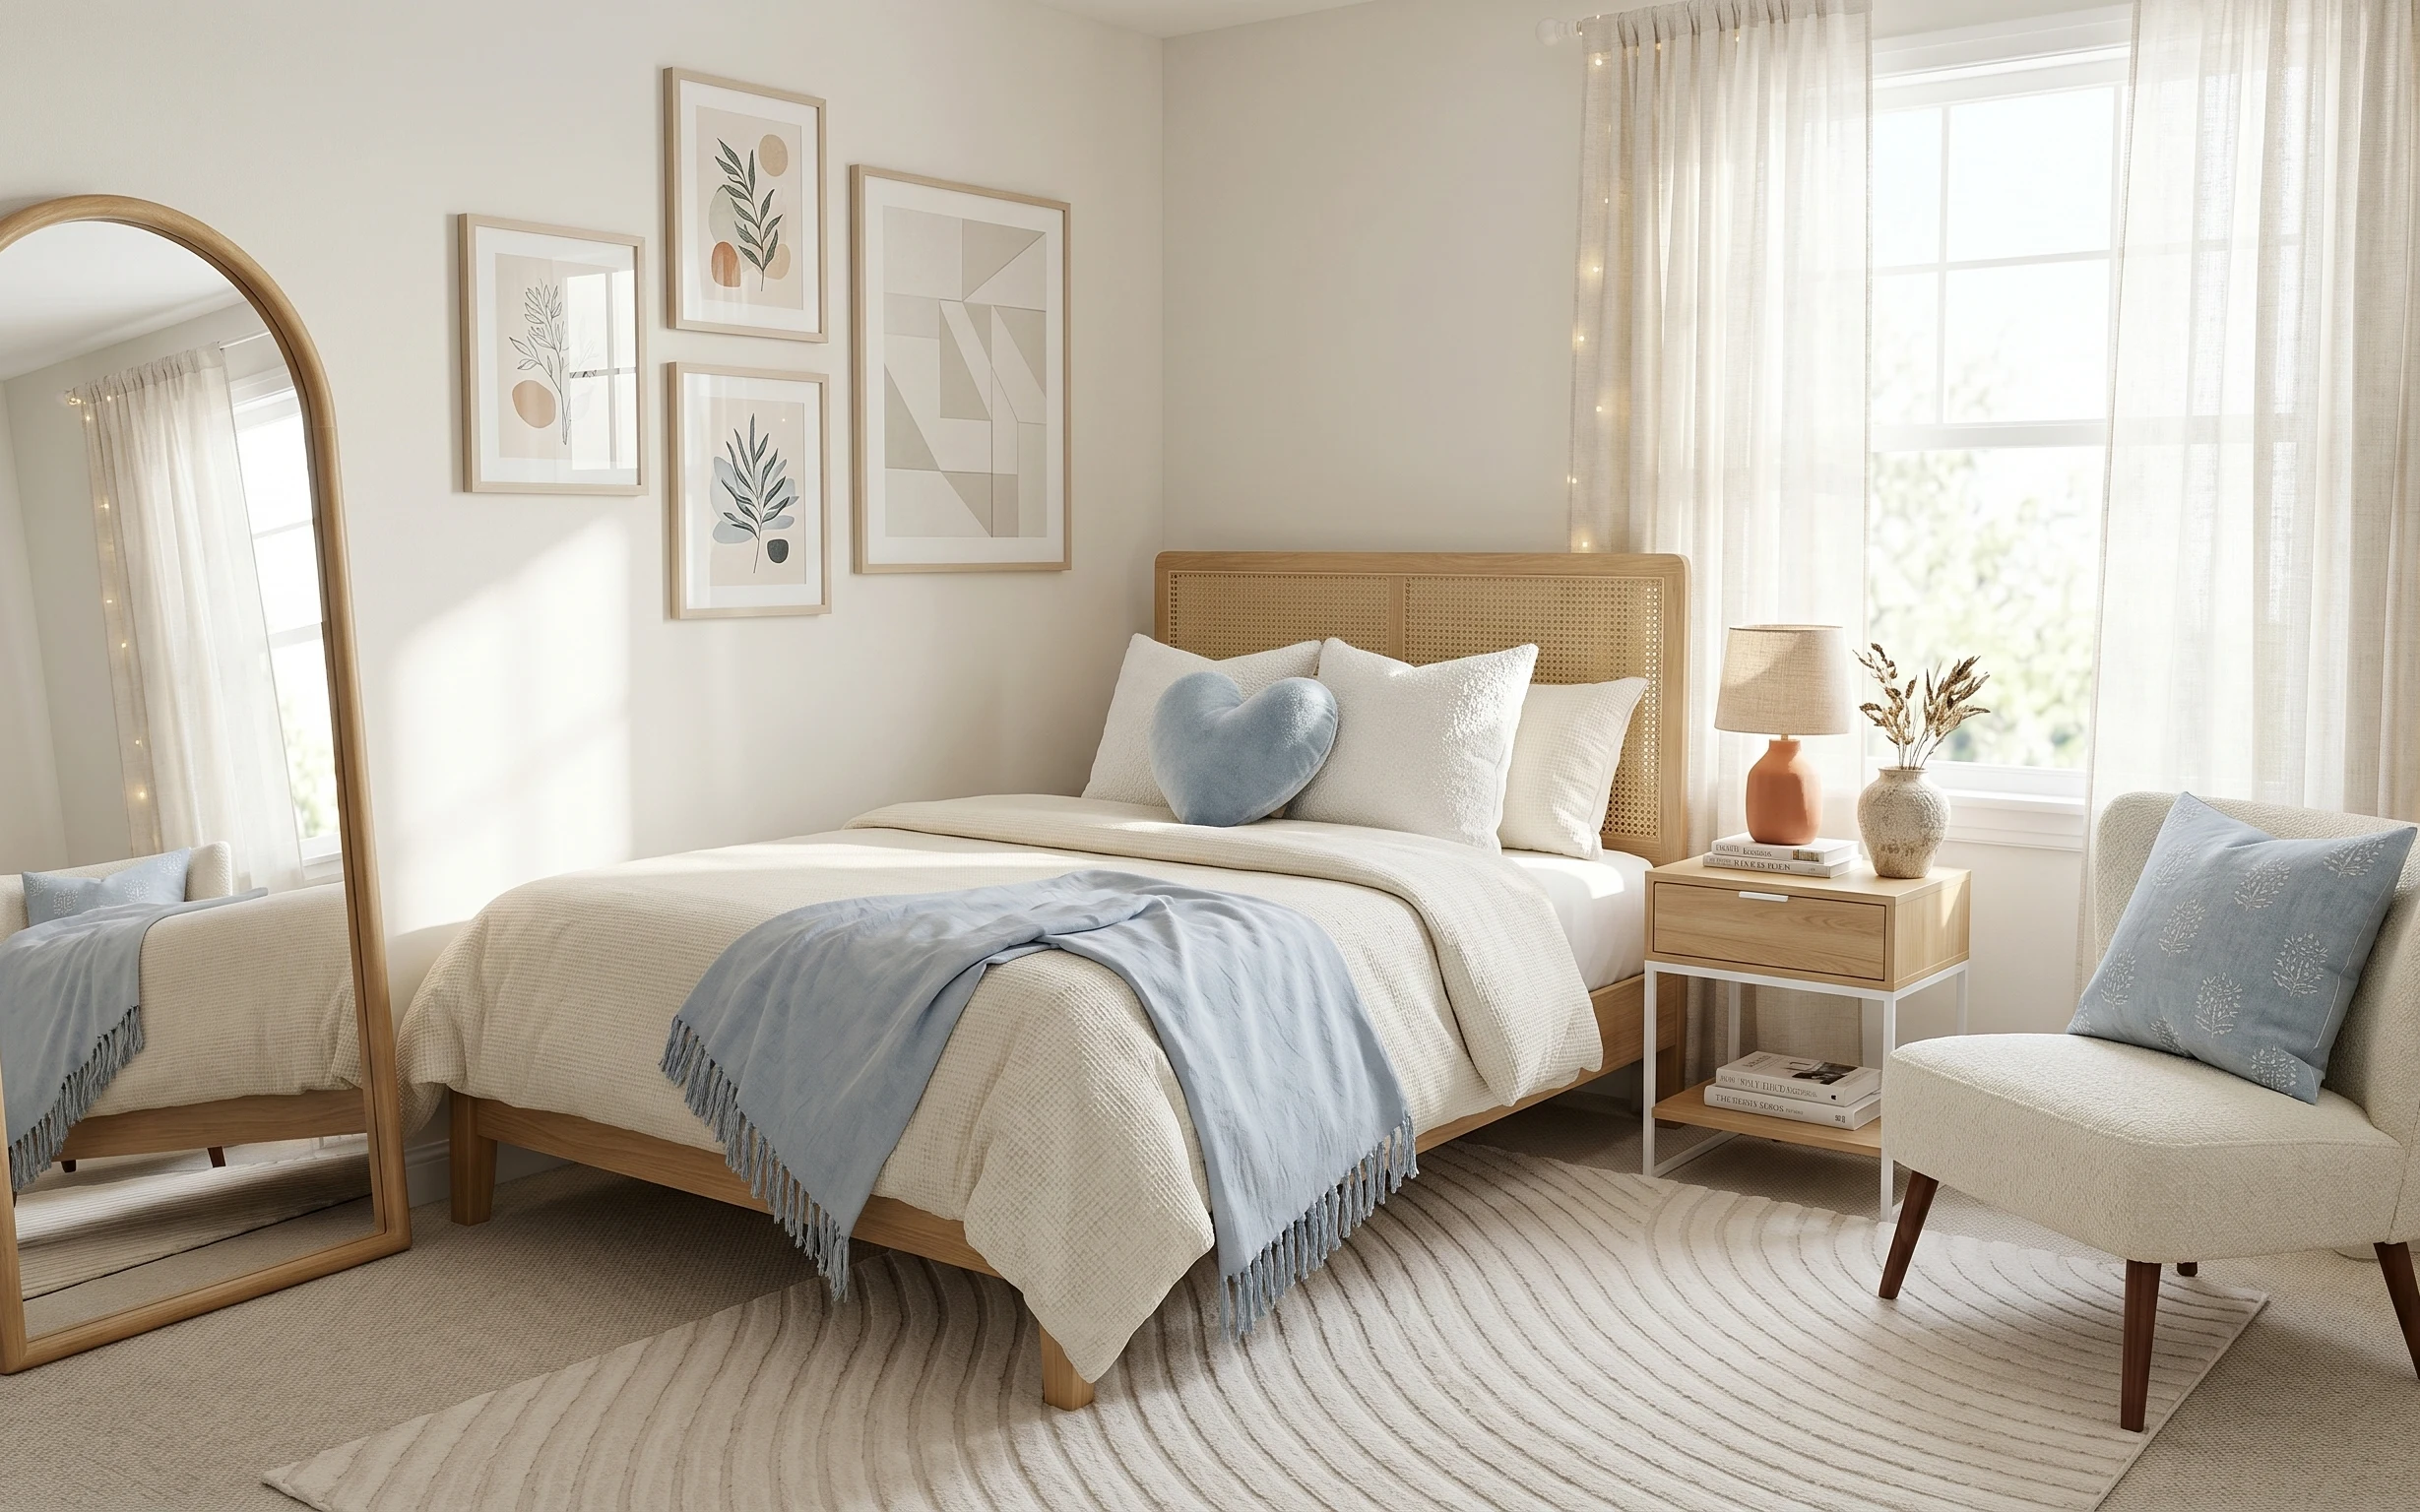
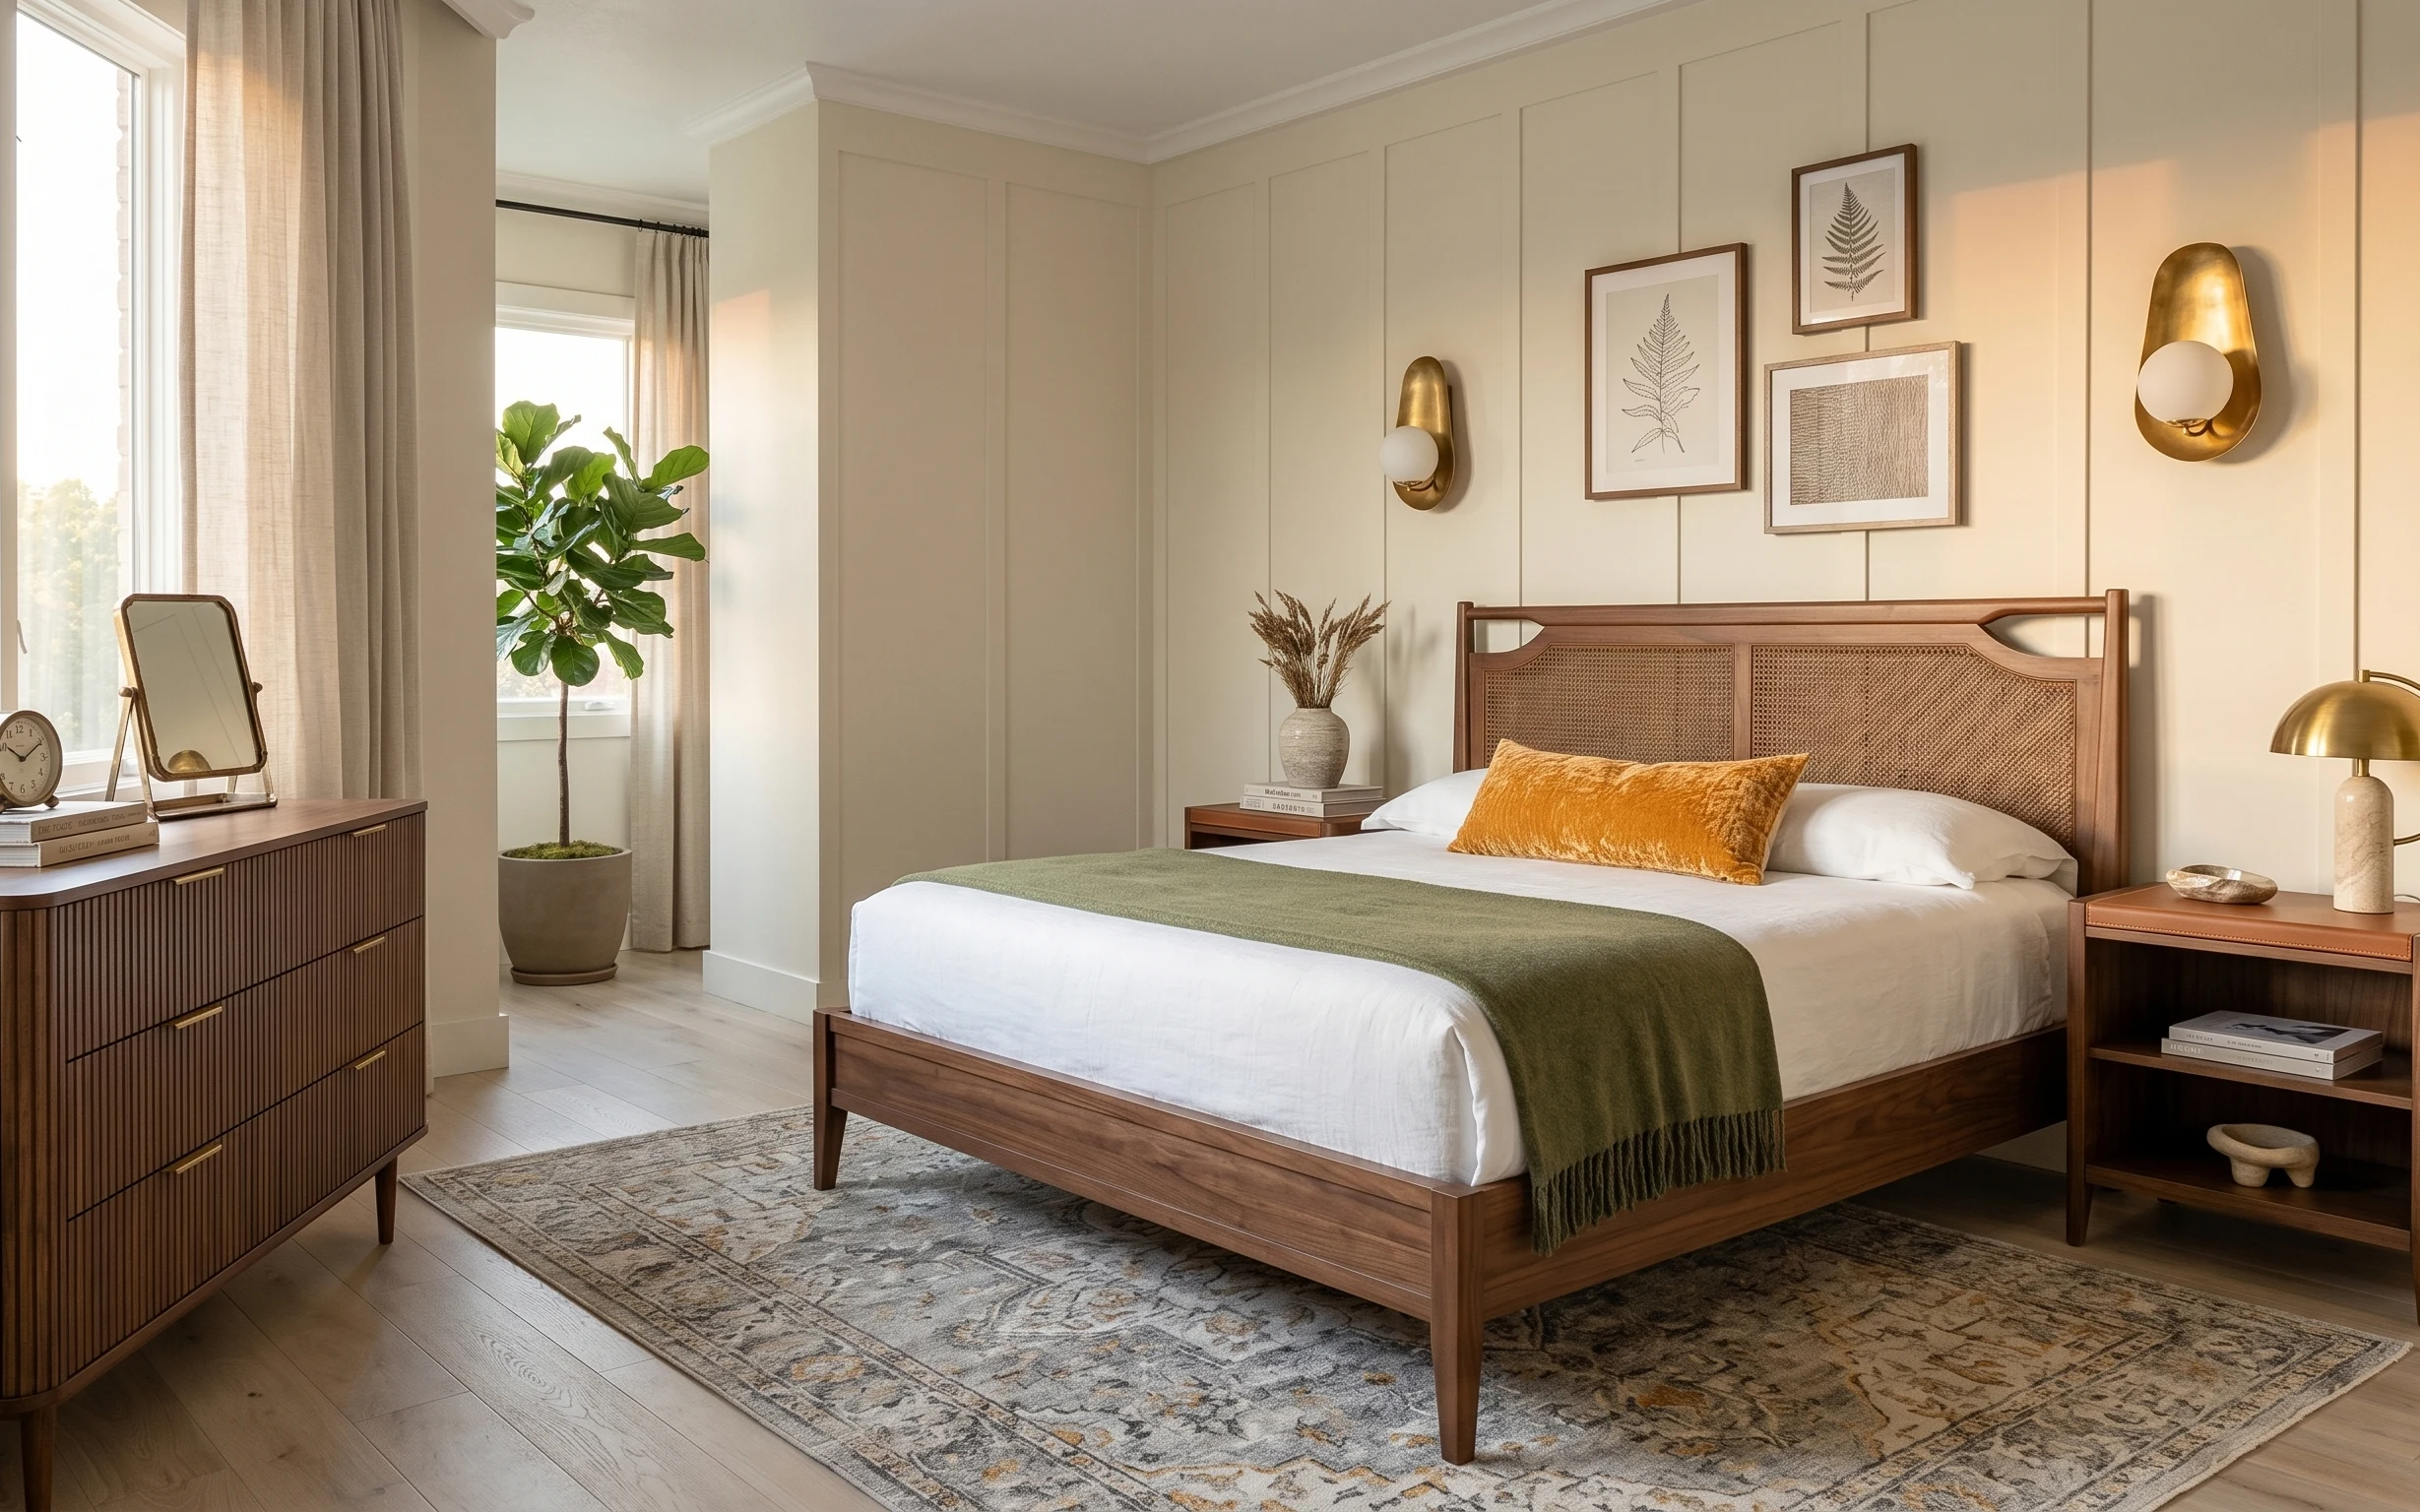
Why this light-blue-and-cream bedding is the sleeping corner of 2026
The first thing this setup nails is contrast: cream bedding and a light blue throw soften a beige rattan headboard, while the wood nightstand keeps everything grounded. In the details, you can see three texture lanes working together—quilted fabric on the bed, linen-like curtains across the window, and that subtle striped area rug underfoot. The framed botanical prints add vertical rhythm without feeling busy, and the string lights make the window area look styled even when the room is bright. For homeowners, it’s achievable because most of the changes are décor swaps, not structural work.
I once overthought this kind of bedroom and ended up buying “matching” beige items that felt flat. The look here only works because the blue tone shows up in more than one place—throw blanket plus pillows—so it reads intentional, not accidental. Also, I used to skip curtain height and regret it every time; this time the panels reach up far enough to make the window feel taller. That’s what changed my mind: small-scale decisions (fabric weight and placement) do most of the heavy lifting.
Layer 1 — string lights along the window ($15) soft glow without extra fixtures
String lights are the smallest spend here, but they’re visible from the bed and add “after dark” character to the window area. In the photo they’re wrapped along the curtain line, so they look integrated instead of like a separate gadget. The trade-off is that you can’t expect them to replace overhead lighting—use them for mood, not tasks. The obvious alternative would be adding another lamp, but that can clutter a small side area. These lights keep the light source near the vertical window plane, so the whole sleeping corner feels dressed.
Layer low and vertical
Keep the light aligned with the curtain edge so the glow reads as part of the window styling, not a random string.
Layer 2 — vase with dried stems on the window-side table ($30) adds warm texture on a flat surface
This vase is doing a quiet job: it turns an otherwise empty tabletop into a focal point with warm, organic texture. The dried stems echo the neutral plant tones in the room, and the matte ceramic finish doesn’t compete with the glossy lamp glass. A cheaper alternative would be using a single faux stem, but the whole point is that you can see the variation in the dried heads. The trade-off is that dried arrangements need a little settling and occasional dusting. Still, they’re an easy weekend styling win because you can place it anywhere the eye lands—near the window and just beside the seating zone.
Keep the scale tabletop-friendly
Choose a vase that doesn’t overhang the front edge; you want it to read tall enough to matter, not too big to box in the chair-side area.
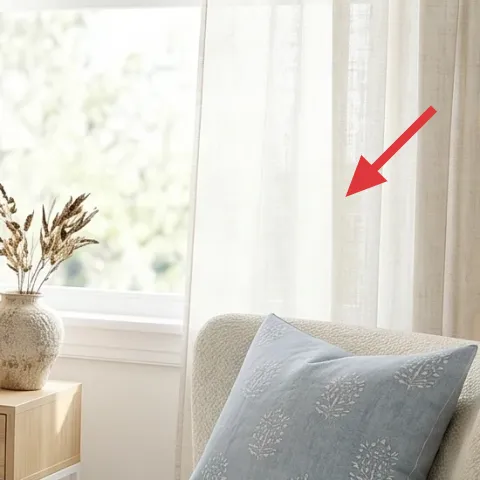
Layer 3 — light blue throw blanket ($60) repeats the color for cohesion
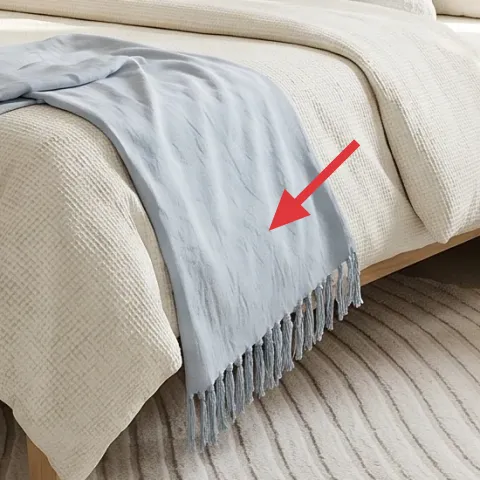
The light blue throw blanket is what makes the palette feel intentional. It shows up right where your eye naturally rests when you’re sitting or lying down—folded across the bedspread near the front edge. Because it’s a throw (not another full blanket set), it’s visually lighter than adding more bedding bulk, and it adds movement through the drape. The trade-off is that throws look best when they’re tucked and re-fluffed; they don’t stay “styled” the same way a perfectly laundered sheet set does. If you skip this step, you often end up with all cream and beige, which can look pretty—but flat.
Don’t pick a blue with the wrong undertone
If your blue is too green, it will fight the warm wood and beige headboard tones instead of harmonizing with them.
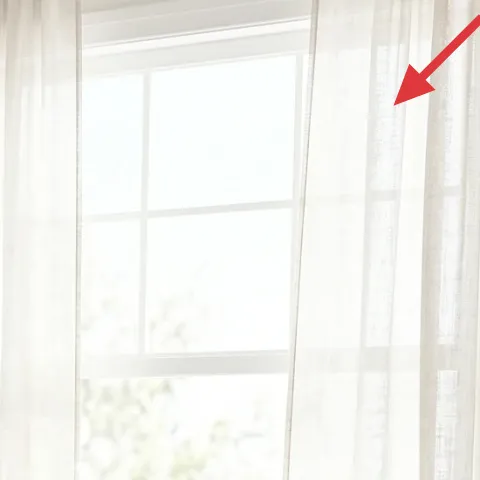
Layer 4 — beige curtain panel pair ($80) makes the window feel taller and softer
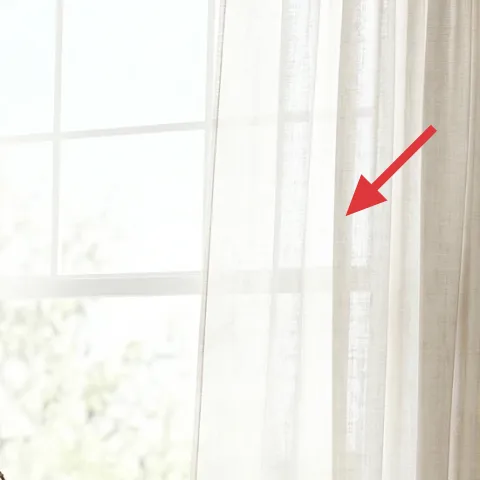
Curtain panels are the quickest way to give the room that finished, “catalog page” look without doing heavy work. Here, the beige panels sit high and hang across the window, softening the bright daylight and creating a calm backdrop for the bed and wall art. The visible string lights blend into the curtain texture, so the whole window reads styled in daylight and at night. The obvious alternative—roller shades or shorter curtains—shrinks the sightline and makes the bed feel tighter to the wall. The trade-off is making sure the panels are full enough for gentle folds rather than stretched-flat fabric.
Hang for height, not just width
When panels start higher than the window trim, the ceiling line looks longer and the room feels bigger.
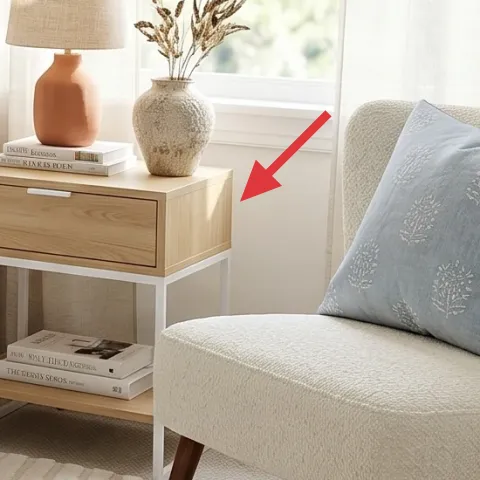
Layer 5 — wood nightstand with drawer and lower shelf ($80) DIY paint that matches the whole palette
Make it instead of buying it
This weekend, refresh the wood nightstand by sanding and painting it so it matches the room’s cream-and-beige tones without replacing furniture.
Materials
- Bonding primer — 1 can (enough for one nightstand) — $28
- Interior paint (cream/greige tone) — 1 quart — $12
- Painter’s tape — 1 roll — $10
- 120–220 grit sandpaper (assorted) — $8
- Foam brush or small roller — $7
Steps
- Clean the nightstand thoroughly with a degreaser so paint grips the wood.
- Lightly scuff-sand all flat areas and the drawer front with 120 grit.
- Wipe away sanding dust with a slightly damp cloth and let dry.
- Apply bonding primer with thin, even coats, then let it fully dry.
- Sand the primed surface lightly with 220 grit for a smooth finish.
- Tape off drawer hardware edges and paint the first coat, then let it dry.
- Apply a second coat if you can still see wood grain or uneven coverage, then let it dry.
- Remove tape carefully and touch up any missed edges.
- Let the painted nightstand cure fully before styling with books and a lamp.
- Put everything back and adjust placement so the lamp sits centered on top.
Total DIY cost: $65 — saves about $15 over buying.
Choosing to paint the nightstand is the most “own-your-home” move in this sleeping corner, because it changes the tone of the room while keeping the furniture shape and storage. In the photo, the nightstand’s warm wood ties into the bed frame, but painting it a lighter cream/greige makes the whole setup feel brighter and more cohesive with the bedding and curtains. The trade-off is extra prep time—sanding and priming matter if you want it to look smooth rather than patchy. The obvious alternative would be to buy a new nightstand, but that usually costs more than one good paint weekend and can break the budget. This way you keep the same footprint and update the color story instead.
Test the tone near the curtain edge
Match the painted finish to the cream curtains, not the darker wood in the frame, so it reads consistent in daylight.
Layer 6 — five framed botanical prints in wood frames ($180) brings pattern without clutter
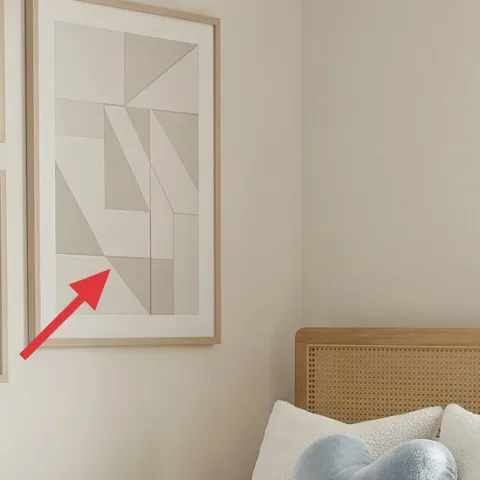
The framed botanical prints are your visual anchor on the left wall, and they make the bed wall feel intentional from standing height. Because the art set uses a mix of leaf illustrations and neutral shapes, it complements the blue accents on the textiles without turning the space into a single-theme print party. The wood frames repeat the warm undertone found in the bed and nightstand, which is why the room doesn’t feel cold. If you skipped the prints, you’d be left with a mostly horizontal composition (bed + rug), and it would feel unfinished. The trade-off is spacing: keep consistent gaps so the set reads like one collection, not random frames.
Match frame color to the bed’s wood
Even when prints vary, consistent frame tone helps the wall look curated instead of mismatched.
Layer 7 — area rug with subtle stripe pattern ($200) defines the bed zone
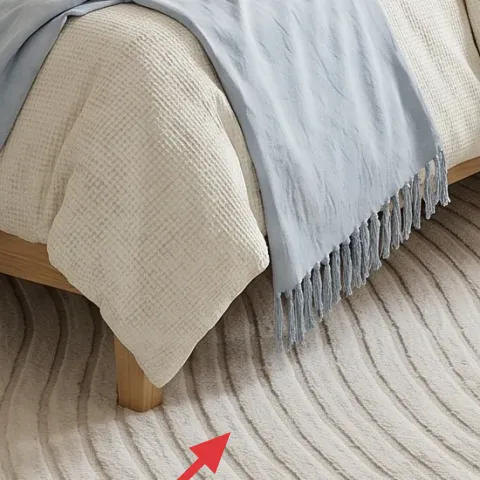
A rug is what makes this sleeping corner feel like a single designed area instead of a bed sitting on floor. The subtle stripe pattern adds motion without fighting the botanical wall art, and its neutral base keeps the room bright. In the photo, the rug extends under the bed and out toward the chair, which is the key: it visually connects the seating spot to the sleeping area. The obvious alternative—smaller rugs tucked only under the front edge—can make the room look tighter and cut the floor into separate “zones.” The trade-off is sizing: if you can’t fit a larger rug, you’ll need to rethink how much of the bed footprint you’re covering.
Let the rug reach past the bed
When the rug extends beyond the bed outline, the bedroom feels anchored and calmer to walk on.
The cost, layer by layer
| Layer | Item | Cost |
|---|---|---|
| 1 | String lights along the window | $15 |
| 2 | Vase with dried stems on the window-side table | $30 |
| 3 | Light blue throw blanket | $60 |
| 4 | Beige curtain panel pair | $80 |
| 5 | Wood nightstand with drawer and lower shelf (paint refresh retail-equivalent) | $80 |
| 6 | Five framed botanical prints in wood frames | $180 |
| 7 | Area rug with subtle stripe pattern | $200 |
| Total | $645 | |
If your budget is tighter, start by swapping only the curtains and adding the rug first—those two cover the biggest visual surface area. You can also use a secondhand framed print set and keep the nightstand as-is if it already looks sturdy.
What worked, what didn't (across the whole room)
The standout wins were the curtain height, the rug anchoring the bed zone, and the framed botanical prints—each one adds structure that makes the sleeping corner feel styled. The light-blue throw and pillows also pulled the palette together without needing a full bedding replacement.
What worked
- Curtain panels hang high enough to lengthen the sightline and make the window feel taller.
- The rug’s subtle stripe pattern adds softness while still letting the botanicals stay readable.
- Framed botanical prints give vertical balance on the wall beside the bed.
- Light blue textiles repeat color so the room reads cohesive instead of beige-only.
- String lights wrapped near the curtain edge make the window look styled at night.
- A painted nightstand keeps storage and adds a fresh, lighter tone.
What didn't
- Skipping curtain fullness creates flat folds that don’t soften the daylight.
- Choosing a blue with a green undertone can clash with warm wood and beige textures.
- Using too-small rugs can make the bed zone feel disconnected from the chair area.
- Haphazard frame spacing can turn a print set into random clutter.
What we'd skip if we did it again
Skip buying a second matching lamp “because it looks balanced.” This sleeping corner already has natural light and a lamp on the nightstand, so extra lighting can create visual noise instead of warmth.
Skip trying to match everything perfectly in one neutral shade. The reason the palette works here is variation—cream bedding, light blue textiles, warm wood, and beige curtains—so repeat a tone, then let textures do the rest.
Skip undersizing the rug or hanging curtains too low. Those two sizing mistakes affect the entire room’s scale, and you end up fighting the proportions even if the art and bedding are spot-on.
Frequently asked
How long does this sleeping corner refresh take on a weekend?
Plan on about 4–6 hours for the décor swaps (rug placement, curtain hang, art hanging) and 1–2 extra sessions for painting the nightstand. Paint usually needs drying time between coats, so it helps to do priming and the first coat on Saturday. If you can dedicate Sunday to touch-ups and curing, the room will look fully finished.
Is this renter-friendly, or does it require owning the space?
Most of it is renter-friendly because curtains, rugs, and wall art are removable. The only non-renter move is painting the nightstand, since that changes the furniture finish. If renting, keep the same plan but swap the DIY layer for a new nightstand or use paint only on a removable piece (like a thrifted side table you don’t mind leaving behind).
What if my window is smaller or the ceiling height is low?
Go with higher curtain hanging and keep the panels fuller rather than shorter. For a small window, panels that start near the ceiling and fall past the trim still help the room feel taller. For the wall art, use fewer frames or increase spacing so the arrangement doesn’t crowd. The goal is vertical rhythm, not filling every inch.
What’s the biggest mistake people make with botanical wall art in a bedroom?
The common miss is frame spacing that’s uneven, which turns a curated set into a random collage. Another issue is hanging it too low—then it sits over the bed like an afterthought. Use a tape measure, keep equal gaps, and align the center of the set with the bed height so the wall feels balanced.
Where should I shop for the rug and curtains if I want this look on a budget?
For rugs, search for neutral 5×7 options with subtle stripes or low-contrast patterns; those blend with botanicals without competing. For curtains, prioritize fabric that hangs with natural folds (linen-look or textured sheers) and pick a longer length so the panels can reach high. Thrift stores are great for frame styles, but aim for consistent wood tones.
If I only do one change, should it be the rug, curtains, or art?
If the bedroom needs the biggest visual anchor, do the rug first or the curtains first—both set the scale of the room. Art works best when the background already has softness (curtains) and a defined floor zone (rug). In practice, rug + curtains creates the finished feel fastest, then art completes the personality.
More in Bedroom
Under $700: sleeping corner refresh with 7 weekend upgrades
A bright, light-blue-and-cream sleeping corner gets a bigger-feeling look with 7 budget-friendly weekend upgrades. The biggest wins come fr…
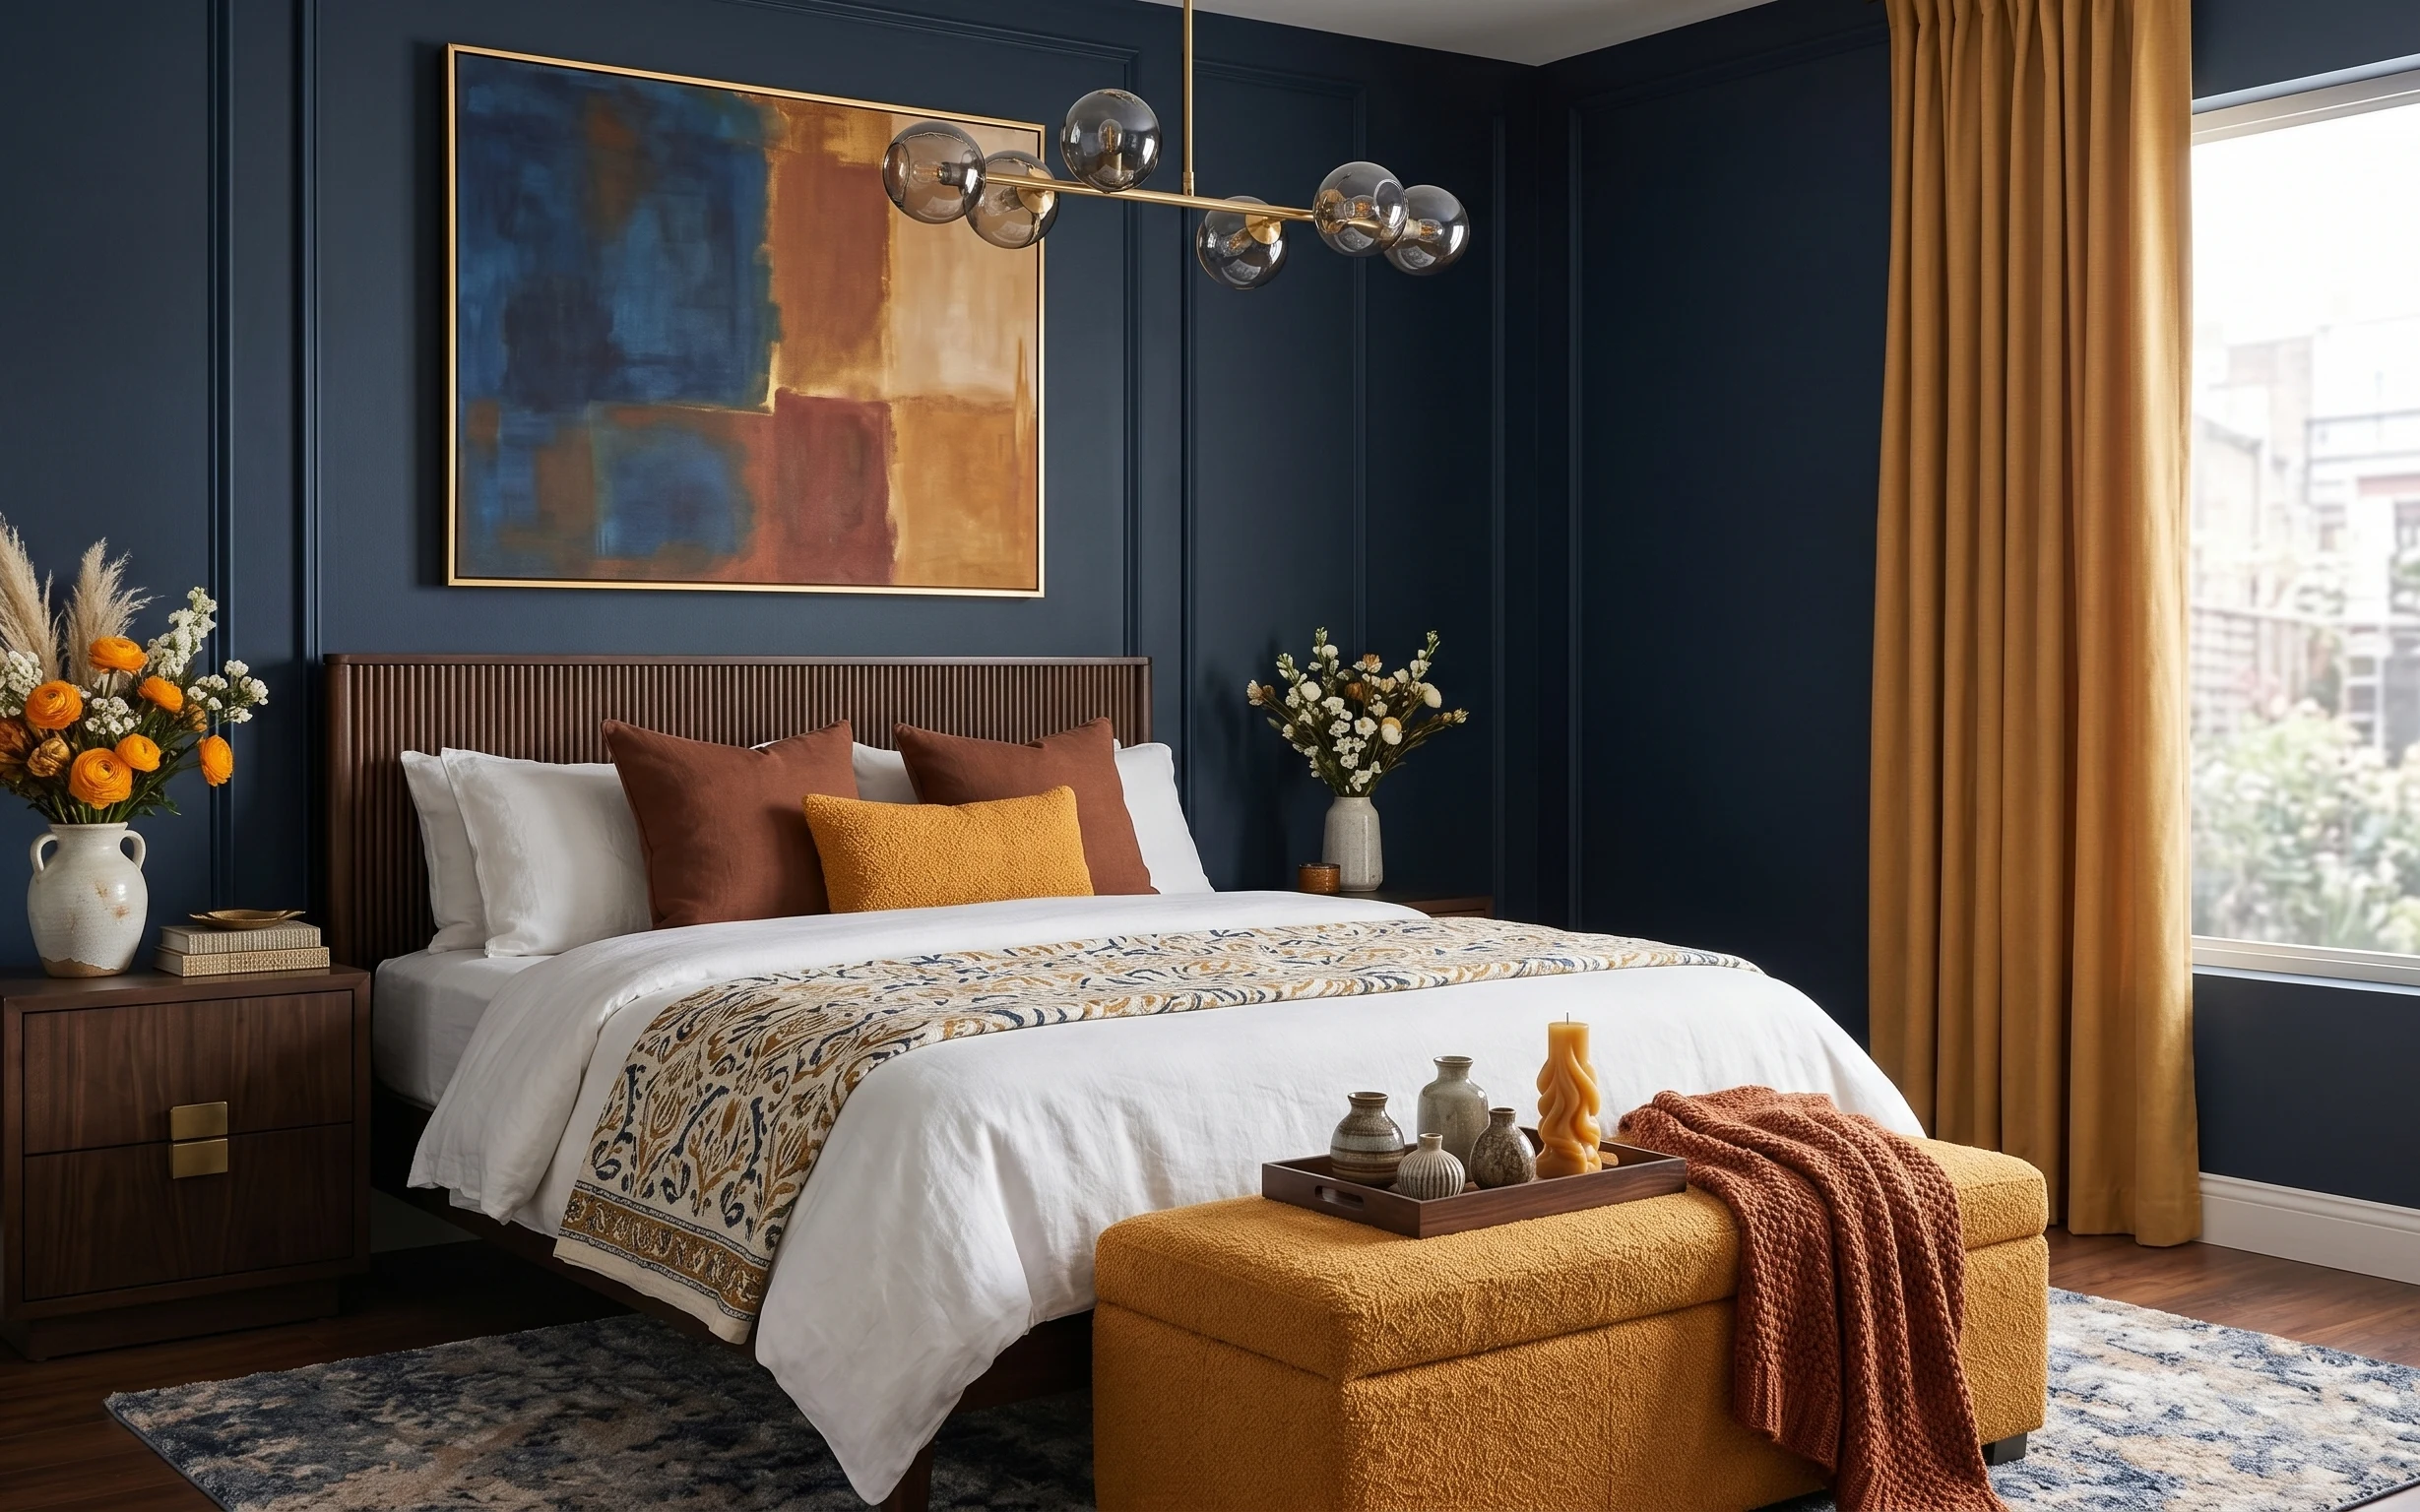
Under $800: navy-and-rust bedroom sleep space refresh with 7 layers
A navy-and-warm bedroom sleep space can feel finished fast. Here’s a 7-layer refresh for under $800, using curtains, an abstract gold-frame…
Under $700: warm olive-and-brass primary bedroom refresh
A warm olive-and-brass primary bedroom refresh that feels styled (not fussy) using 7 weekend-friendly upgrades. Total layer cost lands unde…